Let’s say you have a website but know little about SEO. But you’ve heard about Yoast SEO and people have told you it’s a great tool to optimize your site for Google, Bing, and Yandex. So you install the Yoast SEO plugin. What’s next? To help your pages rise to the top, our plugin needs your input. In this beginner’s guide to Yoast SEO, we’ll guide you through the first steps to get the most out of this plugin and your content!
SEO stands for Search Engine Optimization and it means optimizing your pages to get them to a high position in the search results of Google or any other search engine. If you have a website and you want to attract more people to it, SEO should definitely be a part of your marketing strategy. Our plugin, Yoast SEO, helps you with that by fixing a lot of the technical stuff for you. But also, by giving you feedback on your content to optimize it for SEO and get those higher rankings.
In this beginner’s guide to Yoast SEO, we’re assuming that you have the plugin downloaded and installed. Not quite there yet? Check out how to install Yoast SEO Premium or our free Yoast SEO plugin before you read on. In this guide, we’ll explain how to set up our plugin to get started with the basics of SEO.
A beginner‘s guide to Yoast SEO
Before we start, take note that this isn’t a guide to every single detail of our plugin. In this post, we’ll show you some important things we think you should use or configure. Because our plugin has quite a few settings, it’s good to know which you should configure first. If you have a site-specific question about a particular setting in the plugin, check out the Yoast help center.
In this post, we’ll cover:
Table of contents
- The Yoast SEO configuration wizard
- Organization or person
- Hidden features
- Using the Yoast SEO sidebar or meta box
- The focus keyphrase
- The readability analysis
- SEO analysis
- The Google preview
- A bit more advanced: the Yoast Dashboard
- Search Appearance
- Other guides for (Yoast) SEO beginners
The Yoast SEO configuration wizard
When you’ve installed the plugin, our Yoast SEO configuration wizard is a great place to start configuring your plugin. You’ll find it in the backend of your WordPress website at SEO > General > Dashboard:
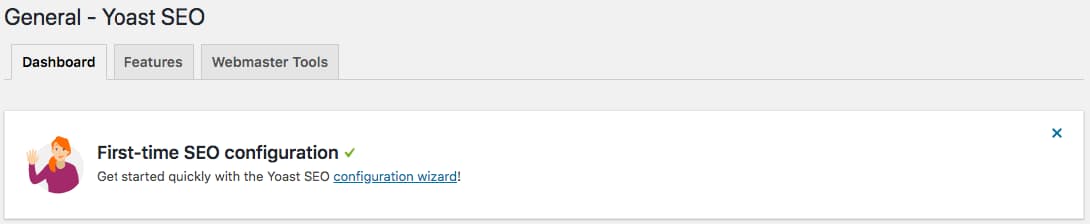
Click on the link to get started. The configuration wizard guides you through several steps that help you configure our plugin to suit the needs of your site. Even if your website has already been around for a while, you can still run the wizard every now and then. Just to make sure your settings are up to date. Each step of the wizard includes questions, the answers to which will determine particular settings. If you want to know what settings these questions determine, we explain this in more detail in this article on the configuration wizard.
Organization or person
In the configuration wizard, you’ll be asked if your website is about you or an organization you represent. We’re highlighting this because the information you fill in here is used in Google’s Knowledge Graph. What is a Knowledge Graph, you ask? It’s is the block of information you often see on the right-hand side of the search results when you search for a company or person. So make sure to fill in all the fields you can in this step, to provide Google with this information and increase your chances of a Knowledge Graph.
Hidden features
There are many aspects to SEO, and many more settings you could tweak in the plugin. But we set the configuration wizard in such a way that it already configures the plugin’s general settings correctly for your website. Helping you a lot with your more technical SEO. That way you can choose to focus on what’s most important – your content!
To give you an idea, here are a few of the things Yoast SEO takes care of in the background. Our plugin:
- Outputs structured data for your pages, helping Google understand them even better.
- Creates an XML sitemap, that search engines use to find and index all of your pages.
- Yoast SEO Premium also avoids dead ends on your site by automatically creating redirects when you move or delete content.
There are lots more hidden features, but it comes down to this: Yoast SEO rolls out the red carpet for the search bots, making it easy for search engines to find and understand your content.
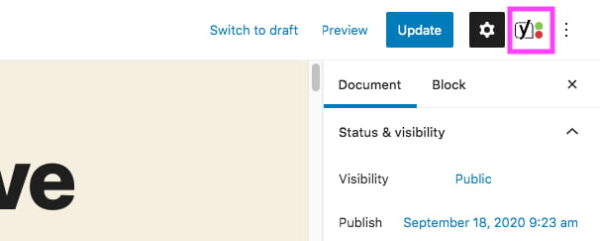
Using the Yoast SEO sidebar or meta box
Yoast SEO is most famous for its green, orange, and red bullets, giving you feedback on the SEO friendliness of your content. Back in the days, you’d just find these in the Yoast SEO meta box below your post editor. Nowadays, if you’re using the WordPress Block editor, you can also find them next to your content. On the right side of the editor, in the Yoast SEO sidebar.
Using the block editor, but can’t see the sidebar? Make sure to click on the Yoast SEO sidebar icon on the top right of your screen:
Here, we’ll highlight 4 essential elements you’ll find in both the Yoast SEO meta box and the Yoast SEO sidebar:
- The Focus keyphrase
- The Readability analysis
- The SEO analysis
- The Google preview
When you write a post or page for your website, checking these four elements should be the bare minimum you do before you publish a post. If you want to fully optimize a post, we’d advise following the steps as described in this blog post checklist.
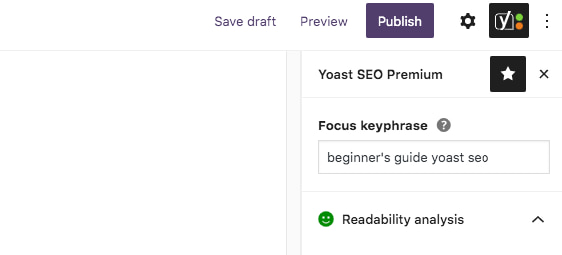
The focus keyphrase
The first field in the Yoast SEO sidebar and the meta box is the focus keyphrase field. In your Yoast SEO sidebar, on the right side of your editor, you’ll find this field at the top:
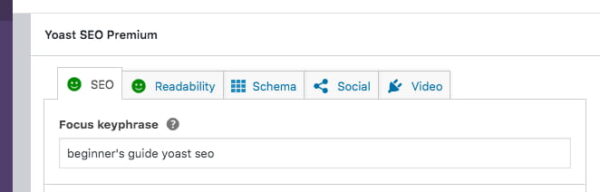
Below your post, you’ll find it in the SEO tab of the meta box:
In this field, you can enter the phrase you’d like this specific post or page to rank for in the search engines. You can add this keyphrase at any moment, but we would suggest adding it right away as a reminder to yourself to keep your content focused on this topic. Wondering how to choose the perfect focus keyphrase? Read our guide on how to choose a focus keyphrase, as it will help you select the right keyphrase you want to (and can) rank for. You can select a keyphrase on a post-by-post basis, but if you’re serious about your rankings you need to carry out keyword research first.
Yoast SEO Premium allows you to set related keyphrases and synonyms too, which is great if you want to take your SEO copywriting to the next level. Nowadays, you really need user-focused and high-quality content to rank high in a (competitive) market. Because Google is getting smarter in this regard, Yoast SEO Premium recognizes variations of your keyphrase and helps you write natural and user-friendly content.
The readability analysis
Below the focus keyphrase field, you can find the Readability analysis tab (in the Yoast SEO sidebar). It’s best to look at this tab after you’ve written the first version of your post or page. It gives you a red, orange or green bullet, which reflects how your text scores on readability. This analysis contains a few different checks, that our plugin automatically does on your content. Open the tab to find out how you’re scoring on all the individual checks and what you can still improve on. You may be wondering why you should look at this tab at all, but trust us: readability is crucial for SEO!
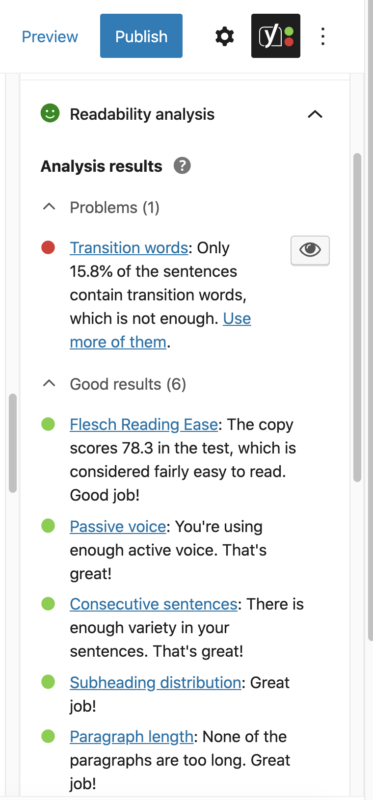
If a bullet is green you’re doing great in that field. Is it orange or red? You can follow the instructions placed along with the bullet to improve on this front. If there’s an eye icon, you can click that to see what part of the text still needs some checking. Now you don’t need to get every bullet green, but try to get the overall bullet green to end up with a readable text. That way the readability analysis helps you write easy-to-read content that your readers will love!
Our readability analysis works for many languages and our team is hard at work to add more languages as we go. If you’re interested in finding more about the logic behind this analysis, you can read more on how to use this analysis in Yoast SEO or how we decided on all of these criteria.
SEO analysis
After checking the readability of your copy, it’s time to look at its SEO-friendliness. Remember the focus keyphrase you’ve set? The SEO analysis evaluates how well your content is optimized to rank for that specific keyphrase.
For instance, it checks whether you’ve used the keyphrase enough, and not too often. But also, whether it’s present in your title, meta description, images, and subheadings. Moreover, it checks other SEO aspects of your content that are not related to your keyphrase, for instance, if you have any internal links to other articles on your website.
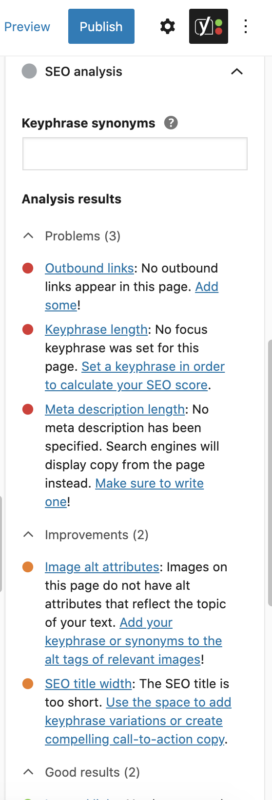
Getting orange or red bullets? Have a look at the feedback the analysis gives and try to make improvements where you can. If you want to dive deeper into this, read our article on how to use Yoast SEO’s content analysis.
Does every bullet need to be green?
No, not every bullet in the SEO analysis has to be green for your post or page to rank. Similarly, getting your post and bullets ‘all-green’ in no way guarantees that it will rank. While it’s tempting to simply aim for all-green bullets on every post or page without working on other aspects of your SEO, this isn’t the best SEO strategy. Proper keyword research and site structure always come before getting green bullets. Read more about properly using the colored bullet system in Yoast SEO.
The Google preview
In addition to the analysis of your content, we provide an editable snippet or Google preview. In the meta box below your post, it’s in the SEO tab and in the sidebar, you can find it here:
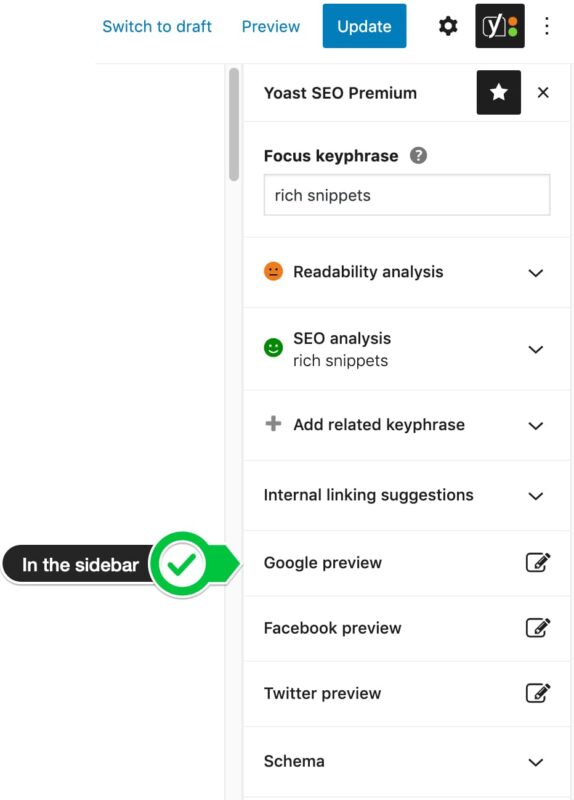
The snippet preview shows you how the Yoast plugin displays your page to Google and other search engines. In other words, it gives an idea of how your site can appear in the search results:
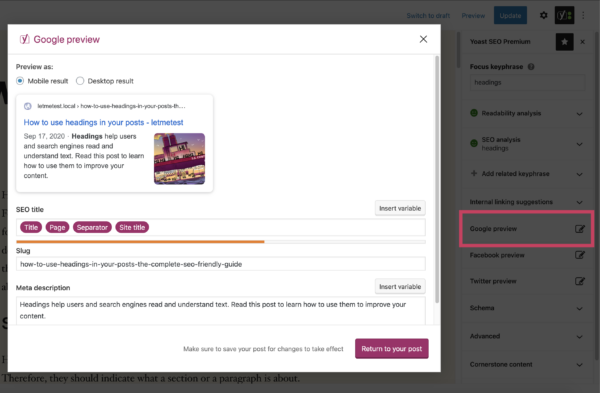
In the Google preview, you can set an SEO title and meta description. Make an effort and write a title and meta description that clearly reflect what your post or page is about. Let people know that they’ll find what they’re looking for on your site and entice them to visit your page. There’s no guarantee that Google will display your meta description in the results pages. But if the meta description you add here is good, you’ll increase the odds of it being used.
Other items in the sidebar and meta box
As said before, we believe this is the minimum investment you should make before publishing a page or post. You may have noticed that there are more items in the Yoast SEO sidebar and meta box, like the internal linking suggestions, social previews, Schema, cornerstone content, insights, and advanced section. It’s worth taking a look at those too, as these can also help you in your SEO efforts!
A bit more advanced: the Yoast Dashboard
Of course, there is so much more you can do with Yoast SEO. You can access and change many settings of the plugin in the Yoast Dashboard. There’s usually no need to change anything. Especially if you’re new to SEO, it’s wise to stick to the settings you set with the configuration wizard. But let’s have a quick look around to give you an idea of what the options are.
Search Appearance
If you go to SEO > Search Appearance in the left-hand side navigation in your WordPress dashboard, you can adjust how your site appears in search engines.
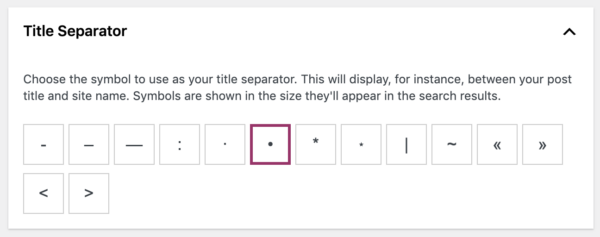
Take the ‘Title Separator’, for instance. In the configuration wizard, you can choose whether you want a dash, asterisk, or something else. But, if you change your mind later, you can always change it here.
In the section Search Appearance, you can also change how our plugin sets up your titles and meta descriptions. Go to the tab ‘Content Types’, where you will find the default template we use for your post titles. Set up by using snippet variables that tell the plugin what the title of your post is, or the separator of your choice. It’s good to know it’s there and realize what you can configure.
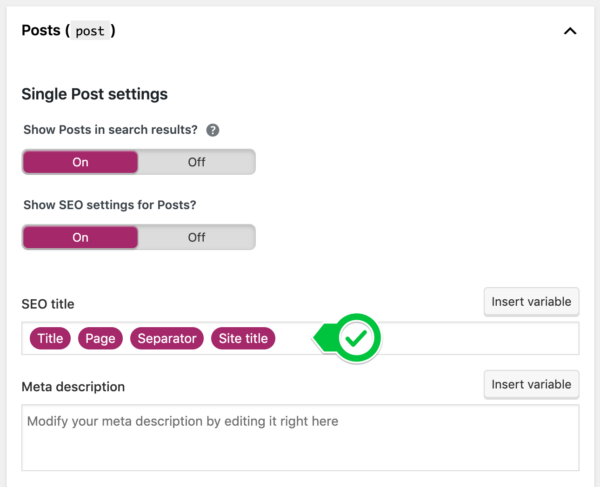
This simply means we will use the title of your page or post as the page title. Then we add a title separator (which we discussed in the first paragraph of this section) and the site name you set when creating your site. So, for example, the title for this Beginner’s guide to Yoast SEO post would look like this:
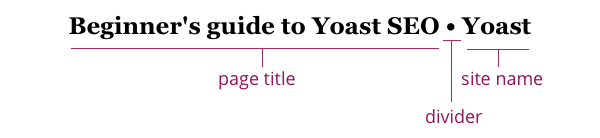
Feel free to change this setup, but this is the one we recommend. It’s focused on the page title (Beginner’s guide to Yoast SEO) and has proper branding at the end (Yoast). The reason why this setting is mentioned here is so that you know it’s there and that this setting is why your titles are shown like this in Google searches.
Other guides for (Yoast) SEO beginners
That’s it for our beginner’s guide to Yoast SEO. With Yoast SEO properly installed, your website is ready for SEO and your pages can be optimized to get ranking. You can now get on track by adding content and optimizing it with the Yoast readability analysis and SEO analysis!
If you want to become a pro user of the Yoast SEO plugin, here are a few more reading recommendations:
- How to use the Yoast SEO readability analysis tool
- How to use the Yoast SEO content analysis tool
- Yoast SEO: don’t set it and forget it!
- Our must-reads and latest articles on Yoast SEO
Or some more general SEO guides for beginners:
- What is SEO? An explanation for beginners
- How to start with SEO
- Complete beginner’s guide to SEO
If you want all this information and more, neatly structured in one place, and with helpful videos, check out our free Yoast SEO for WordPress plugin training! It helps you master our plugin and take the first few practical steps into the world of SEO!
Read more: Why every website needs Yoast SEO »
The post The beginner’s guide to Yoast SEO appeared first on Yoast.