Wanna know what a dropdown menu is and how it works? Then you’ve come to the right place. In this article, we’re going to show you how to add a dropdown menu in WordPress in just a few easy steps.
Dropdown Menus are basically multi-level menus. As the name suggests, a list of items will ‘drop-down’ when you hover over an item. You may think it’s hard to achieve. On the contrary, it couldn’t be easier. A few clicks here and some drag and drop there will give you a dropdown menu.
Through this article, we’ll explain what a dropdown menu is, how it works, and show you just how easily you can create one. In addition, we’ll also let you know how you can customize your menu to fit your needs.
A) What is a Dropdown Menu?
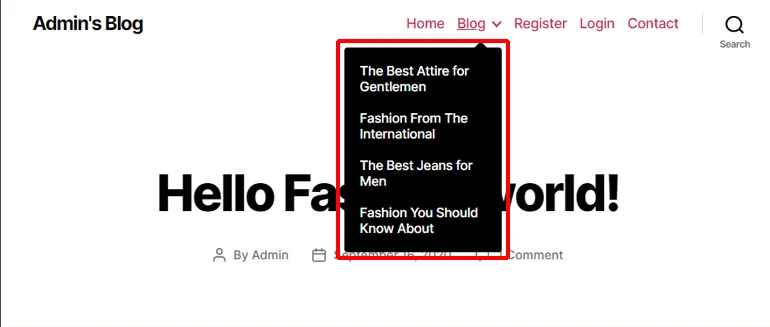
A dropdown menu shows the list of items only when you hover your mouse over the main item. In simple terms, it is a menu with more than one level. Only the first level is shown at the start but when you hover your mouse over it, the other hidden levels are revealed.
As you can see, a dropdown menu saves space on your website’s window. It also allows users to have an organized view of your site.
If you are just starting your WordPress website, a simple navigation menu can be all you need. But as your website grows, it will have more pages and more items to add to the navigation menu.
In time, you will want to switch to another type of menu to avoid cluttering the navigation with a ton of items. That’s where dropdown menus become useful.
Dropdown menus are very flexible. You can arrange your items by topics and priorities. If you use some good plugins, you will even be able to change the behavior of your menu.
B) How to Create a Dropdown Menu in WordPress?
Creating a dropdown menu in WordPress is very simple. Just a few tweaks in your menu and you have yourself a dropdown menu. Here is a step by step guide to creating a dropdown menu in WordPress.
Step 1: Create a WordPress Menu
We already said that your dropdown menu will be created with few tweaks in your menu. So, you need a menu first. If you already have a menu, you can skip to step-3.
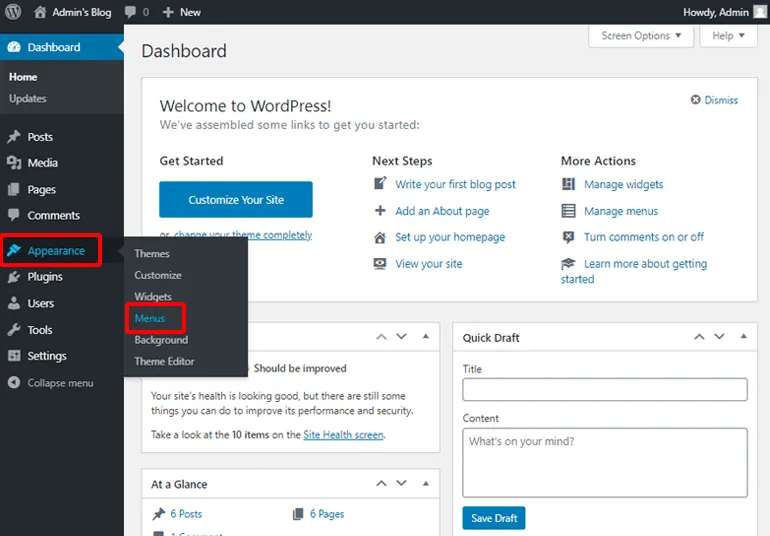
Go to the Appearance tab on your dashboard menu and click on Menus.
In the Menu Name field, put a name for your menu and hit the Create Menu button.
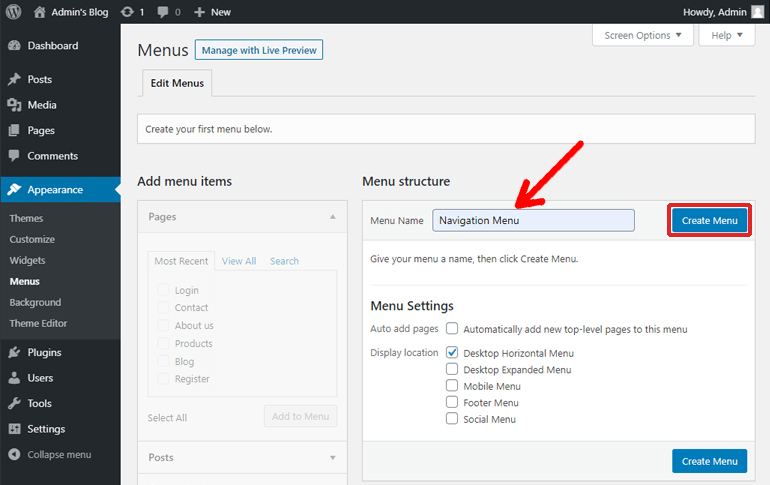
With this, you have created a menu. However, this menu is empty so, on to step-two.
Step 2: Add Items to your Menu
Now it’s time to add some items to your menu. Your menu items are simply the links you provide your visitors for easy navigation.
First, find the panel called pages in your Menu Editor window. It should be next to your dashboard menu, in the Add Menu Items section.
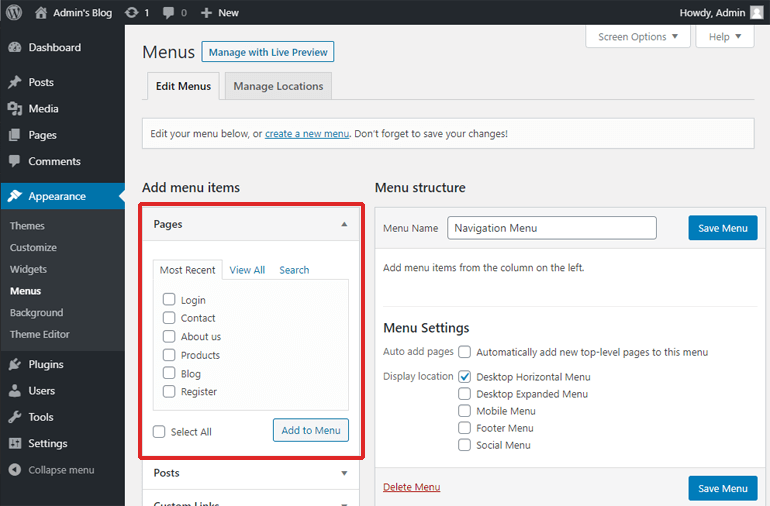
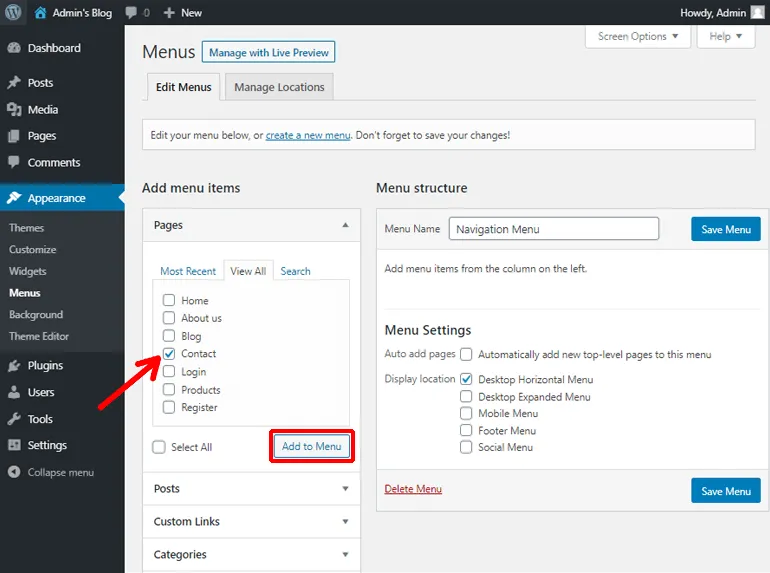
Click on View All and you will see the list of all pages your site has. Now, check the pages you want to add to your menu and hit Add to Menu.
If you want to add posts, custom links, or categories, you can follow a similar process.
Finally, click on the Save Menu button on the right to save the items.
The items you just added will show up in the Menu Structure section of your Menu editor window.
Get Started with WordPress Hosting Today
WordPress can be installed instantly and for free using our 1-Click script installer:
Get Started with WordPress Web Hosting Today
Step 3: Create Dropdown Menus by Arranging Menu Items
Once you have the list of menu items in your Menu Structure section, it is now time to transform your menu into a dropdown menu.
To do that, we are going to use the parent-child structure. The parent item will be the main heading that will always show on your menu. The child items will be the sub-heading that will only show once we hover over the main heading.
To begin, click on the child item and drag it under the parent but keep it slightly to the right. You will notice that the child item gets the tag sub-item.

Using this process, you can create parent and child items as per the need of your dropdown menu. Just click on Save Changes once you’re done.
With this, you have created a dropdown menu for your site.
Step 4: Publish your Dropdown Menu.
The menu that you created in your dashboard is still not on your site. That’s because you have not published it yet. Don’t worry, it’s super easy to do so.
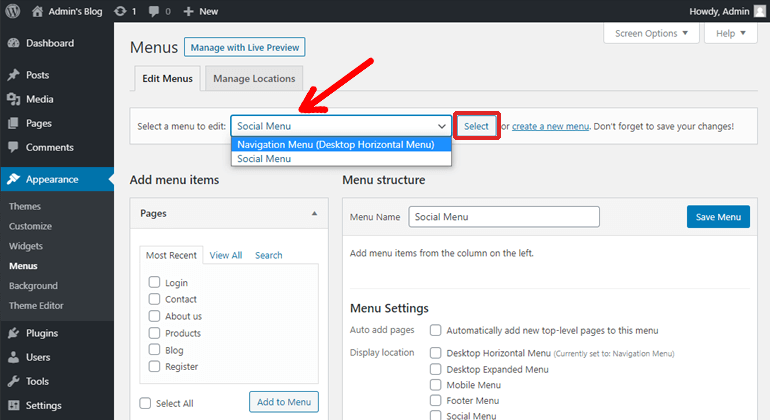
First of all, go to the Manage Locations tab at the top of your Menu Editor window.
Here, find the location you want for your menu. After that, just use the drop-down list to its right and select your new menu from the options.
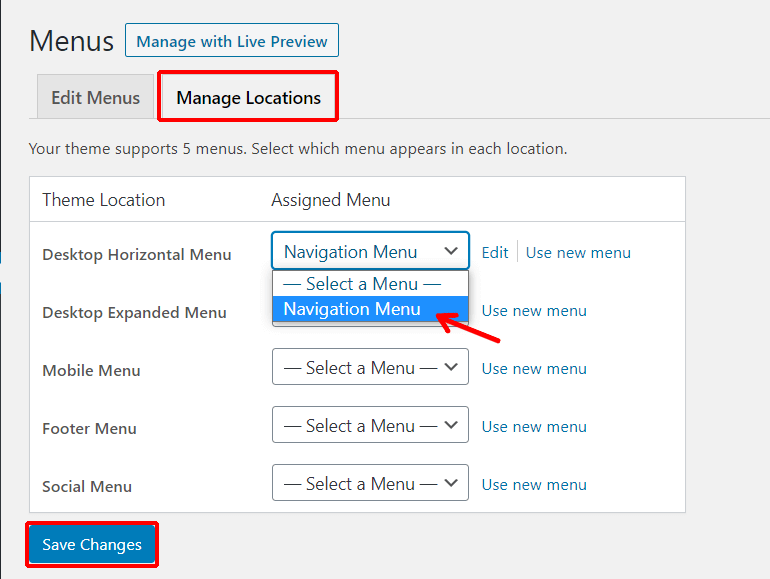
Finally, hit the Save Changes button.
Now, your dropdown menu is added to your site. Users will now be able to interact with your dropdown menu to navigate to the pages and posts on your WordPress website.
C) Editing your Dropdown Menu
In the beginning, your dropdown menu may not need changes. However, with a growing website, you will need to edit your menu. Fortunately, WordPress will make it far from difficult.
Removing an Item from your Menu
Find the menu item on your Menu Editor Window and click on the arrow icon in its right corner to expand the pane.
Then, go to the bottom of the pane and click on the Remove button.

Now just click on the Save Menu button on the top right to save your updated menu.
Reordering the Menu Items
If you ever feel like any item has been misplaced, you can reorder it any time in just two steps. All you need to do is find the item. Then drag and drop it to the position you want it to be.
Like before, click on Save Changes to save the position.
Removing your Dropdown Menu
If you feel like the dropdown menu is not needed on your site, you can just remove it.
Go to your Menu Editor window. a select the menu that you want to remove.
On your Menu Structure section, click on the Delete Menu button on the bottom.
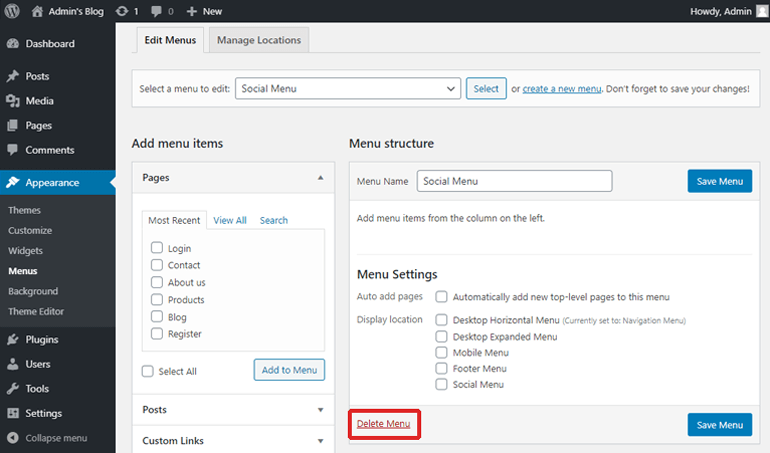
With that, you have one less menu on your site now.
D) Creating and Editing your Dropdown Menu with Live Preview
If you didn’t know, you can create your menu in real-time. This has been made possible by the WordPress customizer. It lets users live preview the changes they make on the WordPress website.
Step 1: Create a Menu with Live Preview
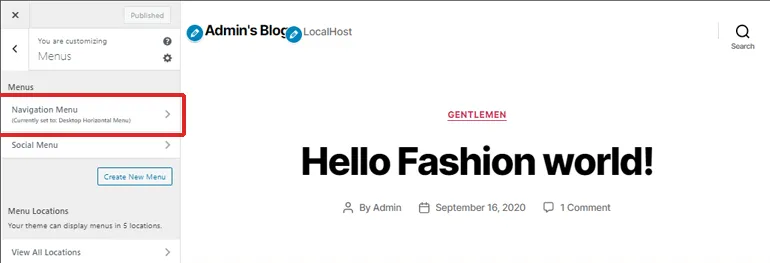
Go to your WordPress Dashboard. Then, click on Customize under the Appearance tab.
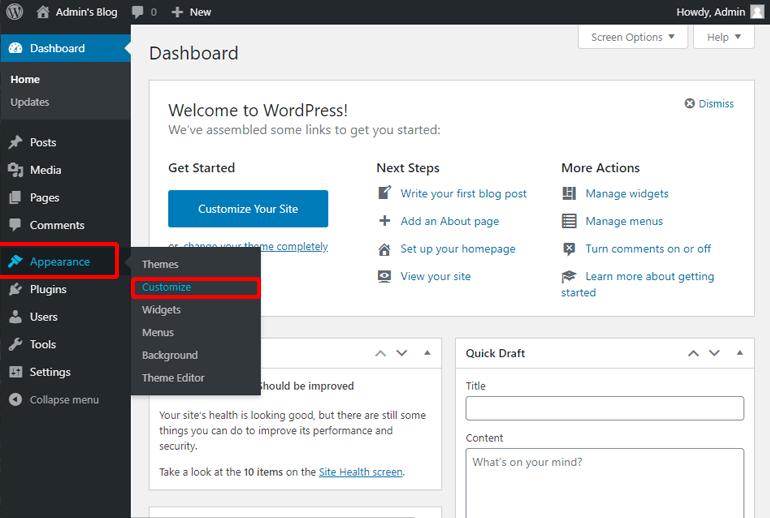
On the right-hand side of the screen, just click on Menus.

Now, click on Create New Menu to make a new menu.

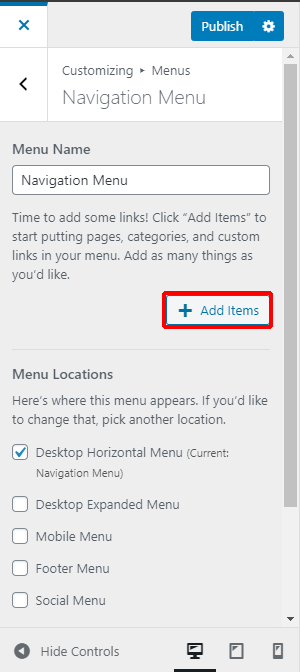
Type a name in the Menu Name field and check the boxes under Menu Locations to select where the menu appears. Then just click on the Next button.

Step 2: Add Menu Items with Live Preview
Don’t worry, stacking up menu items in Live Preview is the same as in Dashboard.
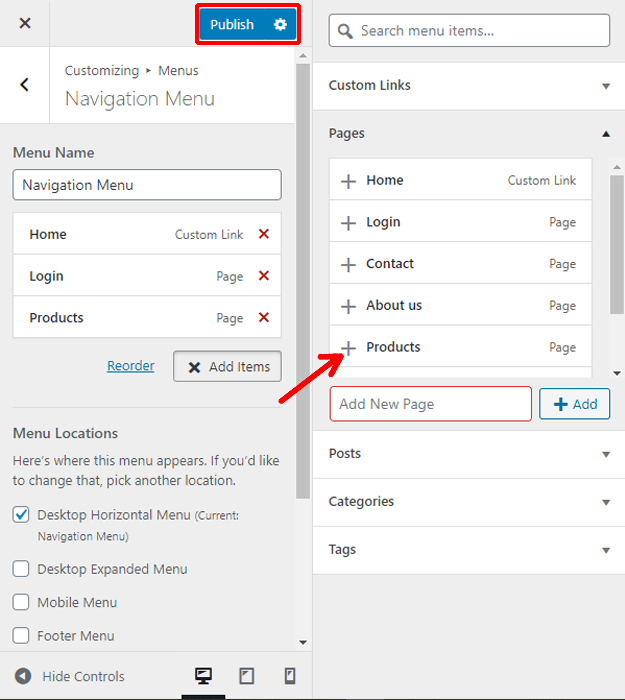
Click on the Add Items button below your Menu Name. This will show the list of pages, posts, categories, etc that you have.
All you need to do now is click on the items that you want to add.
If you want to add posts, click on Posts and then on the name of posts you want to add. The same goes for categories and tags. To add custom links, you need to type the link and name for the custom links.
Step 3: Create Dropdown Menus by Arranging Items with Live Preview
After you have added items to your menu, it is now time for your menu to be transformed. We’re going to use the same drag and drop process and parent-child structure as we did on the dashboard.
Like before, just drag the child item under the parent item, slightly to the right. Now, the child item gets indented under the parent item.
Click on Publish to apply the transformation of your menu to your site.
E) Customizing your Menu with Live Preview
If you want to see the change you applied instantly, then it’s quite easy actually.
First of all, go to your Live Preview window and click on Menus. Now select the menu you want to customize.
Reordering Menu Items with Live Preview
Trying different orders of items can result in a good menu. If you can see the changes in the order being applied in real-time it gets even better. That’s why you have the option of a Live preview.
To reorder items, just drag an item and drop it to the location you see fit. Afterwards, click on Publish to apply the changes to your site.
Deleting Menu Items with Live Preview
First things first, click on your menu item in order to show its pane. After that, just click on Remove at the bottom of the pane.
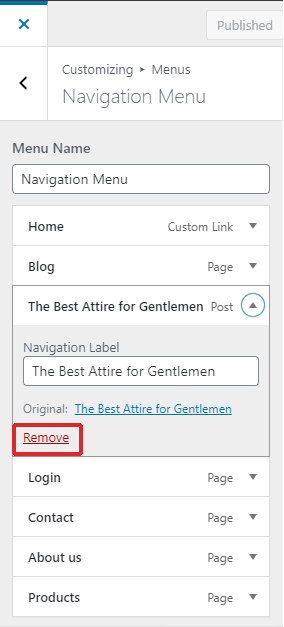
Hit the Publish button to save your changes and you’re good to go.
Deleting a Menu with Live Preview
With the live customizer, deleting an entire menu is also quite simple.
Just click on on the menu you want to remove and scroll to the bottom. Now click on the Delete Menu button.
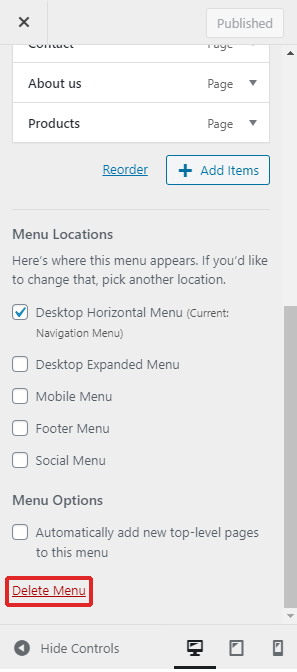
After you click on that, you will be taken back to the list of the menus you have on your site. Lastly, hit the Publish button to apply your decision to the site.

Now, you have one less menu to worry about.
Wrapping up
So this was our article on how to add a dropdown menu to WordPress. It may seem unlikely, but they can improve the quality of navigation on your site. Dropdown menus help you increase the user experience all while fully utilizing the small space on your webpage.
It’s easy to create a dropdown menu, but the number and menu location is limited by the WordPress theme you use. To know more about themes check out our article, What is a WordPress Theme. On that note, you can make your site even easier to navigate by using a one-page theme or a minimalist WordPress theme.
We hope we provided you with information about the dropdown menu that you were looking for. If you think we did, why not share it?