Jira is a pretty powerful tool when it comes to automating recurring processes. You can easily automate Jira ticket creation, for example. The whole process probably wouldn’t take longer than ten minutes to set up, especially when you know what you are doing and you follow Jira best practices.
Let’s say you need to make a monthly report on the performance of your blog. You’ll need to check total traffic, conversions, time on page, etc. Jira allows you to set up certain automation rules that will automatically create a ticket on the date you’ve set up.
Automating Jira Issue Creation With Automation Rules
Automation for Jira is a surprisingly user-friendly feature in Jira that lets you create automations based on if this, then that rules. These rules are composed of four elements:
Triggersor things that trigger the automation to run,Conditionsor elements you specify are needed for the automation to run,Branchesthat allow you to separate conditions,- And
ActionsJira will perform after being triggered if the conditions are met.
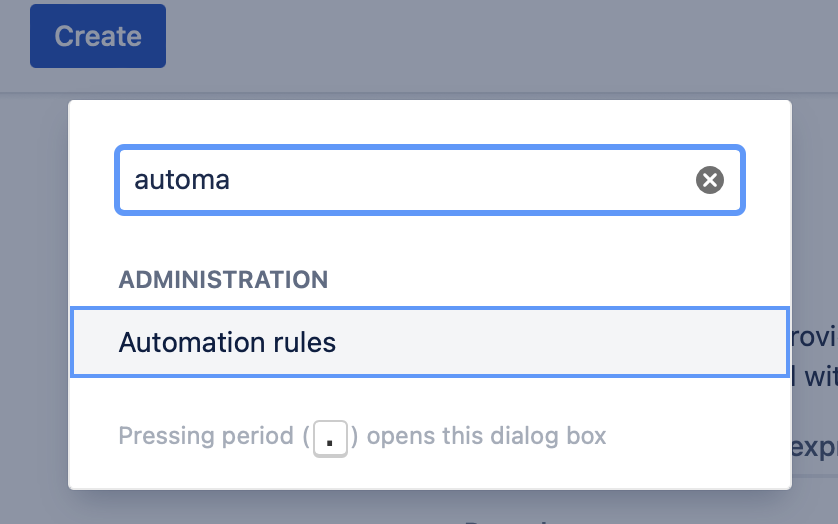
You can access the automation from ??Settings (top right corner) > System > Automation. Alternatively, you can access automation easier using a shortcut: quickly hit the “G” key on your keyboard twice and type “automation” in the search box.
In our example, we will be creating a rule that creates new issues automatically each month using Scheduled as our trigger.
That being said, you are not limited to using dates as your triggers. You can use Incoming webhook to create issues triggered by a third party; Commit created to create issues for QA when code is committed; Object trigger for Jira Service Management Schema changes, and many others. Here’s a full list of triggers you can use.
Trigger: Scheduled
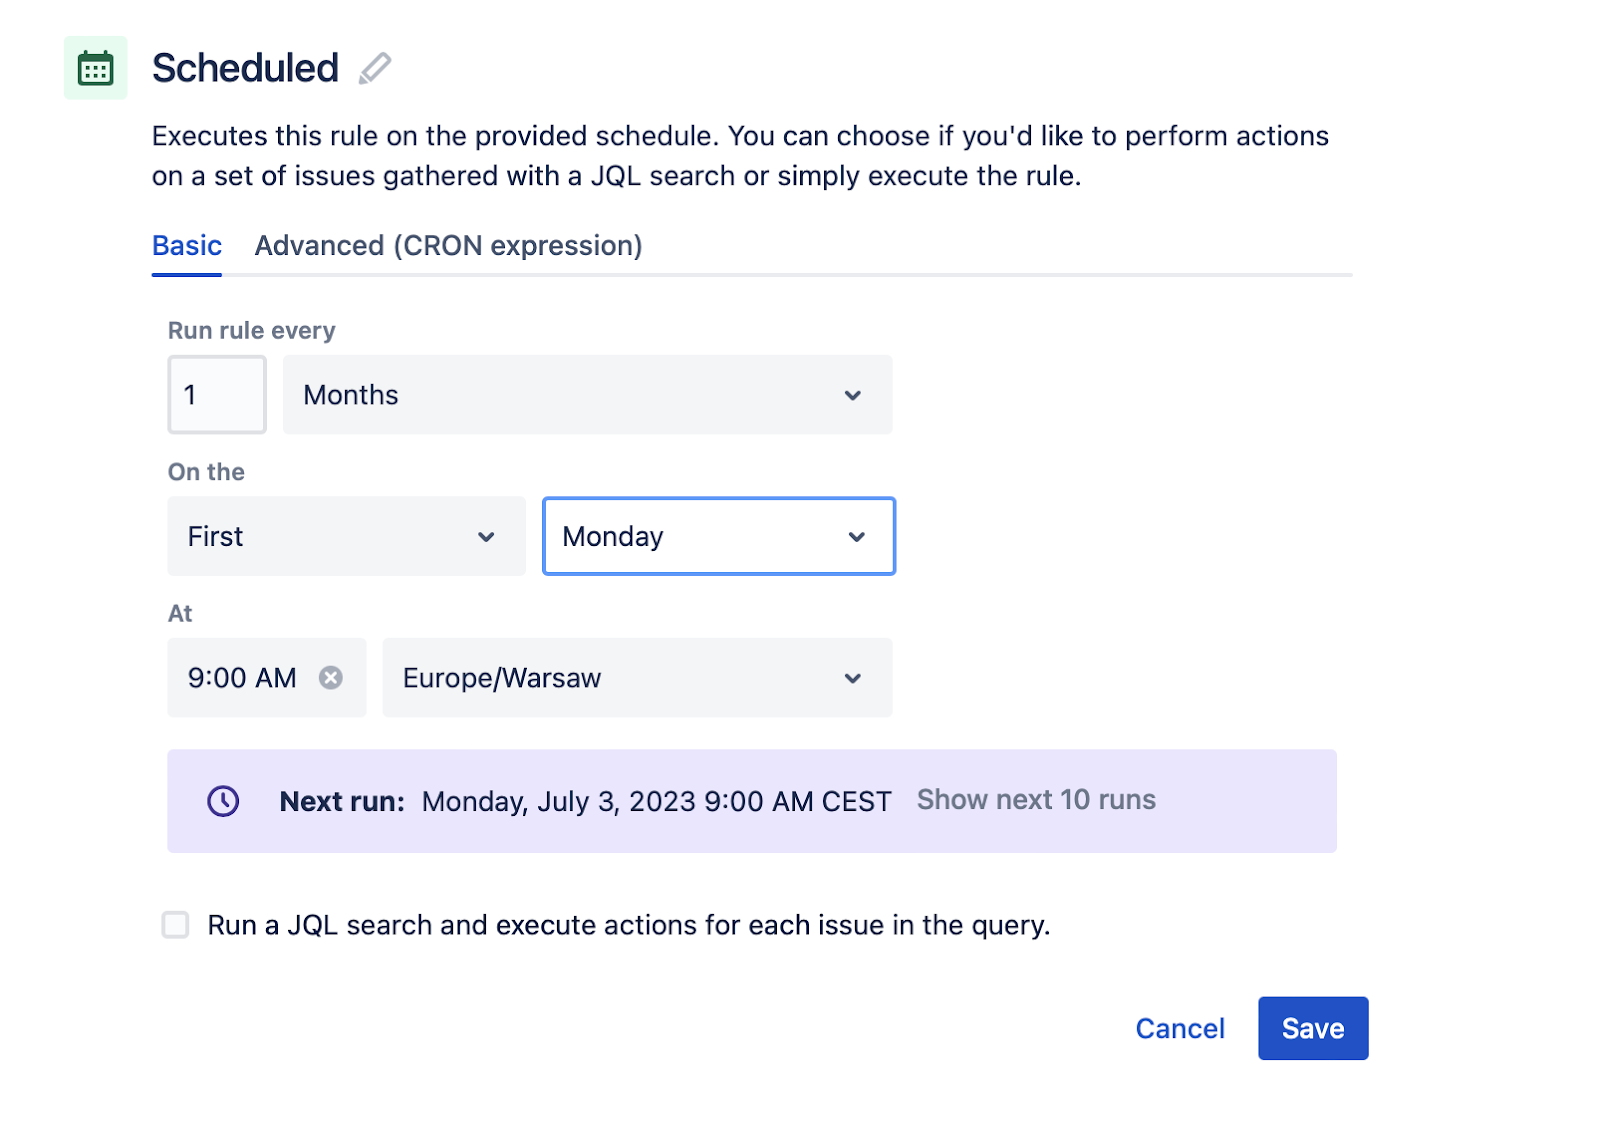
This trigger allows you to select the date and frequency of something you want your Jira instance to do. In our example, we will be making a rule that automatically creates issues on the first Monday of every month. You can make these adjustments in the settings of the trigger.
Action: Create Issue
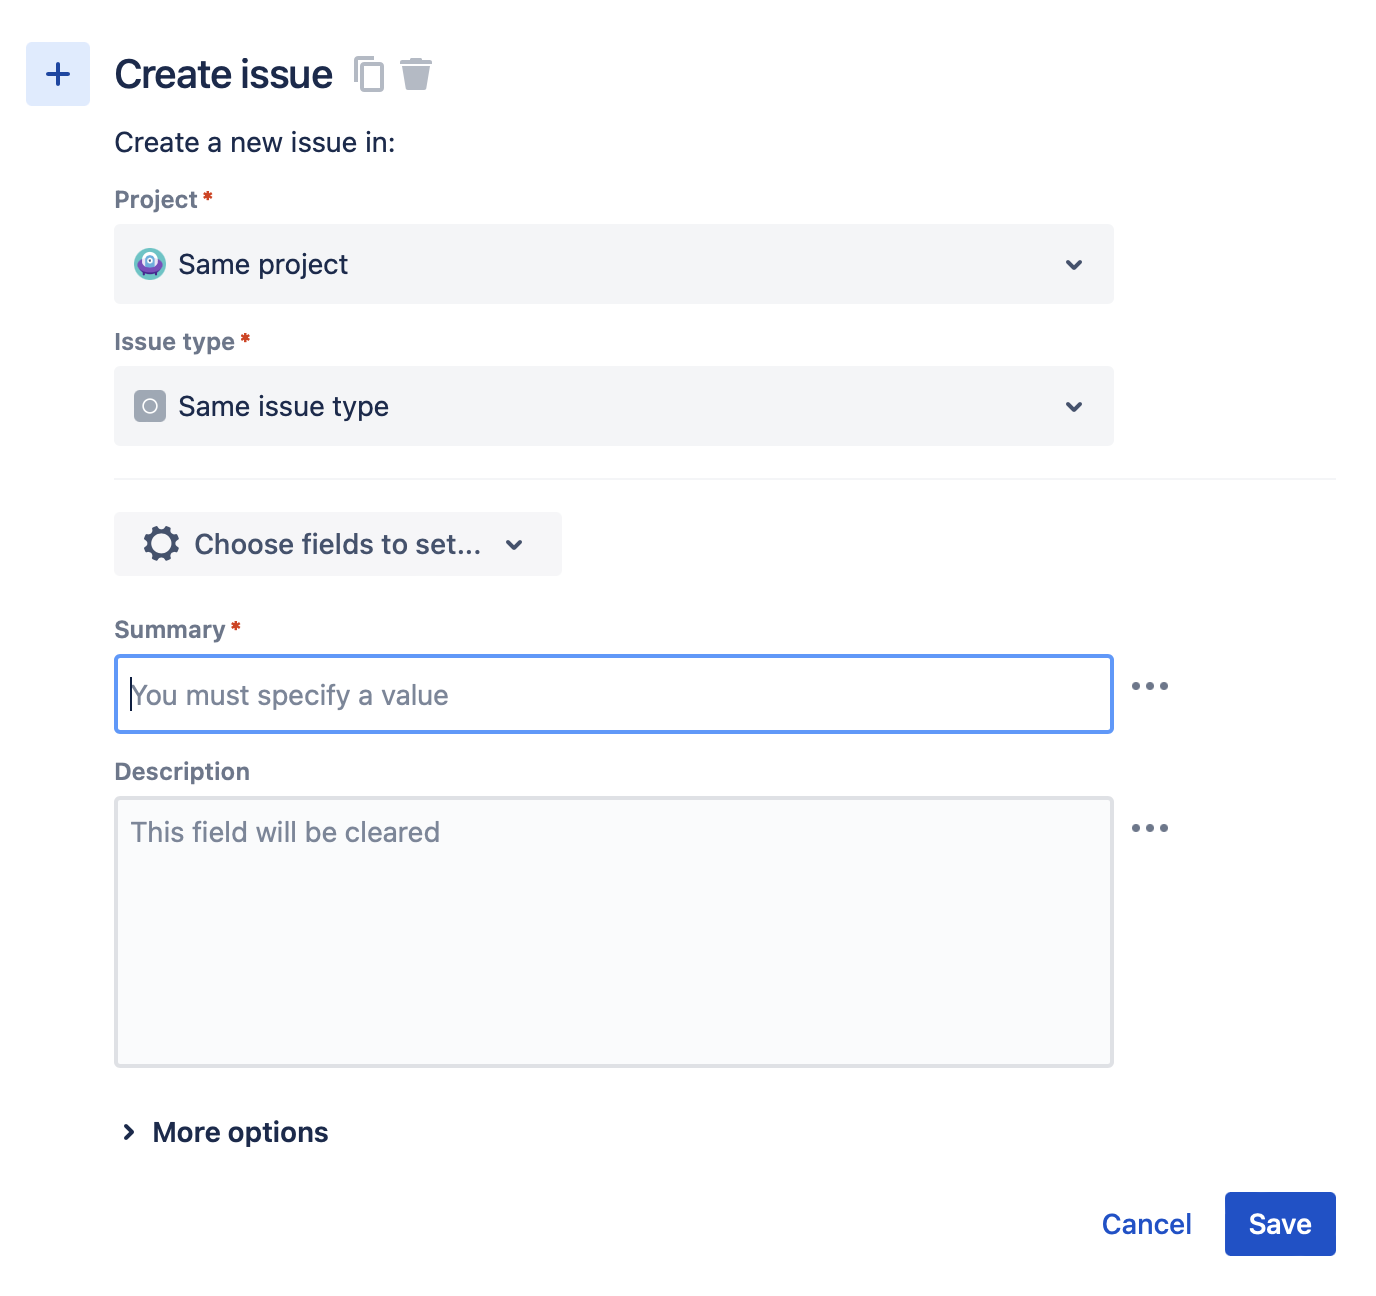
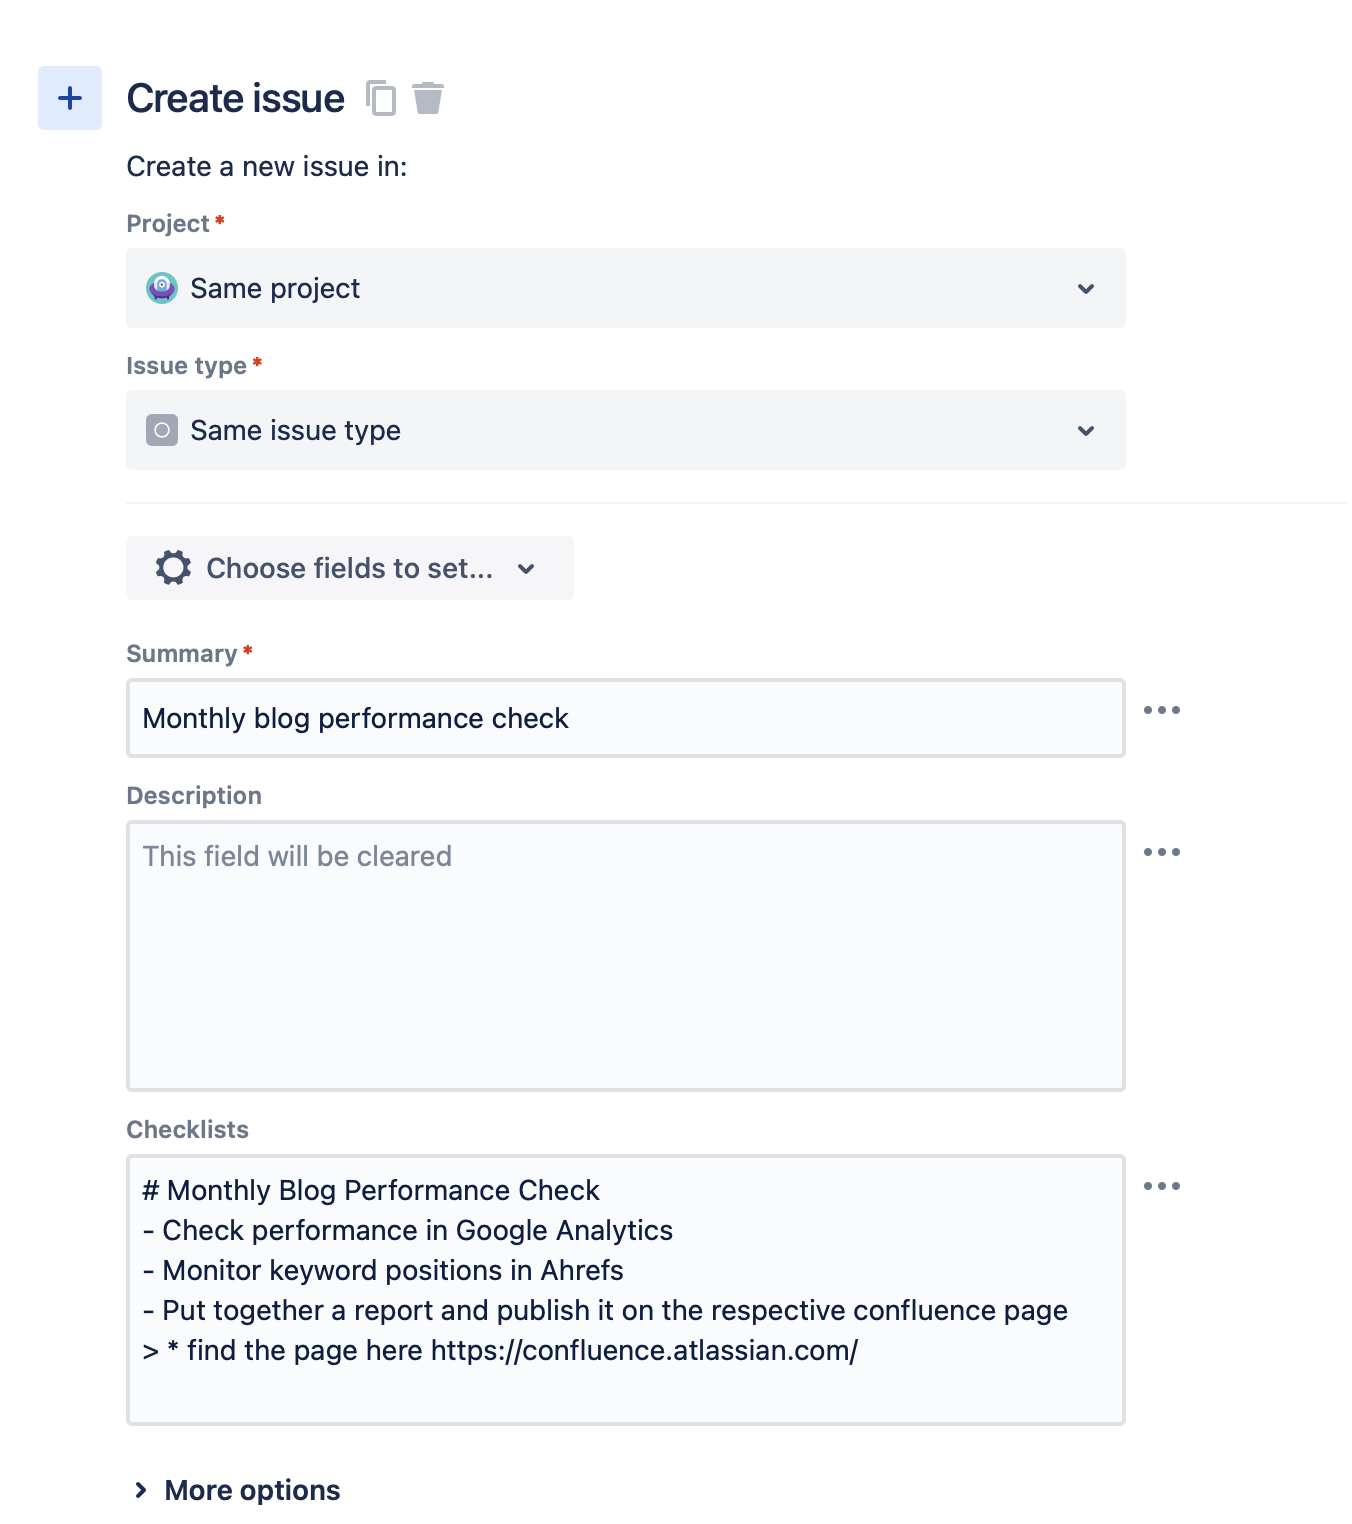
Next, we will be using an action to create an issue. This action allows you to specify the project an issue will be added to, the issue’s type, certain custom fields you’d like to set up, and a summary and description for said issue.
The option to choose custom fields is pretty powerful as you can choose to add important elements like labels. Or, if you are a Smart Checklist user, you can go one step further with issue creation automation using the Checklists custom field.
Note that you’ll need to set the Checklists field up separately. Here’s how.
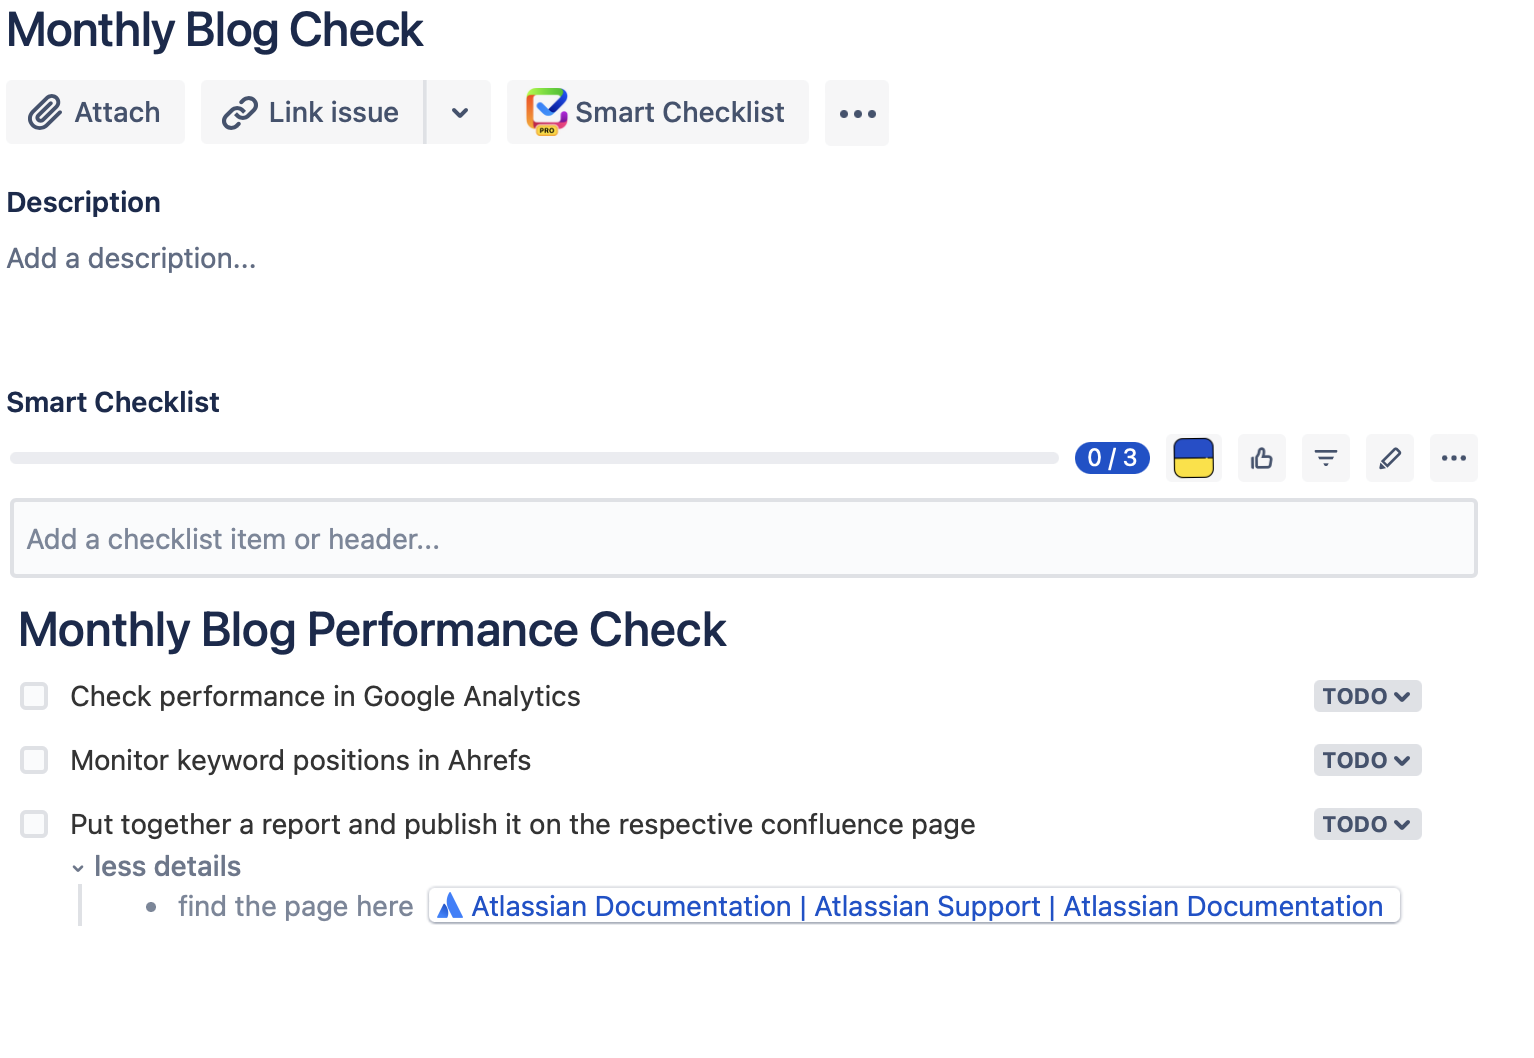
Adding this field and filling it with content will generate a checklist under your issue automatically. This way you’ll be able to add clear guidelines and instructions, add links to tools, tag other users, and much more. A checklist is also handy for creating Jira templates for Definition of Done or other recurring processes.
Adding this field and filling it with content will generate a checklist under your issue automatically. This way you’ll be able to add clear guidelines and instructions, add links to tools, tag other users and much more.
This is how your ticket will look with a nicely crafted checklist.
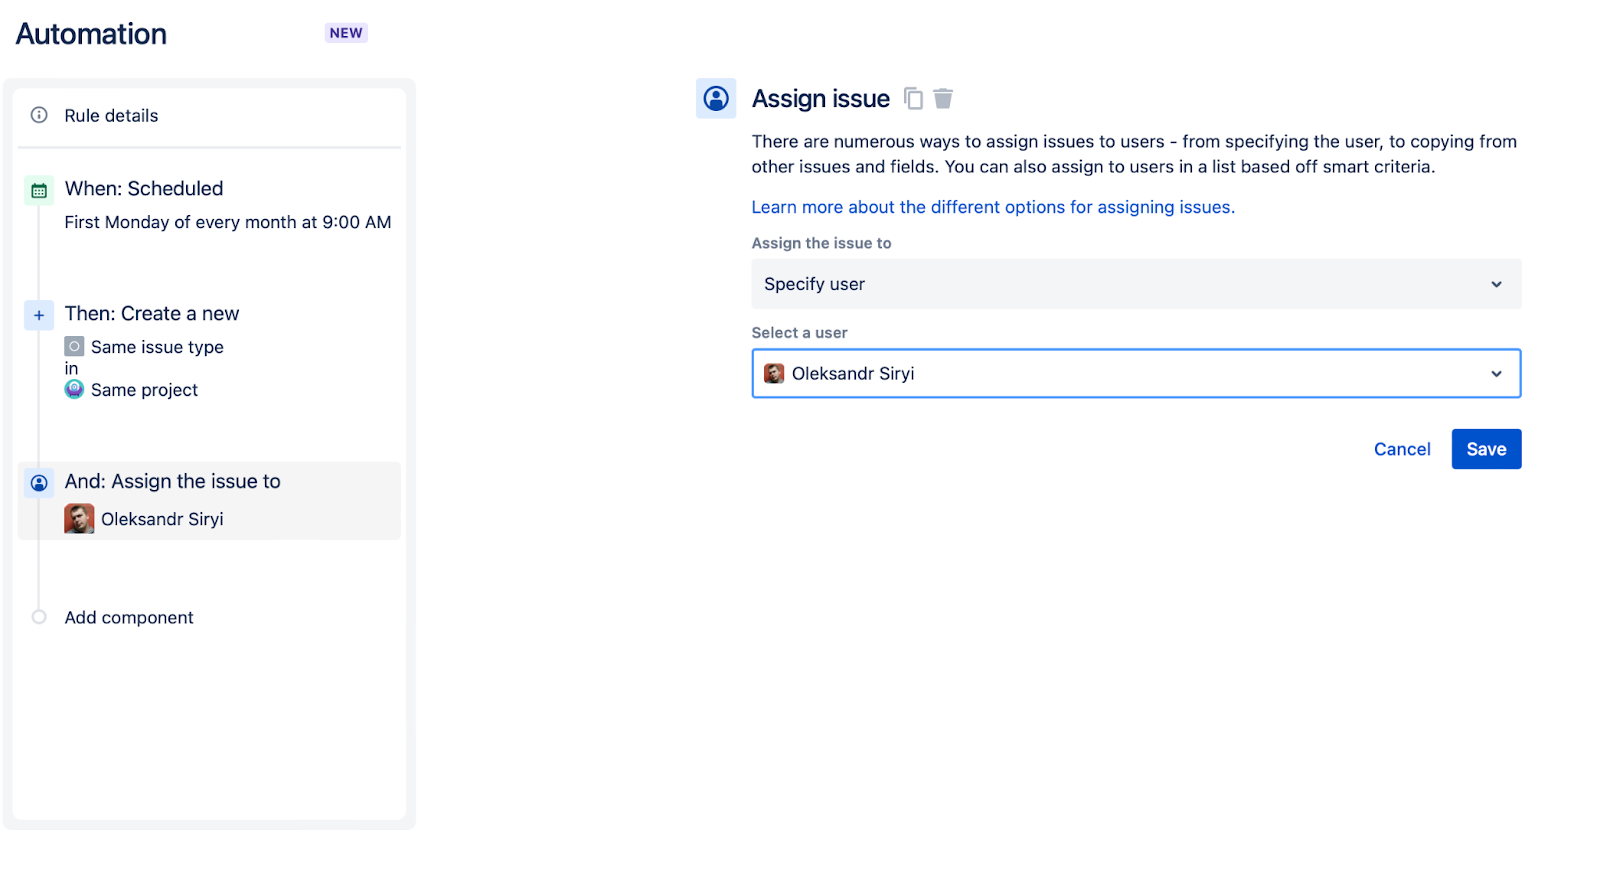
You’ll need to add another element to your automation rule — the assignee. You do want someone to complete your task, right?
Action: Assign User
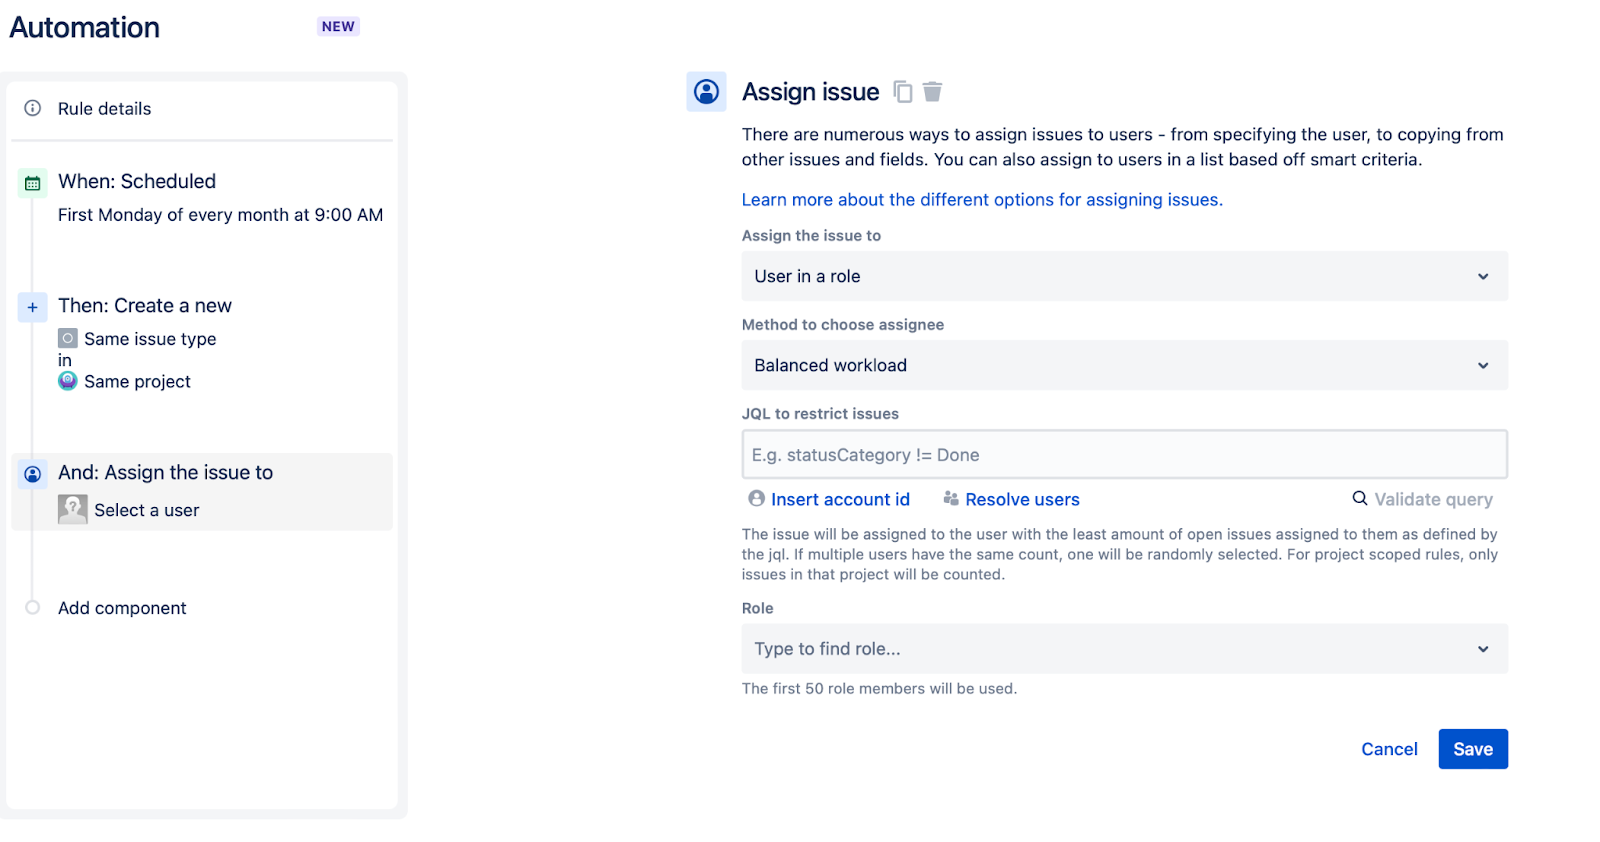
This action is pretty neat as it allows you to assign issues based on a selection of options. The most straightforward would be to assign an issue to a specific user, but you can also assign it based on a role making sure that the report is done even if the current responsible person is on vacation. You can also trust Jira to make the selection for you, based on workload.
In our example, however, we’ll be assigning the issue to little old me.
Lastly, let’s make sure that the assignee is aware a new issue was created and awaits their attention. I’d suggest adding an email notification. That being said, you are not limited to using email in your automations. Jira offers actions for Slack messages, SMS notifications via Twilio, MS Teams messages, etc.
Action: Send Email
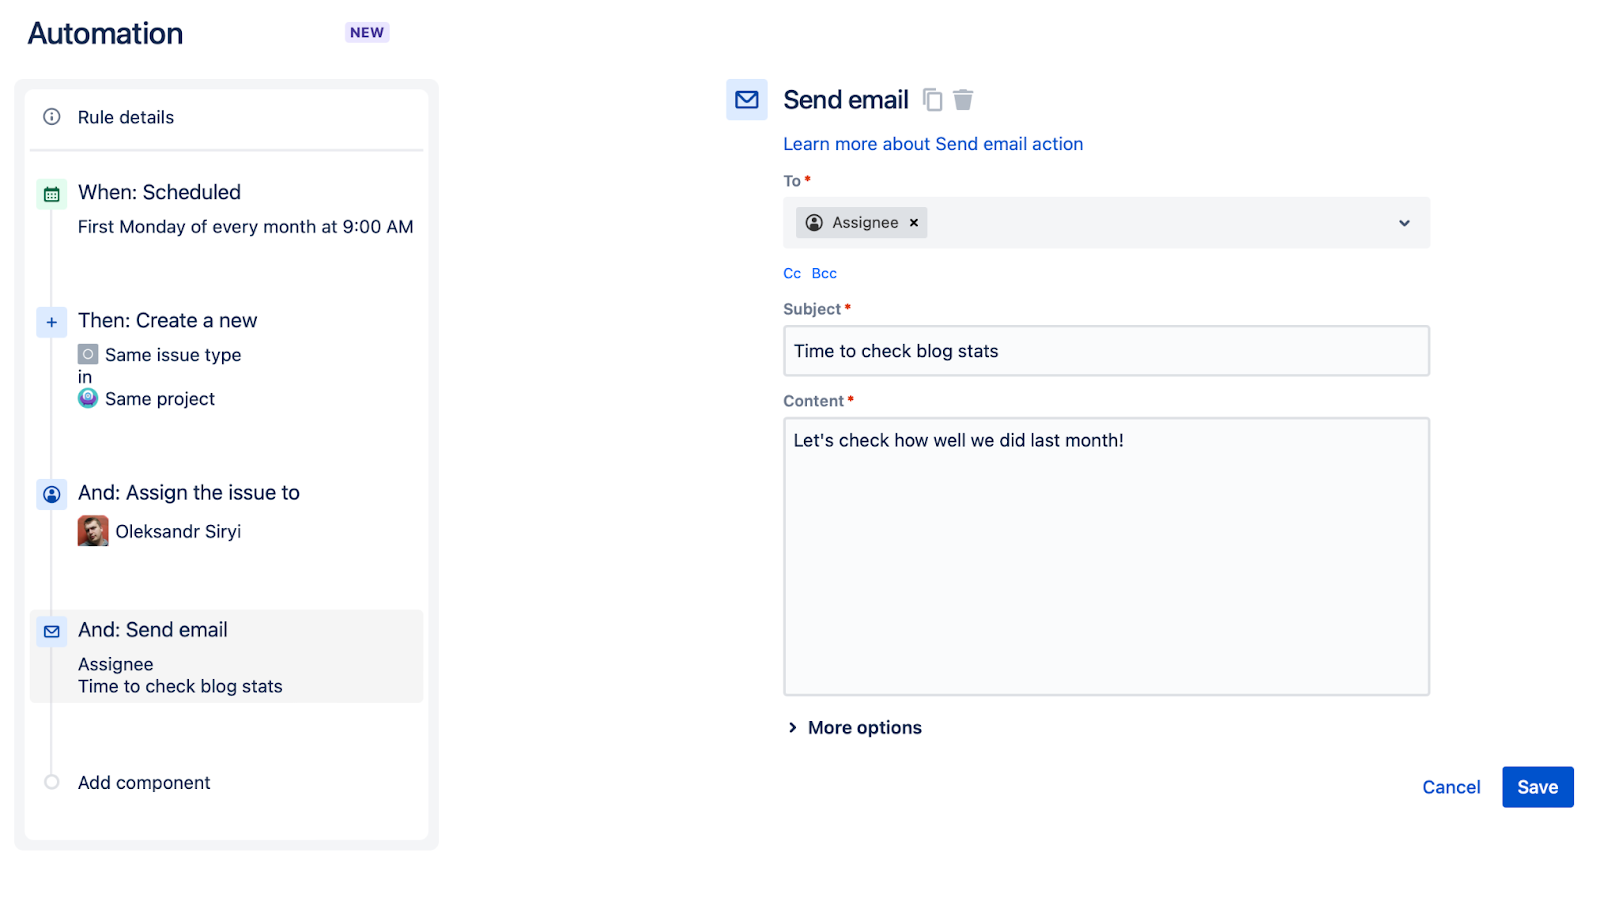
That’s it — we’ve created a handy rule that will automatically create an issue assigned to me on every first Monday of the month. This issue has clear and actionable instructions as well as links to the tools I’ll need to succeed.
Create Issues in Bulk from CSV
But what if you already have a large list of Jira issues you’d like to create automatically? Well, you can automate Jira ticket creation from an Excel sheet for example. Jira allows bulk import of issues from CSV.
For starters, you’ll need a CSV spreadsheet with your issues. Make sure to name the columns respectively to the fields inside your Jira issues. In this example, I’ll be adding Jira issues with summaries, descriptions, labels, and checklists.
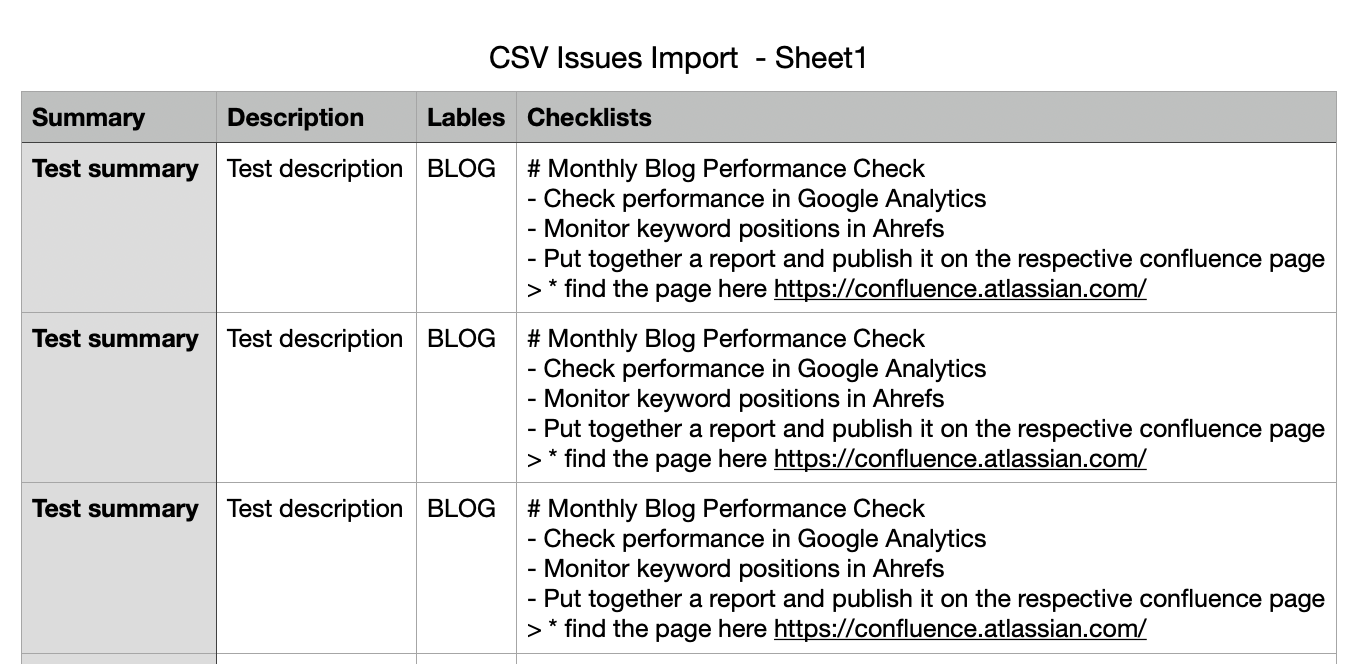
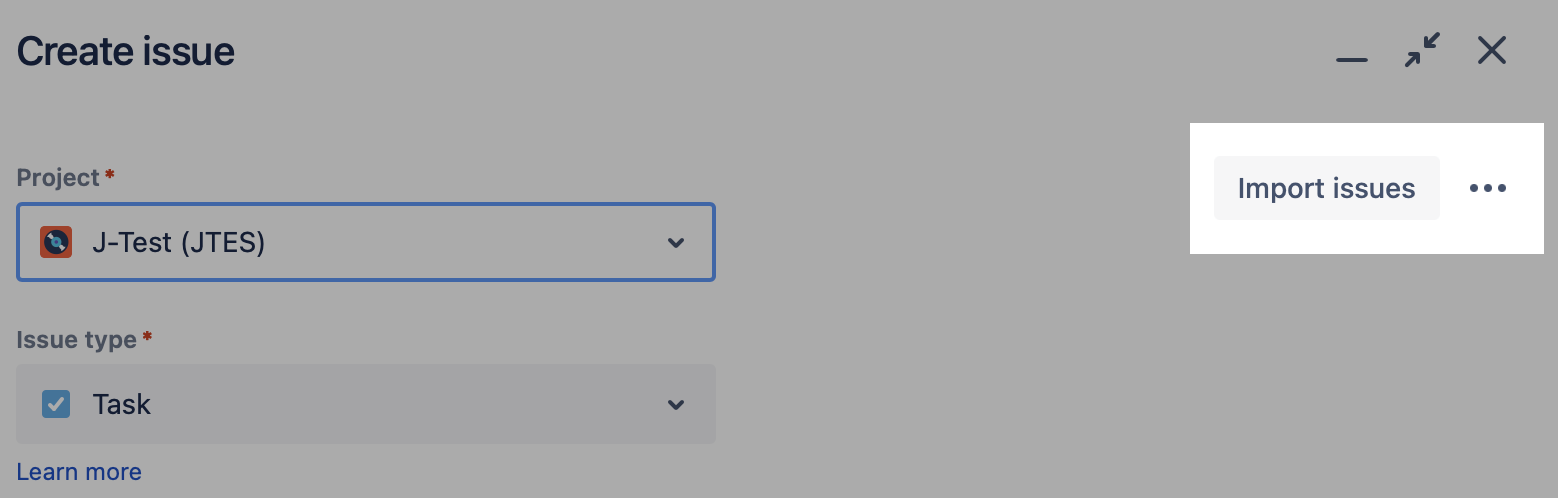
If you already have a spreadsheet saved in CSV format handy — go to your Jira instance and click on the blue create button. You’ll see an option to import issues. Click on it and agree to go to a different page if a prompt appears.
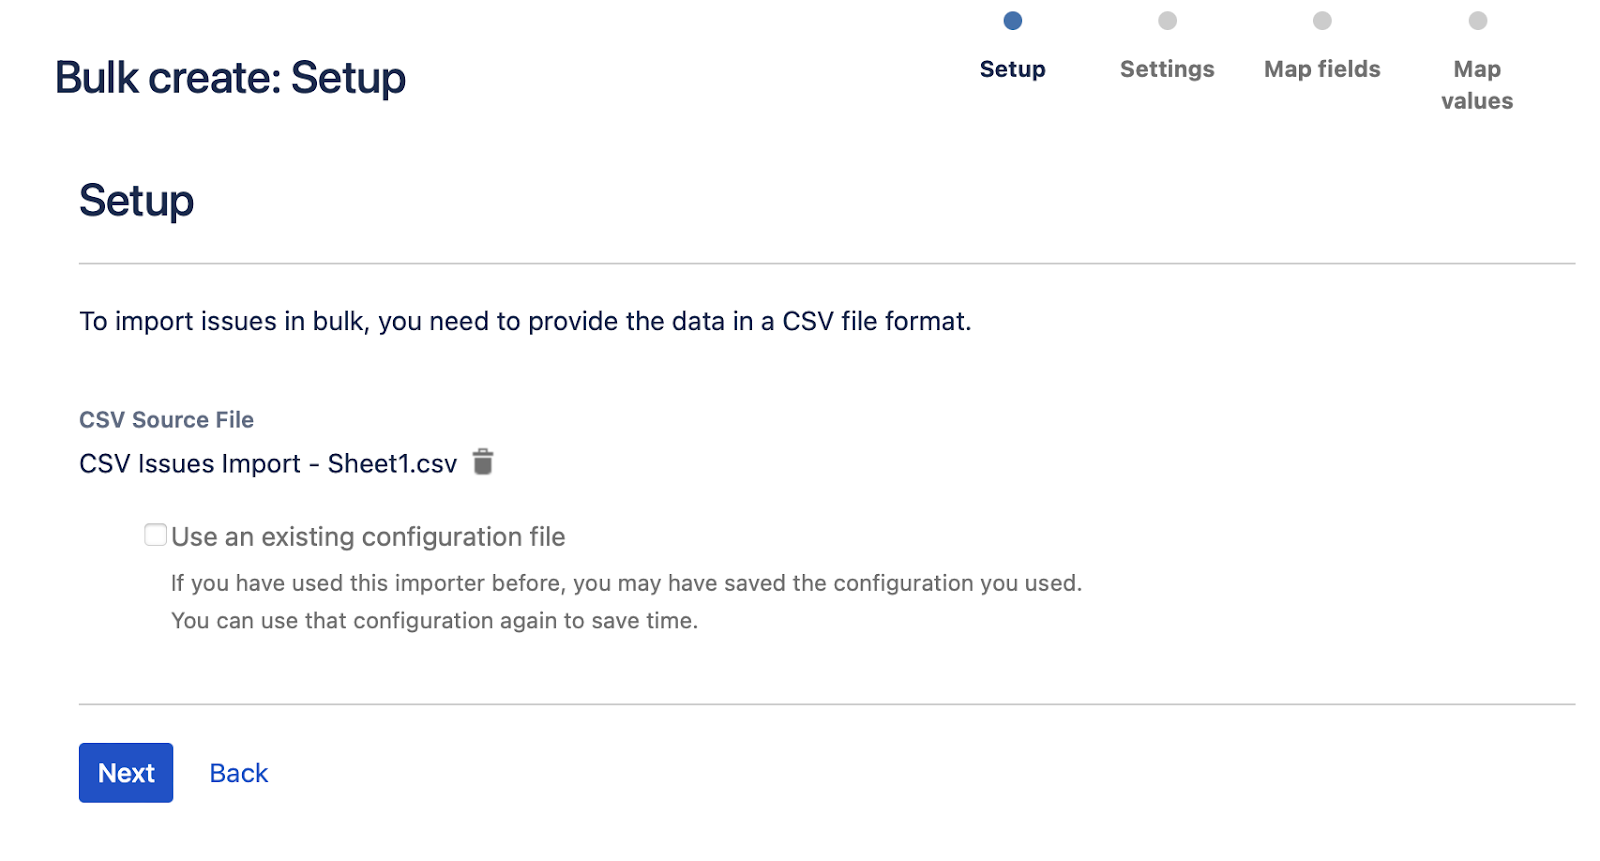
Upload your CSV file.
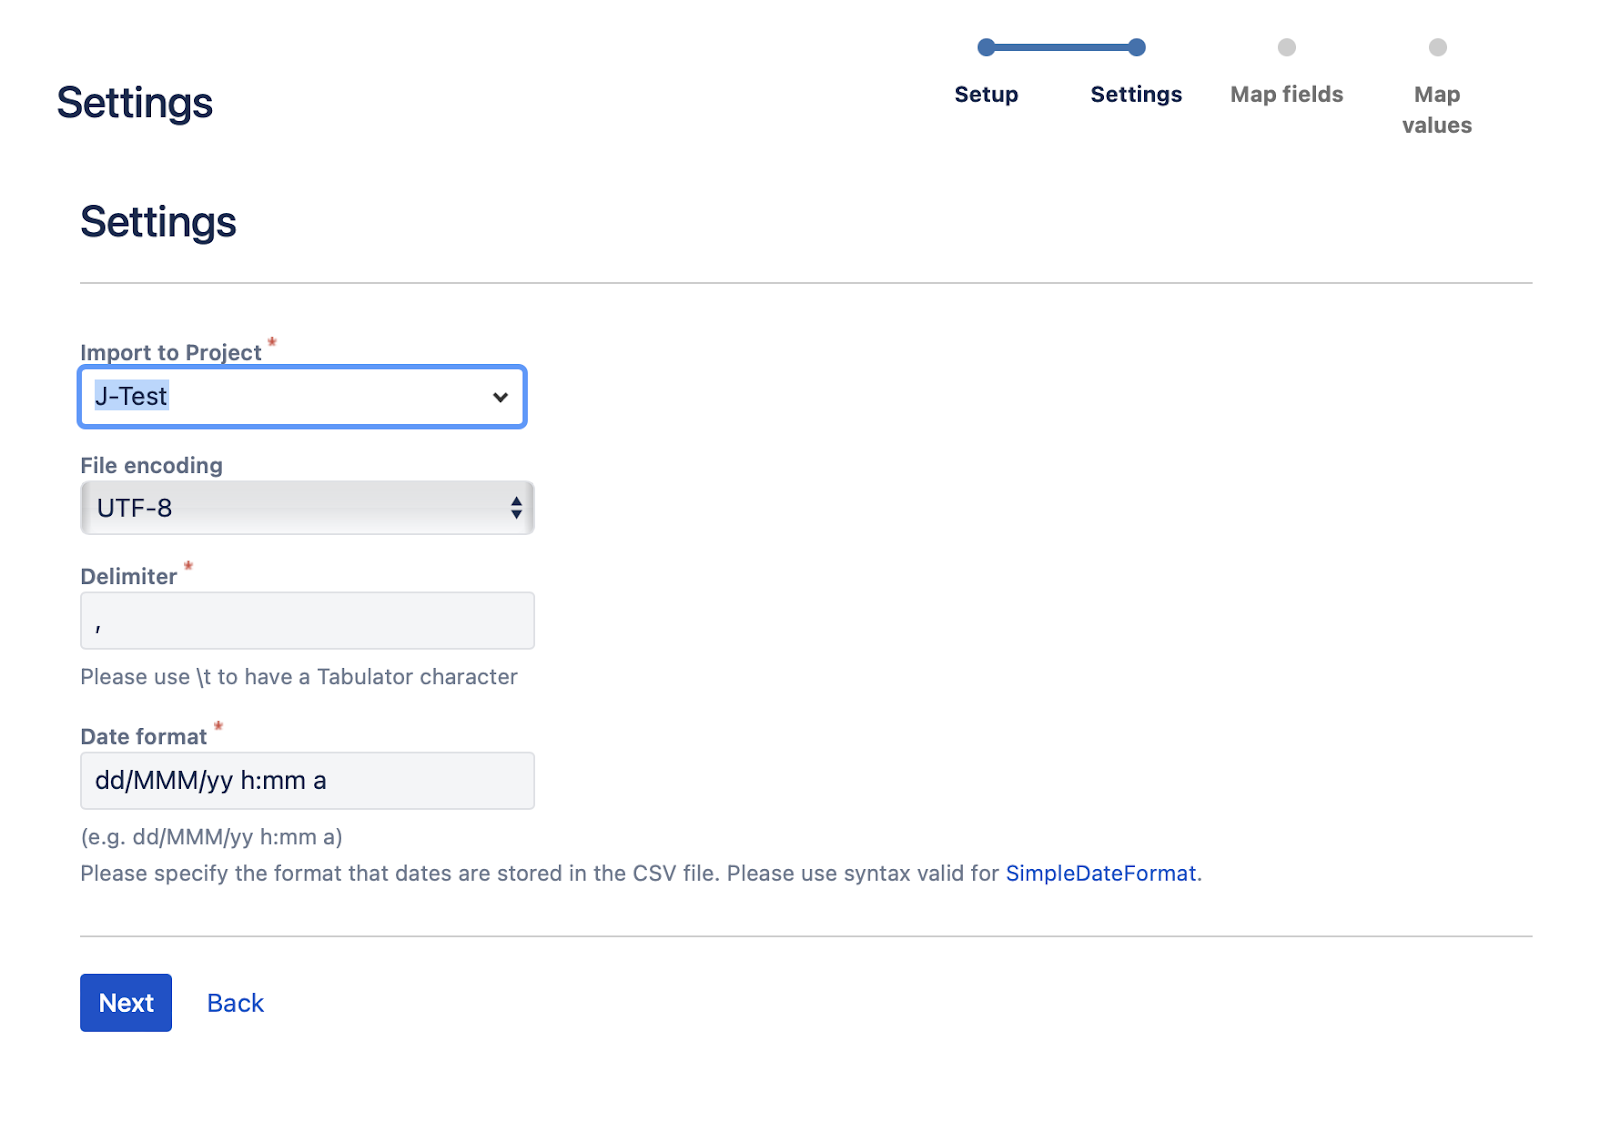
Select the project you’d like to import issues to from the dropdown menu. Leave other settings as is, unless you’ve specifically made modifications to these parameters in the spreadsheet.
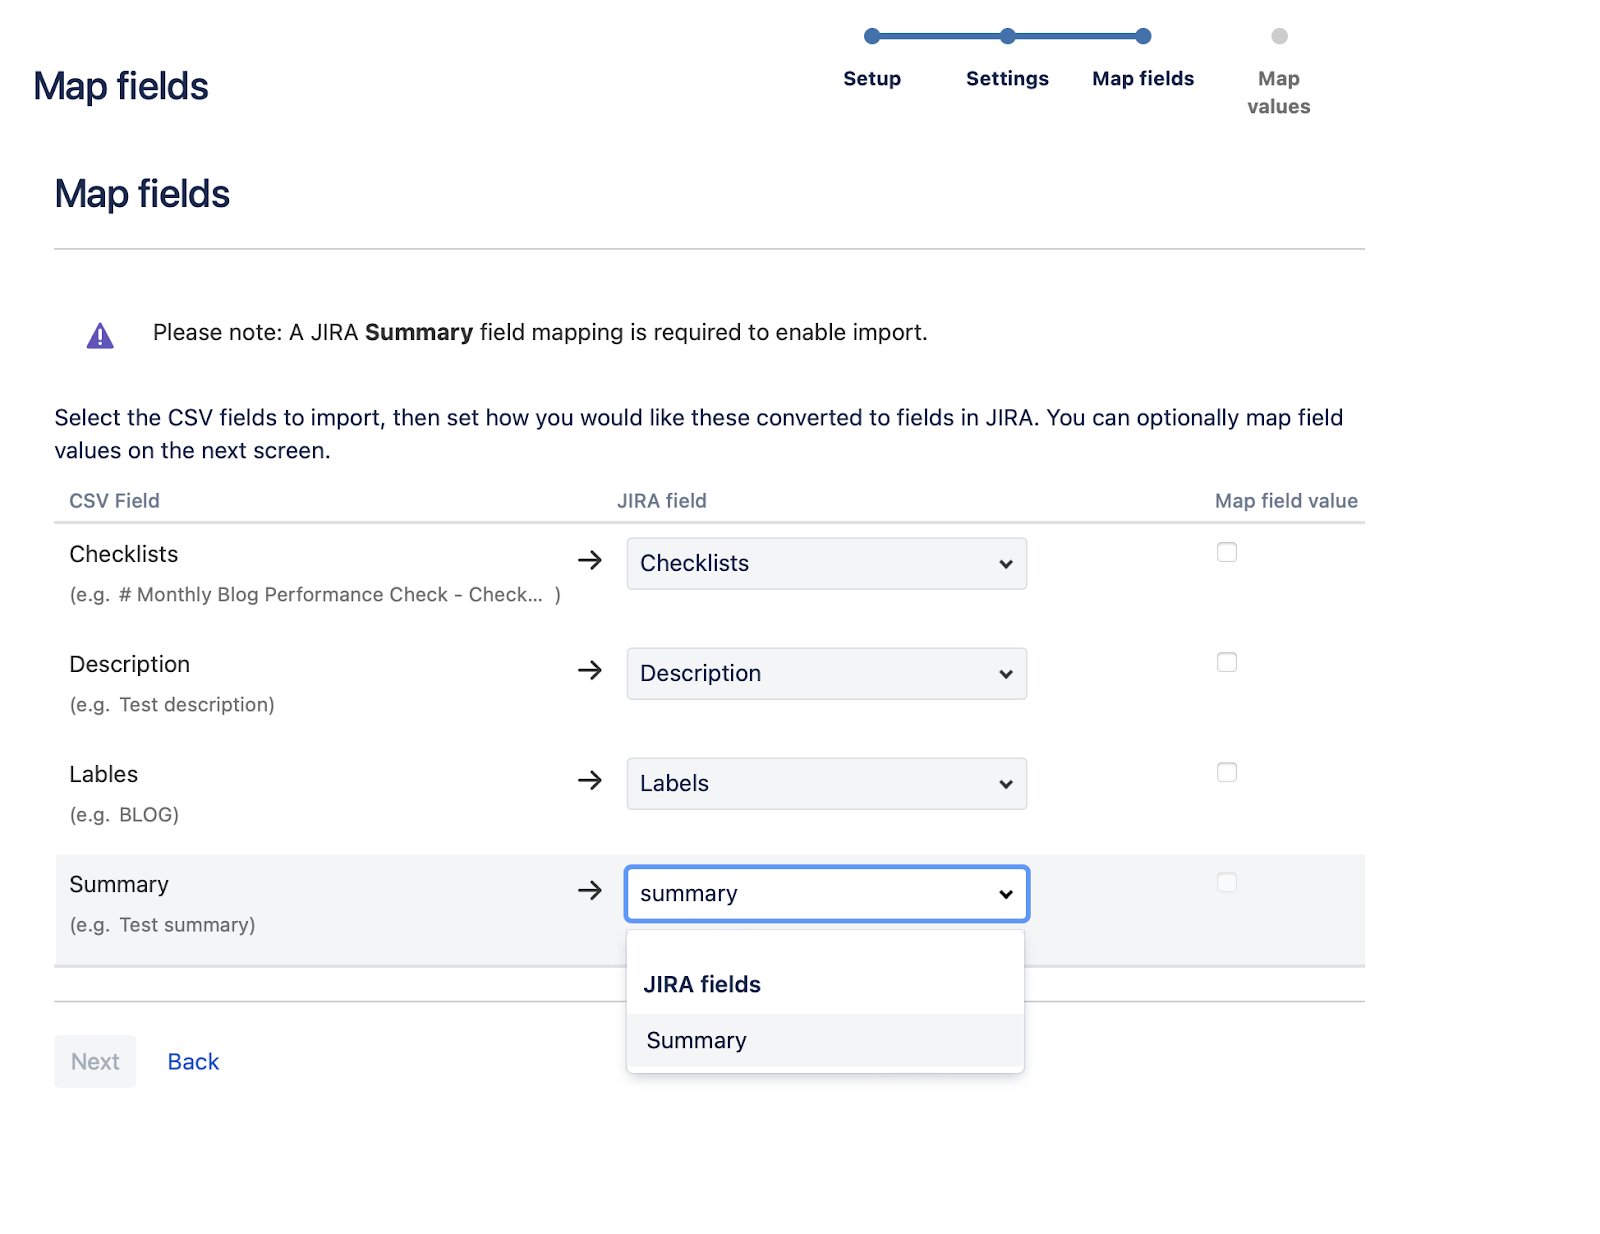
The next step will help you map the columns from the CSV file to the corresponding fields in Jira. Use the dropdown menu to map them.
Pay attention to the Map field value checkbox. Ticking it may mess up the formatting. Particularly, if you enable it for the description field, your multi-line formatting will be converted into a single string of text.
Note: You’ll need to install Smart Checklist and enable the Checklists custom field if you want to bulk upload issues with checklists.
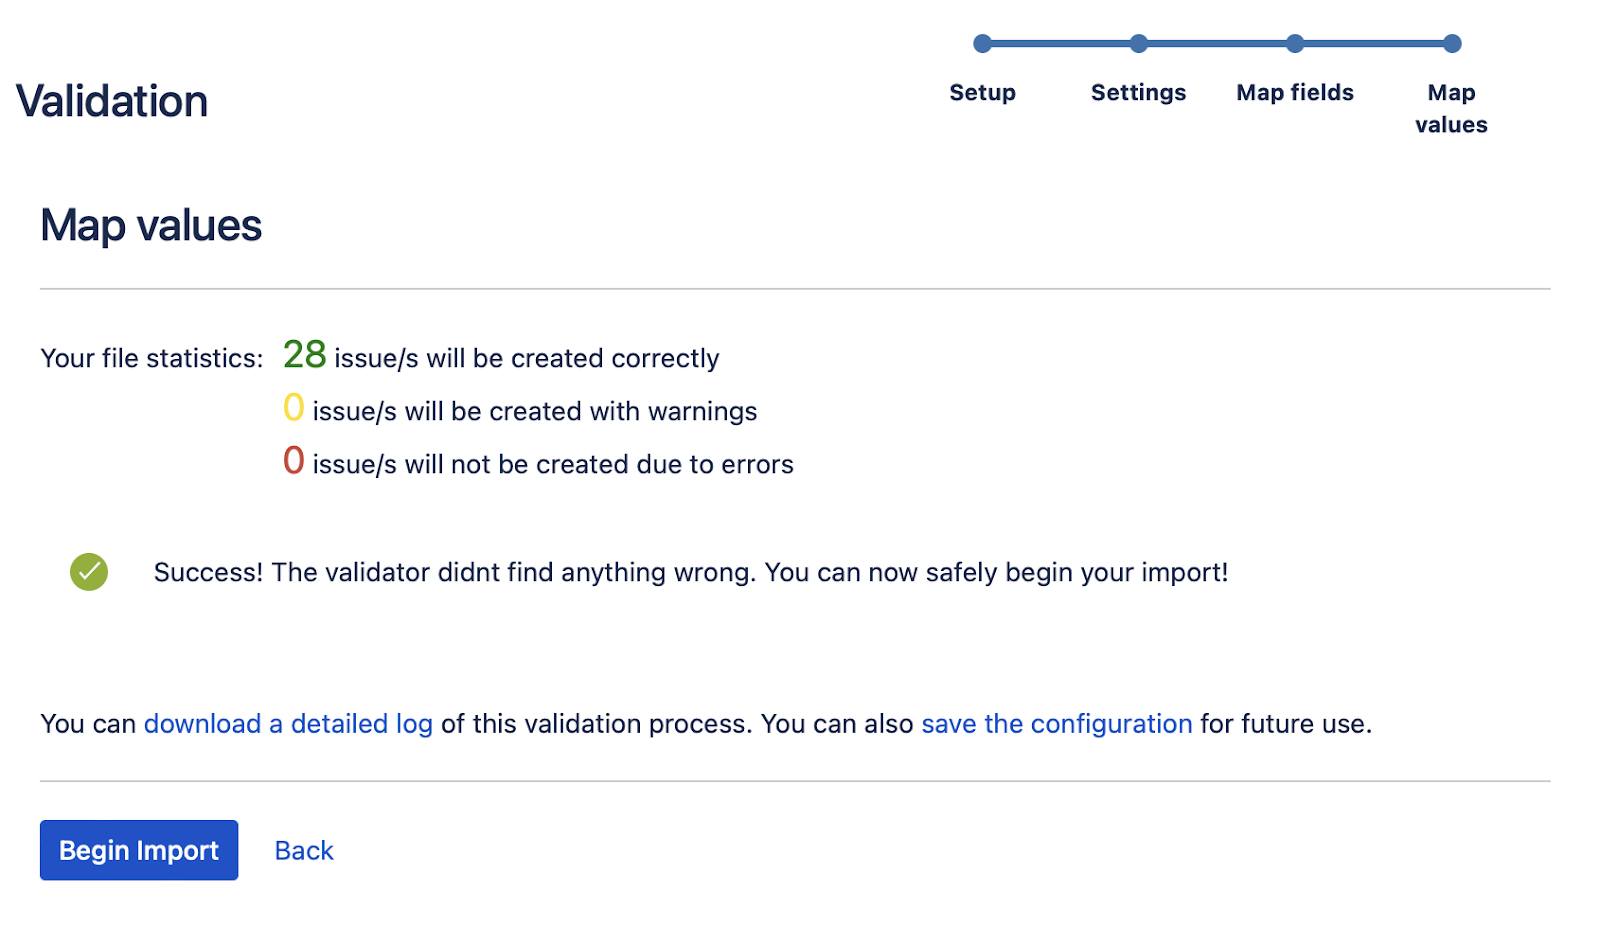
Technically, you could begin the import now but I strongly recommend validating your import first. The last thing you want is to find out that something went wrong with your data once you’ve already imported it.
And that’s how you automatically create issues in Jira.