cPanel comes with an extensive suite of built in backup tools. Below, we cover how to use these cPanel Backup utilities to both backup and restore files on your cPanel account.
InMotion Hosting also offers Backup Manager to keep your account backed up and secure,
- Making cPanel Backups
- Backup Wizard
- Other Tools
- Restore From Backups
Get the best in cPanel backup tools at an affordable price with InMotion’s cPanel Hosting!
cPanel Backups
Making a Full cPanel Backup
This handy utility will create a compressed file that you then can download to your local computer for storage. Please be advised, we do not allow anyone to store backups in File Manager— you must store them off of the server.
- Login to your cPanel
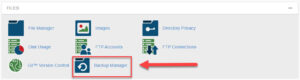
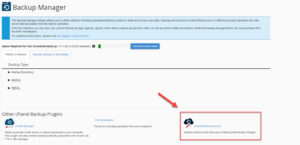
- Click the Backup Manager button in the Files section of cPanel.
- Under Other cPanel Backup Plugins, click on cPanel Backups.

- In the Full Backup section, click the Download a Full Account Backup button.
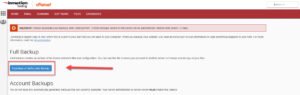
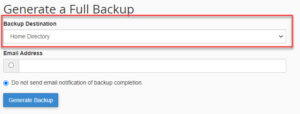
- On the next screen make sure the Home Directory option is selected.
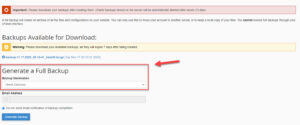
- If you want an email notification when the backup completes, enter your email address. If you do not want an email, select the box next to Do not send email notification of backup completion.
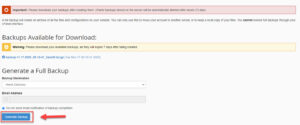
- Click the Generate Backup button to begin the Full cPanel Backup. You will then see a message stating “Full Backup in Progress…” Allow some time for the backup to complete, you will receive an email notification upon completion (if you entered your email address in the last step).
- Download the file from your cPanel. It will be located in your /home directory, begin with backup, and include the date. For example backup-10.26.2020_15-51-32_example.tar.gz
Downloading Home Directory Backup in cPanel
- Log into cPanel.
- Click the Backup Manager link in the Files section.
- Under Other cPanel Backup Plugins, click on cPanel Backups.
- Click the Home Directory button under the Download a Home Directory Backup section. You will then begin downloading a backup of your Home Directory. This can take several minutes to complete depending on the size of your site.
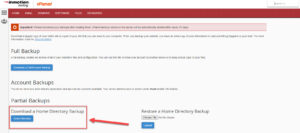
- You can then access the file in your browser’s download directory. In this example, the home directory backup is named backup-example.com-10-4-2017.tar.gz.
You should now have successfully backed up your website files by downloading a partial home directory backup in cPanel.
Retrieve a Standard Database Backup in cPanel
- Login to your cPanel.
- Click the Backup Manager link in the Files section.
- Under Other cPanel Backup Plugins, click on cPanel Backups.
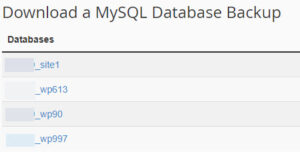
- Now under the Download a MySQL Database Backup section, click on the name of the database you wish to download. If you aren’t sure which database is associated with your site, check the name in the site’s configuration data. For WordPress sites, this is your wp-config.php file.
- On your local machine, go to the folder your web-browser downloaded the database backup and you should now see the compressed .sql.gz file.
Now you’ll have a good working copy of your database locally stored safely on your own computer. If you delete something by accident, or are having any other database problems, you can then restore your database from that good backup.
Backup Wizard
The Backup Wizard provides the same functionality as the standard cPanel Backups, except that the options are separated out by section. This is helpful if you are still getting used to the backup process and want to make sure you aren’t forgetting anything, or if you are only focusing on backing up one specific item.
Create a Backup in Backup Wizard
- Login to the cPanel.
- Click the Backup Manager link under the Files section.
- Click on the cPanel Backup Wizard link.
- Click on the blue button labeled Back Up.
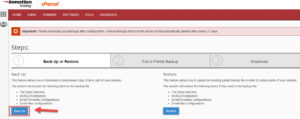
- Choose your type of backup: Full Backup or select a Partial Backup. These options let you download a smaller file with exactly what you need. Home Directory creates a backup consisting of everything in the user’s Home Directory. The other options will limit you to only databases (MySQL Databases) or email data (Email Forwarders & Filters), while the Full Backup option is essentially the same as the full backup above.
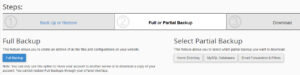
- Determine the destination of the backup. Click the drop-down arrow and select either Home Directory, Remote FTP server, Remote FTP server (passive mode transfer), or Secure Copy (SCP).
- Enter the email address to receive notification of the backup completion. If no notification is required, click that radial button.
- Click on Generate Backup.
- When the backup completes you will see a link that says Backups Available for Download. Click the link to download the backup file.
Other Tools
Create a custom Database Backup in PHPMyAdmin
- Once you have logged into cPanel, click on the icon “PHPMyAdmin” in the databases section.

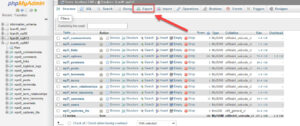
Once you have done that you should see a screen like the one below.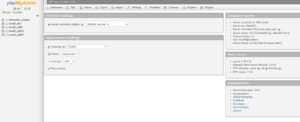
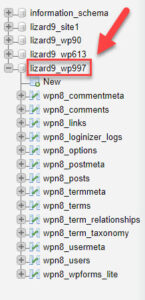
- Select the database you wish to export by clicking on the database name in the sidebar as indicated in the graphic below.
- Click on Export in the menu at the top of the phpMySQL screen. This will bring up the options for export and also give you a confirmation of where the export is coming from.
- We are using the Quick export method. This exports the file in SQL format. If you need to select specific options for the export, then click on Custom and select your options. You should only select this if you are familiar with exporting MYSQL databases. Click on Go to complete the export.
- You will see a screen that asks where you want to save the export file. You also have the option to name the database backup file. When you save the file, make sure that it is saved to a safe location once the export is complete.
Restore From Backups
These processes only work if you have already saved one or more backups locally. If your backup is not yet on your account but is saved elsewhere, please see the below section on Uploading. If you have made changes to an account or directory since making a backup, be sure to save any newly added or edited files before the restoration. For example, if you have a new file such as /public_html/index2.htm live on your website that didn’t exist in the backup, these files will not be overwritten during a restoration.
When you restore a partial home directory backup like we’re creating covering below, this is going to overwrite any existing files currently on your account. So if you have /public_html/index.htm file on your account, and the backup you created also has that file, the file from the backup will be restored over the current live file.
Restore a home Directory Backup in cPanel
Following the steps below you can learn how to restore a partial backup of your website including all the files in your home directory.
- Login to your cPanel.
- Under the files section, click on Backup Manager.
- Click on cPanel Backups.
- Under Restore a Home Directory Backup, click on Choose File.
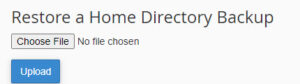
- Find the appropriate file on your computer and click Open.
- The name of your backup should now be displayed, so click on Upload.
- You should then see the progress of your files being restored.
A Note on Restoring MySQL and PostgreSQL Databases
You can restore databases within their respective cPanel applications if your database is under 50MB:
- Import MySQL databases in phpMyAdmin
- Import PostgreSQL databases in phpPgAdmin
If over 50MB, you can import the database with SSH or request technical support for data recovery assistance. For technical assistance, you must upload the database file to your cPanel account, then submit a ticket to support with the database file path and name of the database you want it restored to.
Take the guesswork out of backups and subscribe to InMotion Hosting’s Backup Manager!