There is a lot of advice on keeping your WordPress themes, plugins, and core files up to date. This helps keep your site in working order. Though, it’s not the only element to focus on. You’ll also want to update PHP in WordPress, to keep the server-side running smooth.
Every site has a front end and back end. The back end makes sure your site loads quick, is performant, and keeps malicious users at bay. Your PHP version should be current, for many of the same reasons your site’s files should.
In this post, we’ll give you an overview of how WordPress and PHP interact. From there, we’ll show you how to update your PHP in WordPress.
How WordPress Uses PHP to Serve Websites
Before we get into the bulk of the article, let’s discuss PHP itself. For the unaware, websites run on a ‘stack’. This is a collection of software that helps the site run. For example, WordPress runs using a few different tools and languages:
- Front end: HTML, CSS.
- Interactivity: JavaScript, React.
- Back end: PHP.
- Server: MySQL.
While we won’t be going into the details of everything here in this post, know that PHP is important to WordPress’ functionality. It’s a ‘server-side’ programming language that makes websites dynamic.
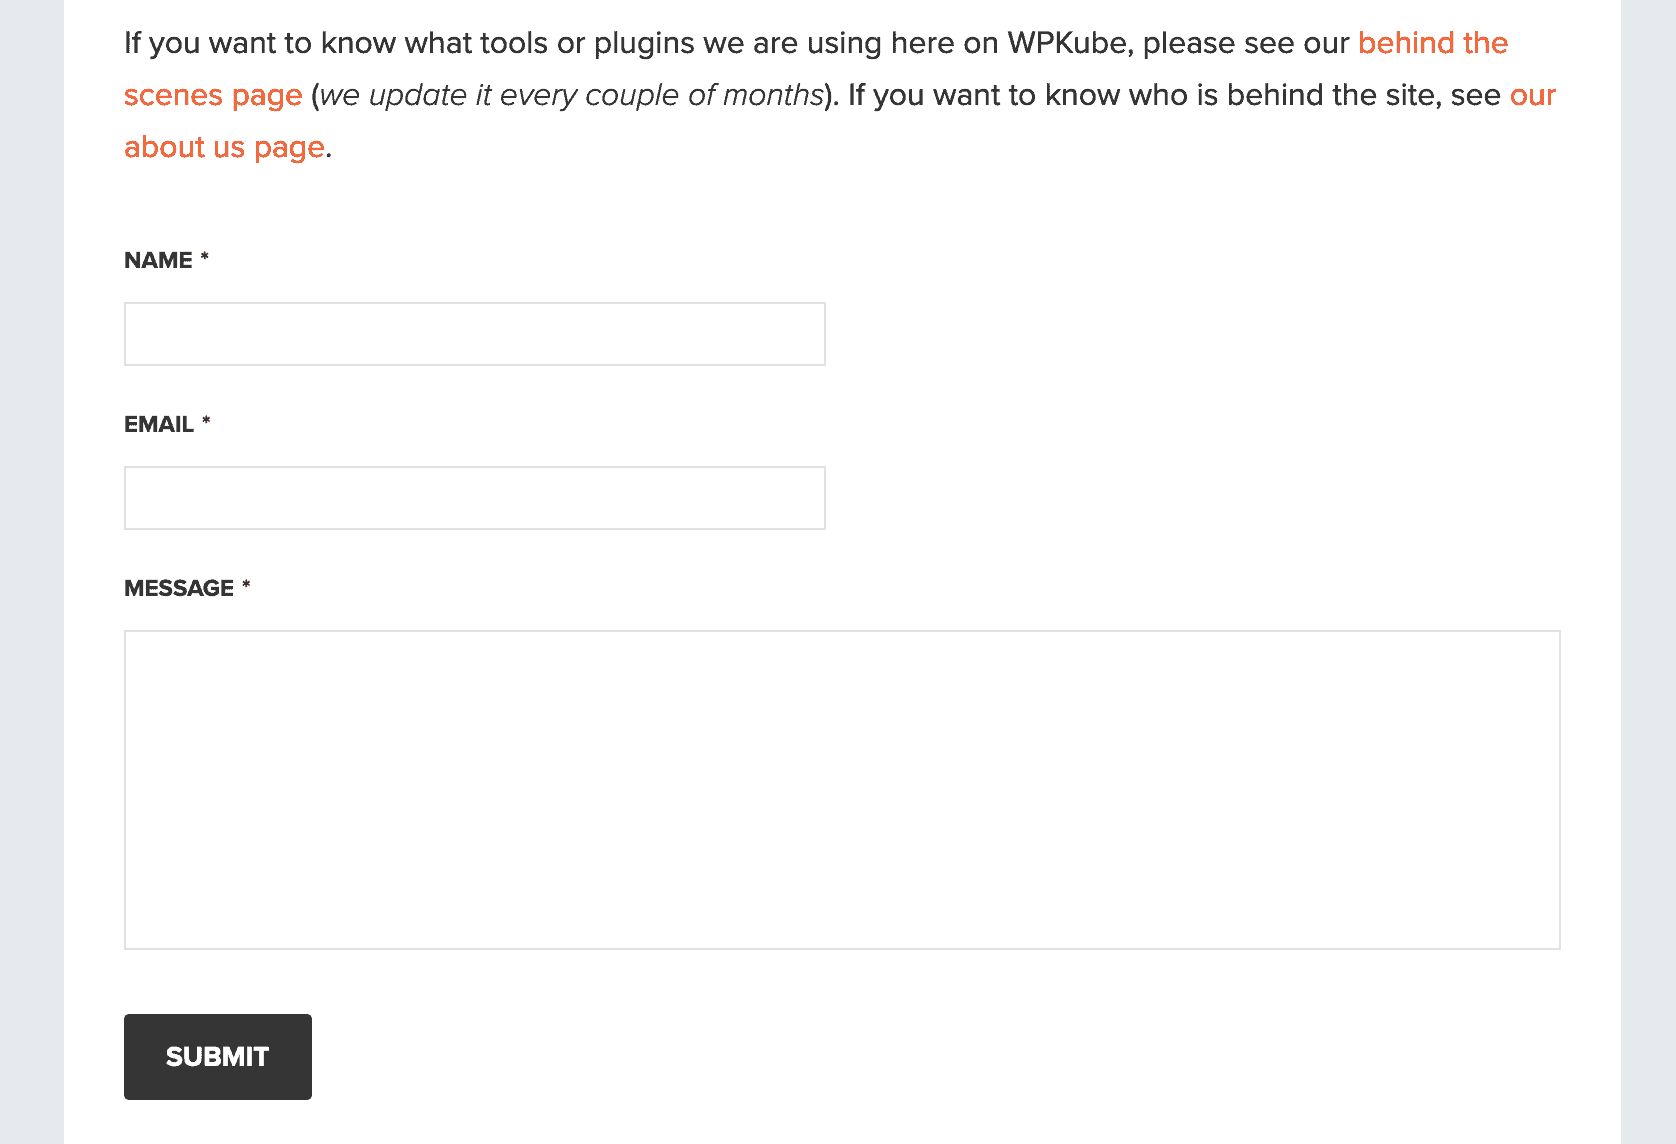
Take a contact form. The ability to send the information it contains to the server, and store it in the database is crucial for basic operation. The isn’t possible without PHP as part of the WordPress stack.
Why You Should Update Your PHP Version in WordPress
Given how WordPress uses PHP – it’s inherent in its operation – keeping the PHP version up to date on your server has a lot of benefits. Many of them are the same here as they are for other site elements:
- You can take advantage of new developments in the language.
- There is often better performance in the newer version.
- Security issues found in previous versions will often be patched, making your site stronger and more secure.
For a real-world example, take PHP 8. This is the most recent version of PHP, and it’s been adopted by lots of leading web hosts, for a few reasons:
- PHP 8 has tightened up its error reporting, which helps developers maintain better code.
- There are new performance features, such as ‘Just In Time’ (JIT) processing. This can be compared to caching, in that PHP tracks often used scripts and optimizes them.
There are a lot more benefits, but they’re beyond the scope of this article. Even so, there are some situations that don’t call for an immediate upgrade. Let’s discuss this next.
When You Should Update Your PHP Version
As per the standard advice for anything relating to your site, updating depends on a few variables. In most situations involving your themes, plugins, and core files, you’ll update as soon as you’re able.
In contrast, your PHP version may not warrant an upgrade straight away. For many cases, there are more drawbacks than positives. Here are a few:
- Some functions have been depreciated in PHP 8, but are still used in lots of WordPress plugins. As such, upgrading could break them (and by extension, your site). In other words, your site and its dependencies may not be compatible with the update.
- You may find that you don’t need the enhanced functionality of a new PHP version.
- Your host might not support the newer version of PHP yet, for reasons of security and stability.
Again, there are lots more reasons, specific to your own needs and that of your host. In general, unless there’s a huge spotlit reason for not upgrading, you should do so.
What’s more, lots of hosts will let you know how to upgrade when the time’s right. They should all have a blog, newsletter, knowledge base article, and more detailing whether an upgrade is possible, and how to do it.
How to Check Your Current PHP Version
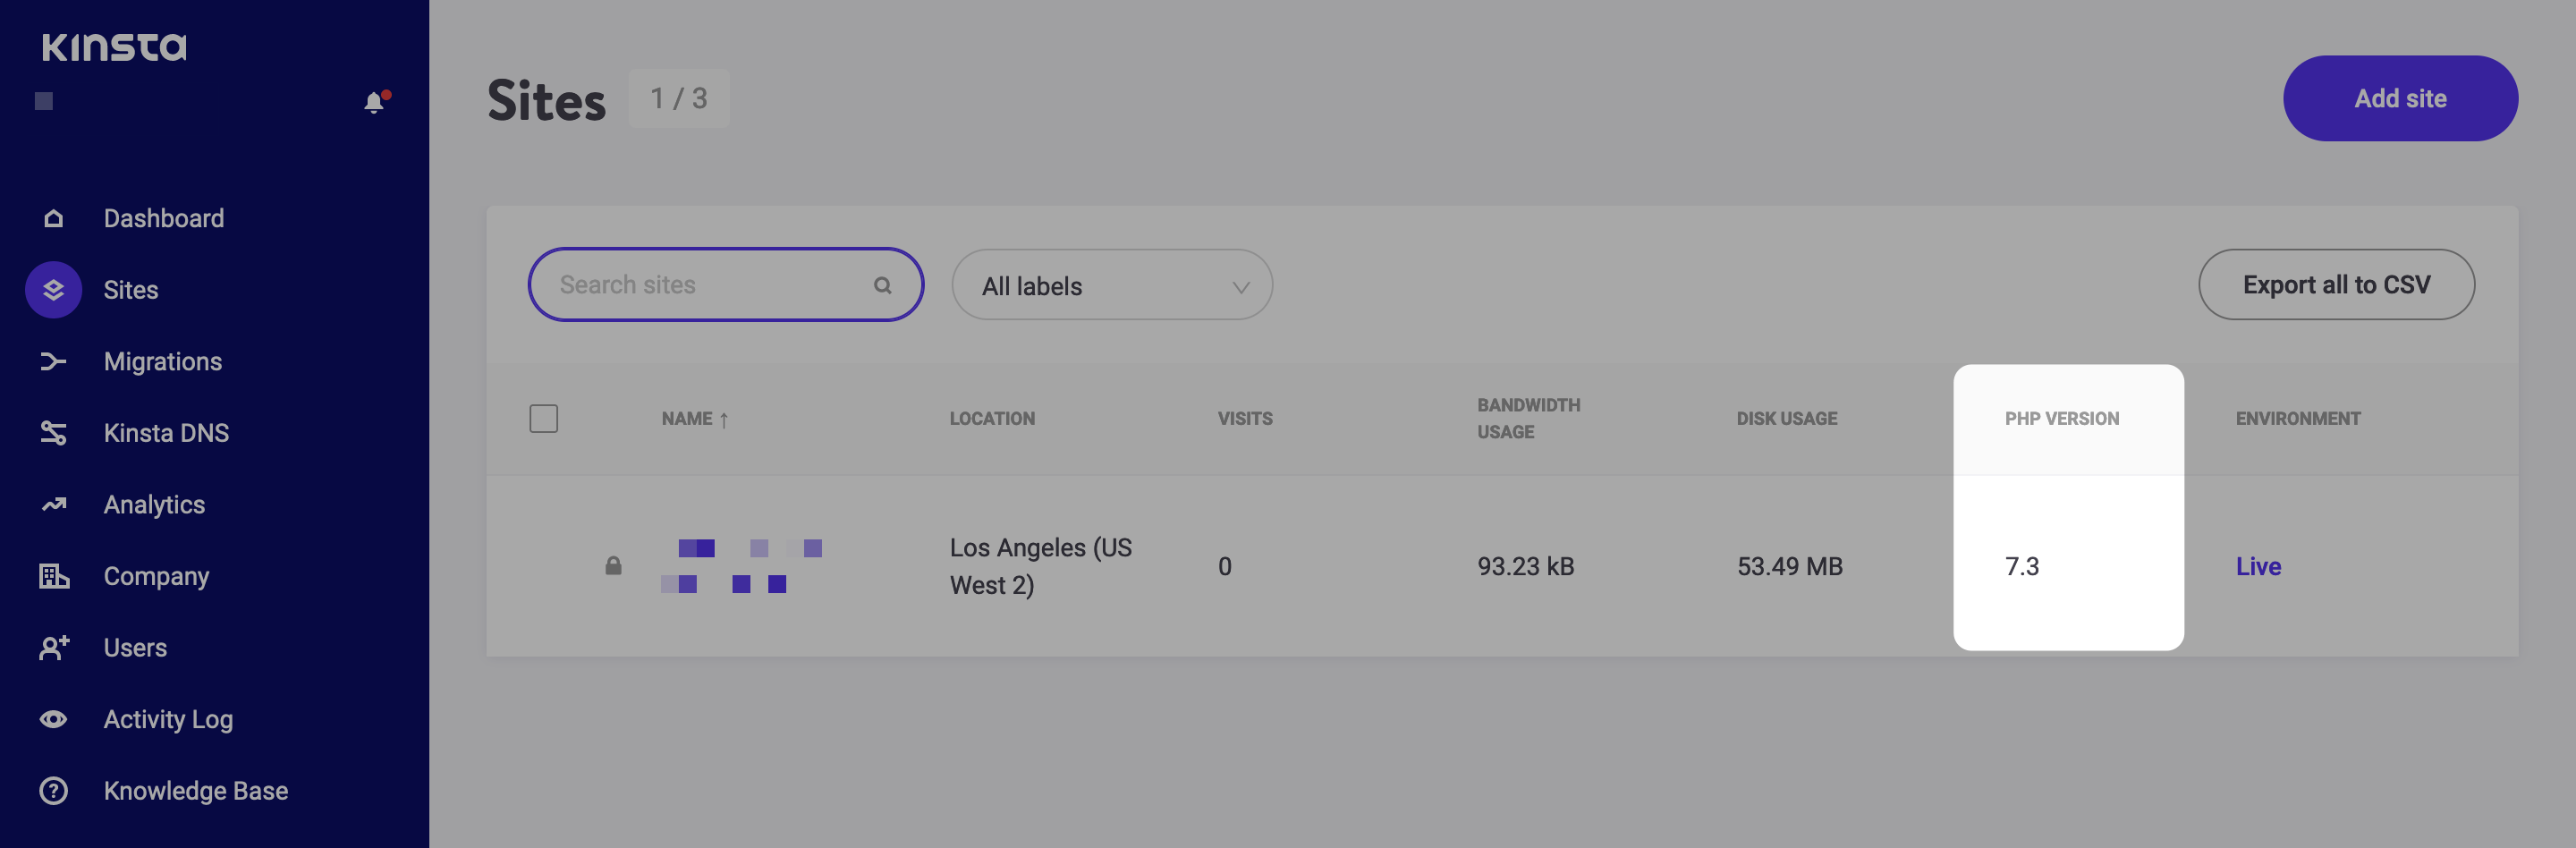
First off, you need to check your current version of PHP before upgrading it. Achieving this depends on your host and current plan. Most custom dashboards will have a specific panel dedicated to PHP management. For example, Kinsta (our review) includes it in your list of sites:
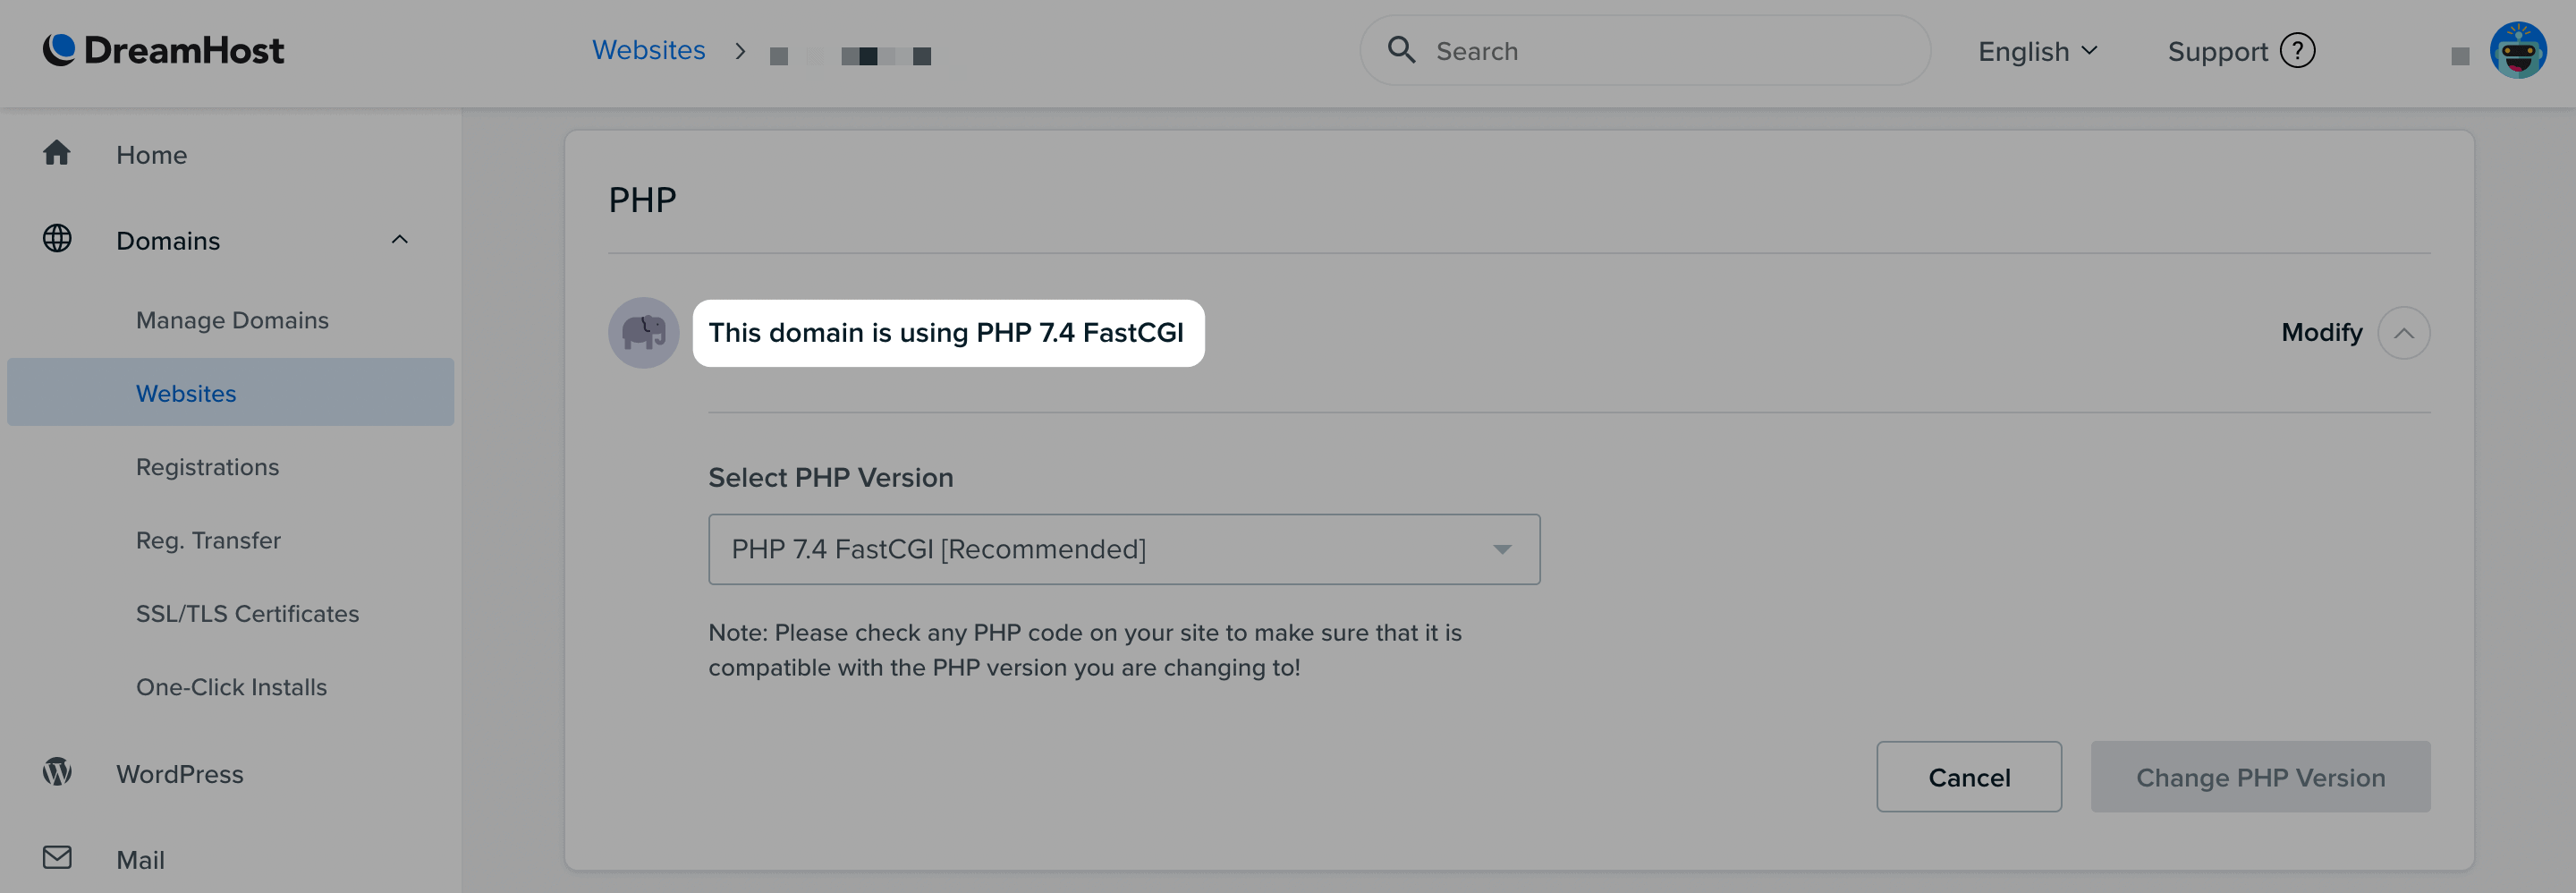
In contrast, DreamHost gives you the information after navigating a few subscreens:
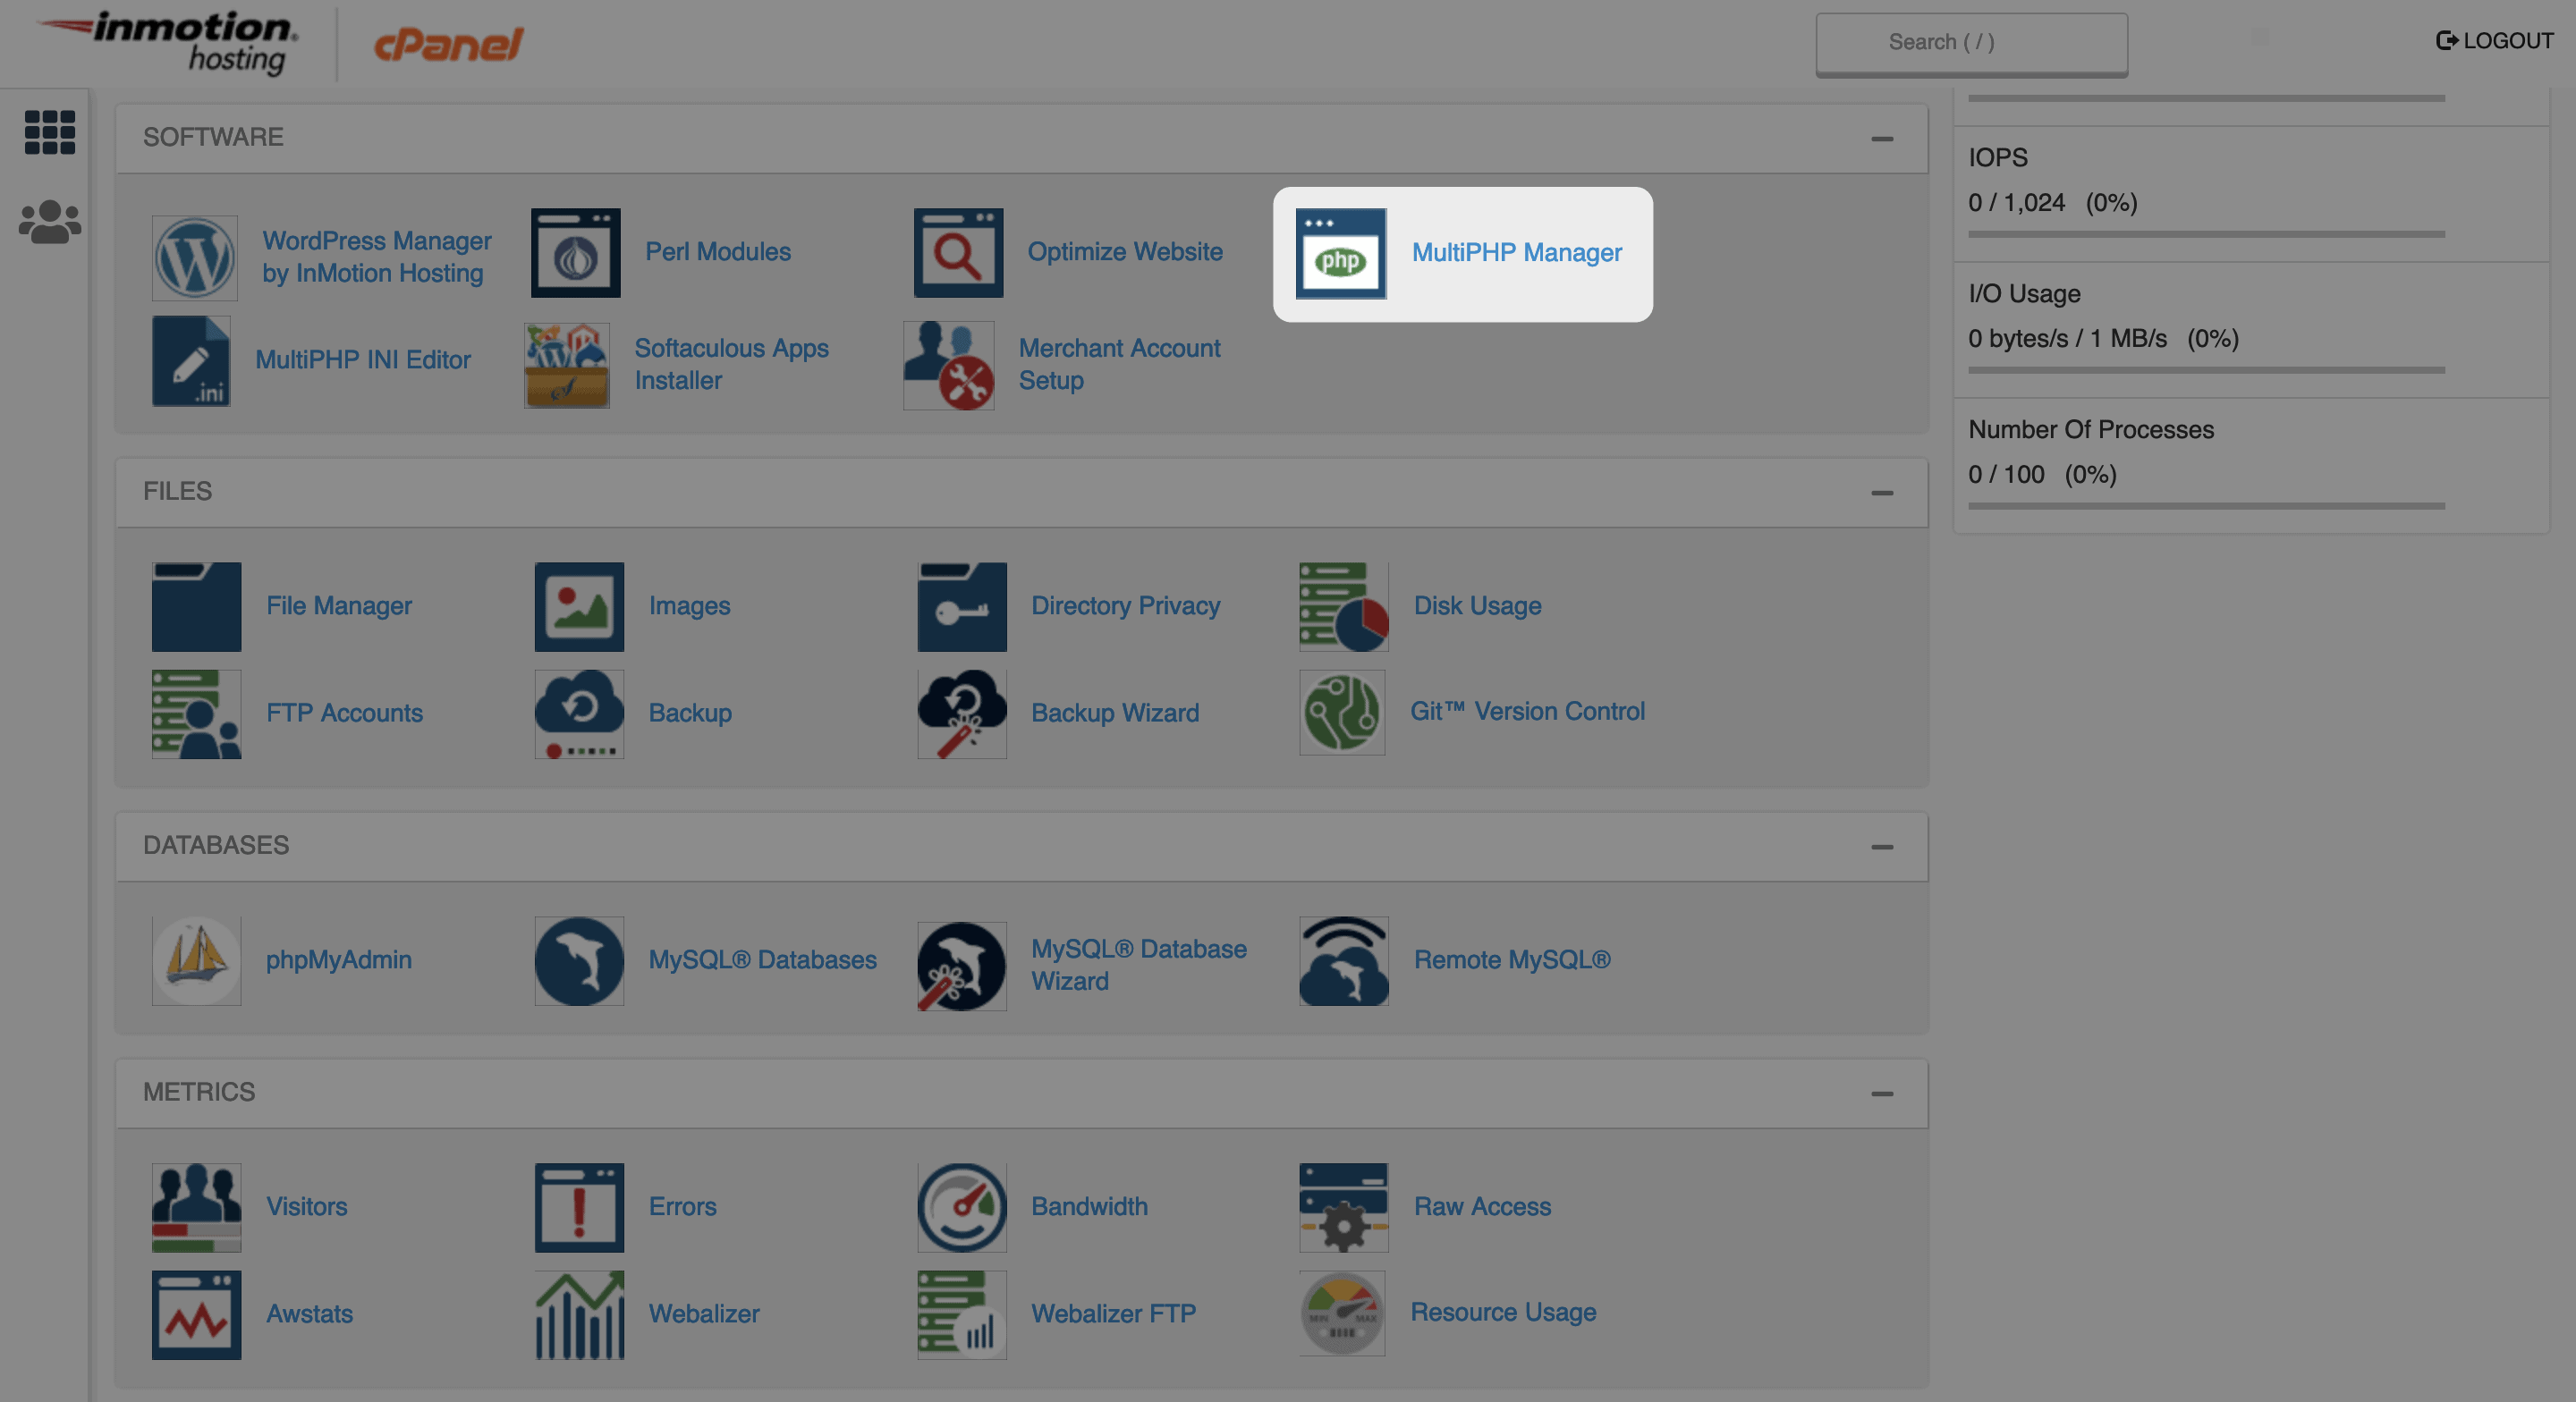
For cPanel users, your current PHP version can be found in the MultiPHP Manager:

Regardless of your host, it should almost always display the current version of PHP used on your site. You may also find that you’re running the latest version of PHP anyway.
Lots of hosts will automate this with your permission, such as confirmation through a newsletter, or a dedicated toggle within your control panel.
It could also be that you don’t get to update PHP in WordPress just yet. This is often because the host wants to test the functionality first before deploying it to the public. In these cases, there’s not much for you to do. Your host will handle the process, and you can sit back.
It’s fair to say that this article is less relevant if you’re on a managed WordPress host. Still, the process is worth knowing as you may want to update PHP in WordPress for reasons specific to you.
What You’ll Need Before Updating Your PHP Version
The good news is that because updating PHP in WordPress is straightforward, you won’t need too much to get the job done. In fact, there are less than a handful of elements you’ll need in place:
- Administrator access to your server.
- The ability to upgrade your PHP version within your hosting panel.
Other than this, there are a few preventative measures you can take before pressing on with an update:
- Make a current, clean backup of your site – in case the worst happens and you have to start from scratch.
- Update your WordPress site’s core files.
- Update your site’s themes and plugins.
- Check the compatibility once again.
Once you’re set, you’re ready. The next section will show you how to update PHP in WordPress.
How to Update PHP in WordPress
Over the next few sections, we’ll show you how to update PHP in WordPress through a variety of different host types. Rather than cover individual hosts, we’ll show you how to get the job done in two different custom dashboards, and cPanel. This should cover all of the bases you’ll find. Here they are:
- Kinsta. In about three clicks, you can update PHP in WordPress and go about your day.
- DreamHost. While there are a few steps to go through here, changing your PHP version is straightforward
- cPanel. While the option to change PHP is buried away somewhat, cPanel is as simple to use as other hosts.
To start, let’s show you how to update PHP in WordPress using Kinsta.
1. Kinsta
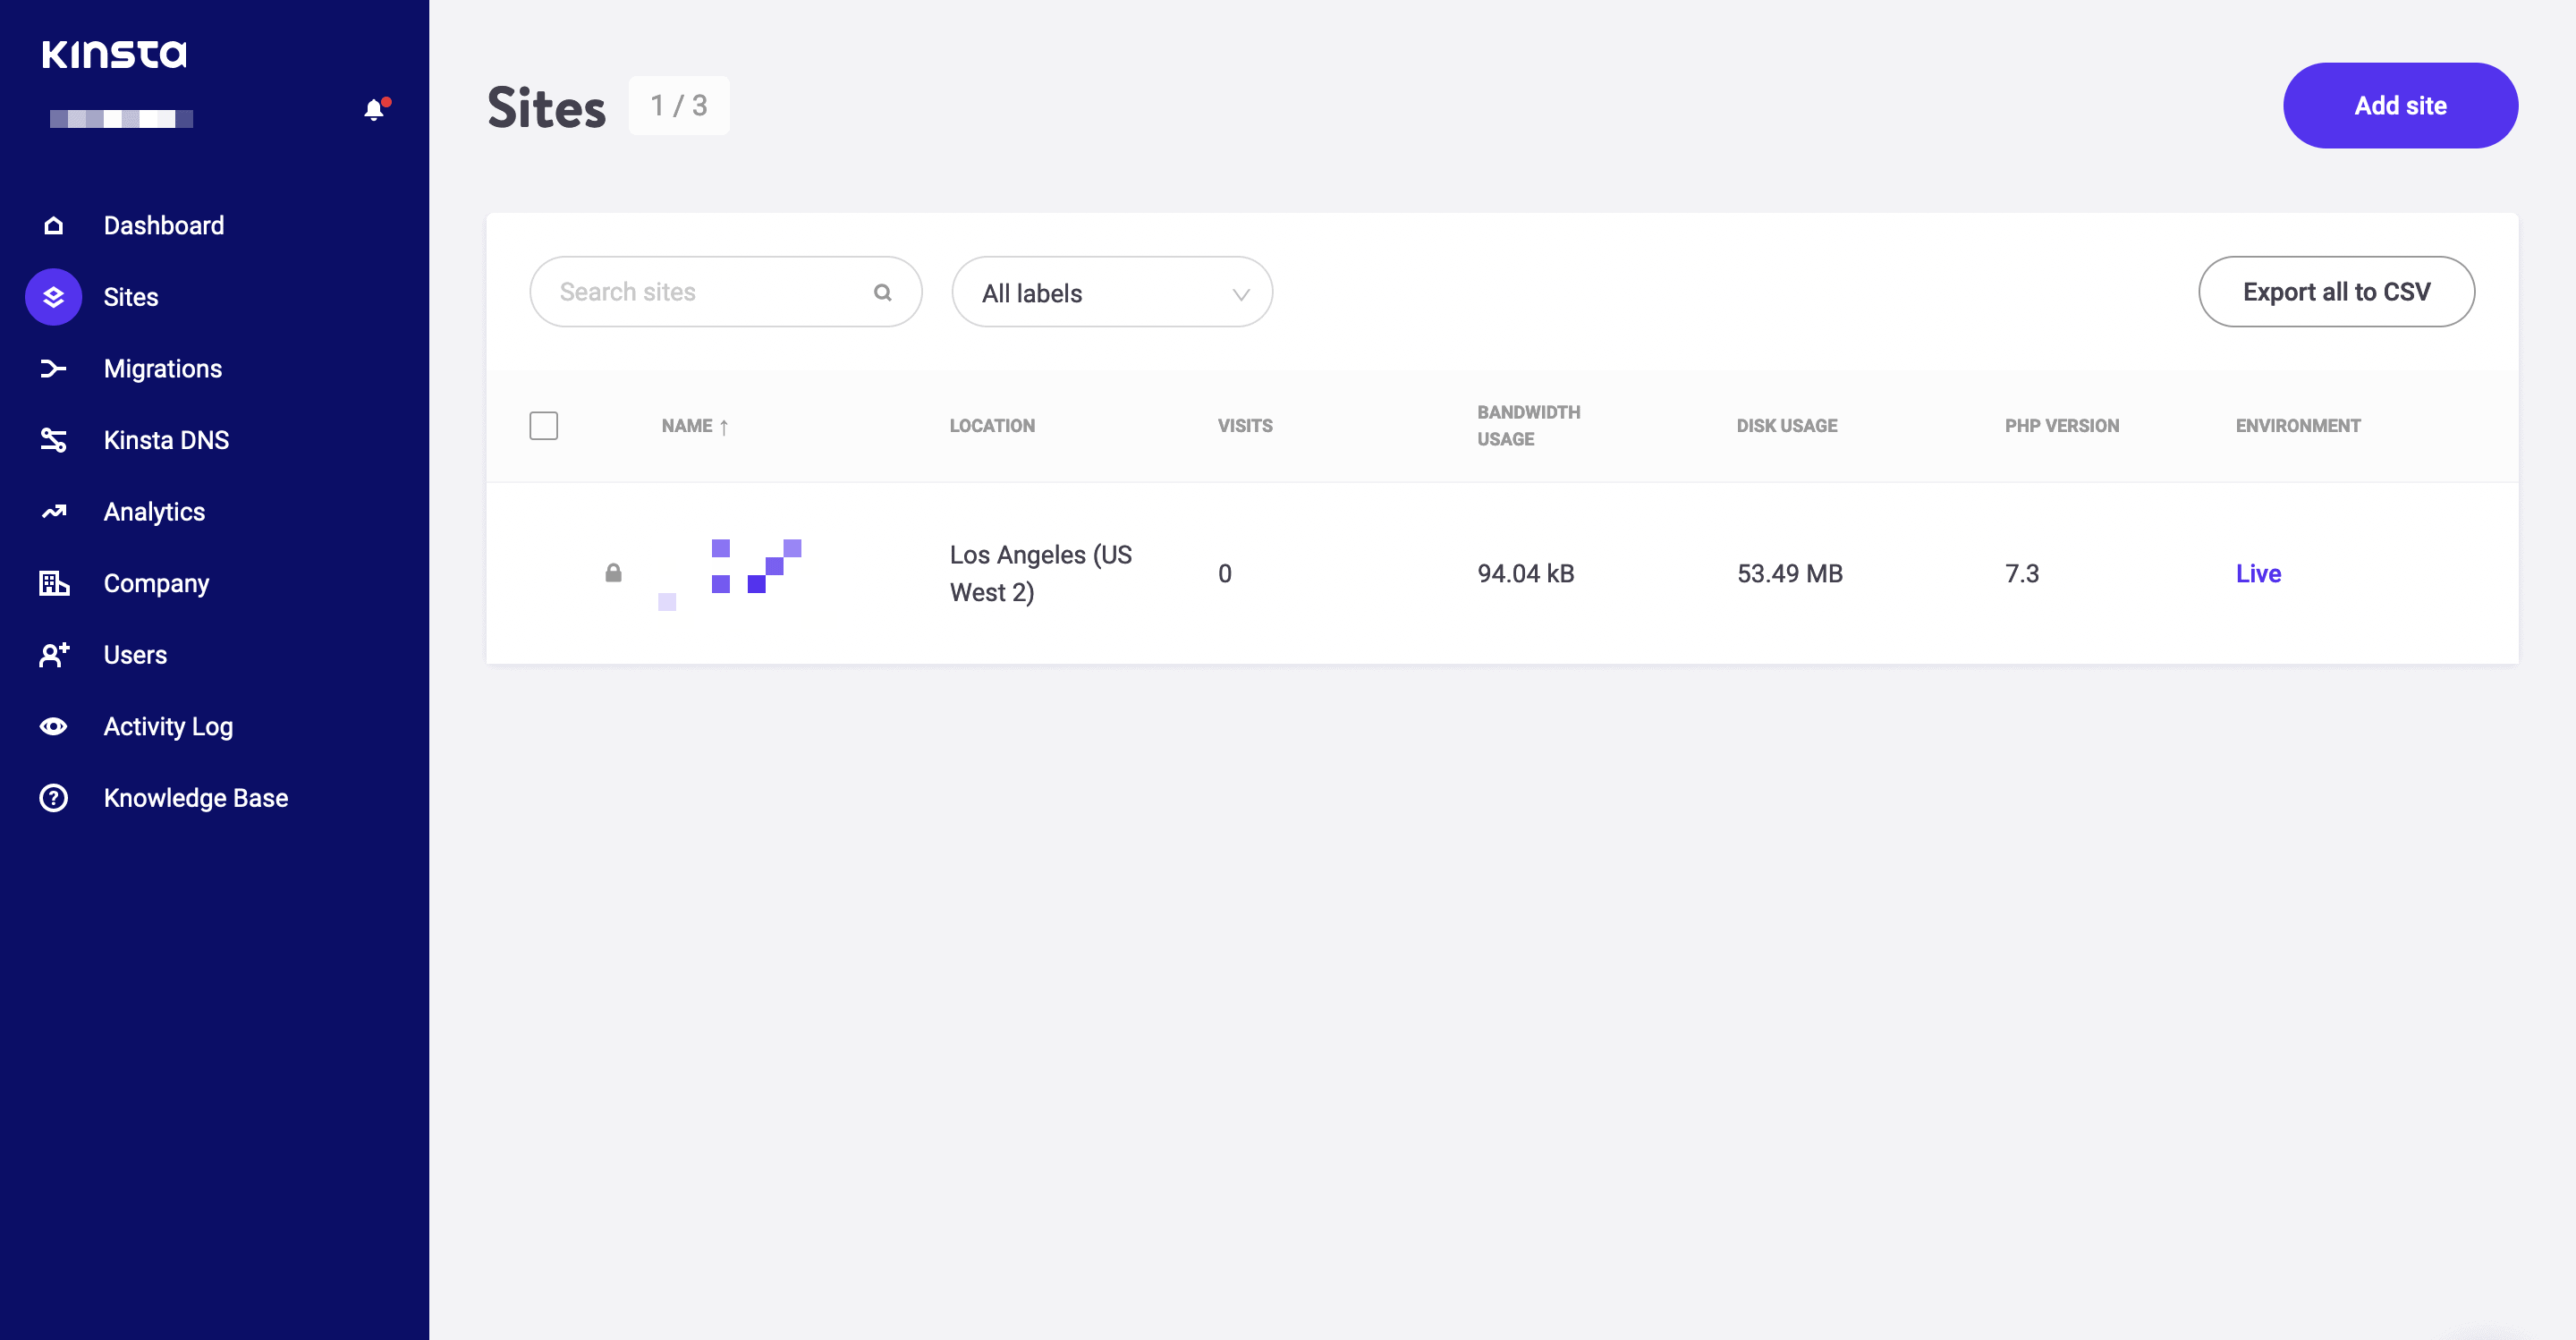
We’re going to start from the MyKinsta dashboard for this one. The screen you need to get to is Sites:
From here, click into your site, and you’ll be presented with a wealth of information and options for your site:
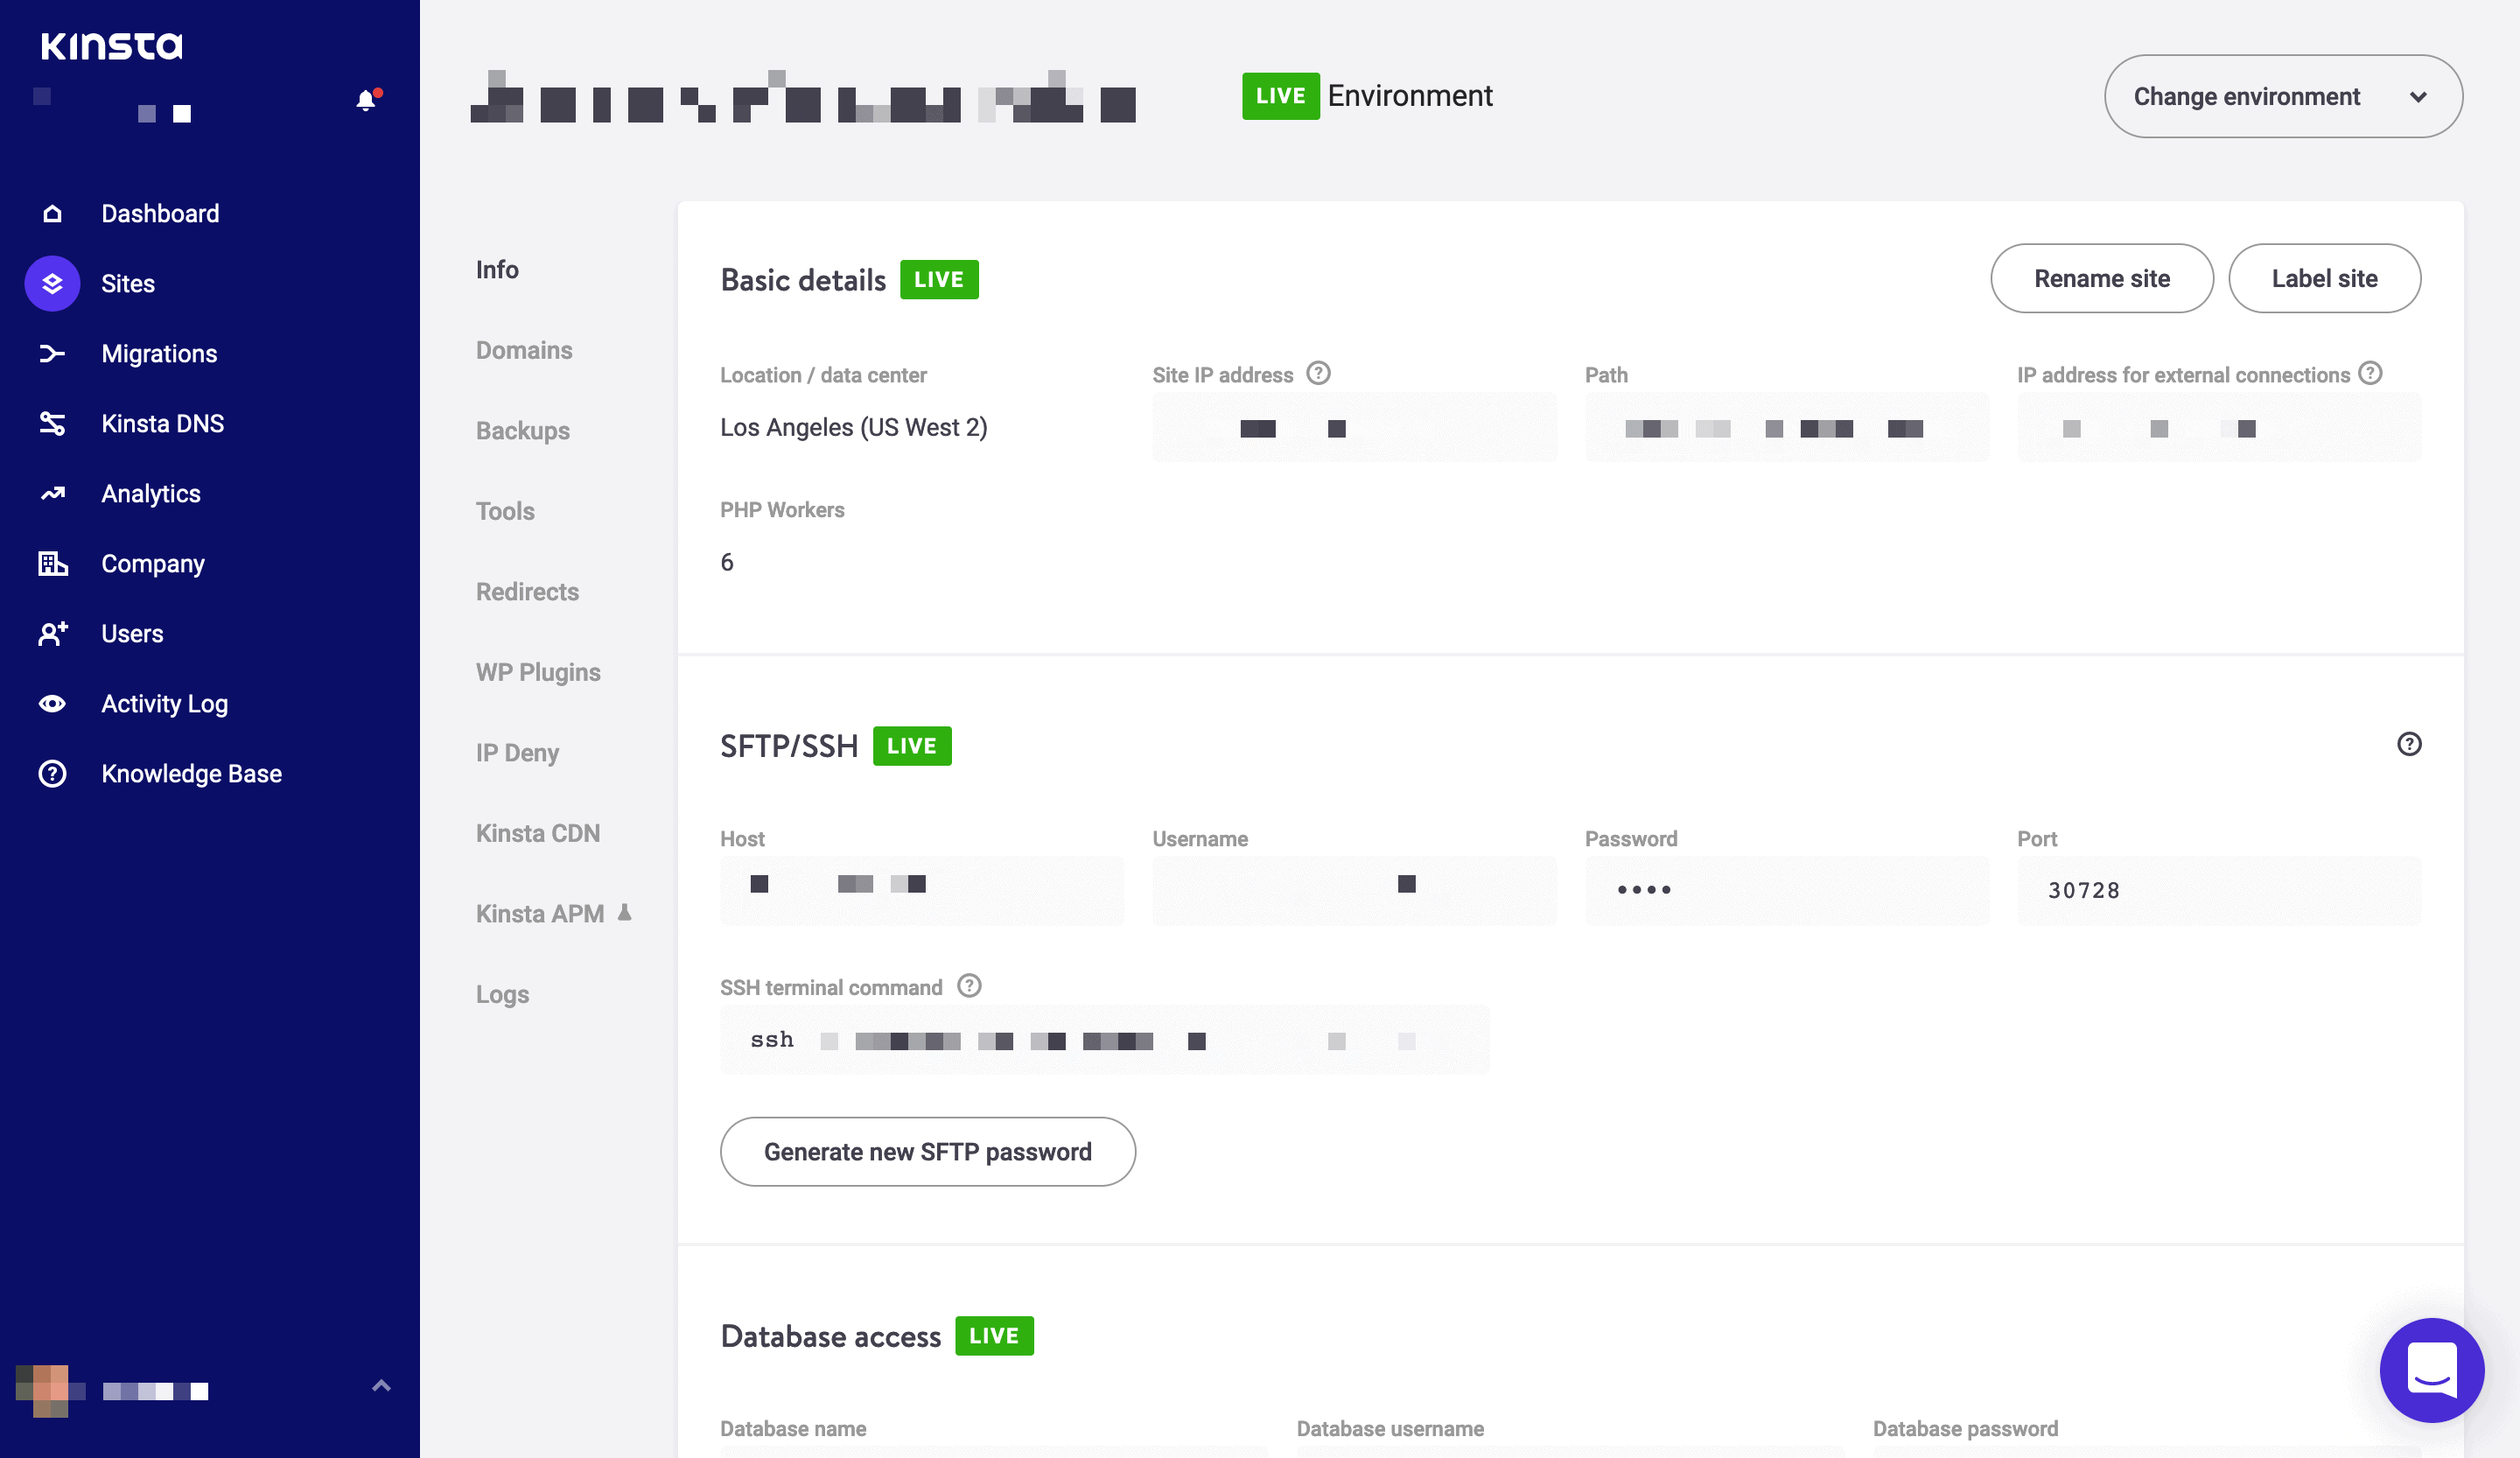
Though, we want to head to the Tools screen. This is a bunch of ways to change certain aspects of your server. In our case, it’s the PHP Engine:
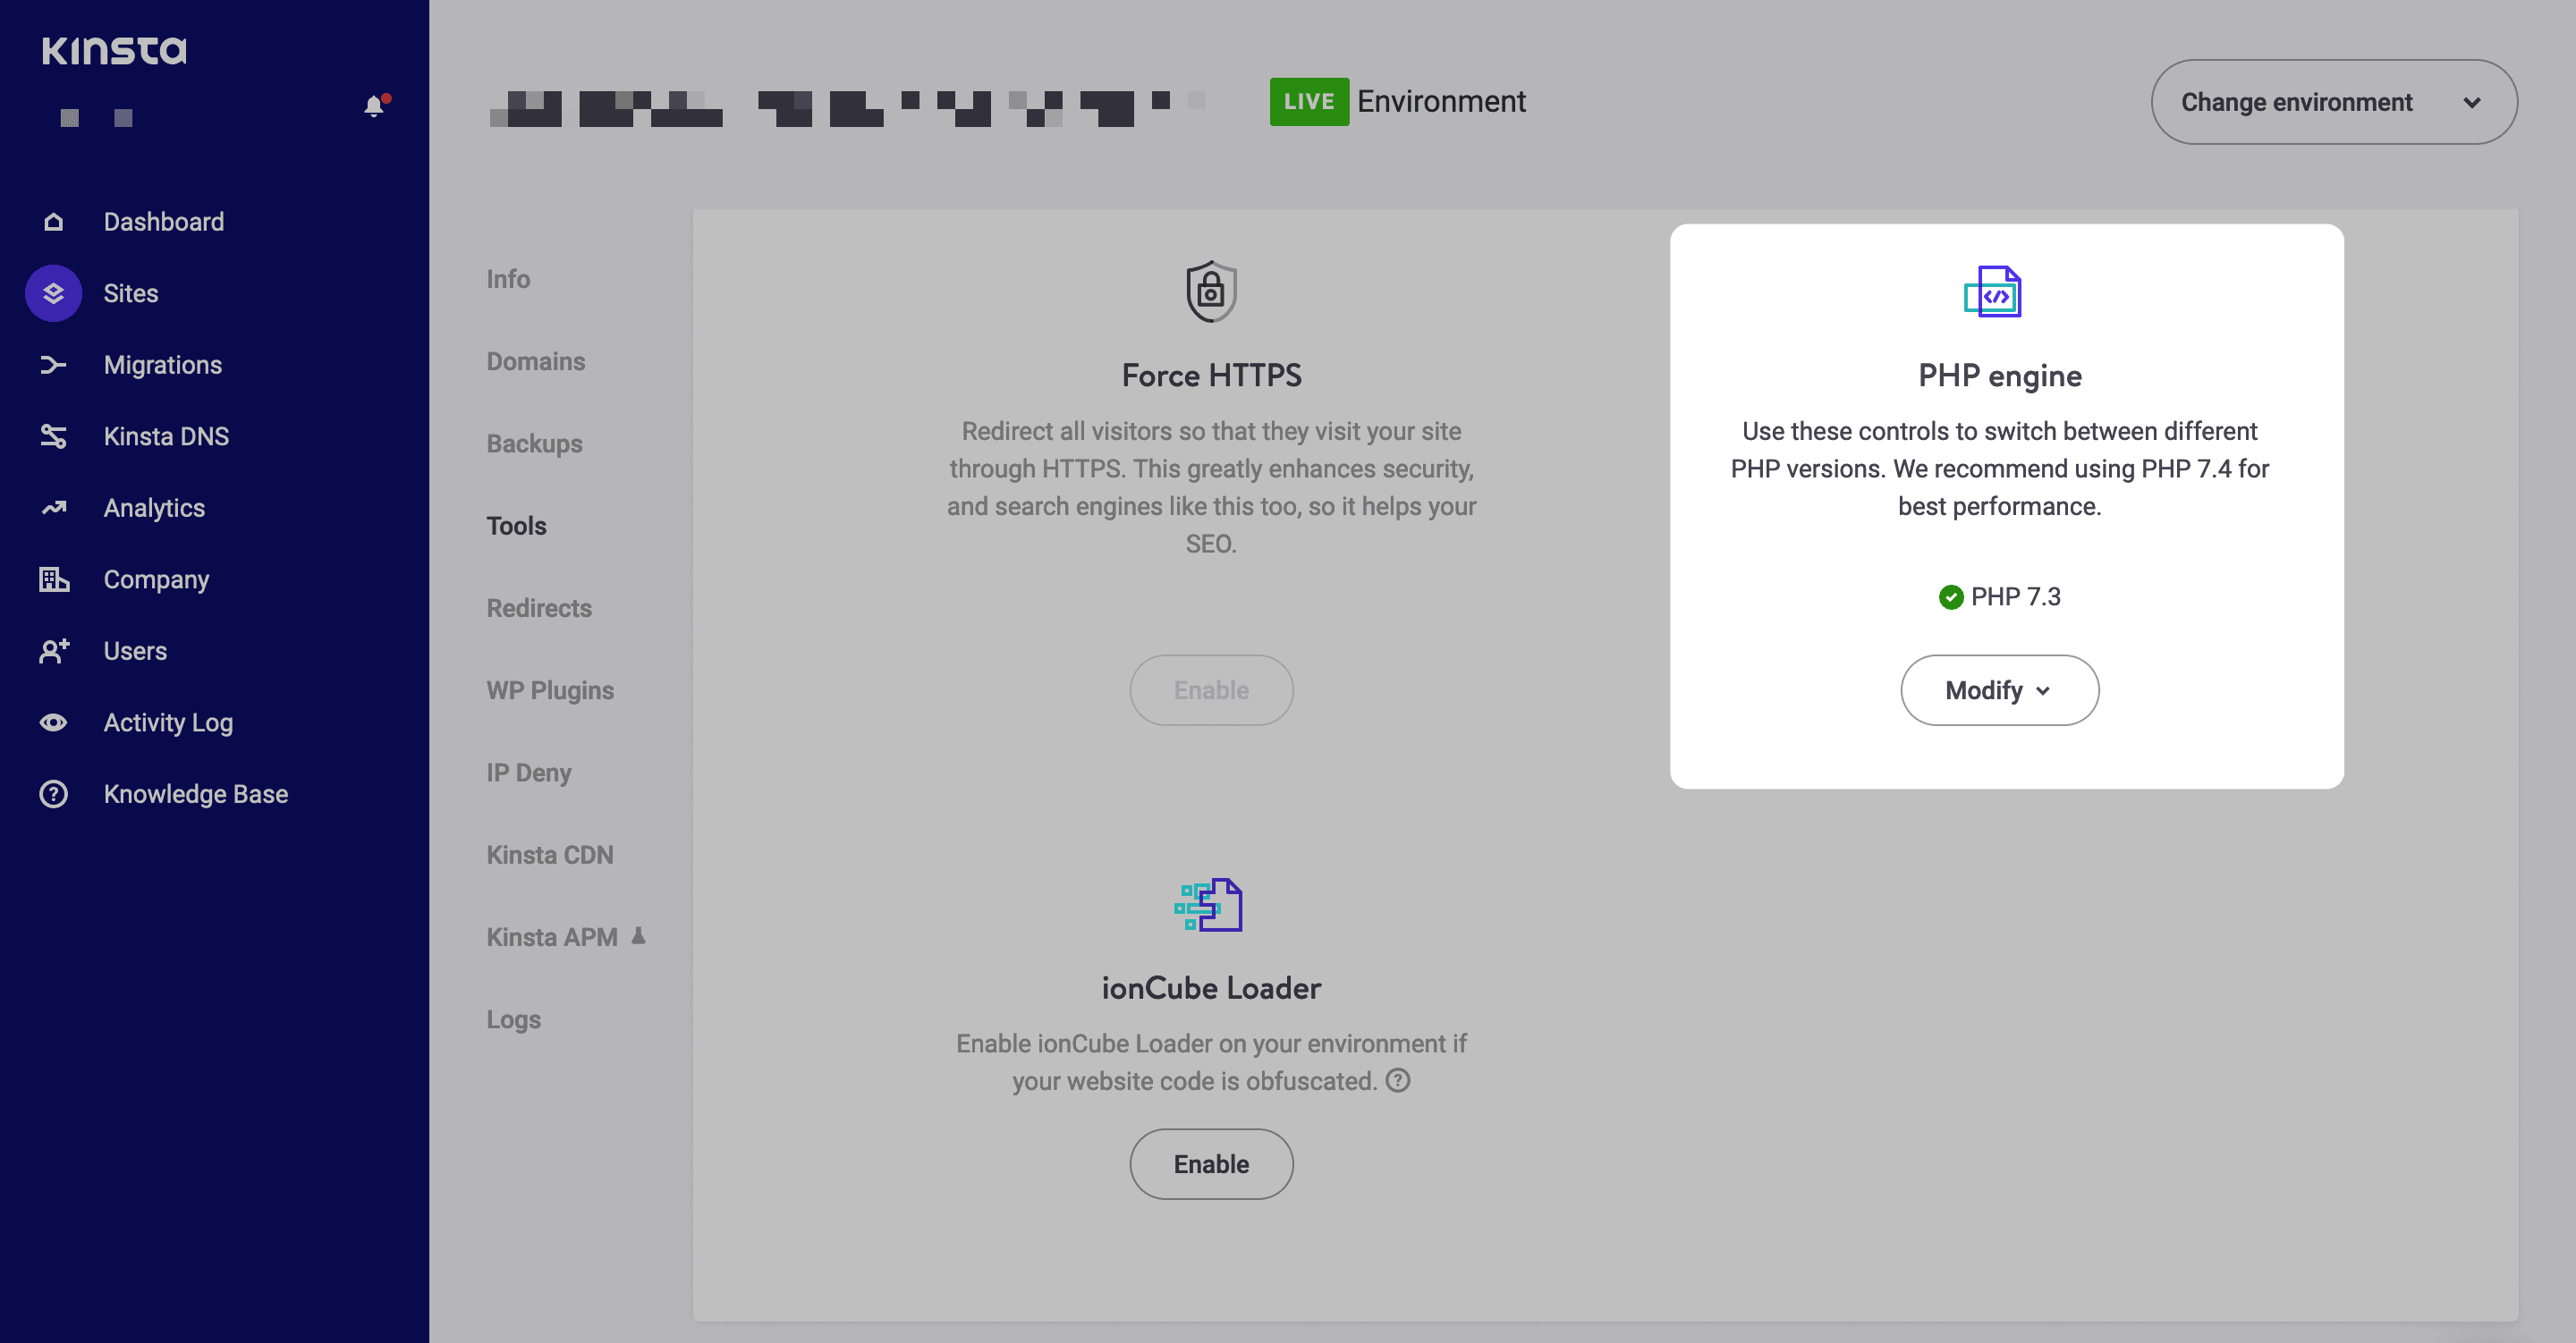
Here, click the Modify drop-down menu, and choose your desired PHP version. This will bring up a dialog box asking for a confirmation:
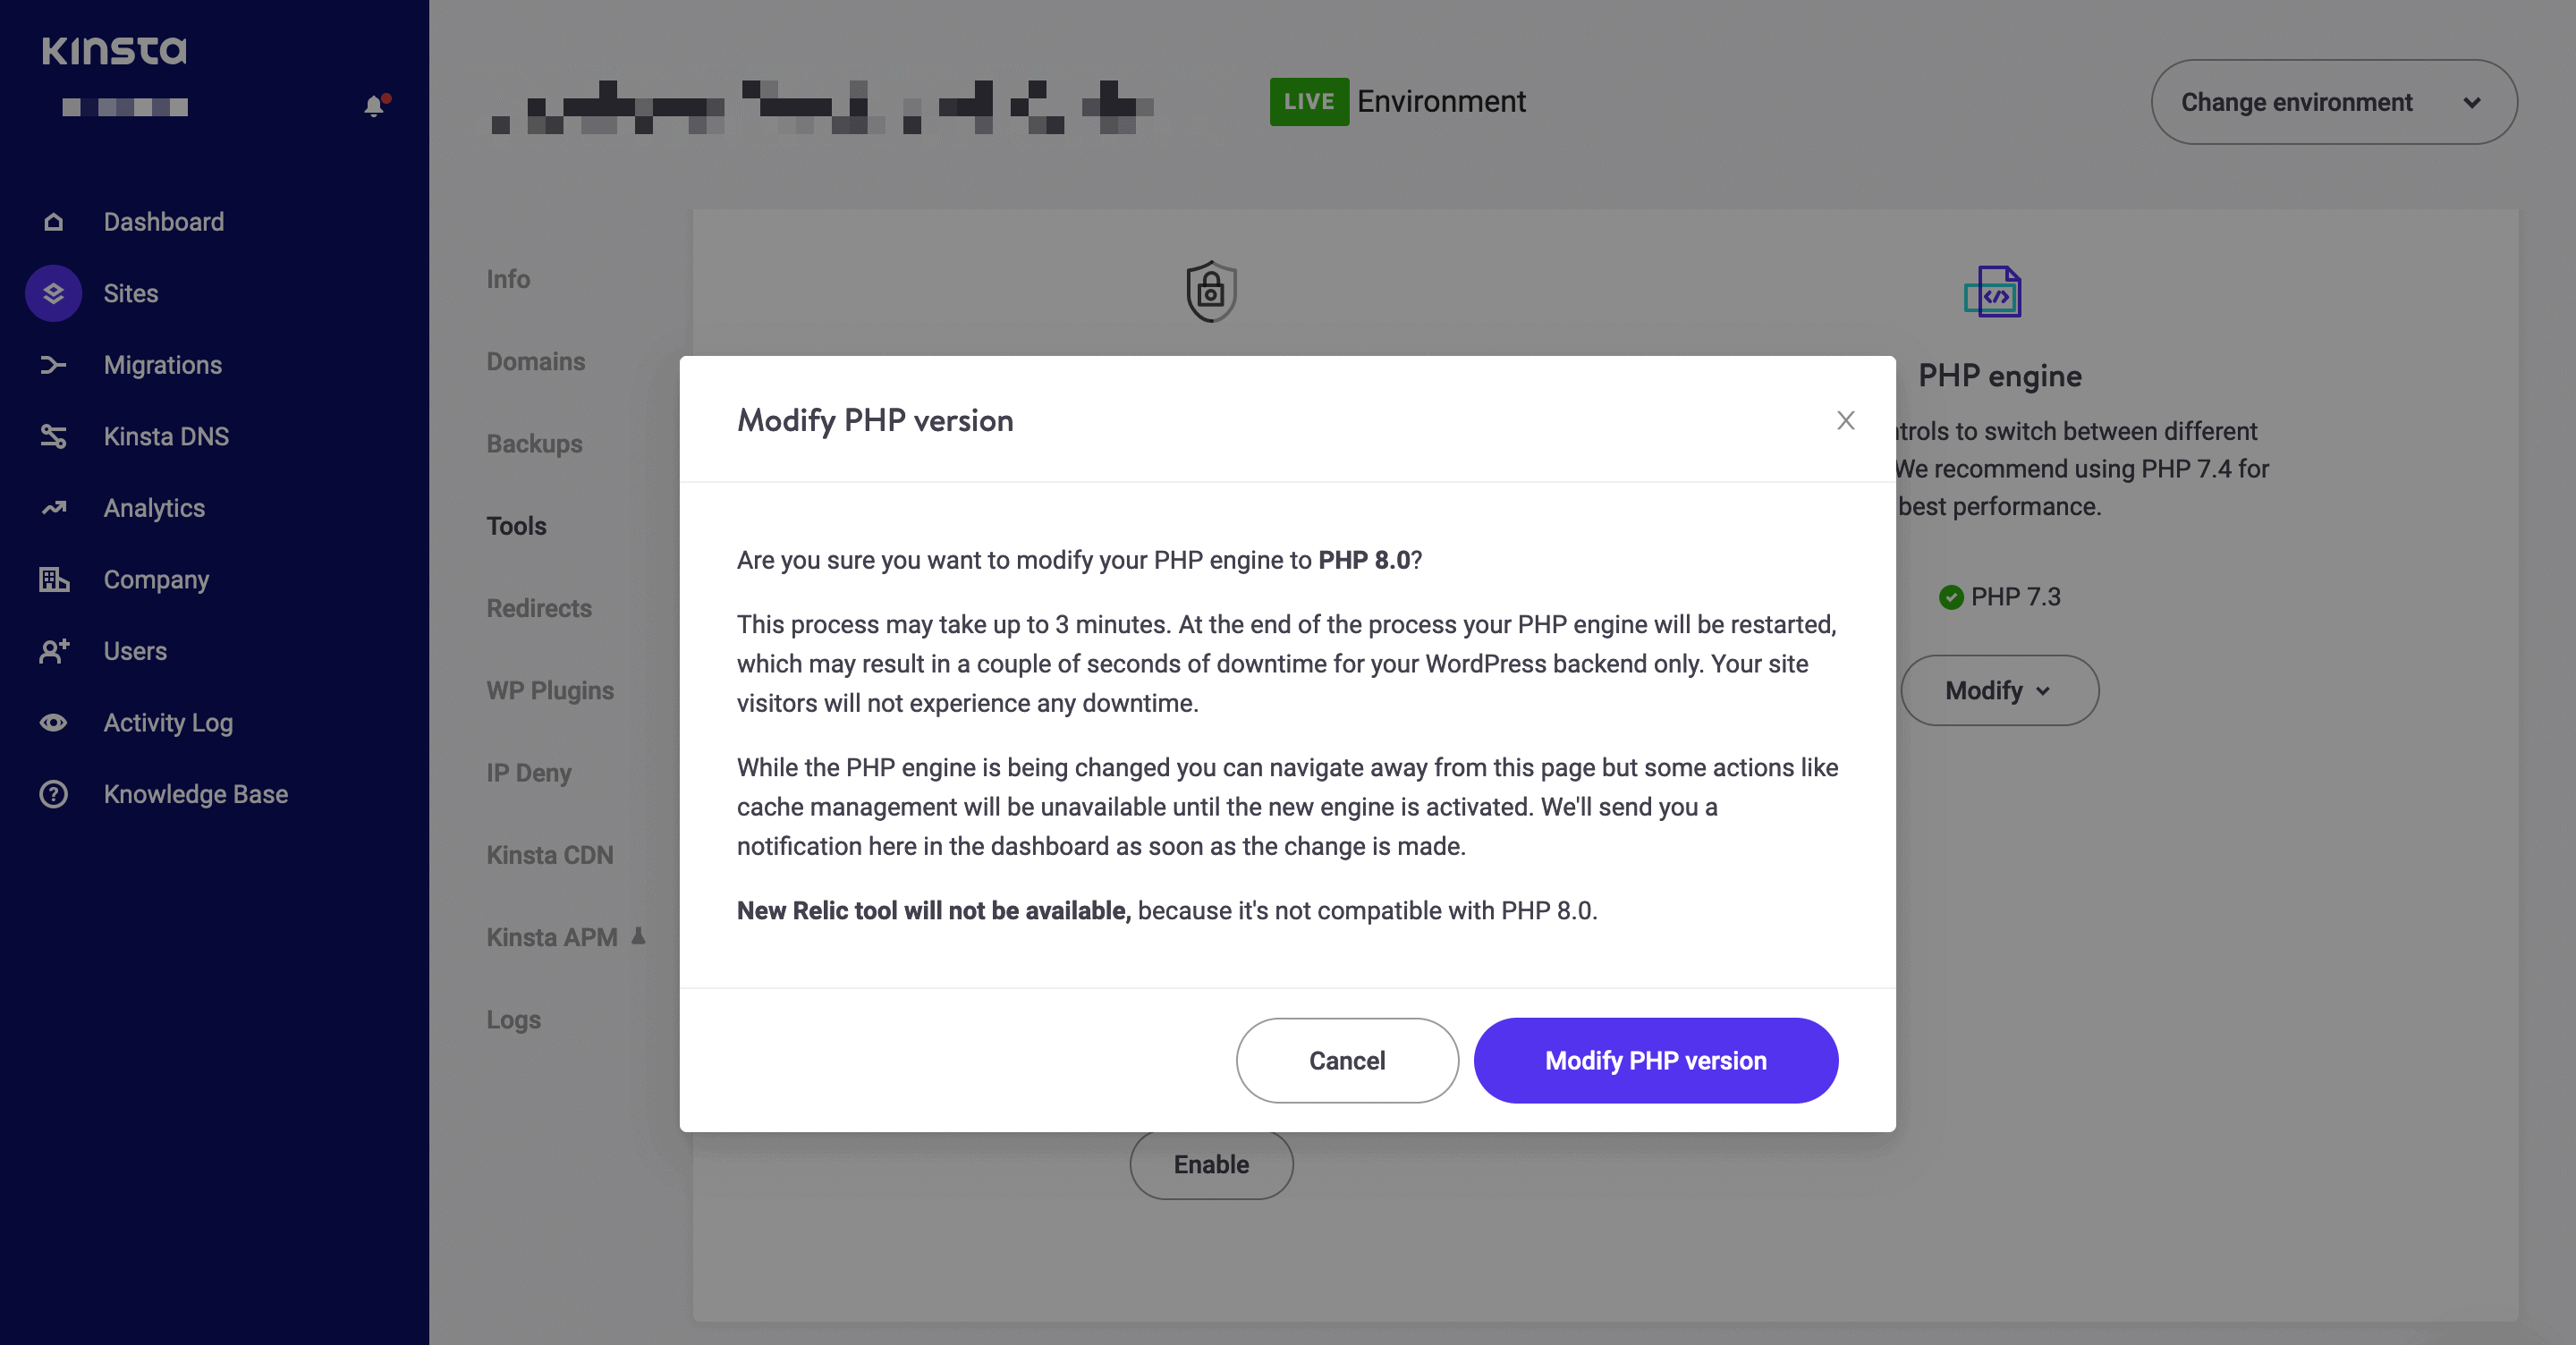
Once you confirm, Kinsta will process the change on the back end, and send you a notification when it’s finished.
2. DreamHost
For DreamHost’s custom dashboard, you’ll need to access the Domains > Websites screen:
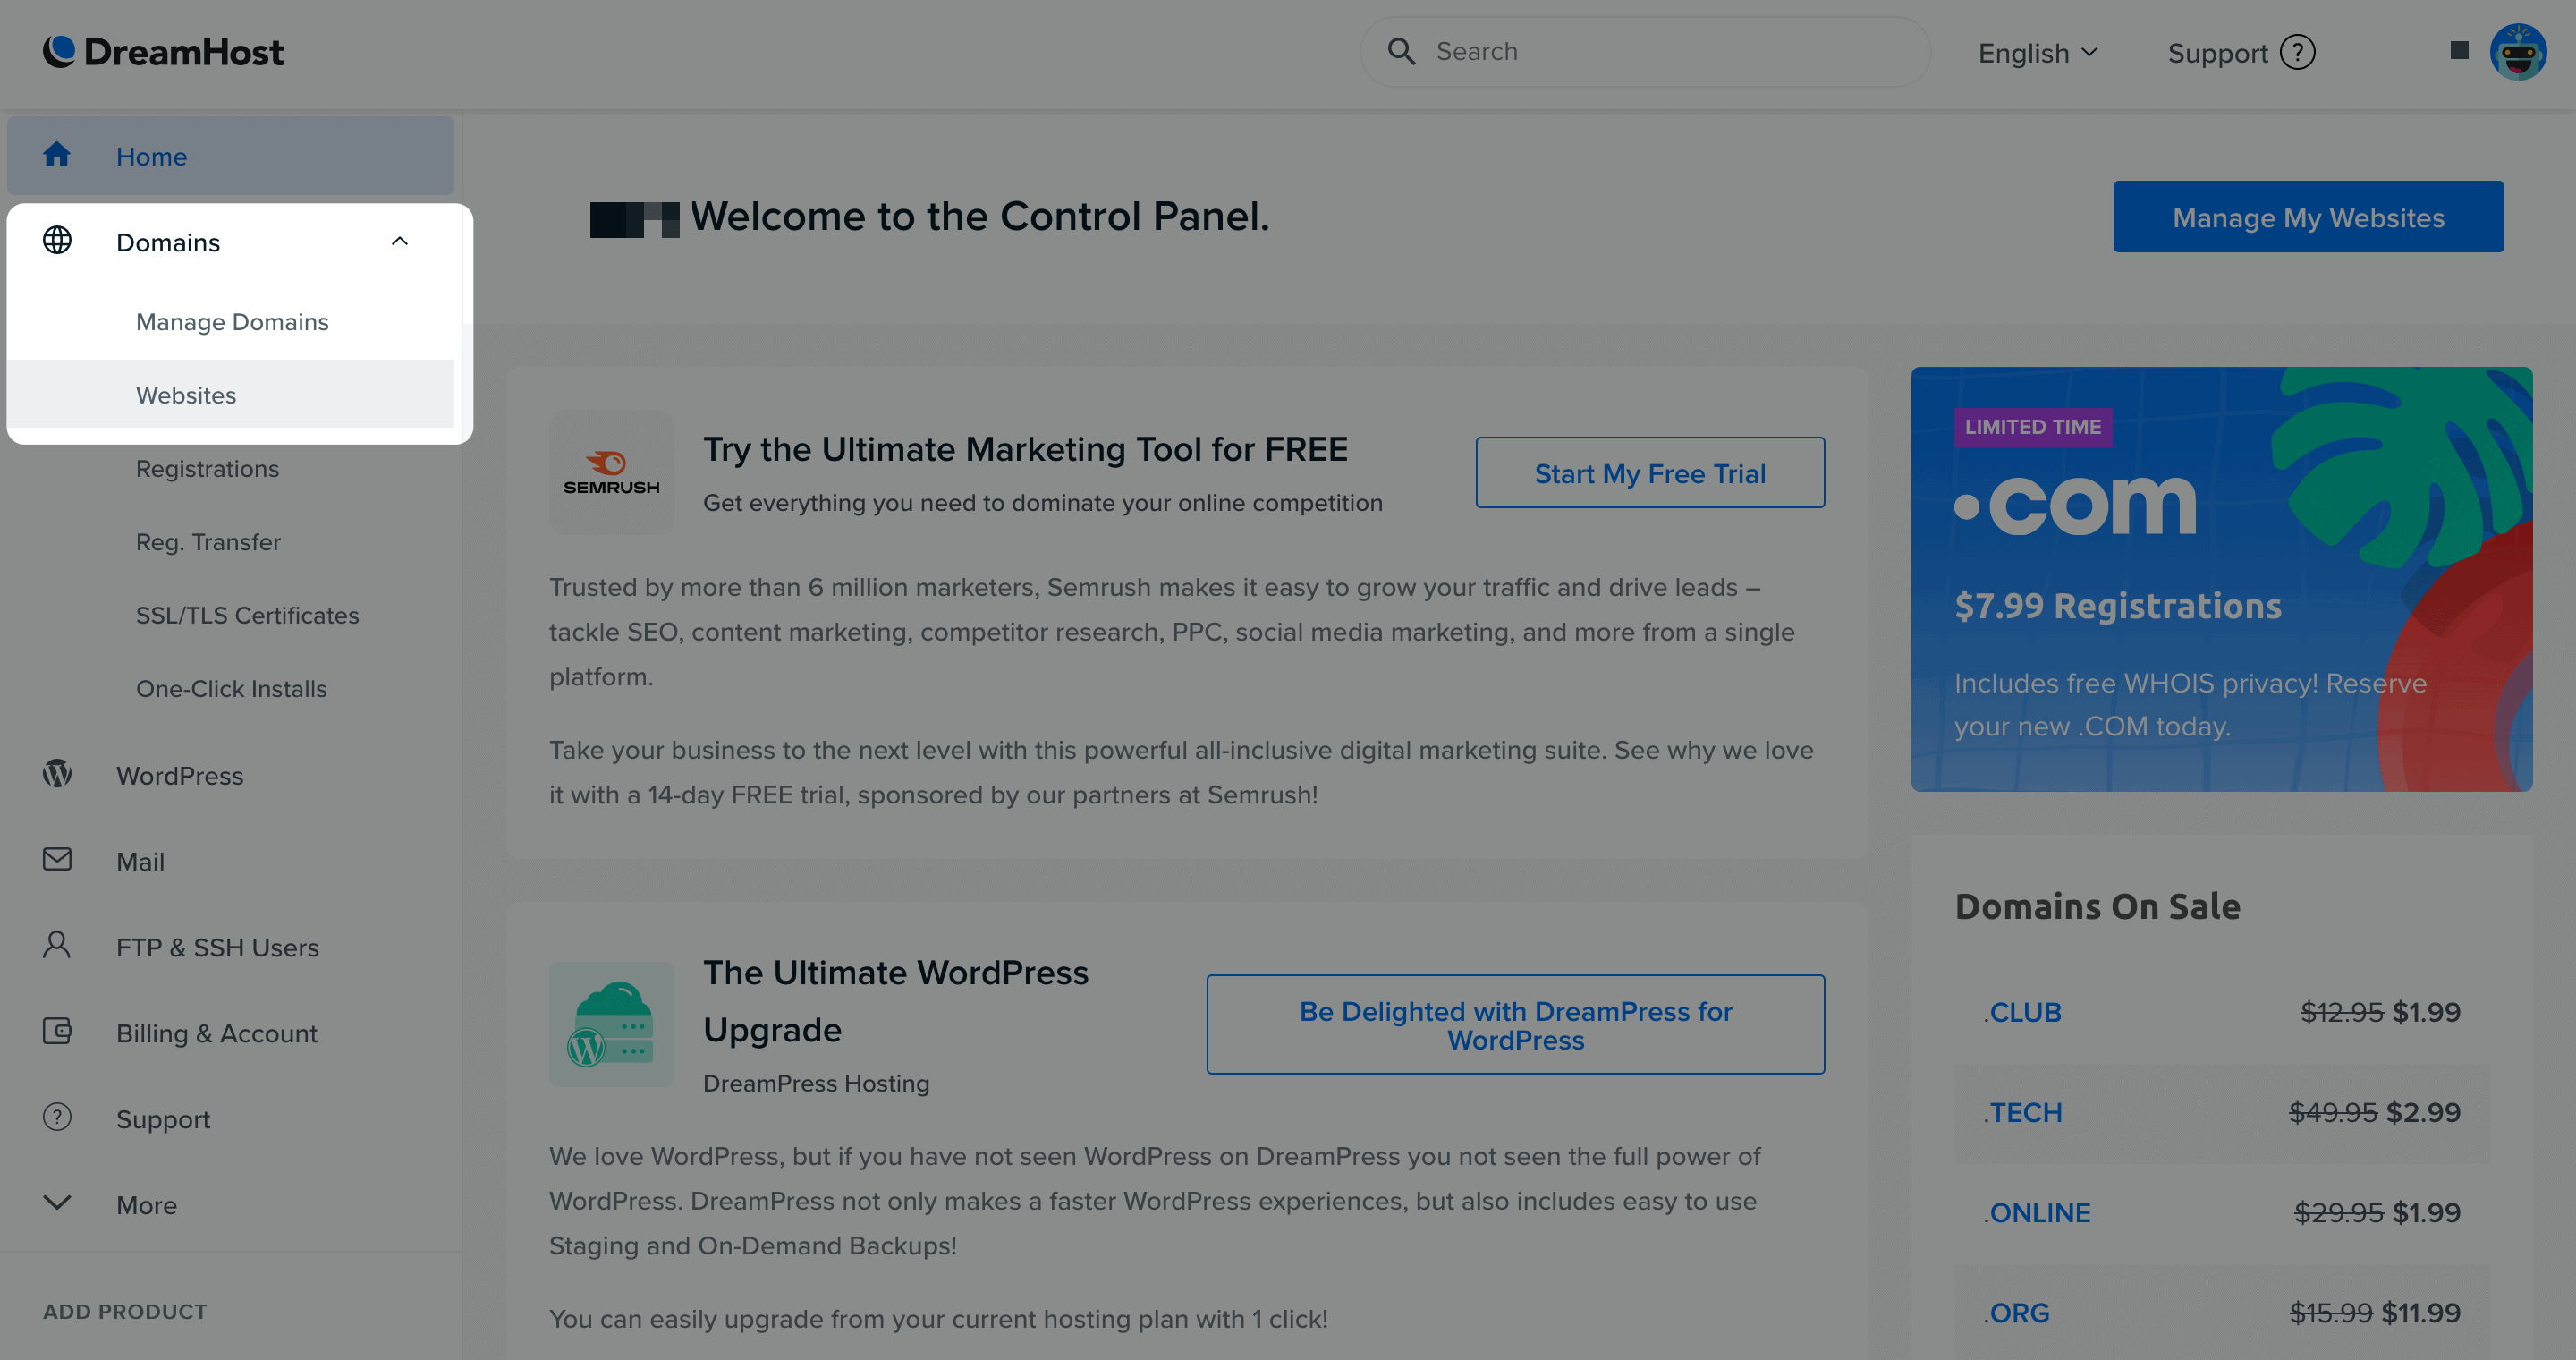
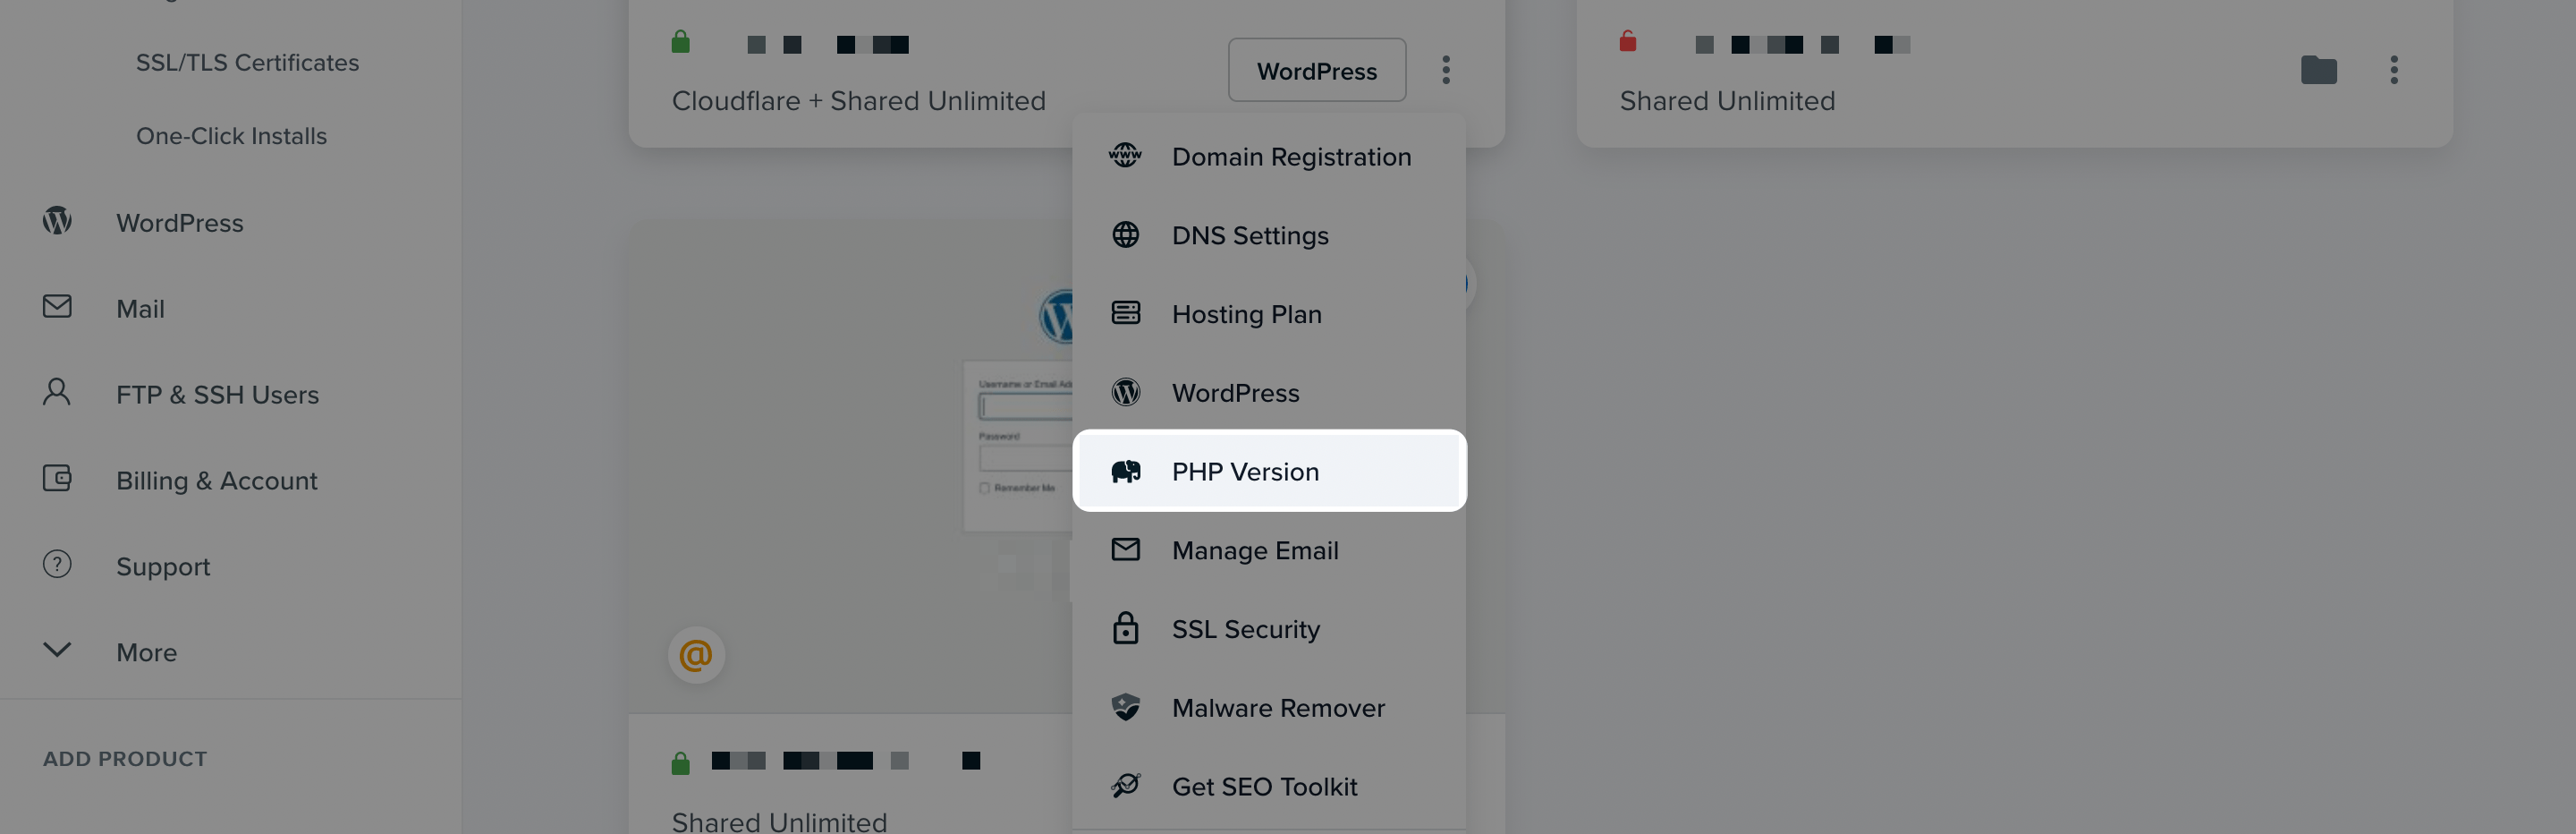
This will show you a list of your current sites, and clicking the traffic light menu will bring up a whole host of options. You’ll want to select PHP Version:
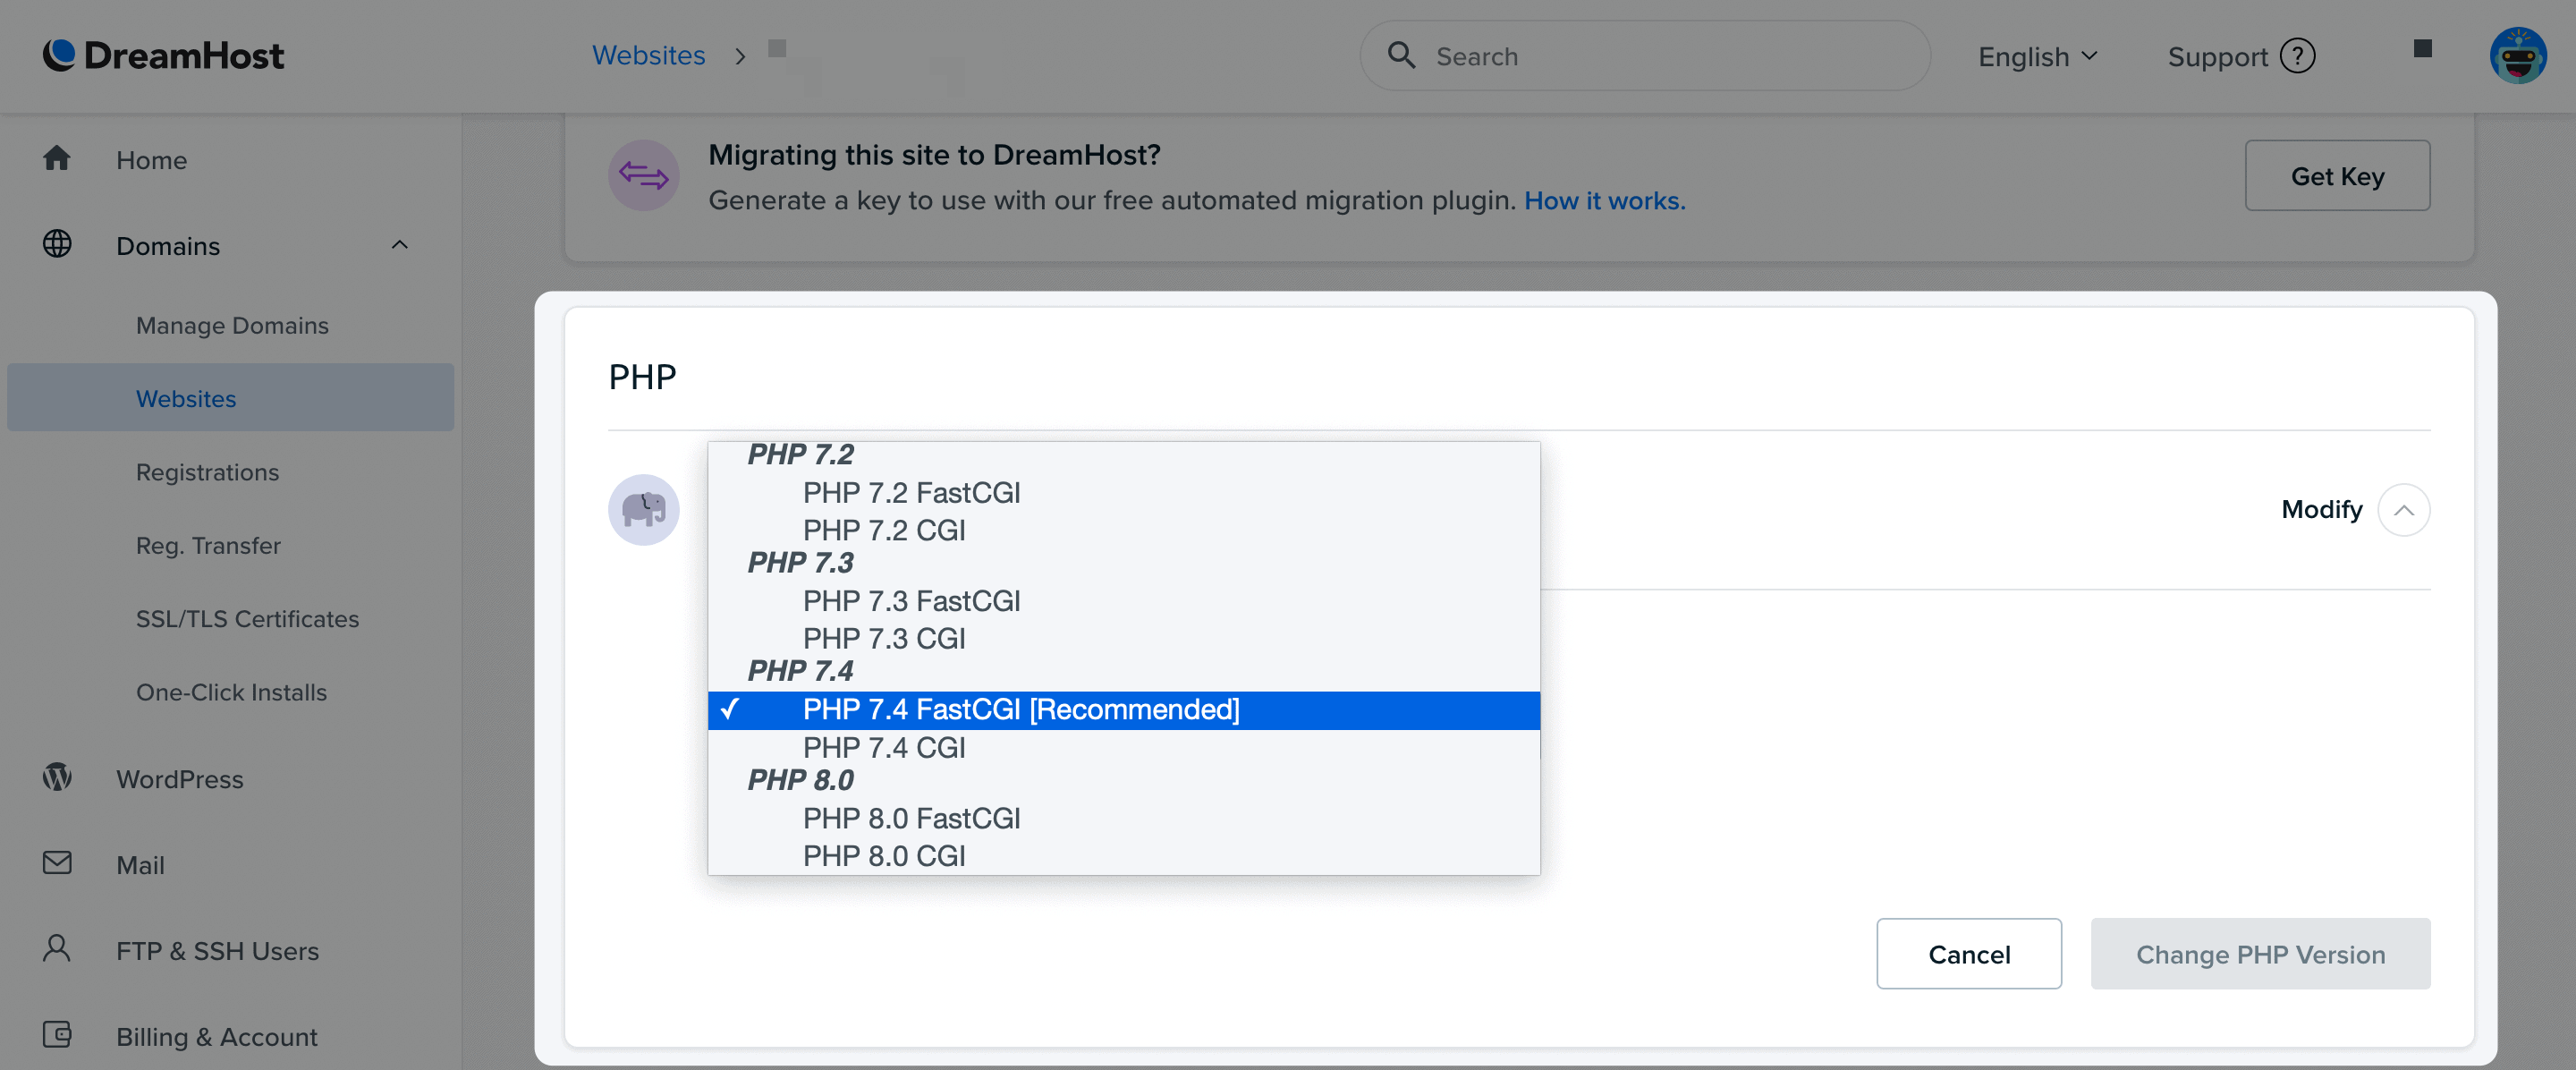
The screen that pops up is the same place you checked your site’s current version in earlier. This time, select your new PHP version from the drop-down menu and click Change PHP Version:
Unlike Kinsta, you’ll get a ‘soft’ warning. This means you’ll have to look for the change in color of the confirmation button – here it’s red:
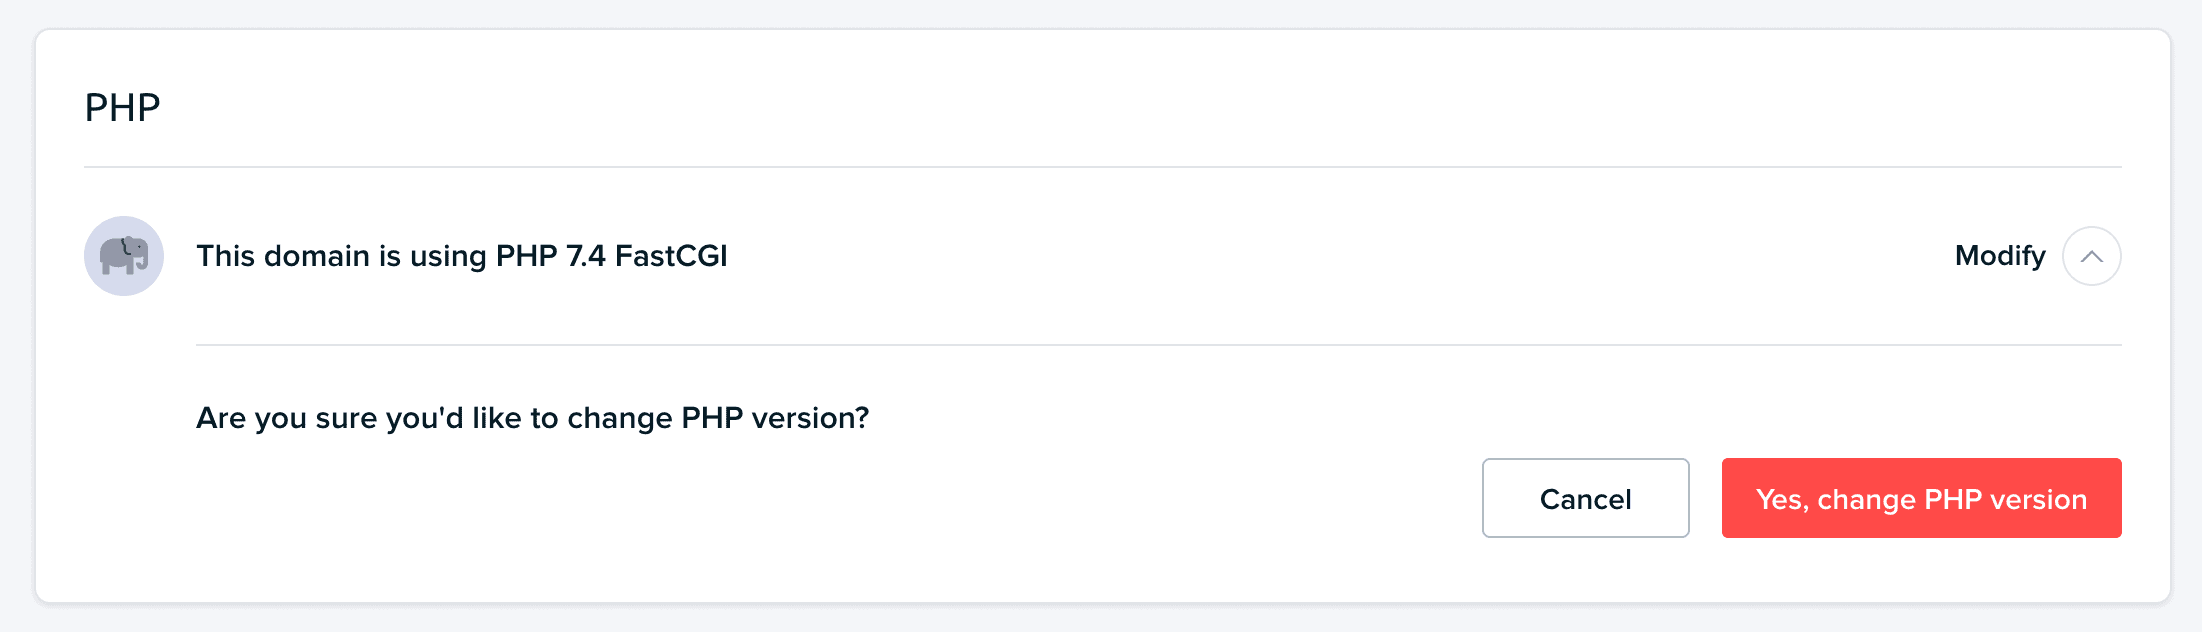
Once you confirm, DreamHost will do its thing.
3. cPanel
For cPanel, the process of updating your PHP is still straightforward. Though, it’s more of a ‘clunky’ way of making the change. First, you’ll need to get back to the MultiPHP Manager in your cPanel dashboard:
From here, check the boxes next to the sites you wish to change, then take a look at the drop-down on the right-hand side:
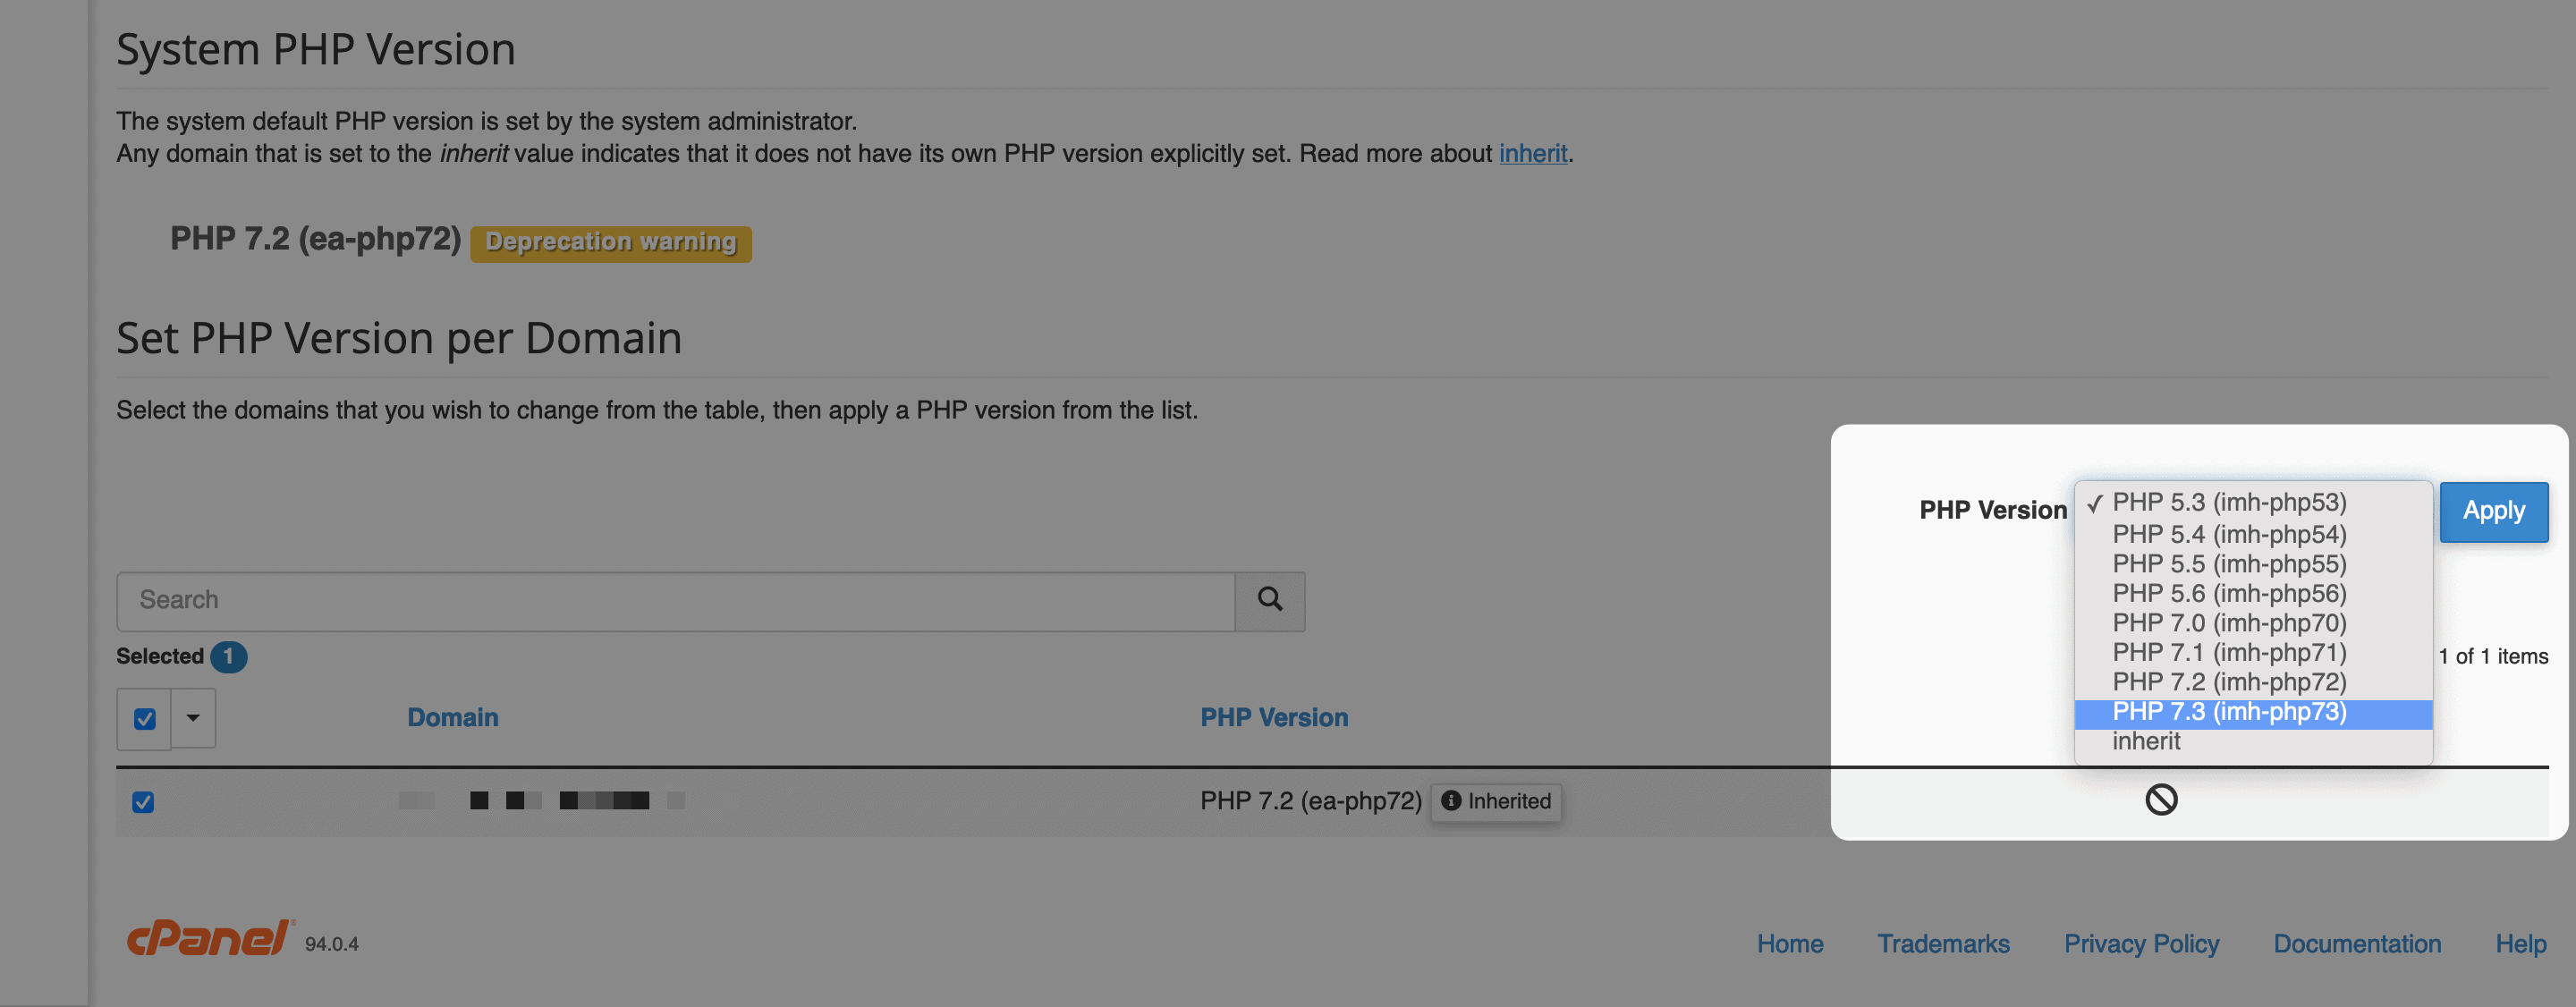
This lets you select another PHP version. Once you’re ready, click Apply, and cPanel will do the necessary. Although cPanel is a generic dashboard for managing your site, some hosts may also provide custom functionality to update PHP in WordPress.
As such, we recommend speaking to your host to find out whether there is a process to make the update even quicker.
In Summary
Updating PHP in WordPress is a task that isn’t always required. In fact, lots of hosts automate the process, and take the job out of your hands. Still, you may sometimes want to carry out a manual update.
The good news is that the process is simple, regardless of your hosting provider. If you can find your PHP version number within your host, there’s often a drop-down to upgrade there. If not, your host can point you to the right location within your control panel.
Are you considering updating your PHP version in WordPress, and if so, why? Let us know in the comments section below!