Containerization has revolutionized the way we develop, deploy, and manage applications. In this blog post, I will explore the benefits of containerization and guide you through the process of containerizing our previous Python Flask application (The Password Generator Wizard). We’ll cover the major steps involved and provide sample Docker commands at each stage.
Step 1: Understanding the Benefits of Containerization
Containerization offers several advantages for application development and deployment:
1. Portability: Containers encapsulate all the dependencies and configurations needed to run an application. This makes them highly portable, allowing applications to run consistently across different environments, such as development, testing, and production. With containers, you can avoid the “works on my machine” problem and ensure reliable behavior across various deployments.
2. Scalability: Containers enable efficient scalability. You can easily spin up multiple instances of containers to handle increased workloads. Container orchestration platforms like Kubernetes provide powerful scaling mechanisms, allowing applications to scale horizontally based on demand.
3. Isolation: Containers provide a high level of isolation, ensuring that applications and their dependencies are segregated from one another. This isolation enhances security by preventing interference between different components and reducing the attack surface.
4. Simplified Deployment: With containerization, deploying applications becomes streamlined and predictable. Containers package the application, its dependencies, and configuration, making the deployment process consistent and repeatable. This simplifies the deployment pipeline, reducing the risk of errors and enabling faster releases.
5. Resource Efficiency: Containers are lightweight and share the host system’s kernel, reducing resource overhead compared to running virtual machines. This efficiency allows you to utilize resources more effectively and maximize the utilization of hardware infrastructure.
Step 2: Docker Containerizing Our Python Flask Application
Now let’s dive into the process of containerizing our Python Flask application.
Prerequisites:
- Read my previous blog article regarding this application, what it is and how it’s built
- Dowload the project files from my Github page
- Docker should be installed and running on your system. Installation steps for Docker provider in previous blog article.
Step 2.1: Create the Python Flask Application
In Ubuntu, the root directory for my application is located at /home/sysadmin/python-pwgen. Within this directory, you’ll find the essential components of the application: the Dockerfile (which will be explained shortly), pwgen.py (the Python script), requirements.txt (which will also be explained shortly), and a folder named “templates” that holds the index.html file used for the web front end. Visually, the directory structure appears as follows:
.
??? Dockerfile
??? pwgen.py
??? requirements.txt
??? templates
——??? index.html
Step 2.2: The Dockerfile
The Dockerfile is a text file that contains a set of instructions for building a Docker image. It specifies the base image, sets the working directory, copies files into the image, installs dependencies, and defines the command to run when a container is created from the image.
Let’s take a look at the contents of my Dockerfile:
# syntax=docker/dockerfile:1 # What base image to use for the application
FROM python:3.8-slim-buster # Set Docker default location to this path
WORKDIR /app # Copy our requirements.txt file into our Working Directory /app
COPY requirements.txt ./requirements.txt # Commands to run within our container
RUN apt-get update -y
RUN apt-get -y upgrade
RUN pip3 install --upgrade pip
RUN pip3 install -r requirements.txt # Copy source code files into our Working Directory
COPY . /app # Execute our Python app within the container
CMD ["python3","pwgen.py"]
In the provided Dockerfile, the instructions are as follows:
- Sets the base image to
python:3.8-slim-buster, which is a lightweight version of Python 3.8 on Debian Buster. - Sets the working directory inside the container to
/app - It copies the requirements.txt file from the local directory to the
/appdirectory inside the container. - Updates and upgrades the package manager within the container.
- It installs or upgrades
pipwithin the container. - Installs the Python dependencies listed in
requirements.txtusingpip - Copies all the files from the local directory to the
/appdirectory inside the container. - Sets the command to run the Python script pwgen.py within the container.
The requirements.txt file
The requirements.txt file is a plain text file commonly used in Python projects to specify the project’s dependencies. Therefore, each line in the file represents a package or library required by the application, along with the specified version (if any).
Flask
# You can also specify a version by using Flask==2.3.2
Step 2.3: Building the Docker Image
Next, let’s dive into an exciting phase of the process: building our Docker image.
A Docker image is a lightweight, standalone, and executable package that contains everything needed to run an application, including the code, runtime, system tools, libraries, and dependencies. It is built from a set of instructions defined in a Dockerfile. Images serve as the building blocks for containers, which are the running instances of the images. Above all, Docker images are portable and can be easily shared, deployed, and scaled across different environments, ensuring consistent application behavior and eliminating dependency issues.
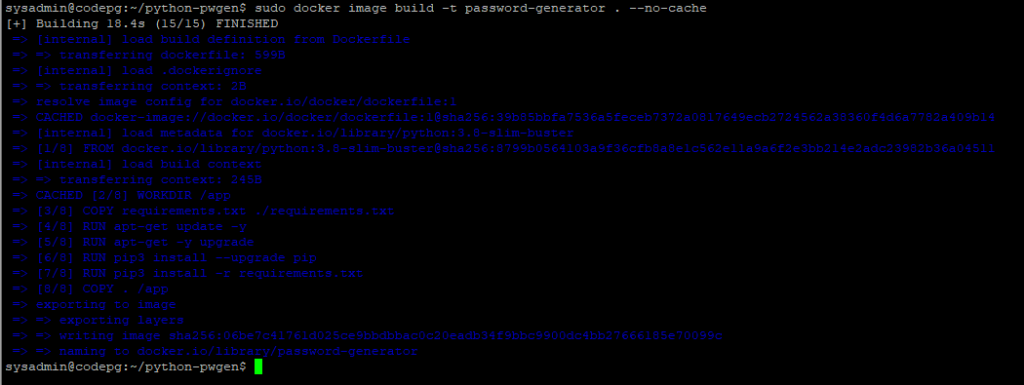
To begin, navigate to the directory where our Python Flask application and the Dockerfile are located and type the following command, including the . after password-generator:
sudo docker image build -t password-generator . --no-cache
Step 2.4: Start our Containerized Application
Now that the Docker image has been built, it’s time to start our container and run the application. The container is an instance of the Docker image, and it encapsulates the application along with its dependencies, configurations, and runtime environment.
Starting a container involves executing the Docker image and running it as a separate, isolated process. When a container starts, it creates a runtime environment that is isolated from the host system and other containers. This isolation ensures that the application runs consistently and does not interfere with other processes or containers.
To initiate the application and configure it to listen on port 5000, employ the following command:
sudo docker run -d -p 5000:5000 --name password-generator password-generator
After the container has been started, you can retrieve a list of containers by executing the following command:
sudo docker container list --all

Within this command syntax, there are several switches that I will elaborate on:
- -d This option runs the container in detached mode, meaning it runs in the background without attaching to the container’s console. This allows the container to run independently and frees up the terminal for other tasks.
- -p This option maps the host’s port 5000 to the container’s port 5000. It enables accessing the application running inside the container on the host machine using the specified port.
- –name This option assigns a name to the container, in this case, “password-generator”. It provides a human-readable identifier to easily manage and reference the container.
- password-generator: This is the name of the Docker image to be used to create the container. It references the image by its name.
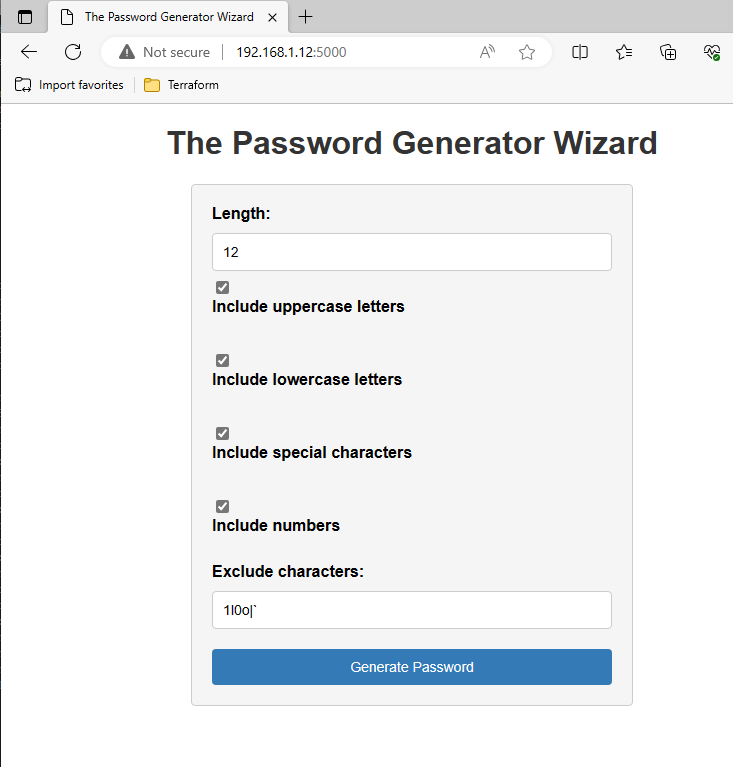
And now, the moment of truth arrives. Open your preferred web browser and enter your Docker host’s IP address, followed by port number 5000. Prepare yourself for a captivating sight as your application springs to life.
Step 2.5 Docker Container and Image Cleanup (Optional)
If the time comes when you desire to remove the Docker container and image from your system, you can follow these steps to accomplish the task:
sudo docker stop password-generator
sudo docker container rm password-generator
sudo docker rmi password-generator
What does it look like after executing the above commands ?

Conclusion
Through this blog post, we have delved into the incredible advantages of containerization and shared step-by-step instructions on how to containerize a Python Flask application using Docker. By following these instructions and harnessing the power of Docker’s capabilities, you have the opportunity to elevate your development workflow and achieve optimal application deployment.
We hope you found this article enlightening and insightful as you embarked on a journey alongside the Docker whale, the iconic symbol of containerization.
Thank you for joining us on this containerization adventure! Happy Dockerizing!
The post How To Docker Containerize A Python Flask Application appeared first on SYSADMINTUTORIALS IT TECHNOLOGY BLOG.