There are lots of standard shapes available in PowerPoint, but sometimes you need one that’s unique. Using the Merge Shapes functionality in PowerPoint, you can create almost anything you want.

In this hands-on tutorial, I’ll show you how to work with Union, Combine, Fragment, Intersect and Subtract, as well as how to Edit Points of a shape.

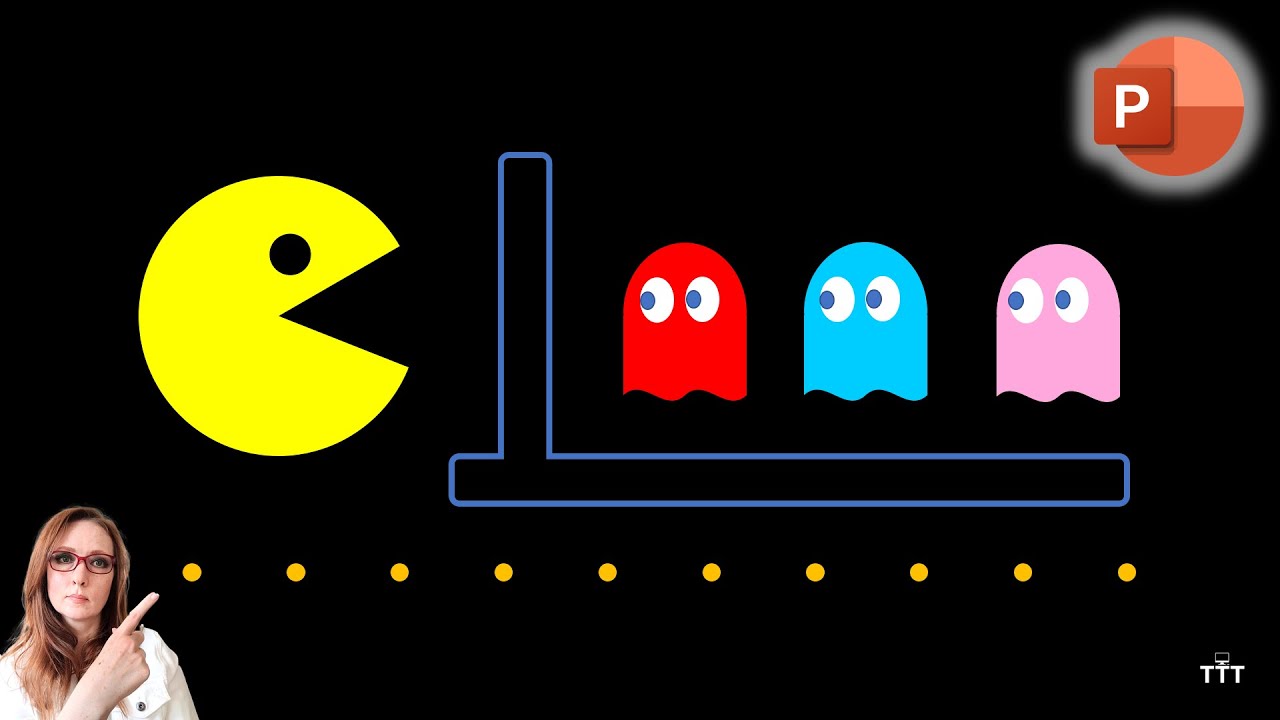
00:00 – Previewing the standard shapes menu plus the completed Pac-Man shapes
00:24 – Using the Merge Shapes menu (union, combine, fragment, intersect and subtract)
02:36 – Creating the Pac-Man character using shapes and subtract
03:03 – Editing points of a shape in PowerPoint
04:22 – Creating the ghost characters using shapes
06:31 – Creating the Pac-Man wall using the shape union functionality
07:53 – Aligning and distributing shapes evenly in PowerPoint

Create Your Own Shapes in PowerPoint with Merge Shapes

PowerPoint is not just a presentation tool — it’s a surprisingly powerful design platform. One of its most valuable features for custom graphics is the Merge Shapes tool. This function allows you to create entirely new shapes by combining, subtracting, or intersecting existing ones, giving your presentations a more tailored and professional appearance.

What is Merge Shapes?

The Merge Shapes feature enables you to manipulate multiple shapes in PowerPoint to produce custom visual elements. It is found under the Shape Format tab, within the Insert Shapes group, once you select a shape.

The available merge options include:

  • Union – Combines all selected shapes into one seamless shape.

  • Combine – Removes the overlapping portions and merges the remaining outlines.

  • Fragment – Splits all the overlapping areas into distinct pieces.

  • Intersect – Retains only the parts of shapes that overlap.

  • Subtract – Removes the top shape from the one beneath it.

How to Use Merge Shapes

To use the Merge Shapes feature effectively, follow these steps:

1. Insert the Base Shapes

Go to the Insert tab, click on Shapes, and draw the shapes you wish to merge. For best results, start with two or more basic shapes such as circles, rectangles, or triangles.

2. Position Your Shapes

Arrange your shapes so they overlap in the way you want your final shape to appear. The area and order of overlap directly affect the outcome of the merge operation.

3. Select the Shapes

Hold down the Shift key and click each shape, or drag your mouse across all the shapes to select them simultaneously.

4. Access the Merge Shapes Tool

With the shapes selected, go to the Shape Format tab. In the Insert Shapes group, click on the Merge Shapes dropdown.

5. Choose a Merge Option

Click on one of the five options (Union, Combine, Fragment, Intersect, or Subtract) to create your custom shape.

Best Practices and Tips

  • Order Matters: In options like Subtract and Intersect, the topmost shape is critical. You can reorder shapes using the right-click menu and selecting Bring to Front or Send to Back.

  • Use Grouping: After creating your custom shape, group it with any other associated elements to keep your layout consistent.

  • Preserve Originals: It’s wise to duplicate your original shapes before merging in case you want to try different variations.

  • Custom Formatting: Before merging, apply any desired fills, outlines, or effects, as this can affect the final visual outcome.

Real-World Uses for Merge Shapes

The Merge Shapes feature is not just for aesthetics. Here are some practical applications:

  • Designing custom icons for infographics.

  • Creating unique callouts or speech bubbles.

  • Constructing branded diagrams and layouts.

  • Enhancing data visualisation elements with tailored frames and containers.

Conclusion

The Merge Shapes feature in PowerPoint is an excellent tool for anyone looking to enhance the visual appeal of their presentations. Whether you’re building sleek diagrams, designing intuitive icons, or simply experimenting with creative layouts, Merge Shapes provides a versatile and accessible way to do so — without needing external graphic design software. Mastering this feature will give your presentations a distinct, professional edge.

Similar Posts