Do you know what is the superpower of KDE? Customization.
Yes! KDE is customizable to the core. Every aspects the desktop can be customized and this sometimes overwhelms the user.
I am not going to overwhelm you in this article. We have covered tweaks for file managers in GNOME, Cinnamon and Xfce on It’s FOSS. It’s time for KDE.
I am going to list some of the ways you can tweak the Dolphin file manager in KDE to get more out of it.
Let’s begin!
1. Create files from built-in templates
In Dolphin, you can right-click anywhere on a blank space inside a directory and select the Create New option from the context menu to create various template files.

2. Split view
One of the coolest features of Dolphin is its ability to show split window, and it is available right in the default configuration.
Click on the Split button on the top toolbar to access it.
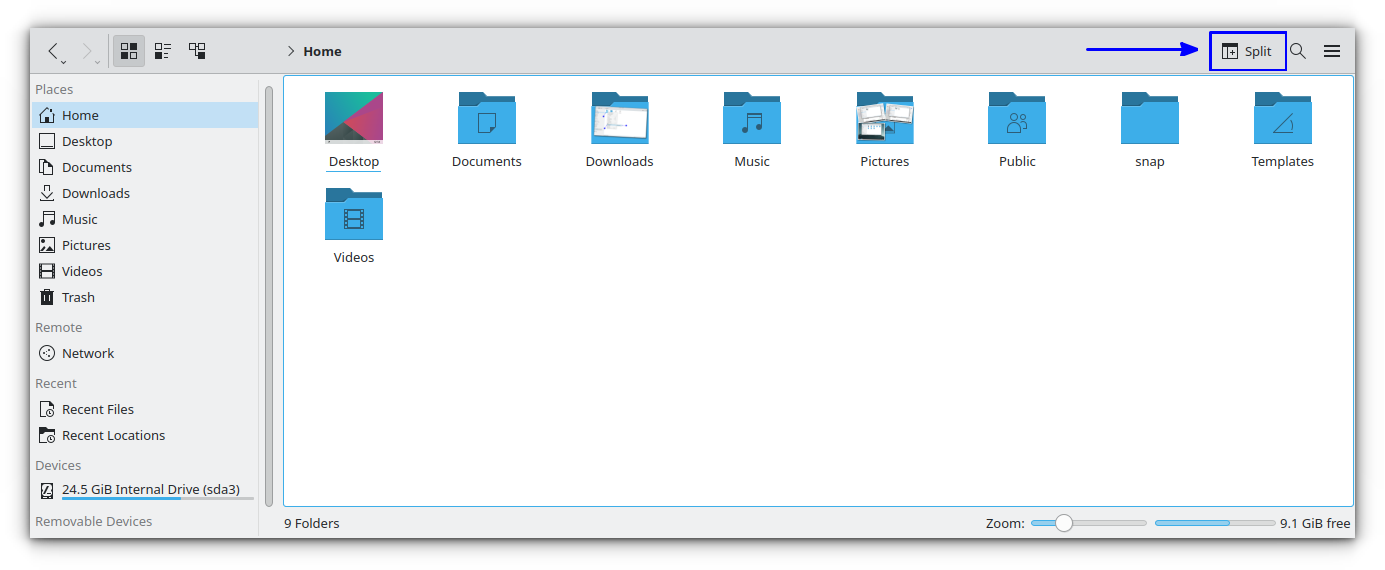
You can do operations like drag and drop, copy and paste etc. here. Once done, click on the close button to close the split view.
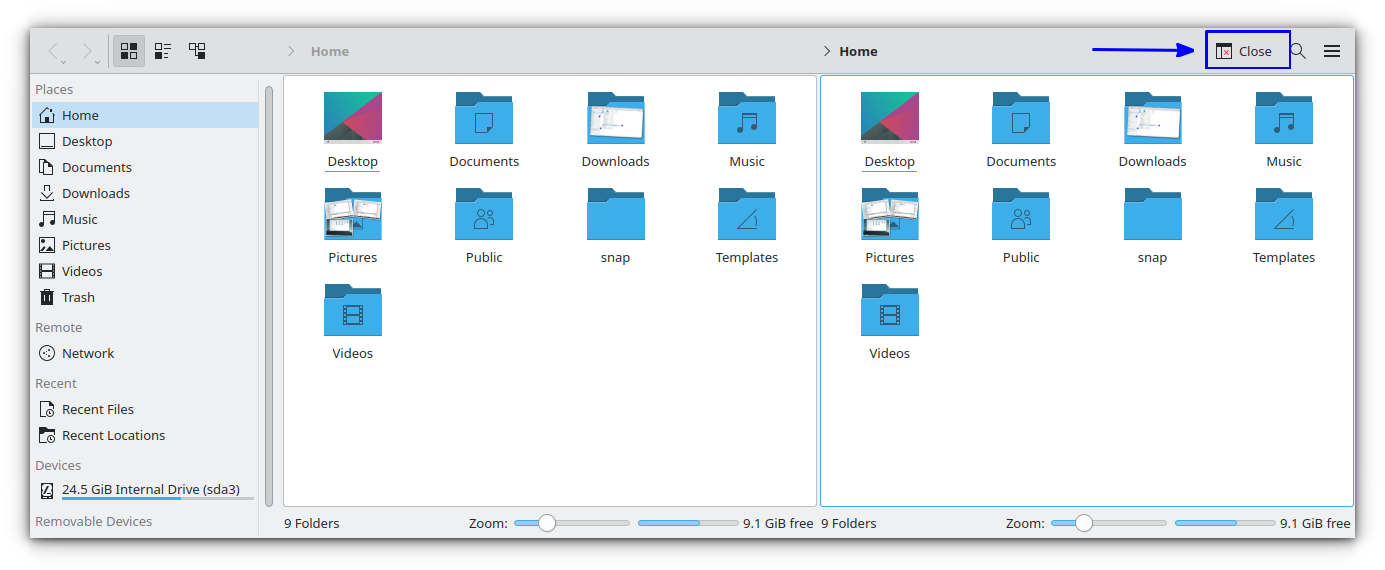
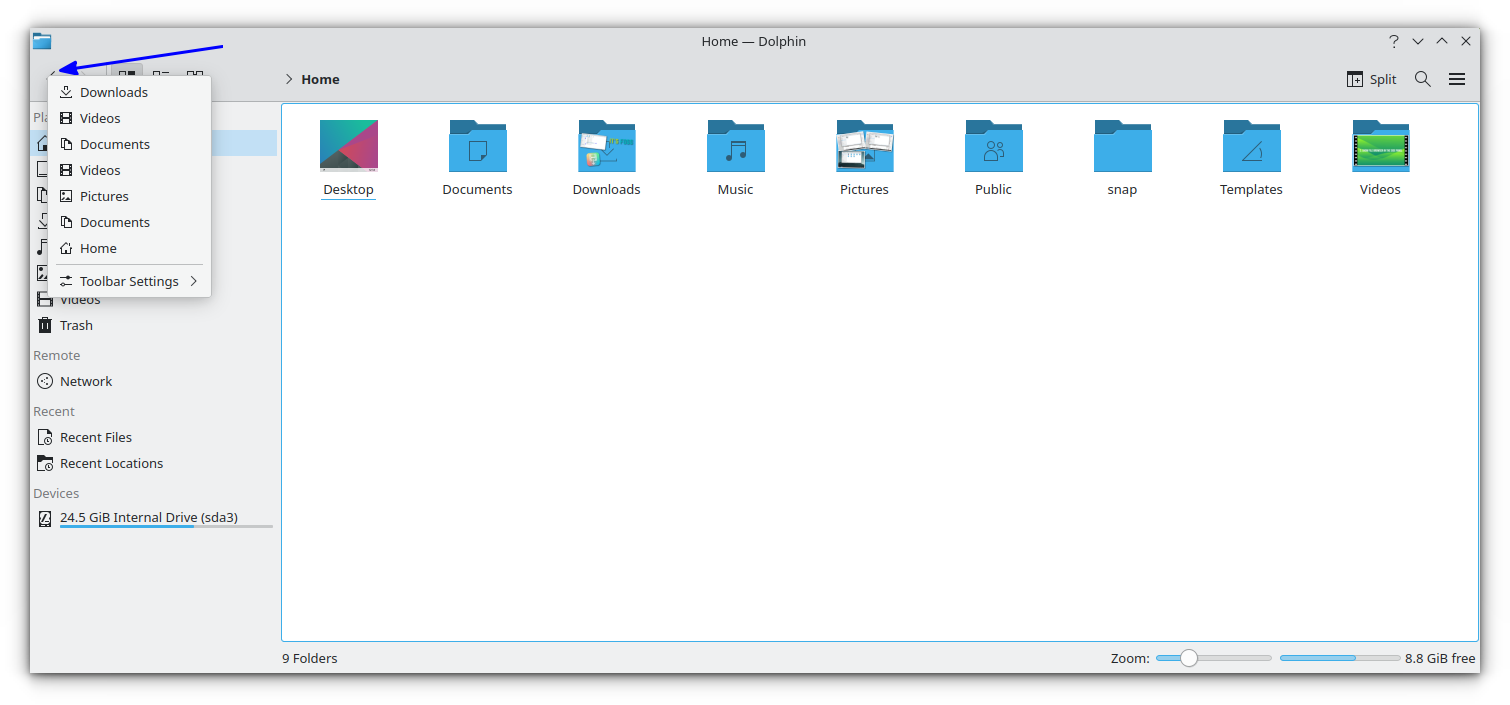
3. Add folders to Places for quick access
Right-click on a folder and select Add to Places.
This folder will be added to the places section on the left sidebar, and will be easily accessible.
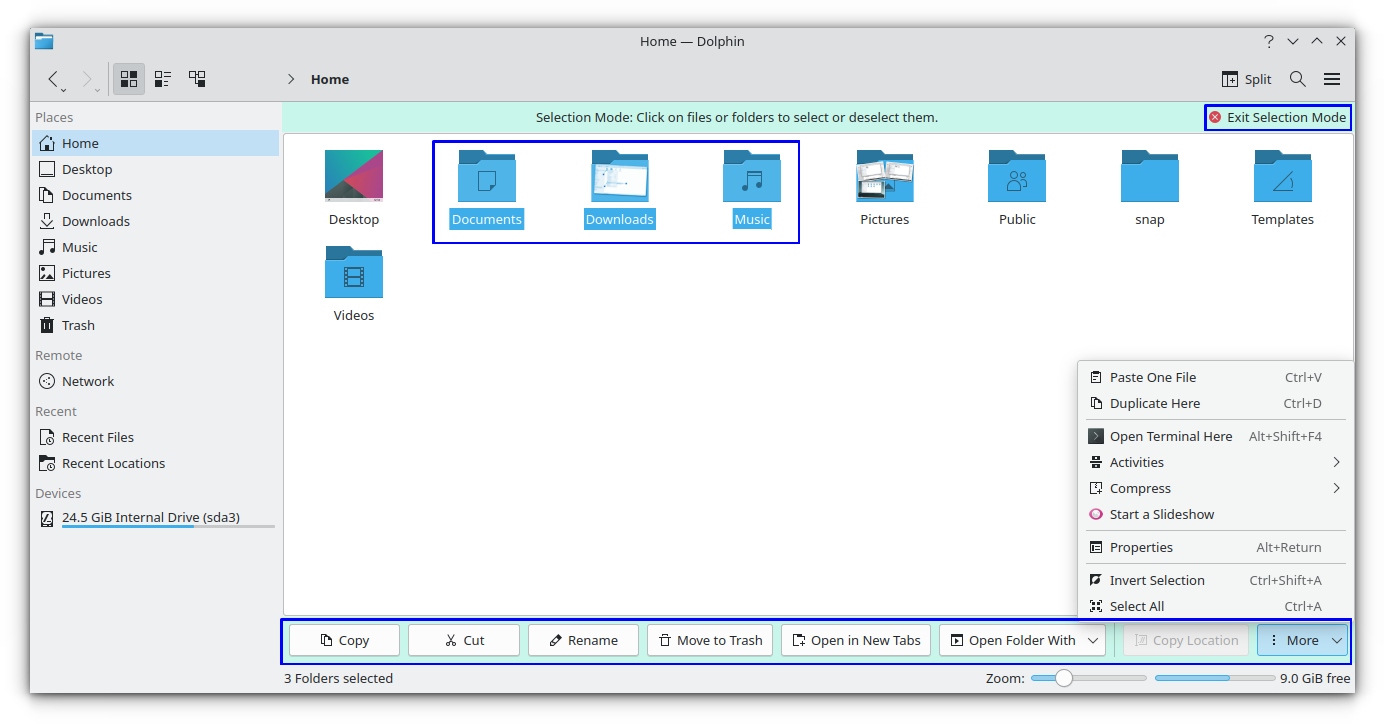
4. Selection mode
Dolphin provides a selection mode. To activate this, click on the Hamburger menu on the top-right and click on the “Select Files and Folders” option.
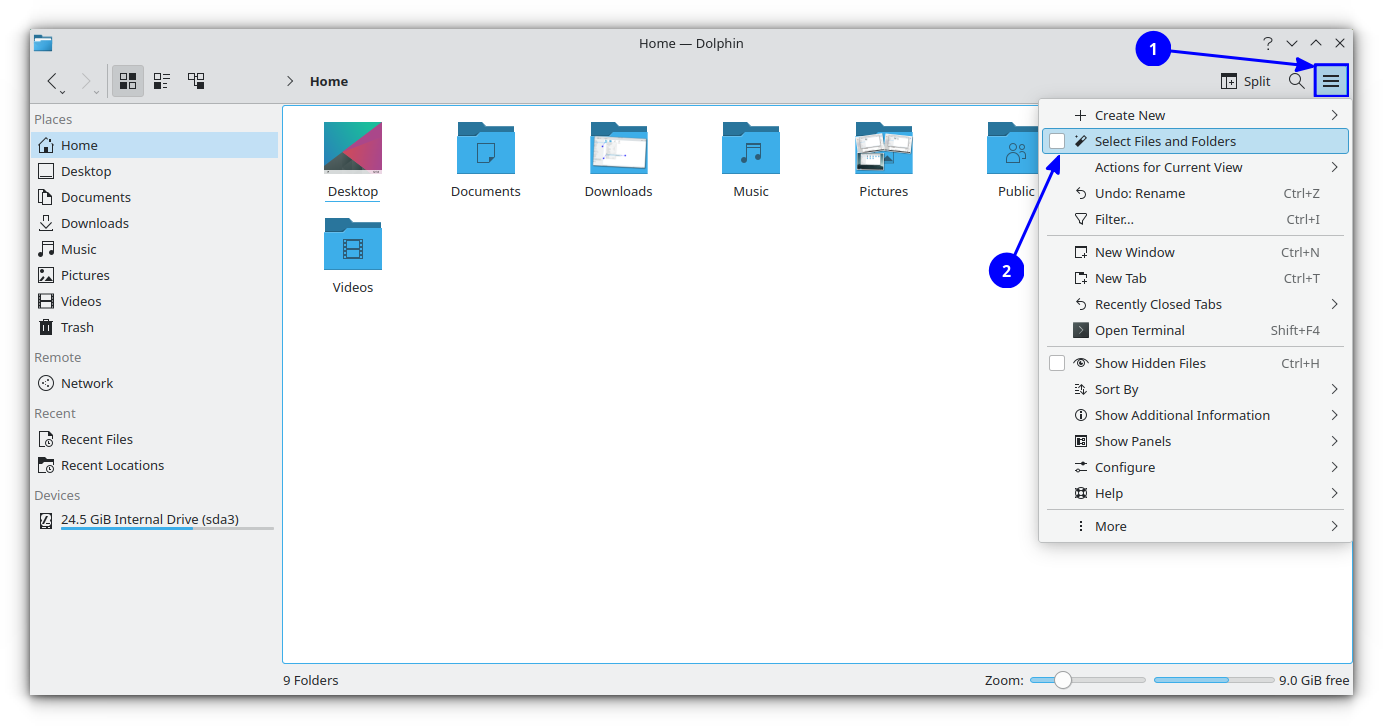
This will open a selection mode, where you can click on files and folders to select them. As soon as you click on any item, you will see a new menu bar containing useful actions appear at the bottom.
5. Open directories in the Places section in separate Tabs
In the Places section on the left sidebar, you can press the CTRL key and then click on the items to open them in separate tabs.
6. Add additional panels
Dolphin has a list of additional panel, disabled by default. You can enable them as required.
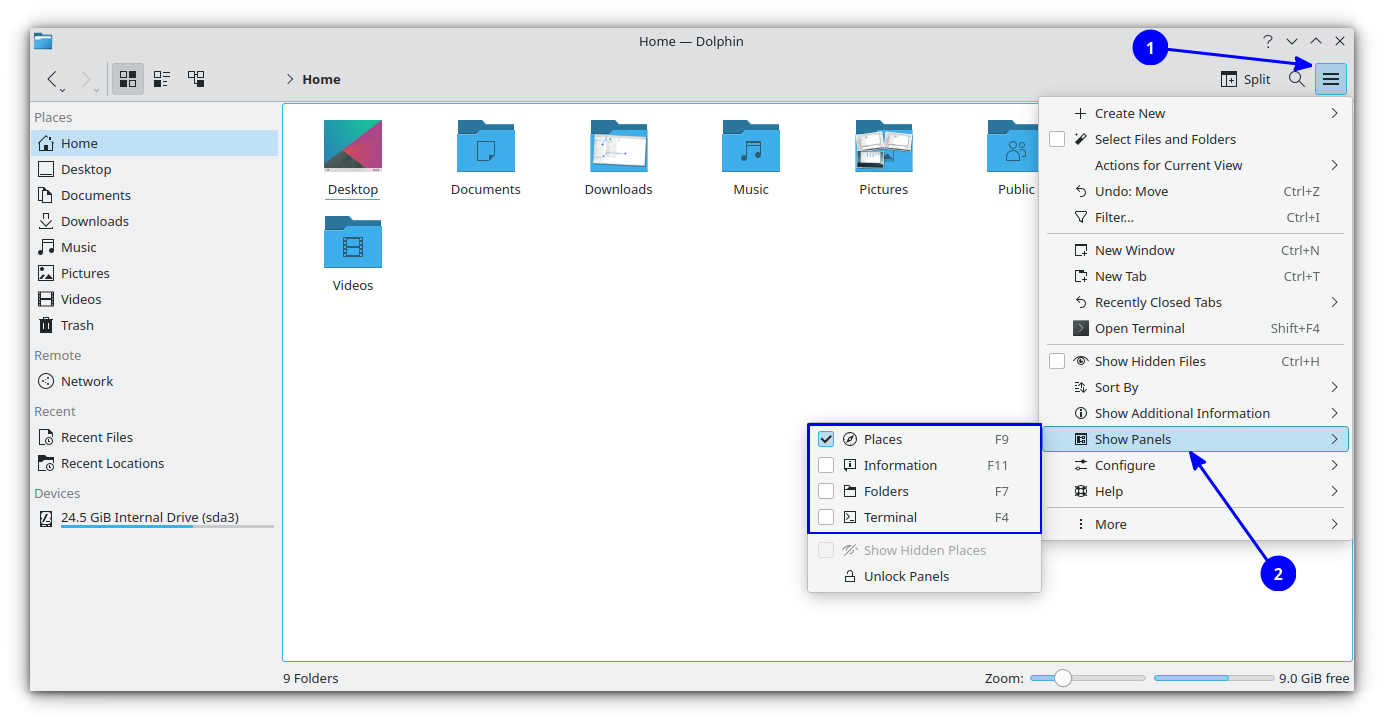
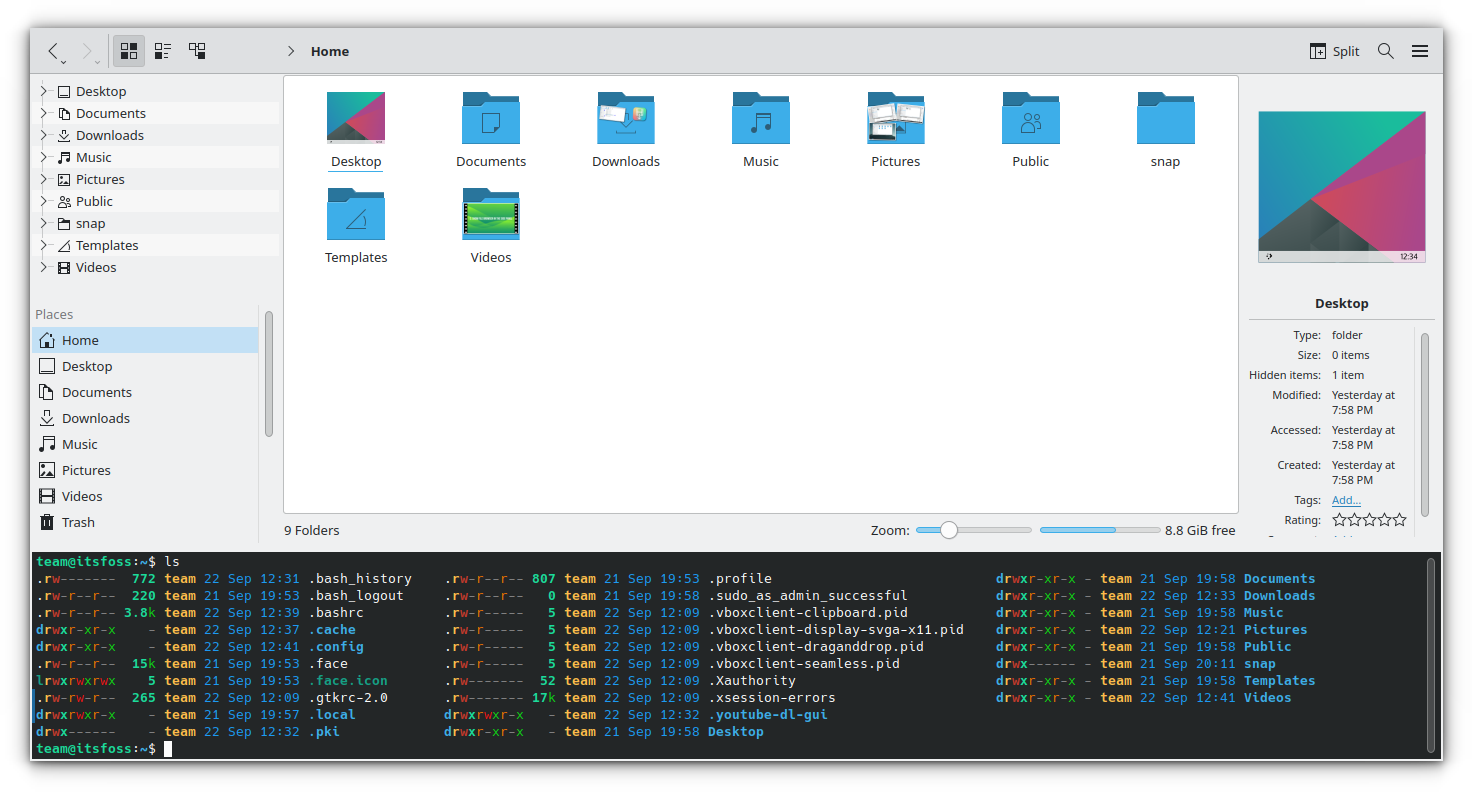
Information Panel
To open the information panel in Dolphin, click on the top-right hamburger menu and select Show Panels ⇾ Information.
As soon as you click, you can see an information panel is activated on the right side. This panel will show the details of the currently selected file or folder.
You can even preview video and audio files in this preview pane!
Embedded Terminal
This is one of the additional panels, that can be used very effectively. First enable it by Menu ⇾ Show Panels ⇾ Terminal
Once enabled, you can use this terminal for most of the usual functions. Also, if you cd into a directory, the GUI part of Dolphin will also move into that directory and vice versa.
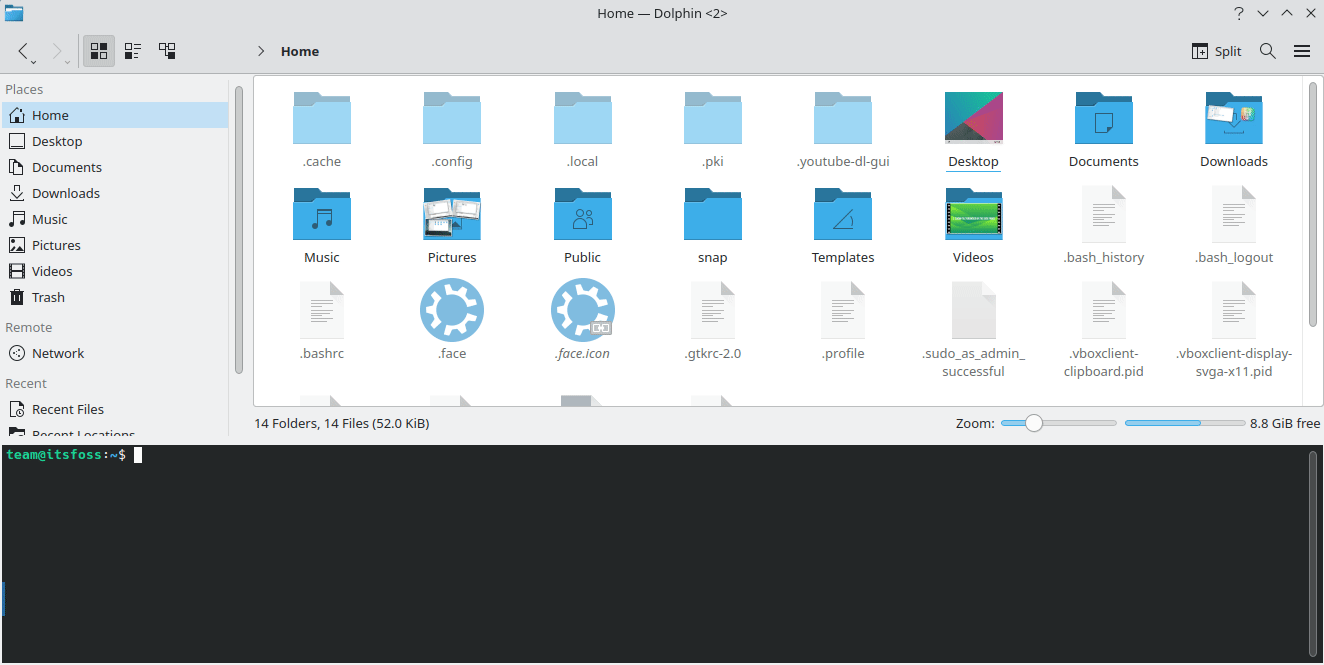
It also supports drag-and-drop of files.
In the below screenshot, you can see that all the additional panels are enabled.
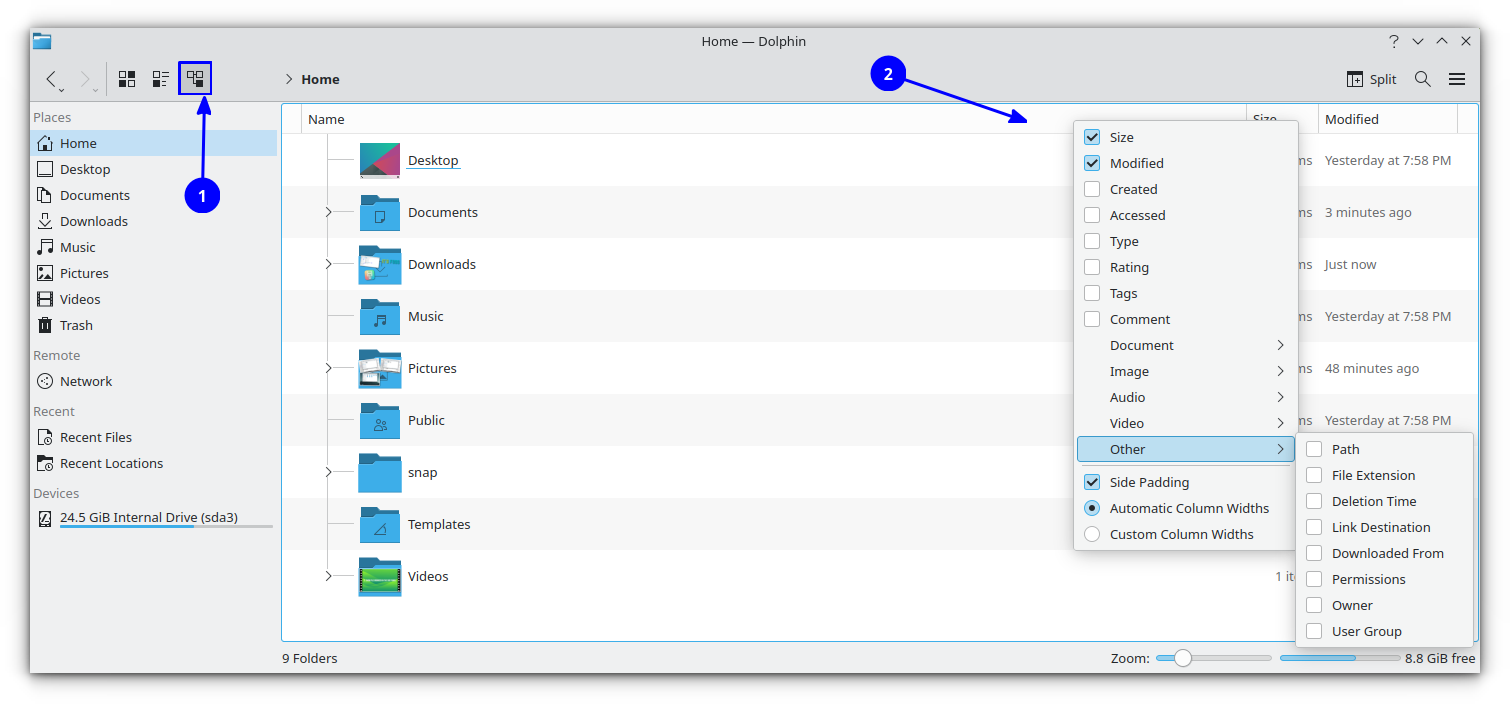
7. Explore column elements in list view
If you are on Dolphin’s Detailed view, by default, there are only a few column entries. Now, right-click on top of the column element name, and you will see many items that can be displayed as column entries.
8. Use folder visit history
You can click on the back arrow on the top toolbar to access a list of directories that you visited previously.
9. Restore closed tabs
If you have closed a tab accidentally, and want to restore it, like in a browser, use CTRL+SHIFT+T. Or, if you want to select from a list of recently closed tabs, go to the menu, select “Recently Closed Tabs”.
You can see a list of tabs, that have been closed recently.
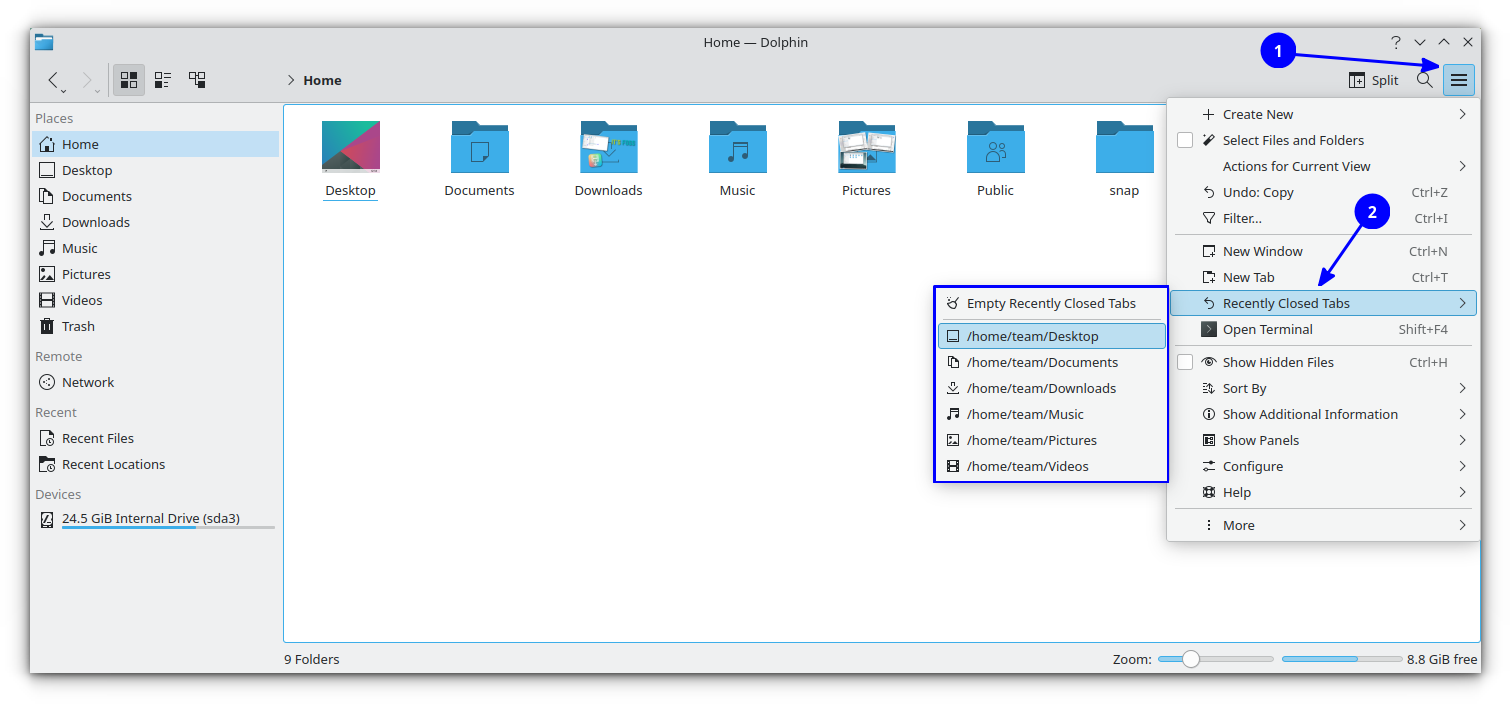
Click from the list to open that particular tab. Keep in mind that, it will not restore if you have restarted the system.
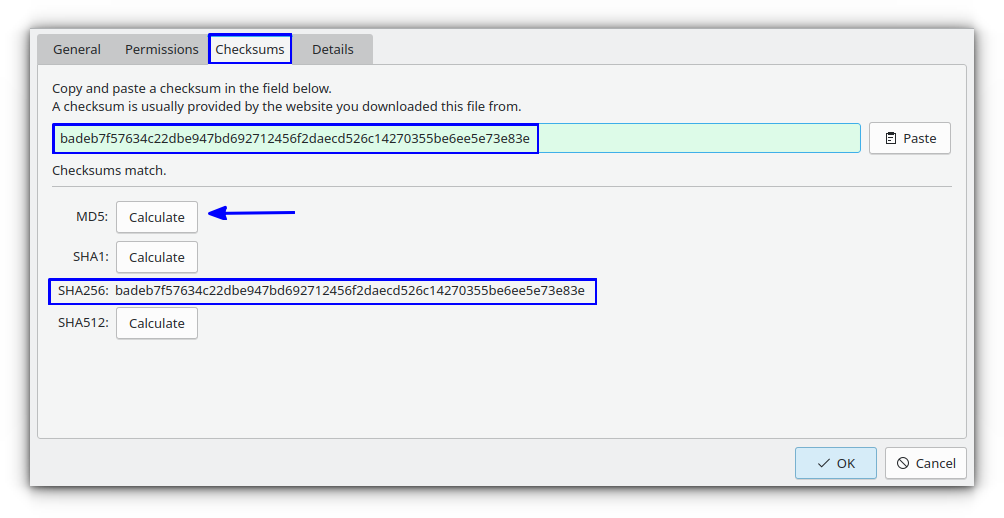
10. Verify checksum of files
To verify the checksum of an ISO or other file, select that file, right click on it and select Properties.

Now, go to the Checksum tab. Here, if you have a hash value for that file from its official website, paste it in the box provided. It will tell which checksum algorithm is matched.
Or you can click on the Calculate button adjacent to each algorithm to get that value.
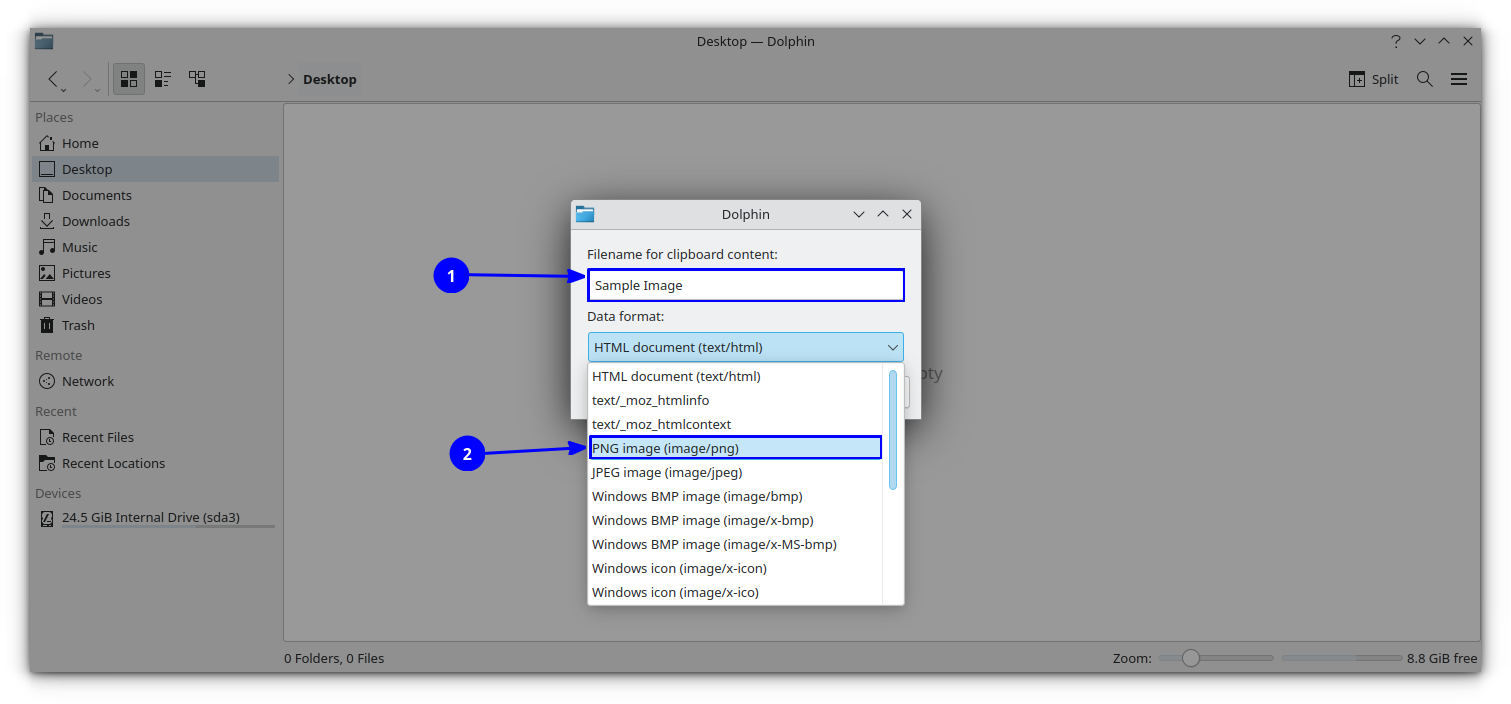
11. Paste images from the Internet
Dolphin supports multiple ways to save an image from the internet.
By copy and paste
Right-click on an image on the internet and select “Copy Image”. Now, open the folder where you want to paste the image and select “Paste Clipboard Contents”.
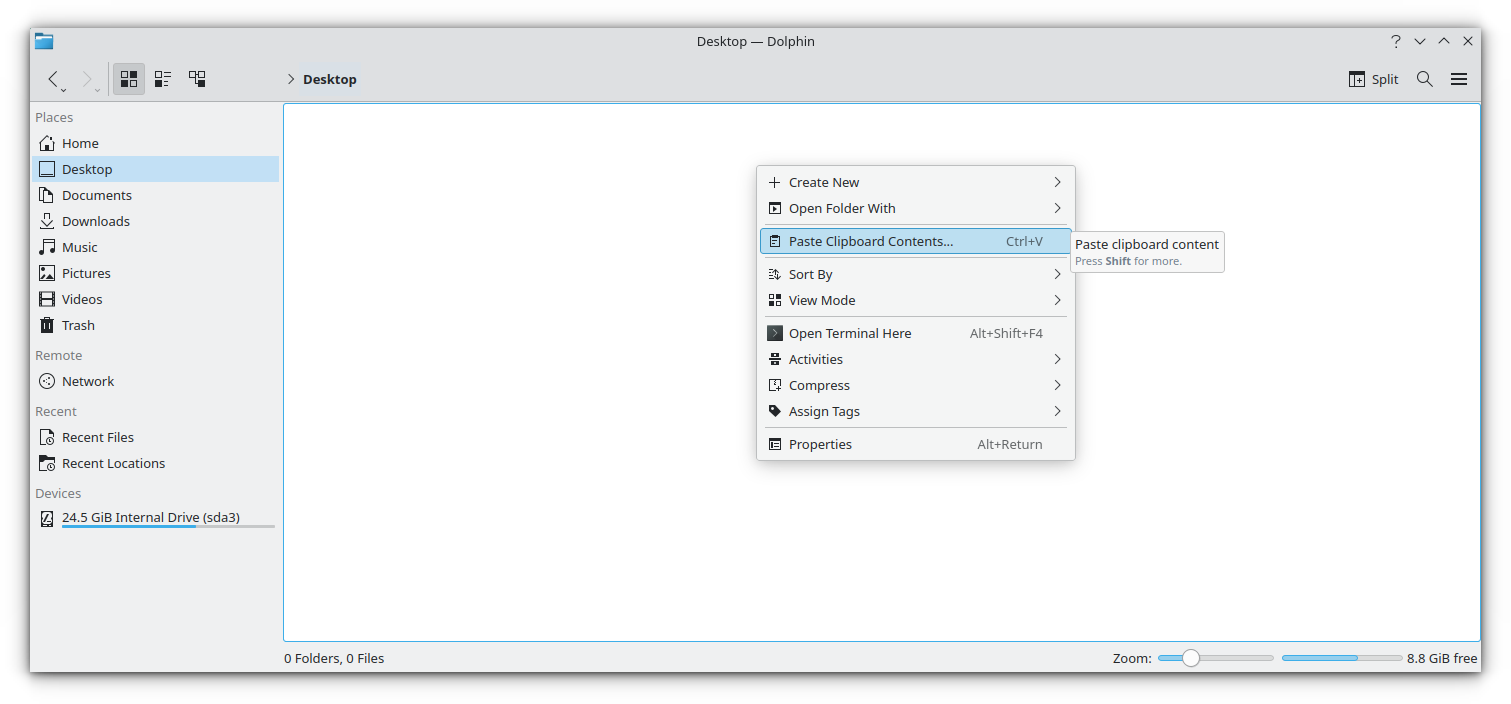
It will open a dialog box, where you need to select an image format. Here I have copied a PNG, so I chose PNG from the dropdown list. Also, give the file a name. Once done, click OK.
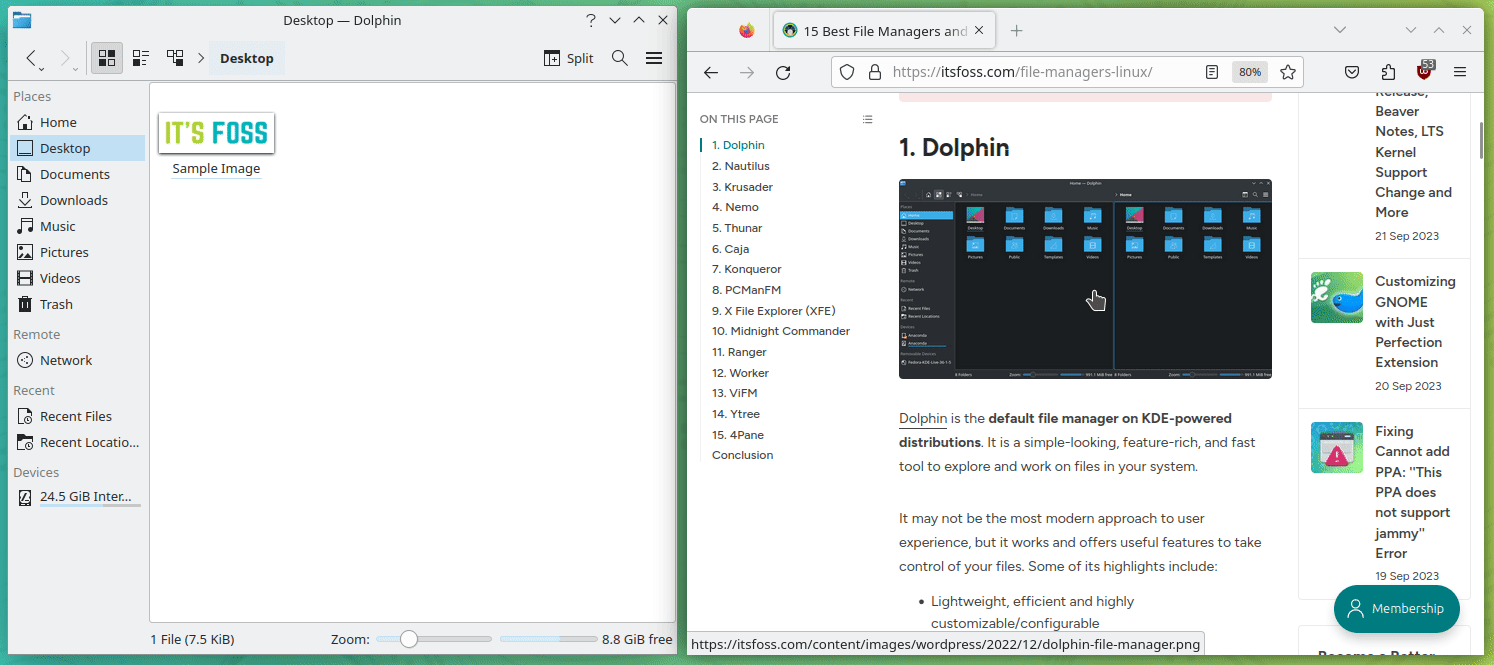
That’s it, the image will be pasted there!
By drag and drop
This is more convenient. Click and drag an image and drop it to the location you wanted. Then, select the “Copy Here” option when asked.
12. Save a search
Do you often search a particular file or content frequently? Then you can add this search to the quick access. This will help you to get that search performed quickly.
First, click on the search icon on the top bar. Now, in the search box, type the term you want to search for. You can either search within file name or within file contents.
Now, click on the save button on the right side of the search bar.
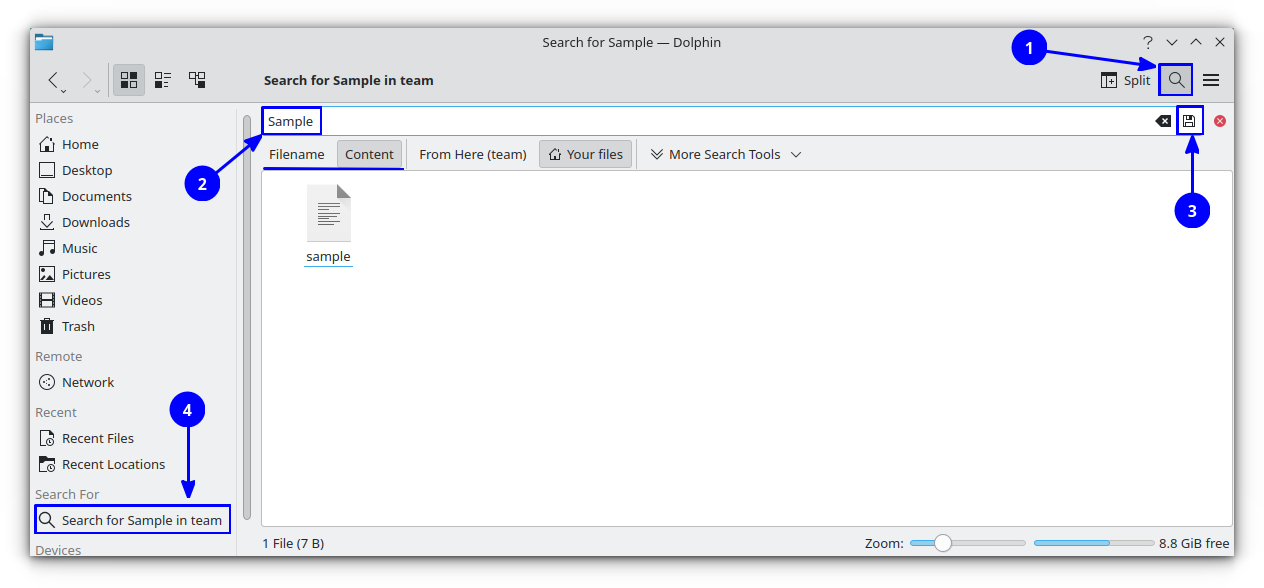
A new entry appears in the quick access area. Whenever you want to perform that search again, click on it!
While clicking on the main menu, right-click menu etc. you will get many unknown options, that you are not sure of. So, in Dolphin, while you hover over such menus, you can see a tool tip, asking you to press the Shift key for more information.
So, while hovering over a menu item, press the shift key, and you will get a concise explanation of what that menu item does.

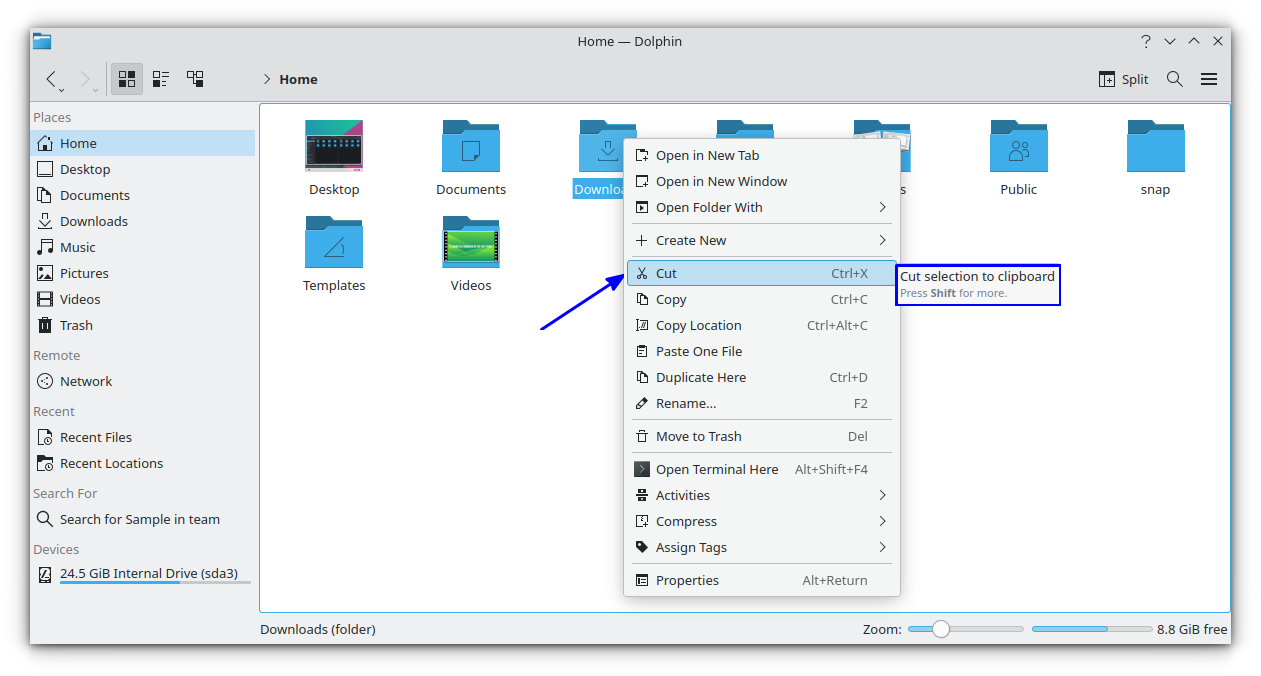
14. Copy location of a file or directory
It’s fairly easy to copy the location of a file/directory in Dolphin. Just right-click on it and select Copy Location.
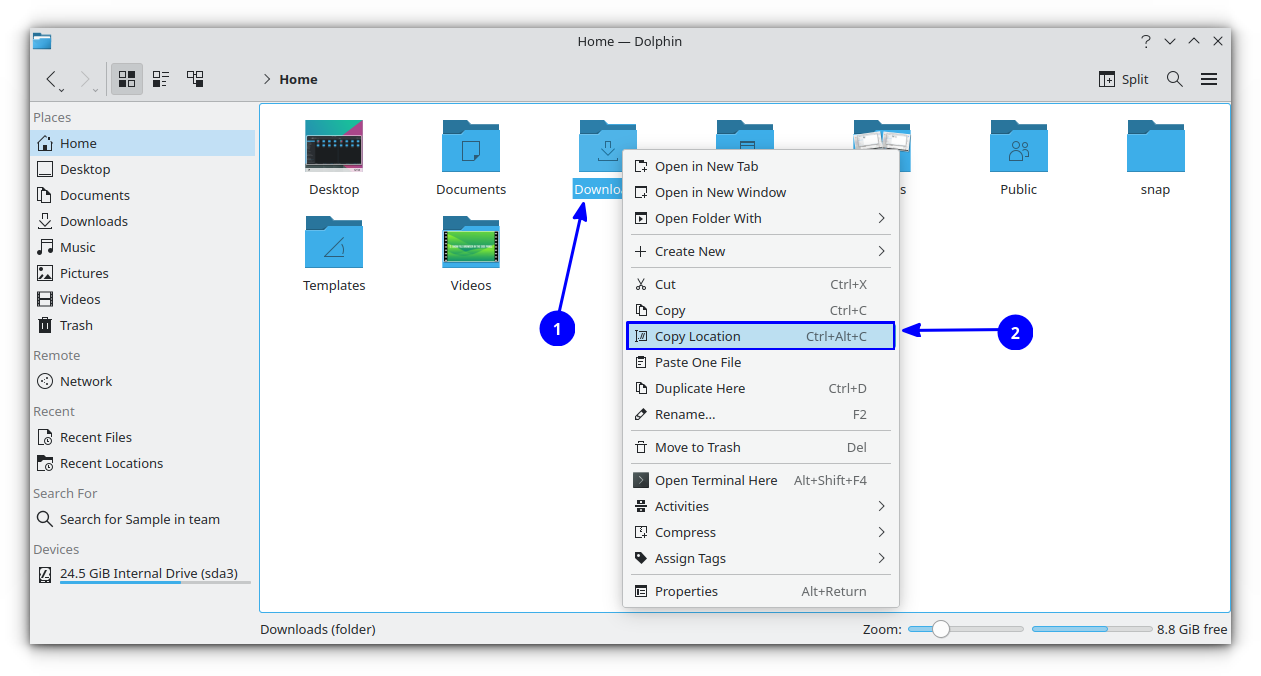
The absolute path to that item will be copied to your clipboard.
Select the Configure option from the main menu and go to Configure Dolphin.
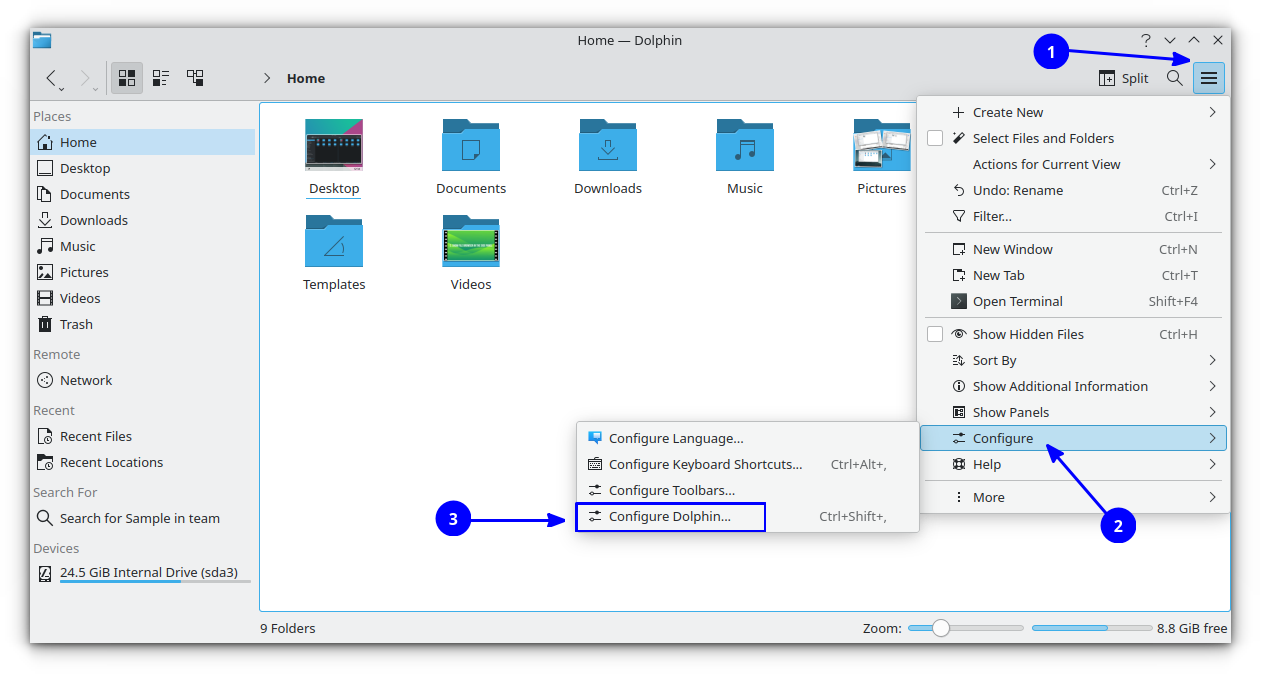
Now, go to the Context menu tab and check/uncheck your choices. Means, what to appear/hidden in the right click context menu.
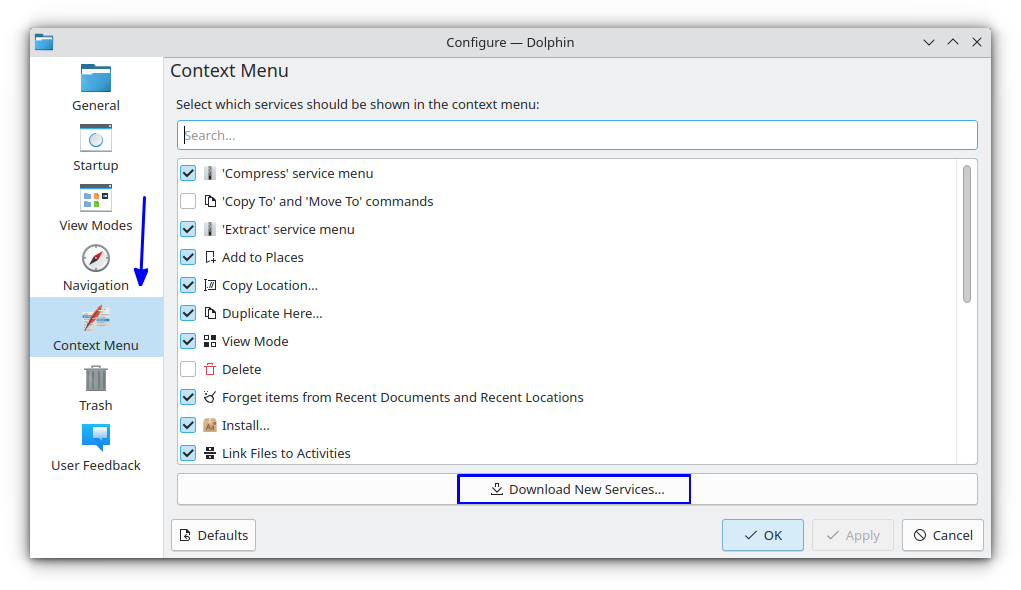
You can also download some actions from the website by using the download button.
🚧
Avoid downloading and using additional actions from this section of configuration. Since most of the actions need some additional dependencies, if you follow this method, you will fail to find out. Thus ends up in a broken experience.
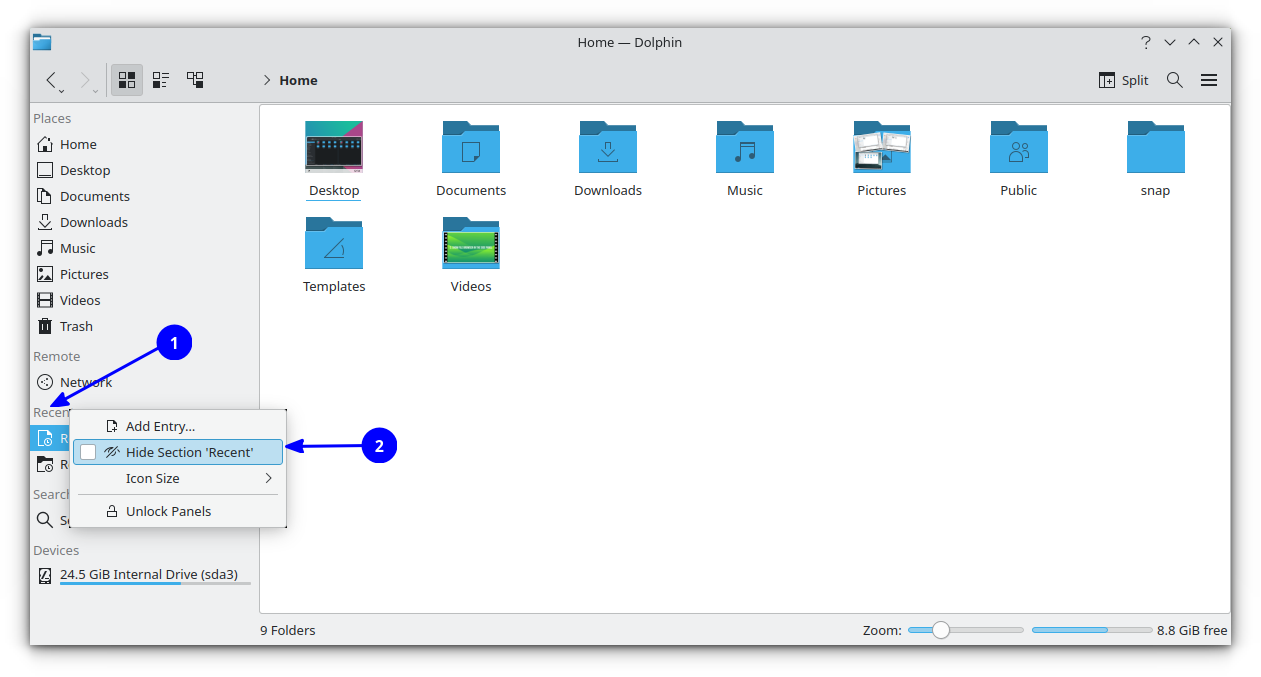
You can hide some sections from the left sidebar. To do this, right-click on the section heading, and check the Hide Section option.
17. Rotate, resize, convert images in Dolphin
This requires the installation of a third-party plugin, called ReImage. Go to the KDE store and download the release file. Since I am using Kubuntu 23.04 here, I will download the DEB file.
Install this on your system. You can use QAptPackageInstaller, a Gdebi like installer for Qt system. Because, it can install the required dependencies also, automatically. Close and open, dolphin.
Now, when you right-click on an image, you will get an additional “Actions” item, which contains the ReImage tools.
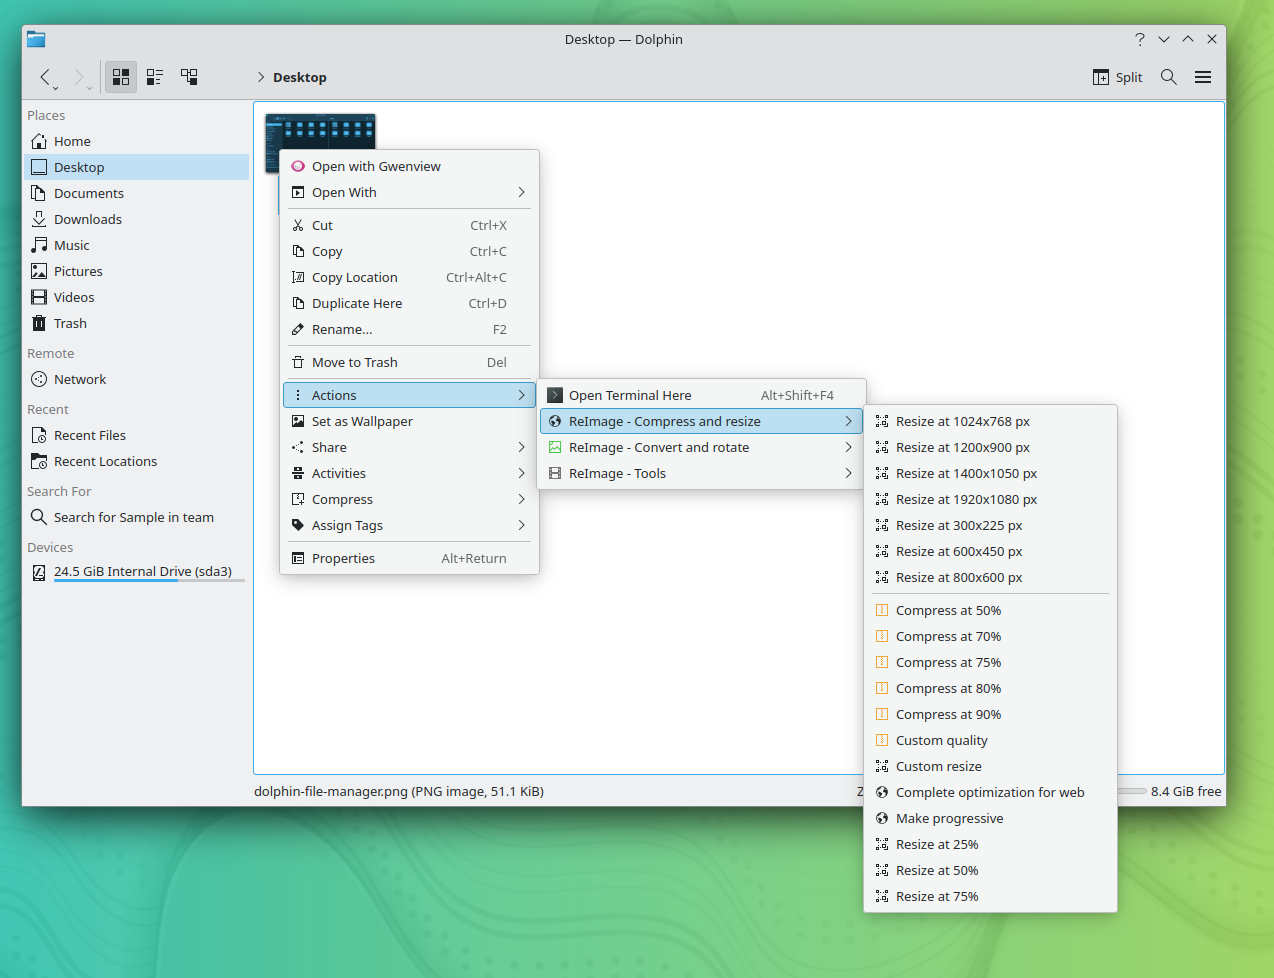
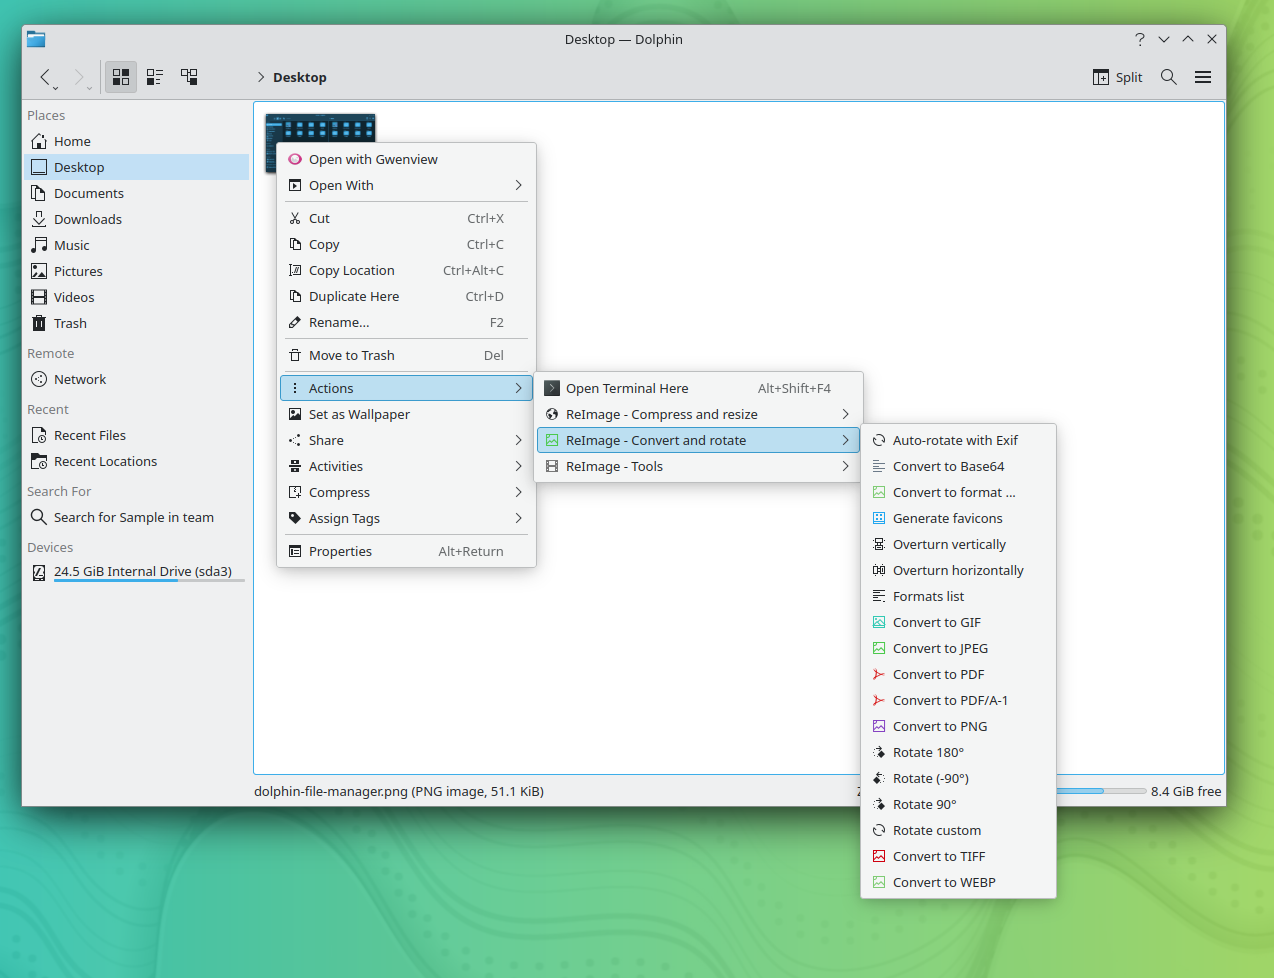
Various image manipulation options available under ReImage Tool’s Action menu
🚧
Converting Image to PDF may throw error, because of some security issues.
More file manager tweaking
As I mentioned in the beginning, we have covered such tweaking tips for other file managers in Linux. Feel free to explore them if you are not using KDE.
I hope you find these tips helpful in getting more out of KDE.
Please share your questions and suggestions in the comments.