It’s surprising how even a small aspect of your site has an impact. The way you set your URLs can make or break your site in some areas. For example, consider the WordPress ‘slug’ you use for each post and page on your website.
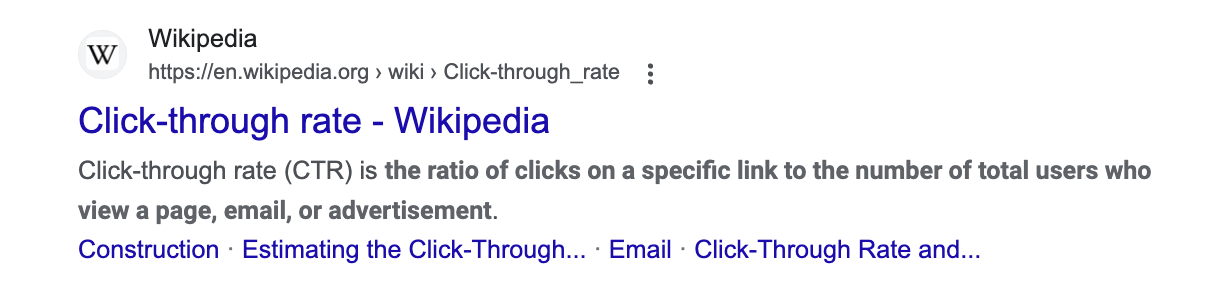
It may seem unimportant, but the slug of your URL opens the door to better Search Engine Optimization (SEO). It also gives users a human-readable way of getting the context of your site.
As such, this post will focus on the topic of WordPress slugs. We’ll also show you how to optimize them, to extract the maximum value.
What a WordPress Slug Is
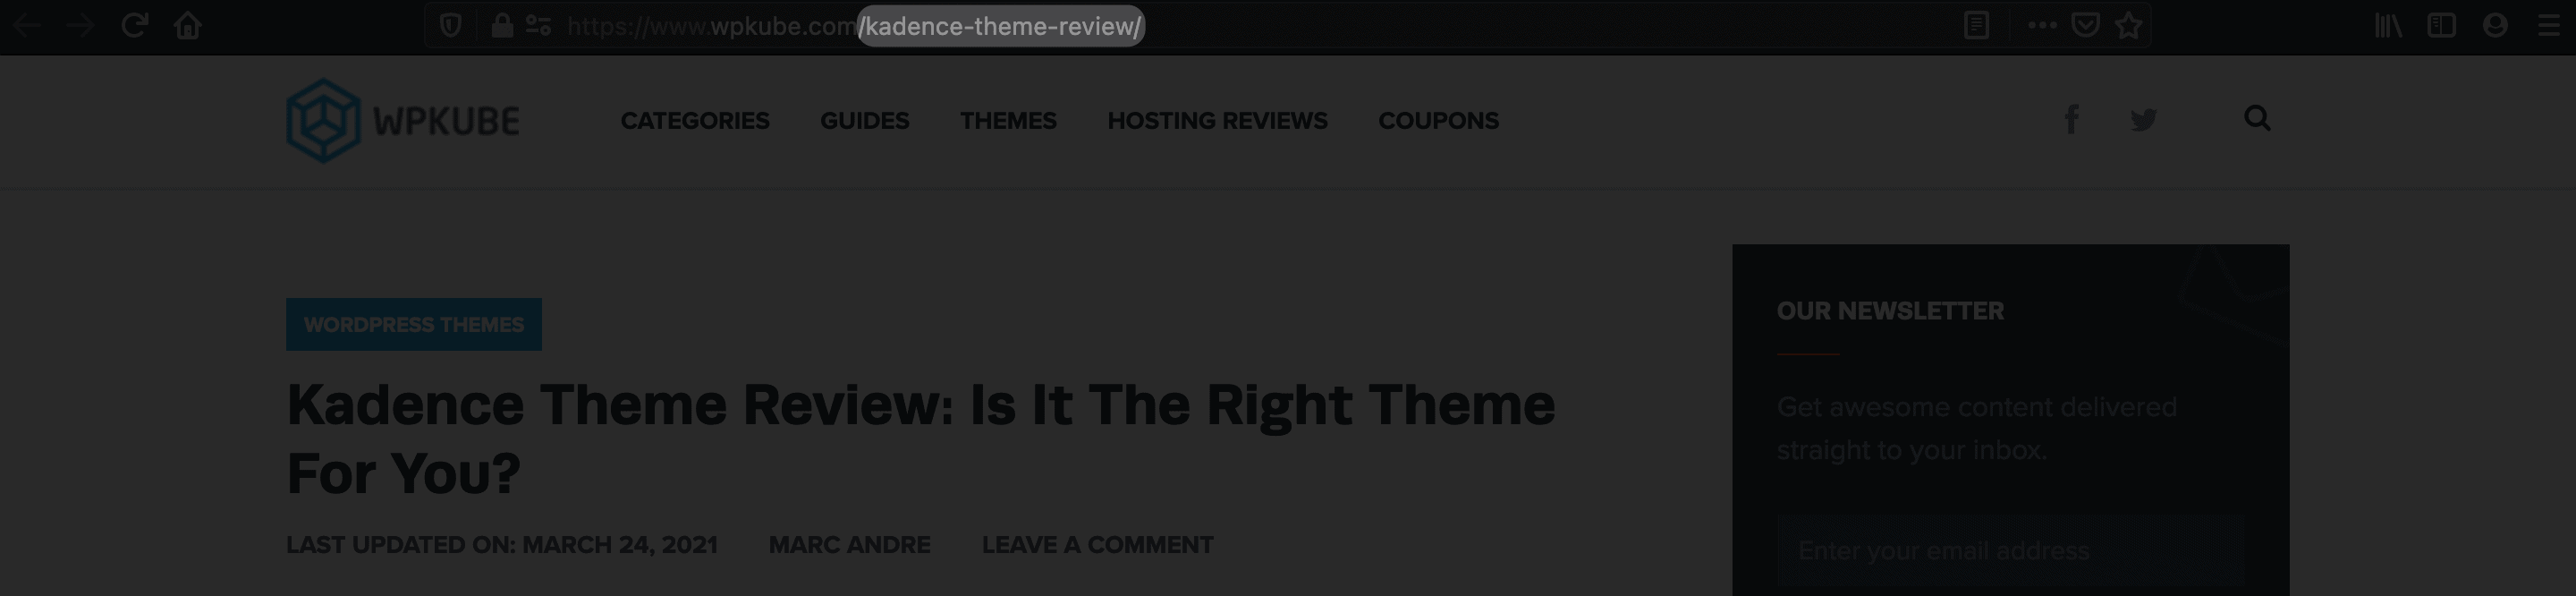
In short, a WordPress slug is the portion of your URL that comes after the main domain name. For example, consider our recent Kadence theme review post:
It’s a piece of identification for your post or page, and it gets its name due to its size. Though, your home page won’t ever have a slug, as that’s identified by your primary domain name.
In some cases, a post or page may have multiple slugs. Consider taxonomies such as category and tag archives, and author pages:

The lines get blurred here and there, because some aspects of a URL may or may not be related to the slug. On the whole, you have full control over every slug for your WordPress website. What’s more, you should exercise that control, because slugs have an important role to play. Let’s discuss this next.
Why a WordPress Slug Is Important
It may seem a minor concern, but a WordPress slug can help you in a few major ways:
- You’re able to give your post or page an SEO boost (more of which later).
- It offers a human-readable element that helps visitors decide if they want to click through to a post or page.
- You can offer a concise version of a longer post title. Again, this impact readability and context.
Given the above, it’s a good idea to work on your WordPress slugs at the point of creating a post or page. We’ll have more to say on this throughout the article. For now, let’s focus on the SEO benefits you’ll get from slugs.
How a WordPress Slug Can Impact Your Search Engine Optimization (SEO)
The main positive to working with WordPress slugs is how they can improve your SEO. Of course, the better your SEO, the greater the traffic you receive. As such, you’ll get a few benefits from optimizing your WordPress slugs:
- Search engine crawlers will be able to parse your content quicker. This is because a slug is clear and defined.
- You’ll be able to rank for the right keywords with a higher success rate. Again, the clarity of a slug means it’s as keyword-rich as possible (if you optimize it well).
- As we noted earlier, a well-optimized slug can help visitors ascertain what your post is about. The traffic and click-throughs that result means better metrics for your site. This will have a knock-on effect to your SEO.
In a nutshell, getting your WordPress slug in an optimal condition is going to help you win the SEO battle on multiple fronts. Let’s take some time to discuss the best way to do this before showing you how to edit slugs.
How to Optimize a WordPress Slug
Setting a slug is not a case of letting WordPress handle the process and sitting back. While WordPress does generate a slug for you once you create a new page, it’s not going to be optimal.
The good news is there are a few solid practices to consider, and they’re easy to implement:
- Keep the slug short. A WordPress slug should be around three to five words in length.
- Use your focus keyword. It seems obvious, but your slug should contain your post’s focus keyword or phrase.
- Only use lowercase letters. Much like filenames, keep a slug lowercase, and use hyphens to separate words rather than other punctuation.
- Add focus where necessary. If you’re using the focus keyword for the post or page, you’ll have natural focus in your slug. Even so, look to remove all superfluous words from your slug, so that the focus of the content is clear.
- Use ‘function words’ if required. Words such as “a” and “the” aren’t required in your slug, unless they help add clarity and focus.
- Keep the slug evergreen. In other words, don’t add time-specific elements such as the year to a slug. This helps you update a post later without changing the URL of the post.
This may seem a lot, but each elements gets you close to the ultimate optimal WordPress slug. Regardless, this knowledge isn’t useful if you don’t know how to edit slugs. Let’s discuss this next.
How to Edit WordPress Slugs
Before we get onto specific editing steps, it’s worth seeing how WordPress helps you to generate slugs in the first place. To do this, head to the Settings > Permalinks page within your WordPress dashboard:
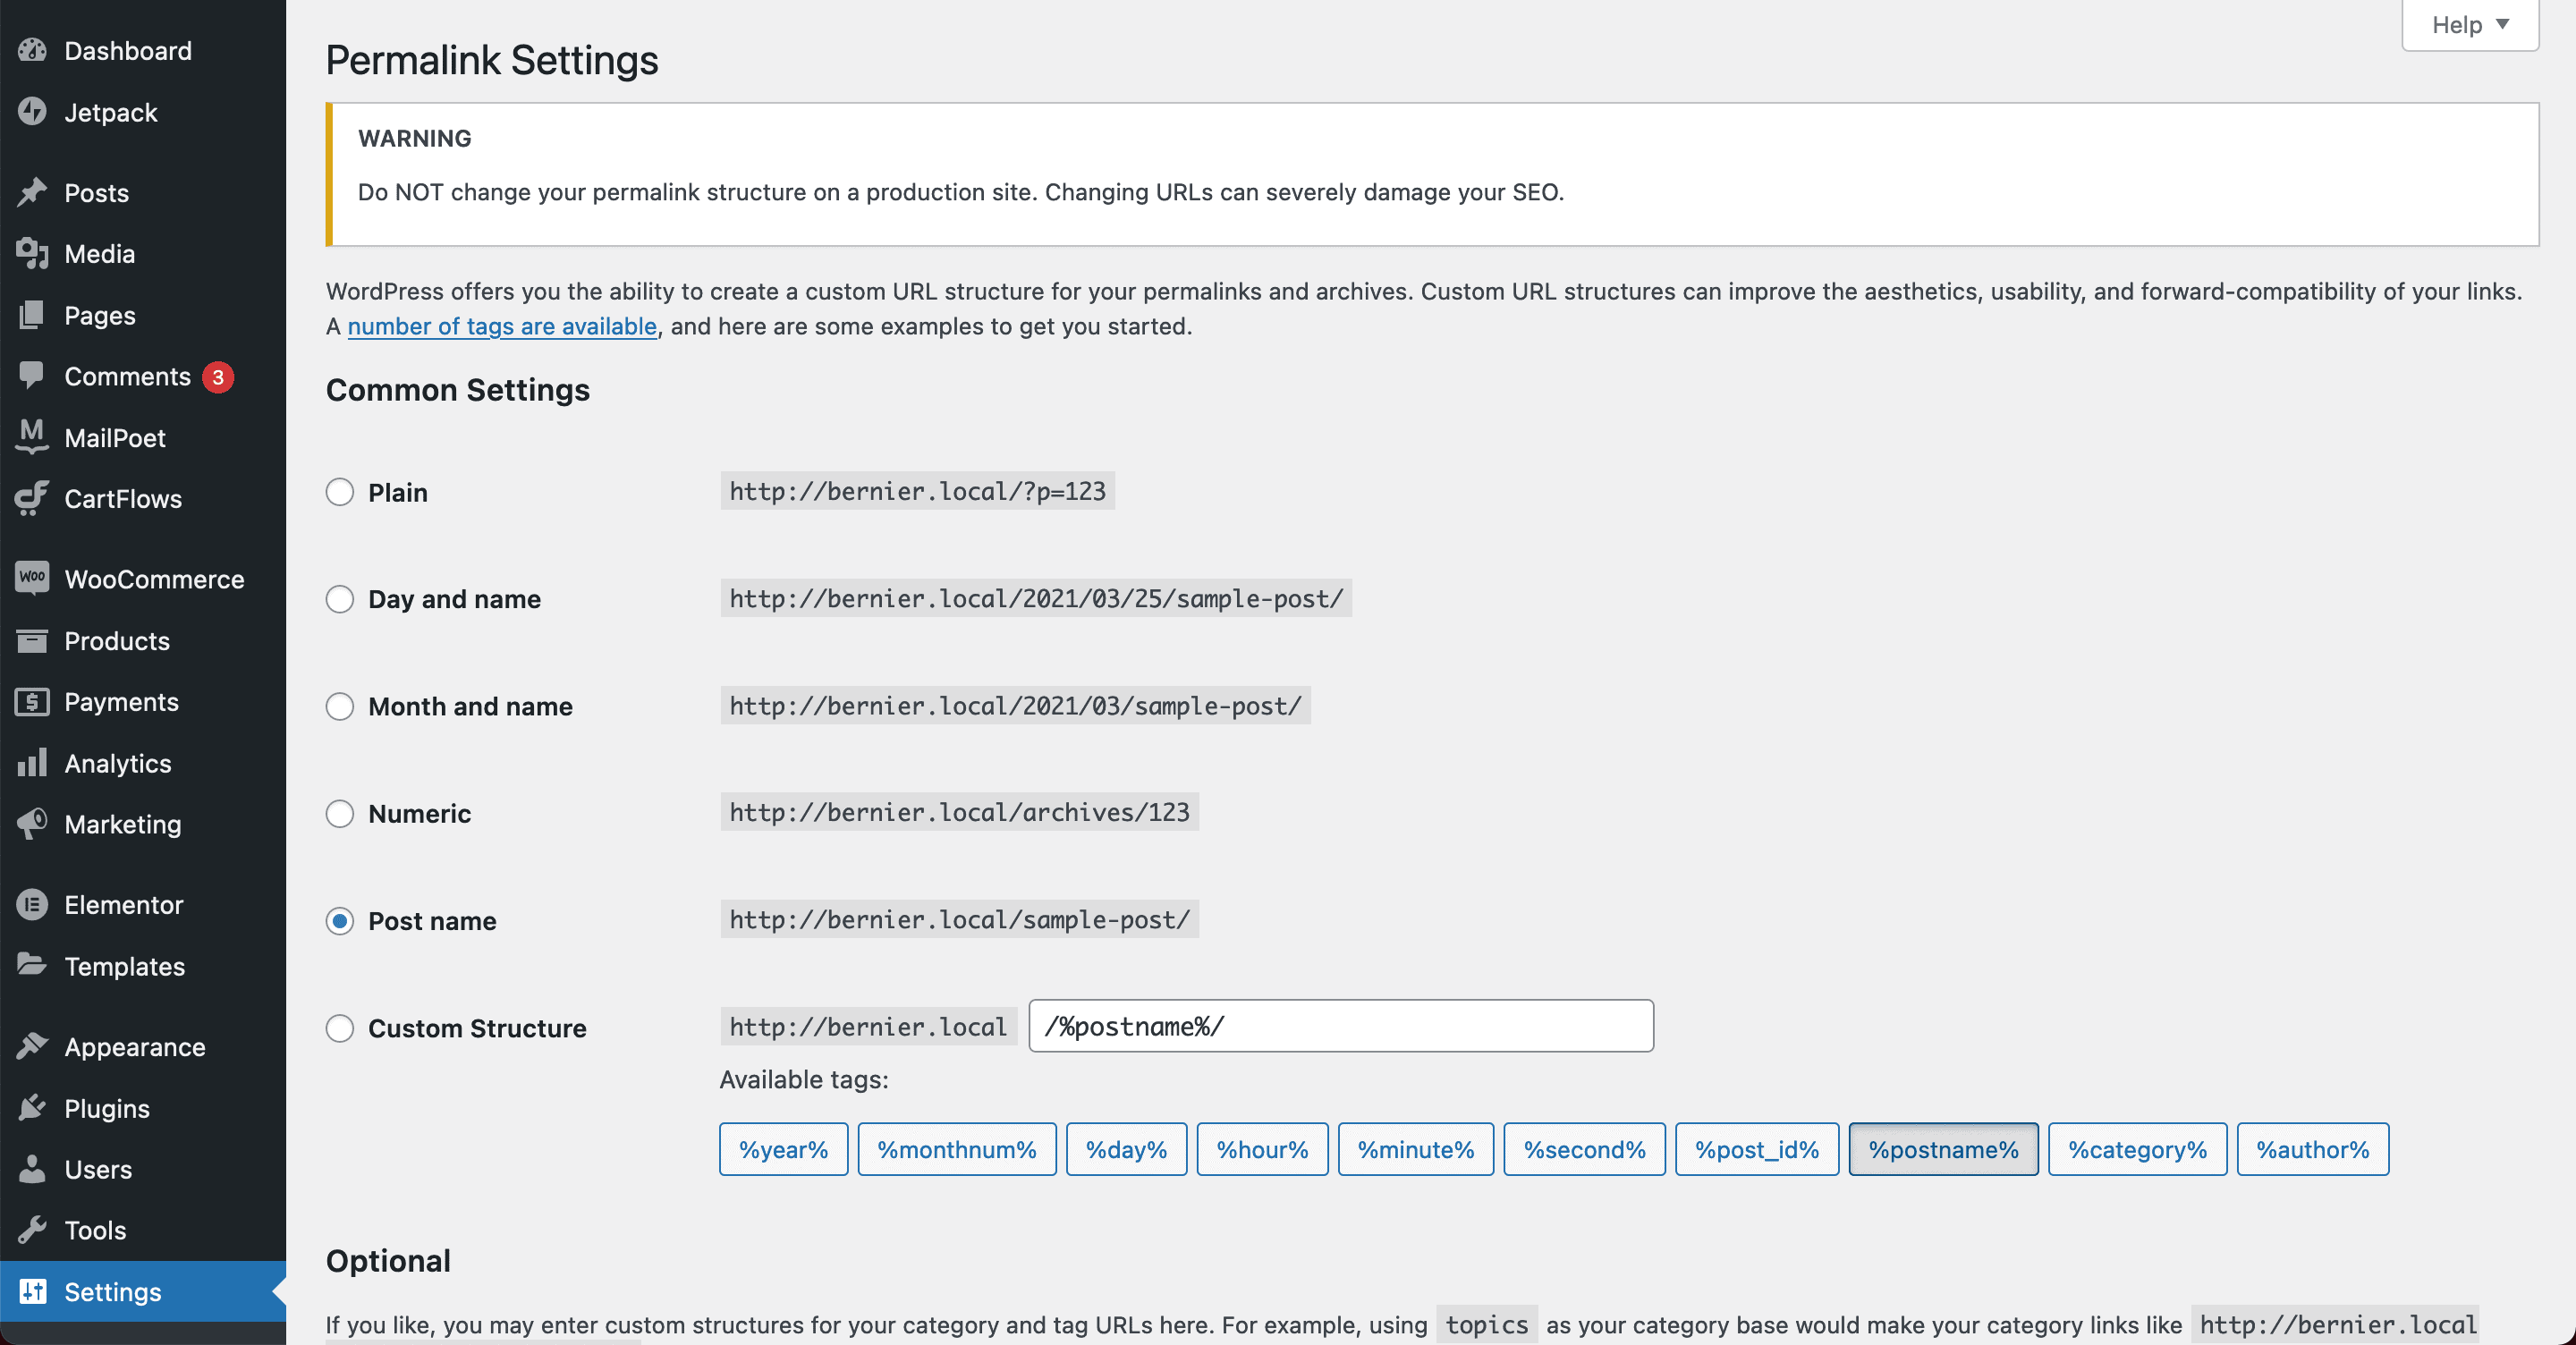
Setting your permalink structure is one of the first tasks you should tackle when starting a site. This is because getting your URL and slug structures right from the start is better for you and your SEO.
There are lots of ‘tags’ available to help you set a suitable structure, but %postname% is your slug for all intents and purposes. In previous versions of WordPress, you would have to make a change before you did anything else on your site.
Though, the development team realized that the Post name permalink structure is ideal. As such, it’s now the default setting for your permalinks.
When it comes to individual slugs though, there’s a different approach. As we noted, WordPress generates slugs for every post page, taxonomy, and author you create. This isn’t going to be optimal in most cases, so we have work to do. Let’s start with your posts and pages.
Editing Slugs for Posts and Pages
There are a few places to edit WordPress slugs on your posts and pages. The most direct method is to head to create a new post or page, and go to edit it:
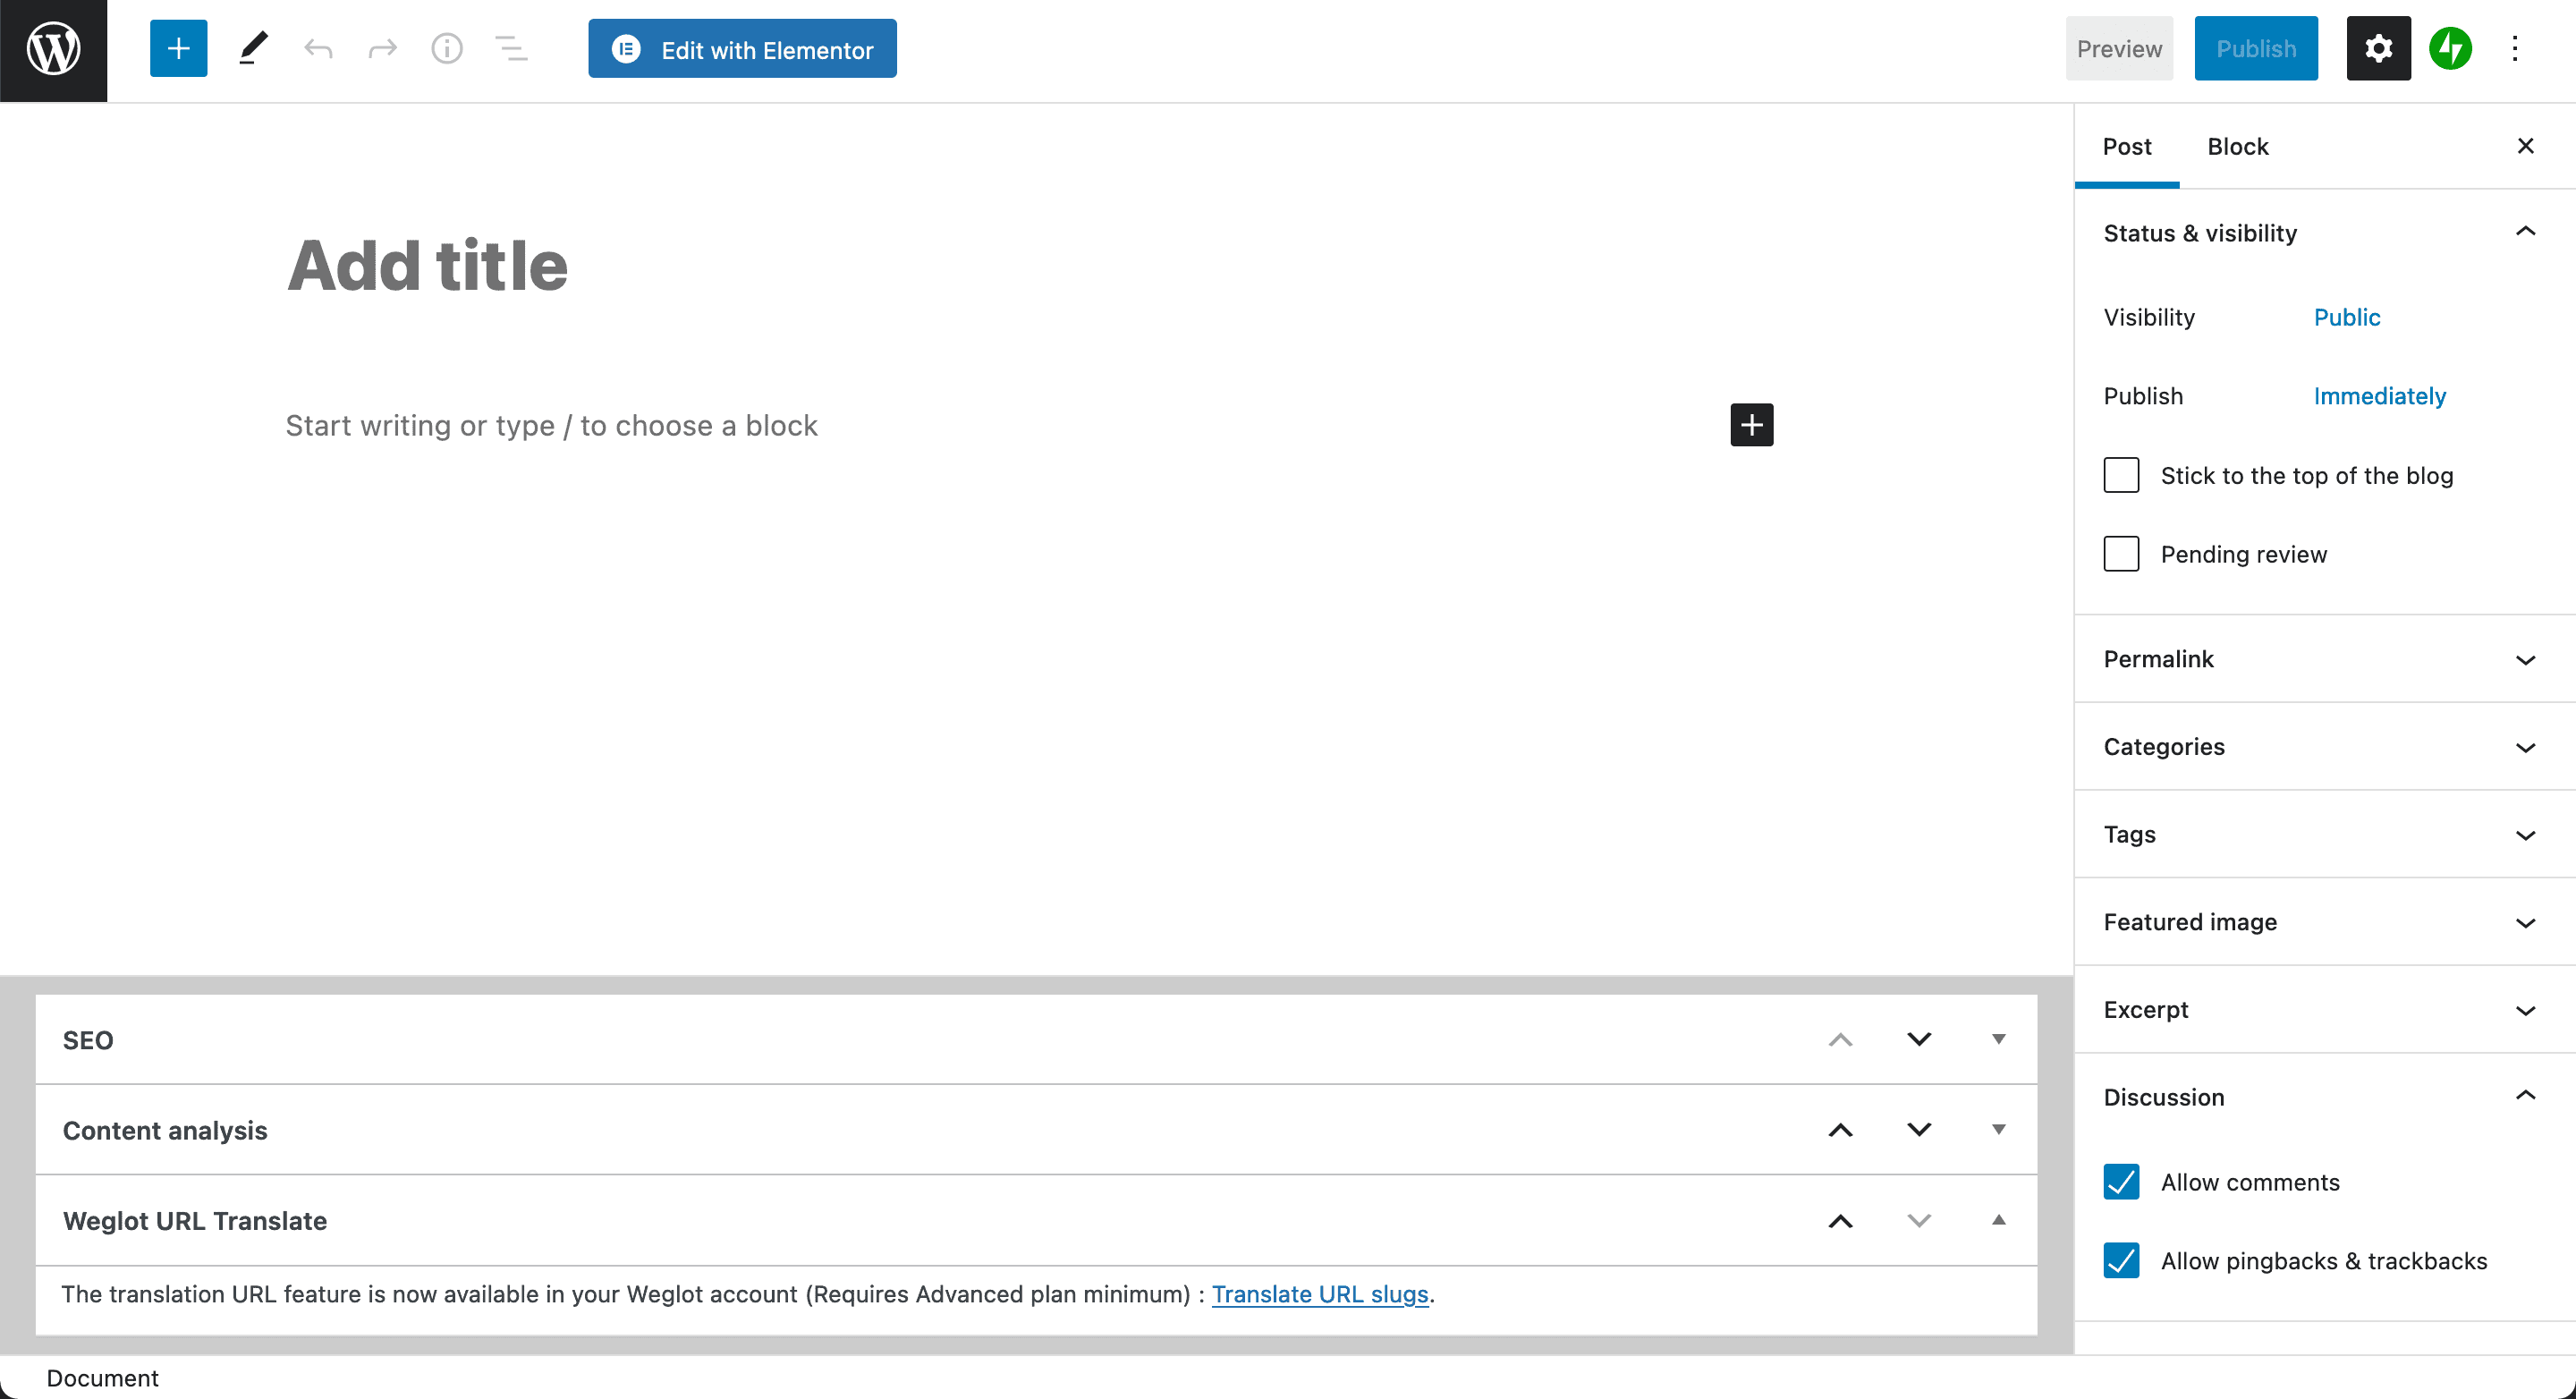
If you look to the right-hand side of the screen, you’ll see the Permalink meta box. Expanding this will show your domain name complete with a slug full of random characters:

If you were expecting to see a readable slug here, you’ll be disappointed. To get WordPress to generate one, add some content, and save the post as a draft.
Once you’ve done this, the meta box will change to show a URL Slug field, and a preview of your full permalink:
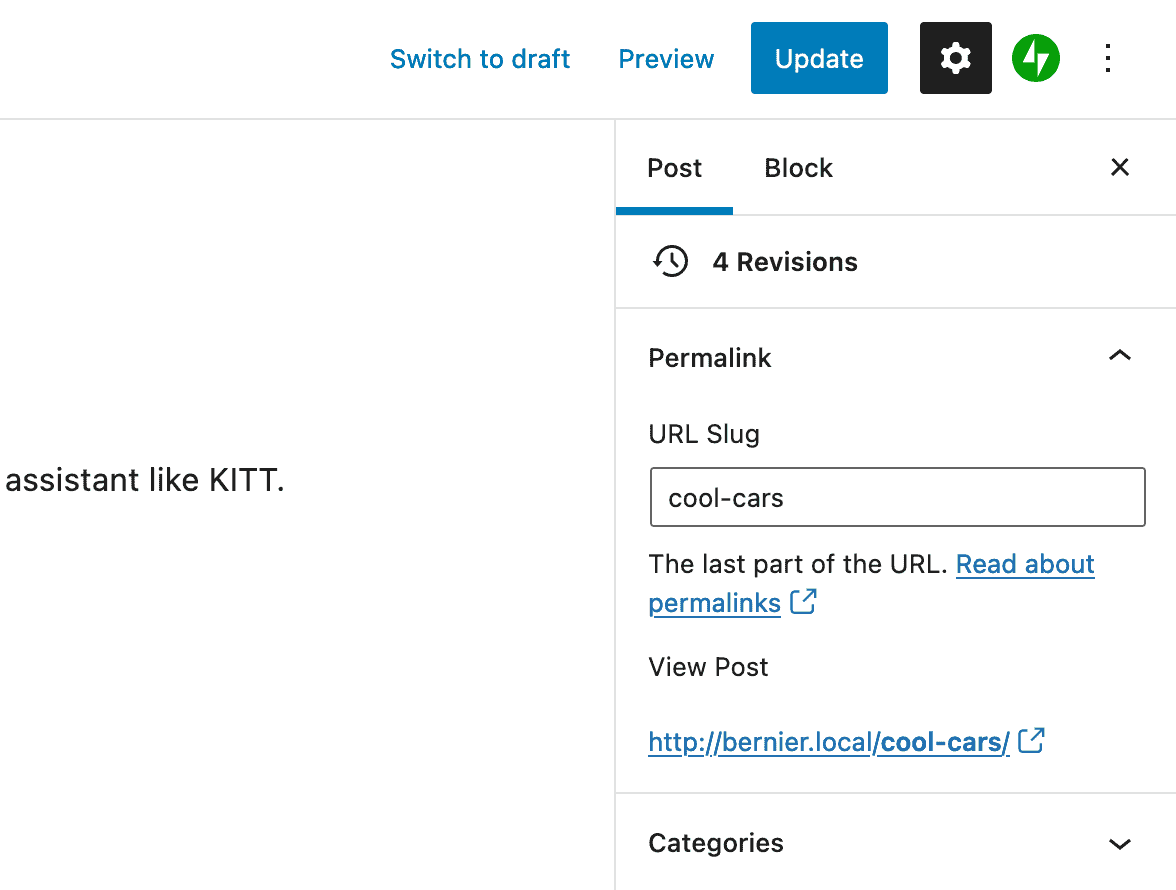
At this point, you can edit the slug as you wish, and save your changes to cement them.
You can also set slugs from the All Posts or All Pages screen in WordPress. To do this, hover over the page or post of your choosing, and select the Quick Edit option:
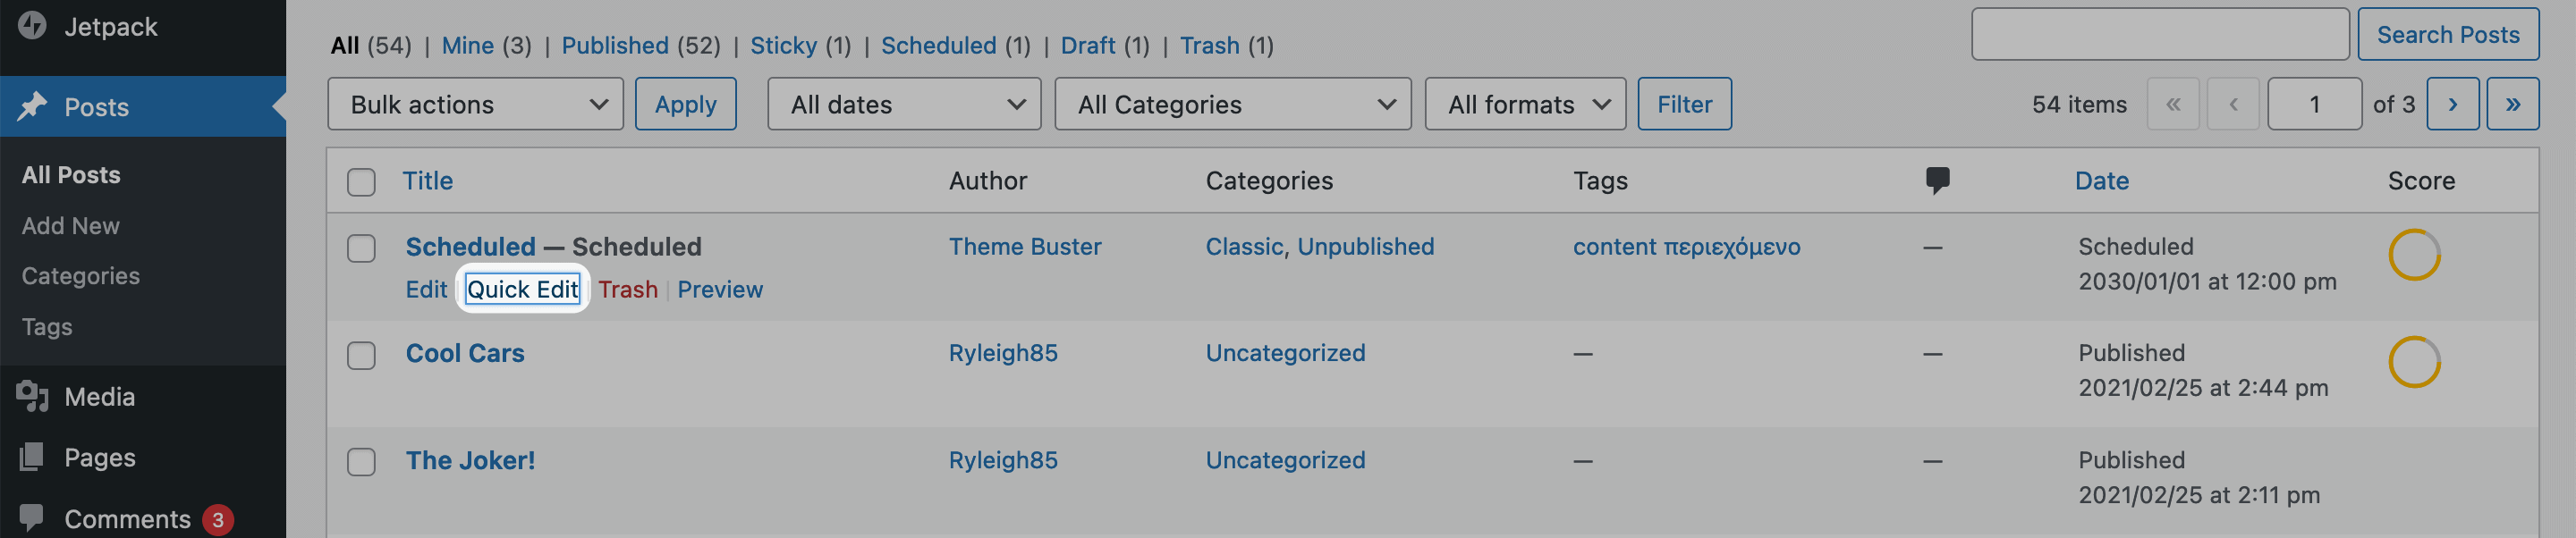
This will expand a meta box, where among other elements, you can set the WordPress slug for your post or page:
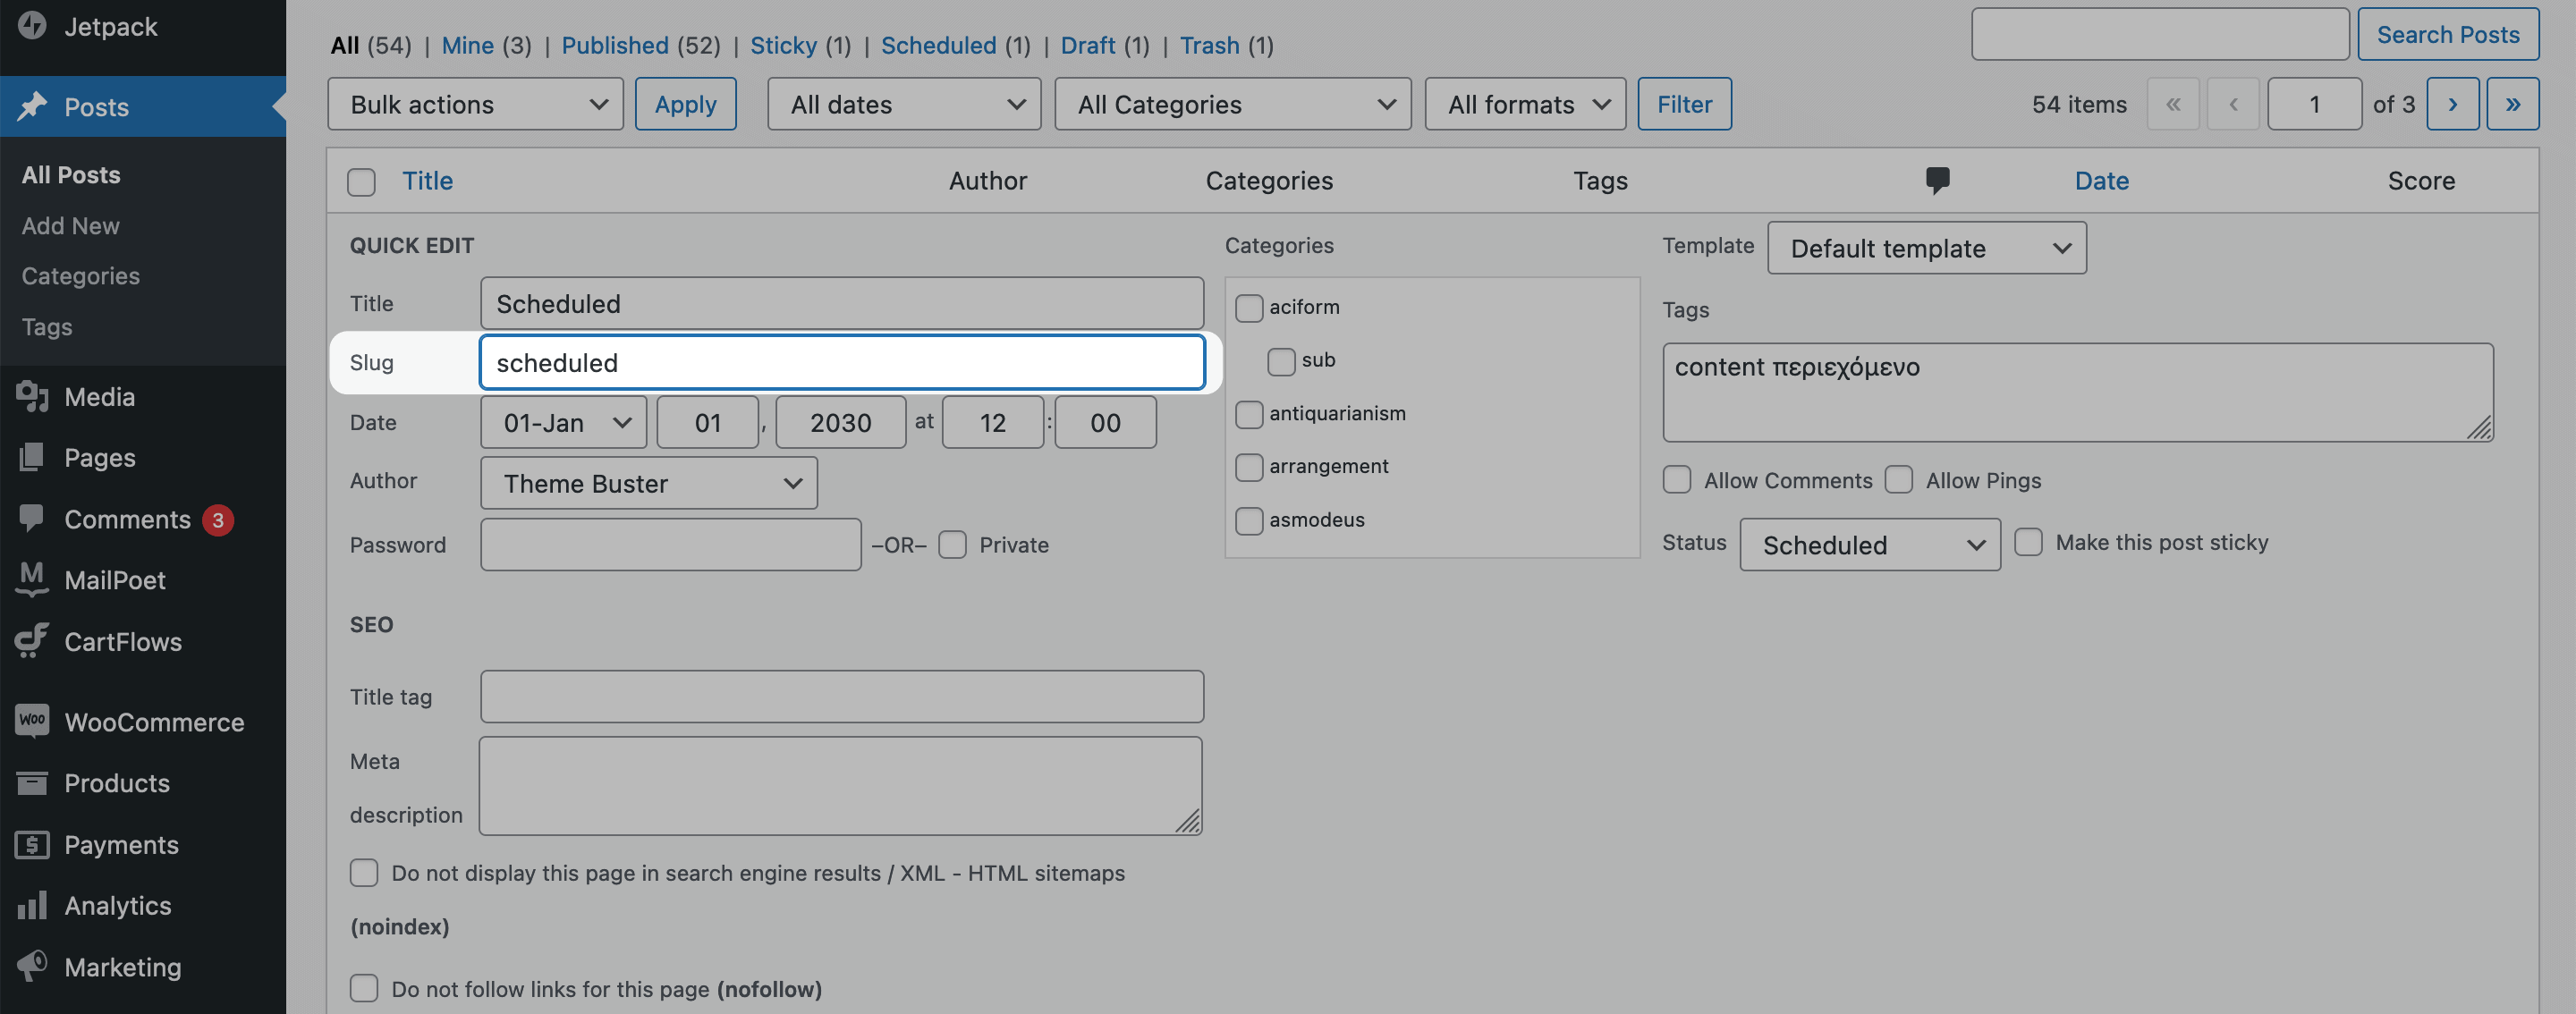
Once you click the Update button, your slug will be set for the post or page.
Editing Slugs for Taxonomies
Much like posts and pages, WordPress also generates slugs for your taxonomies (i.e. your categories and tags) too. The good news is that it’s a similar process to editing post and page slugs.
To start, head to the Posts > Categories page or Posts > Tags page within WordPress:
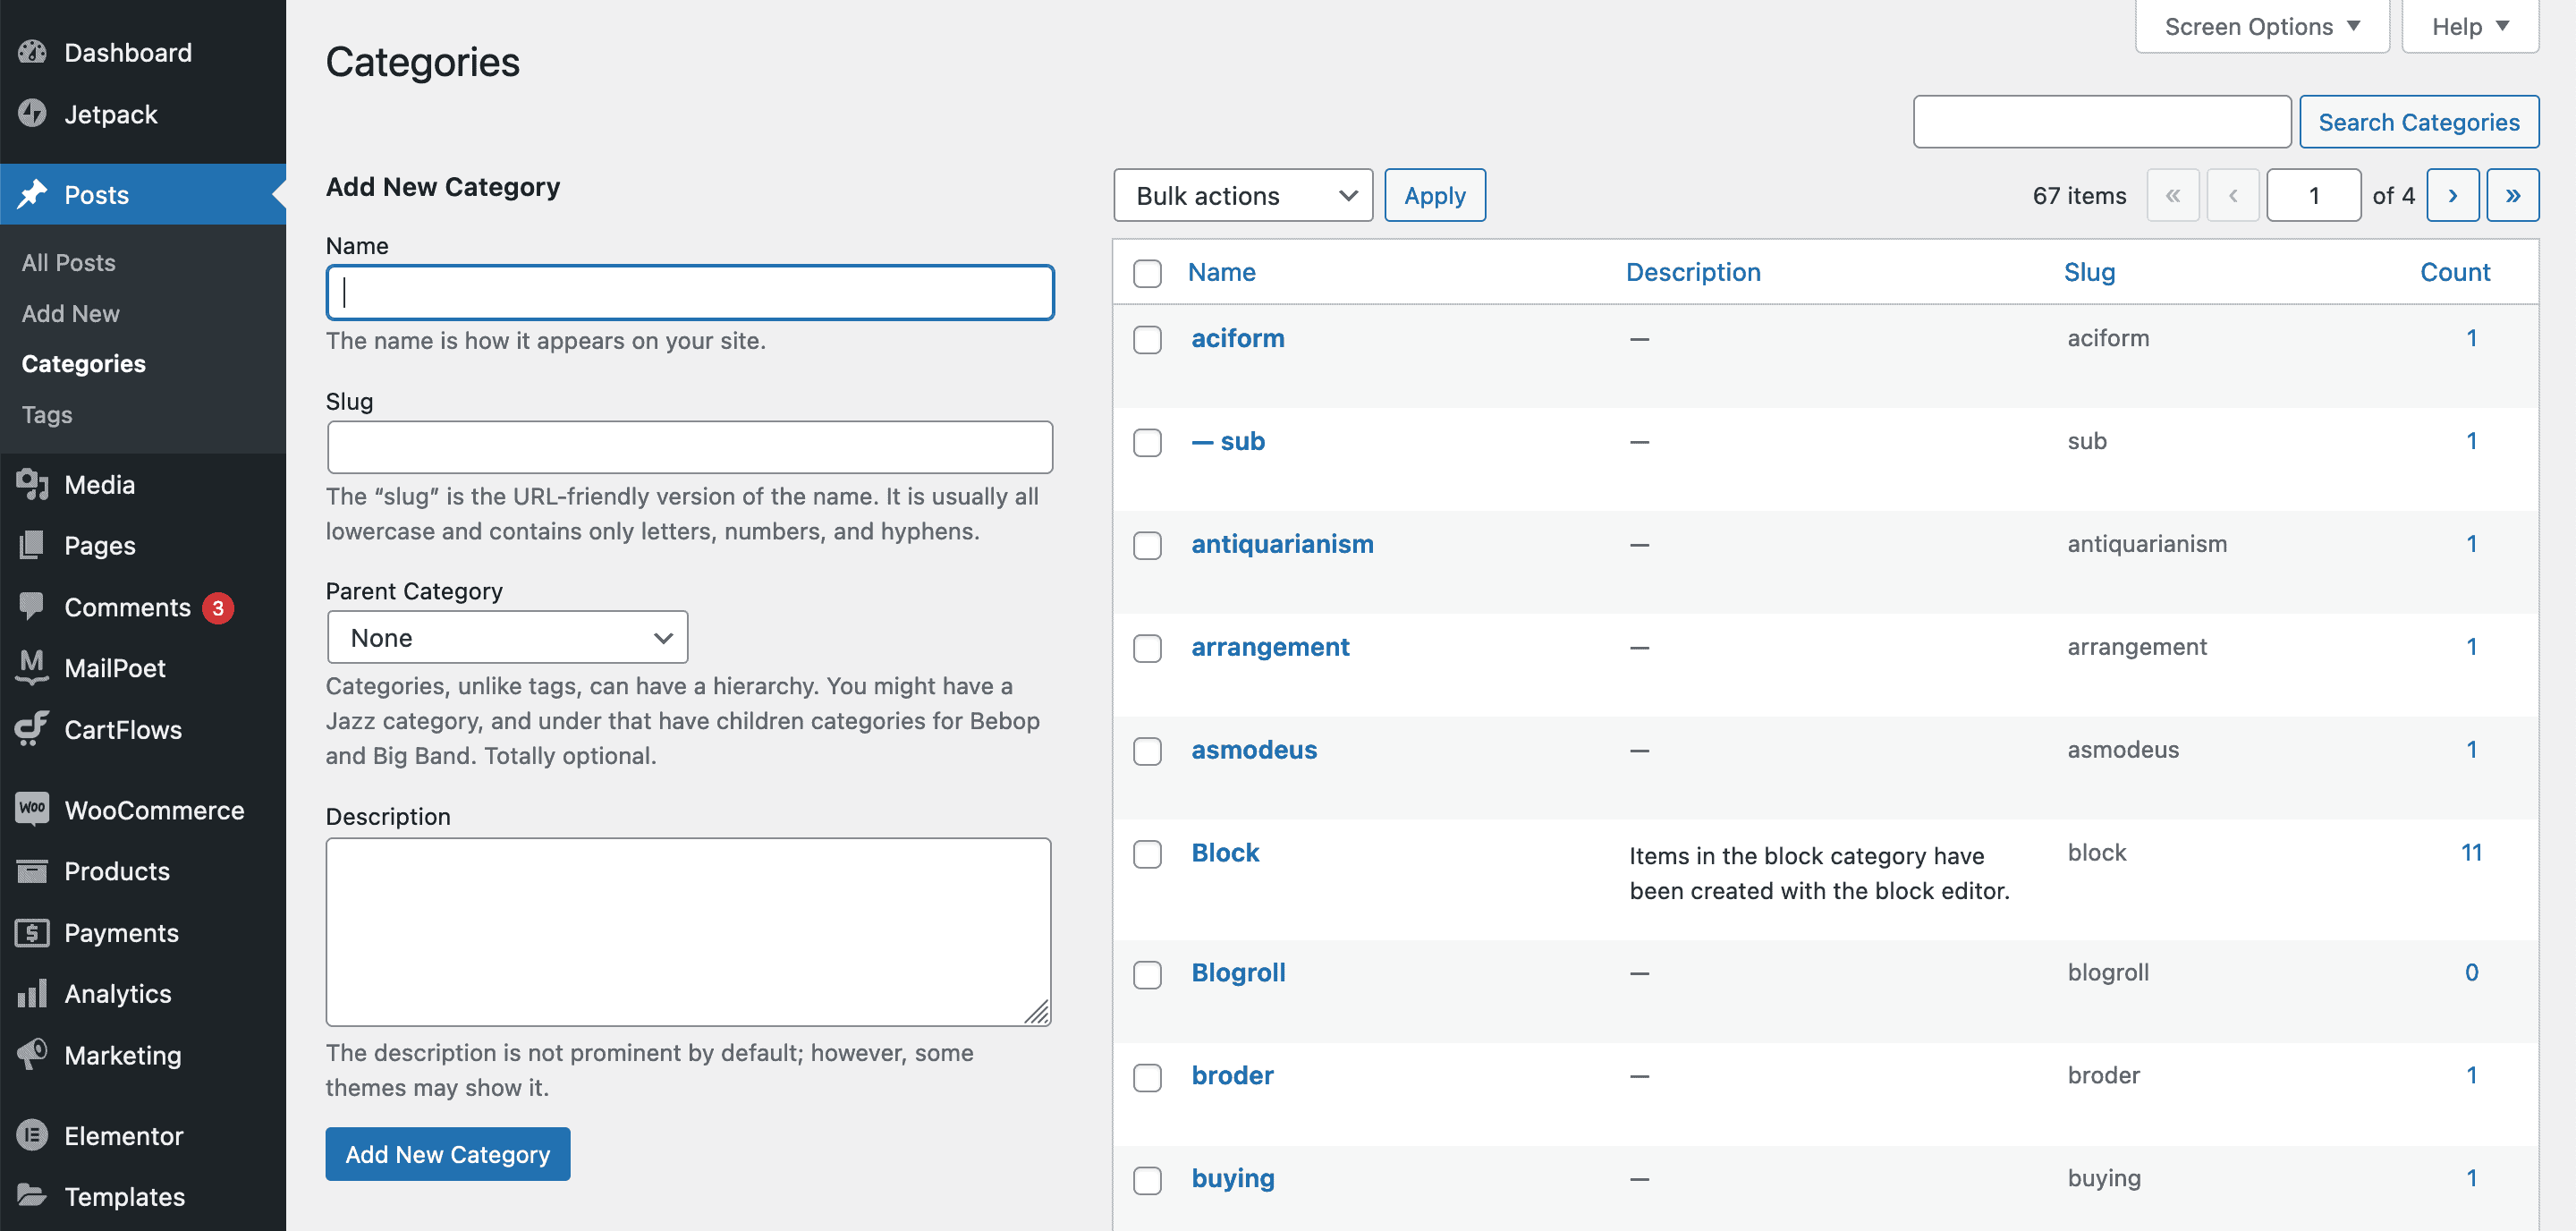
In the same way as posts and pages, you can hover over a taxonomy and click the Quick Edit button to open a few extra fields:

It’s here you’ll edit the slug and save your changes. You’ll also note that you can set a slug when you create a taxonomy too. It’s a good idea to check this every time you create a taxonomy.
For the most part, taxonomies are going to be optimized already. Still, it’s worth double-checking as WordPress can sometimes produce unwieldy slugs.
Editing Slugs for Author Pages
Unlike other slugs, WordPress doesn’t let you change author slugs by default. This makes some sense, as the slug will often be the username of the author. Still, you may want to change the slug of an author – the good news is there’s a plugin to help you.

The Edit Author Slug plugin does what it says on the tin. It lets you change the slug of an author to whatever you choose. You install and activate it in the usual way, at which point you’ll see a new Settings > Edit Author Slug panel within the WordPress dashboard:
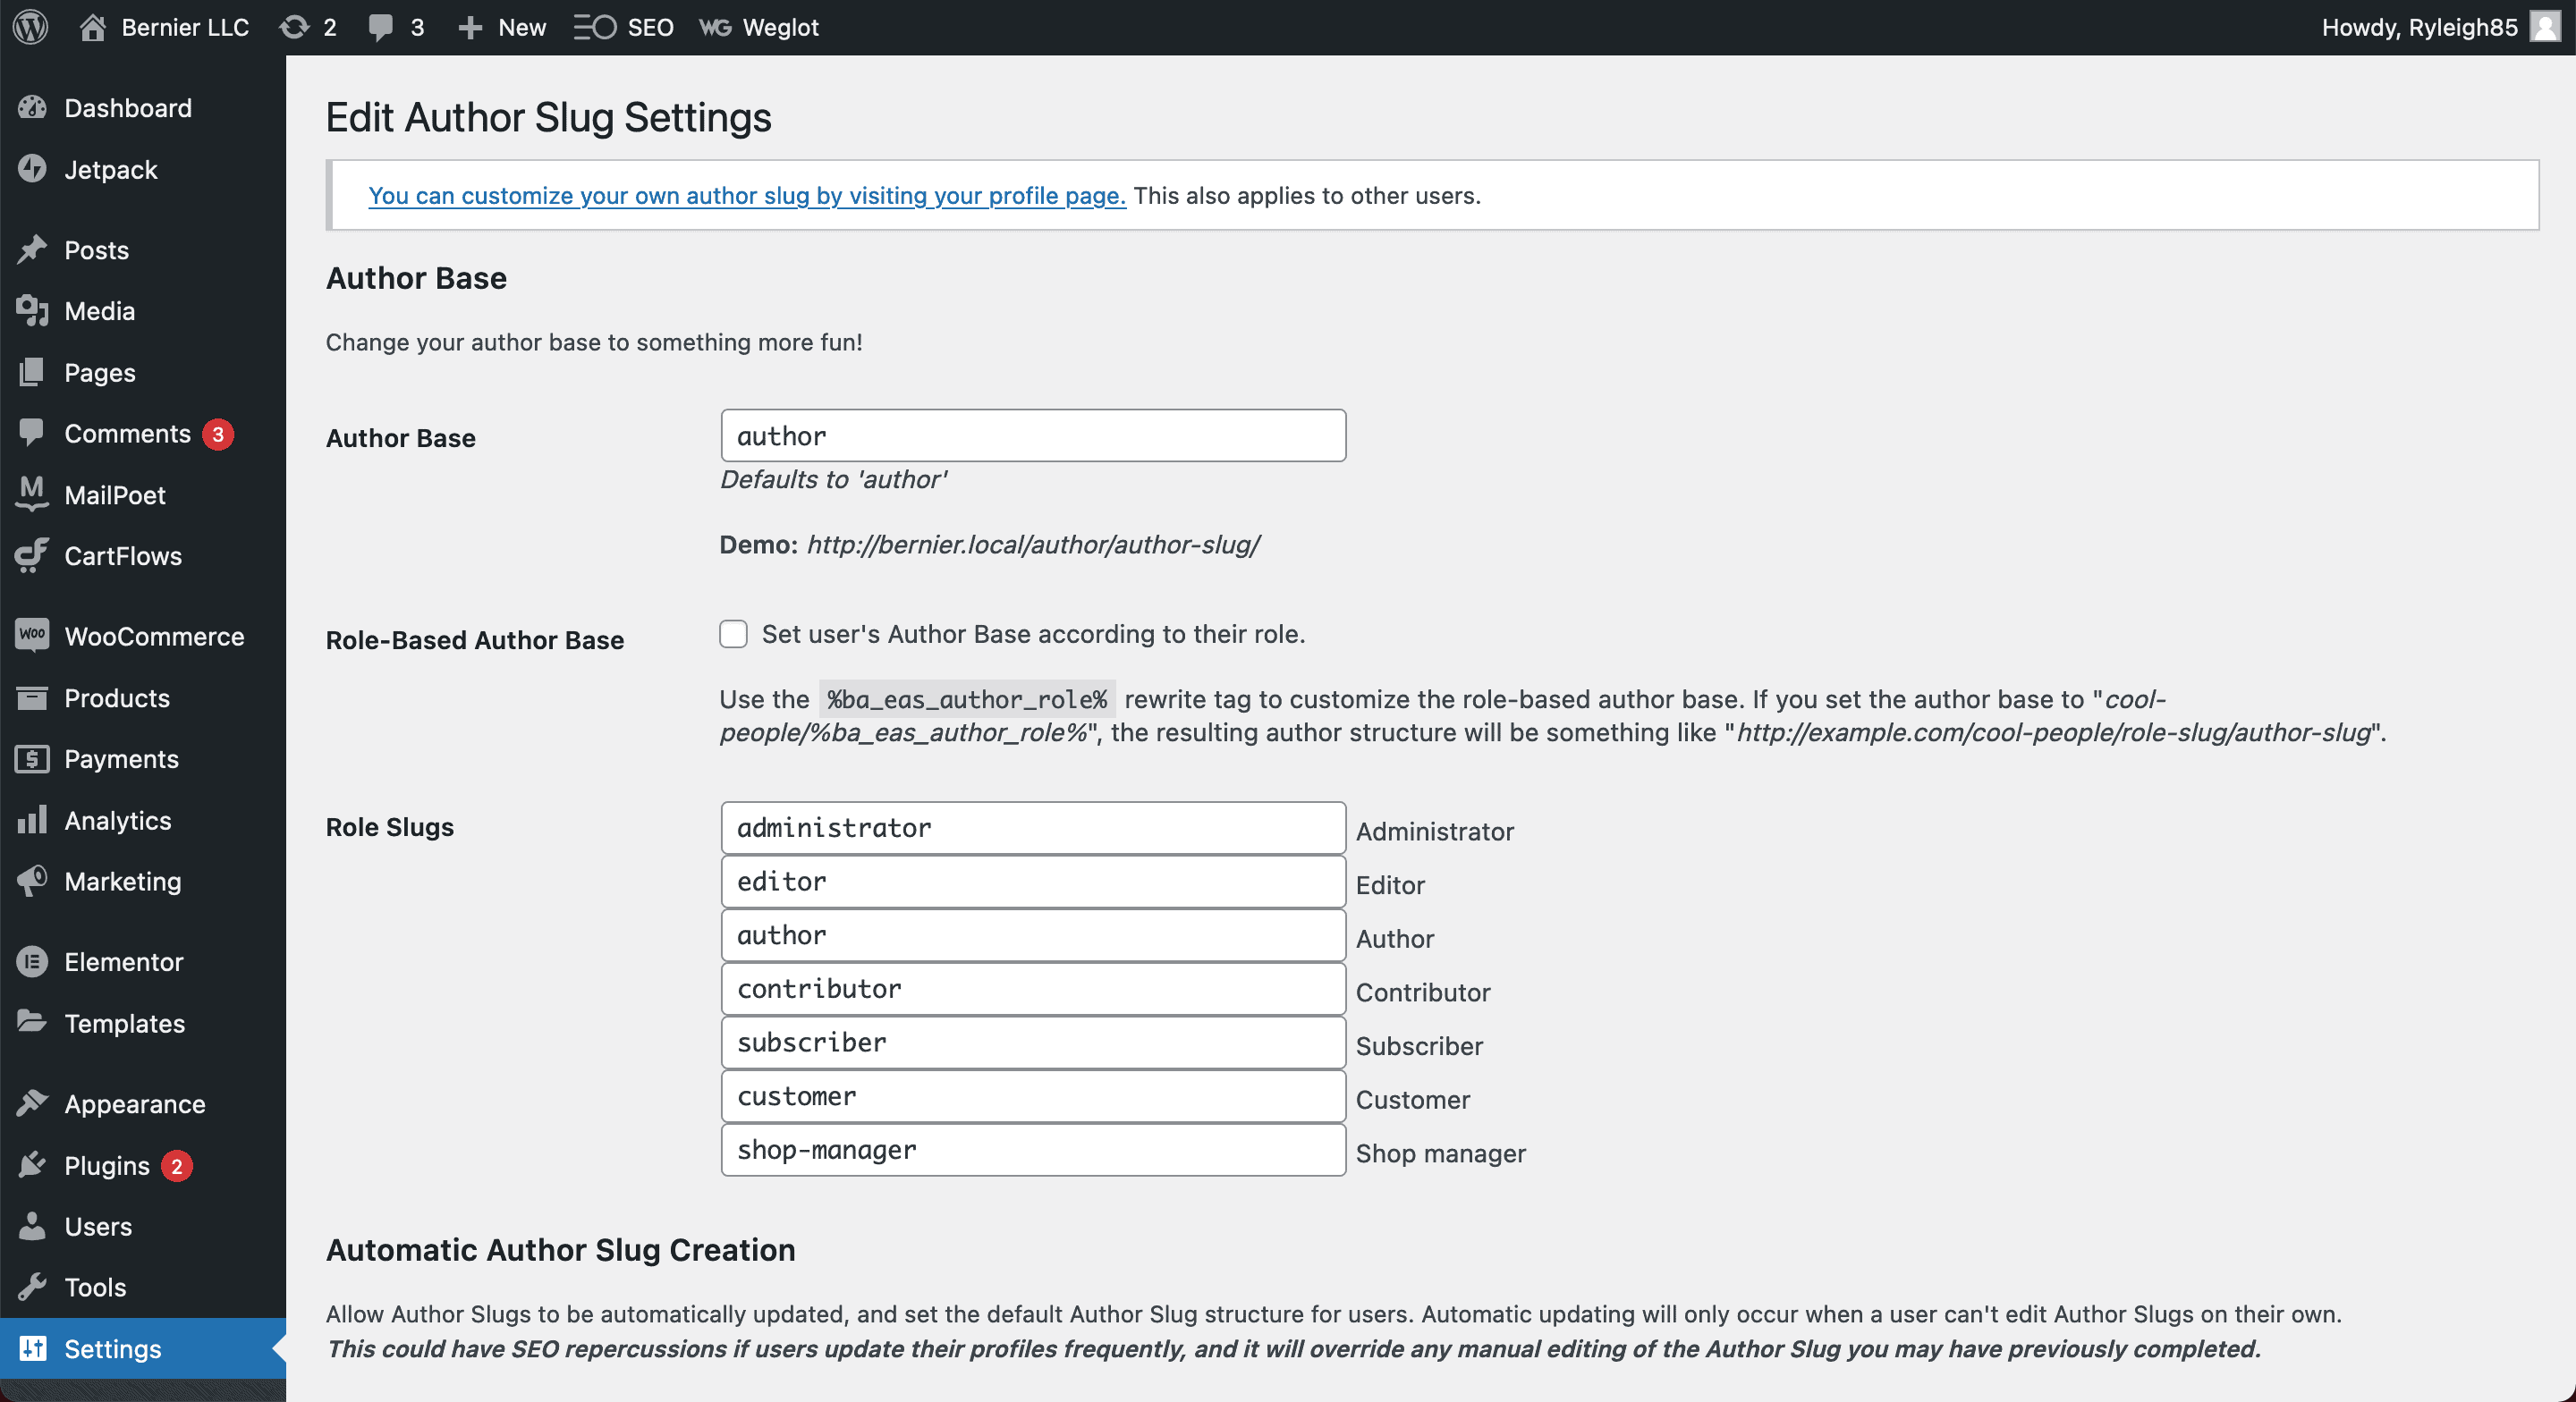
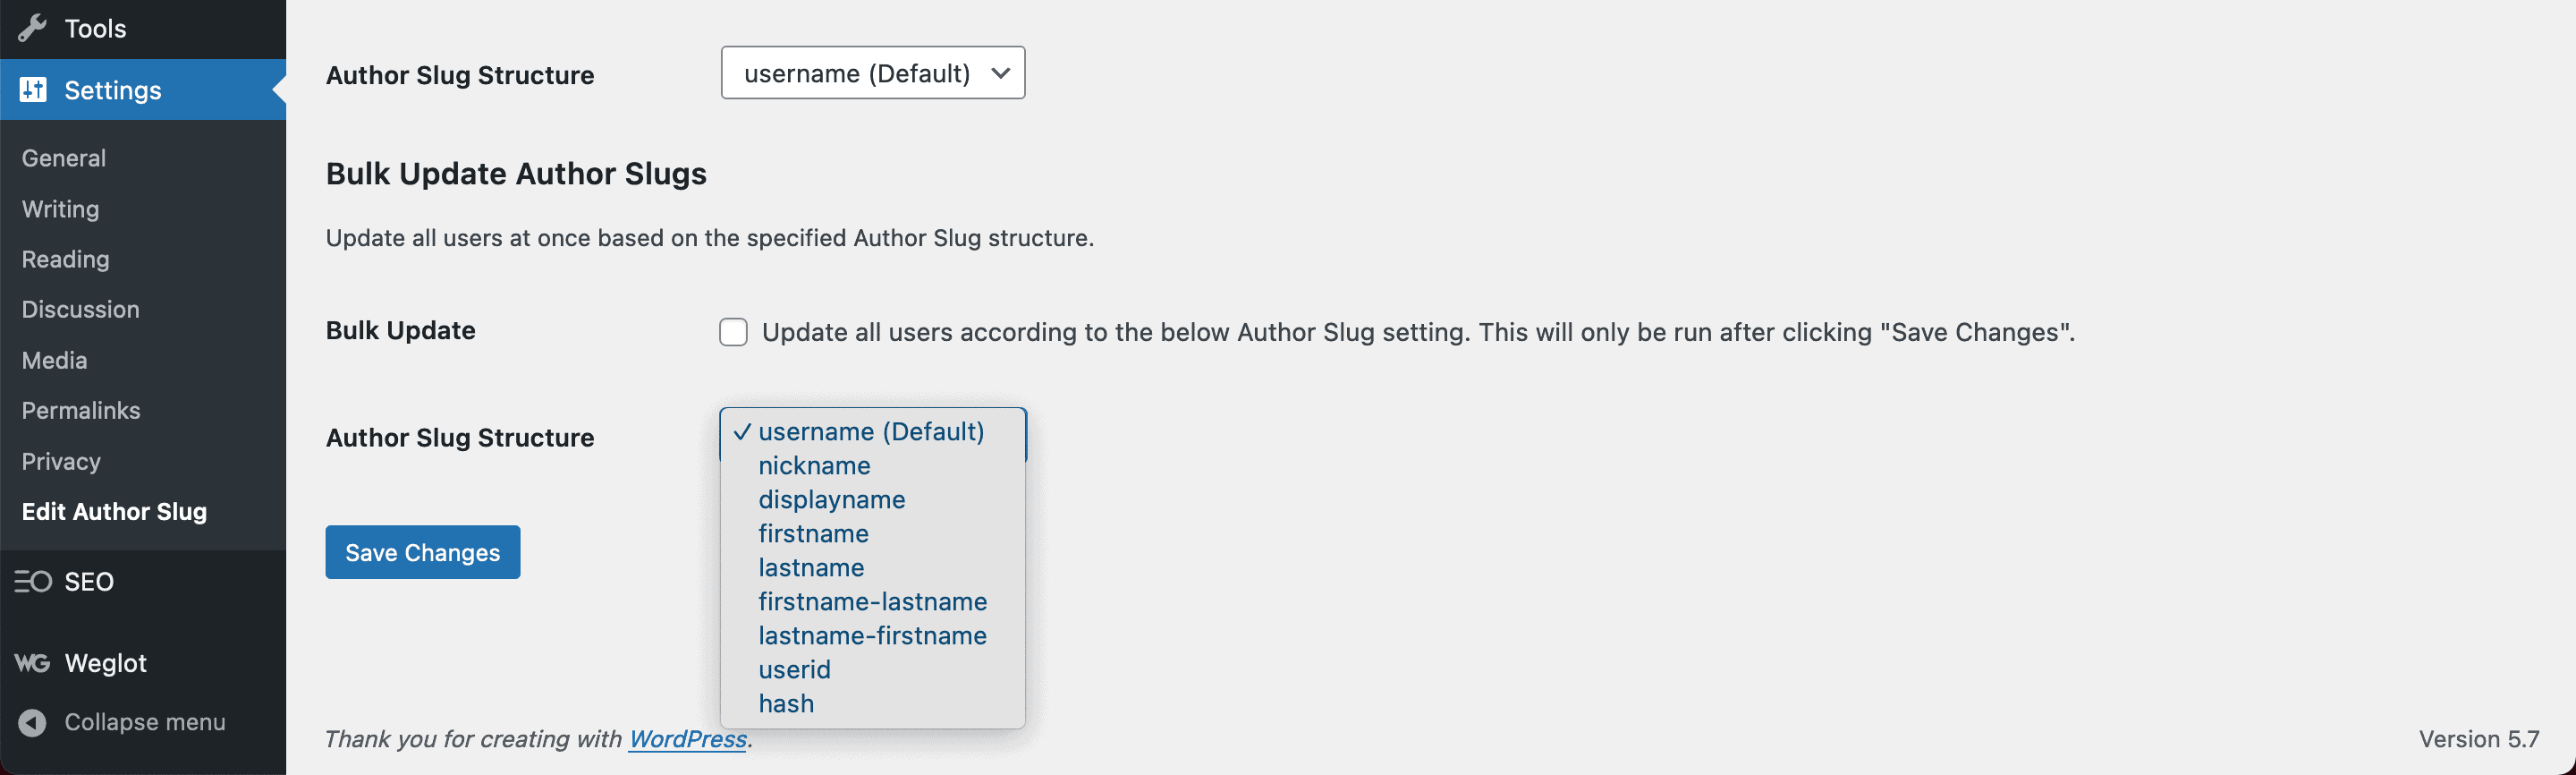
If you’d like to change author slugs in bulk, there are some options for doing so at the bottom of the screen:
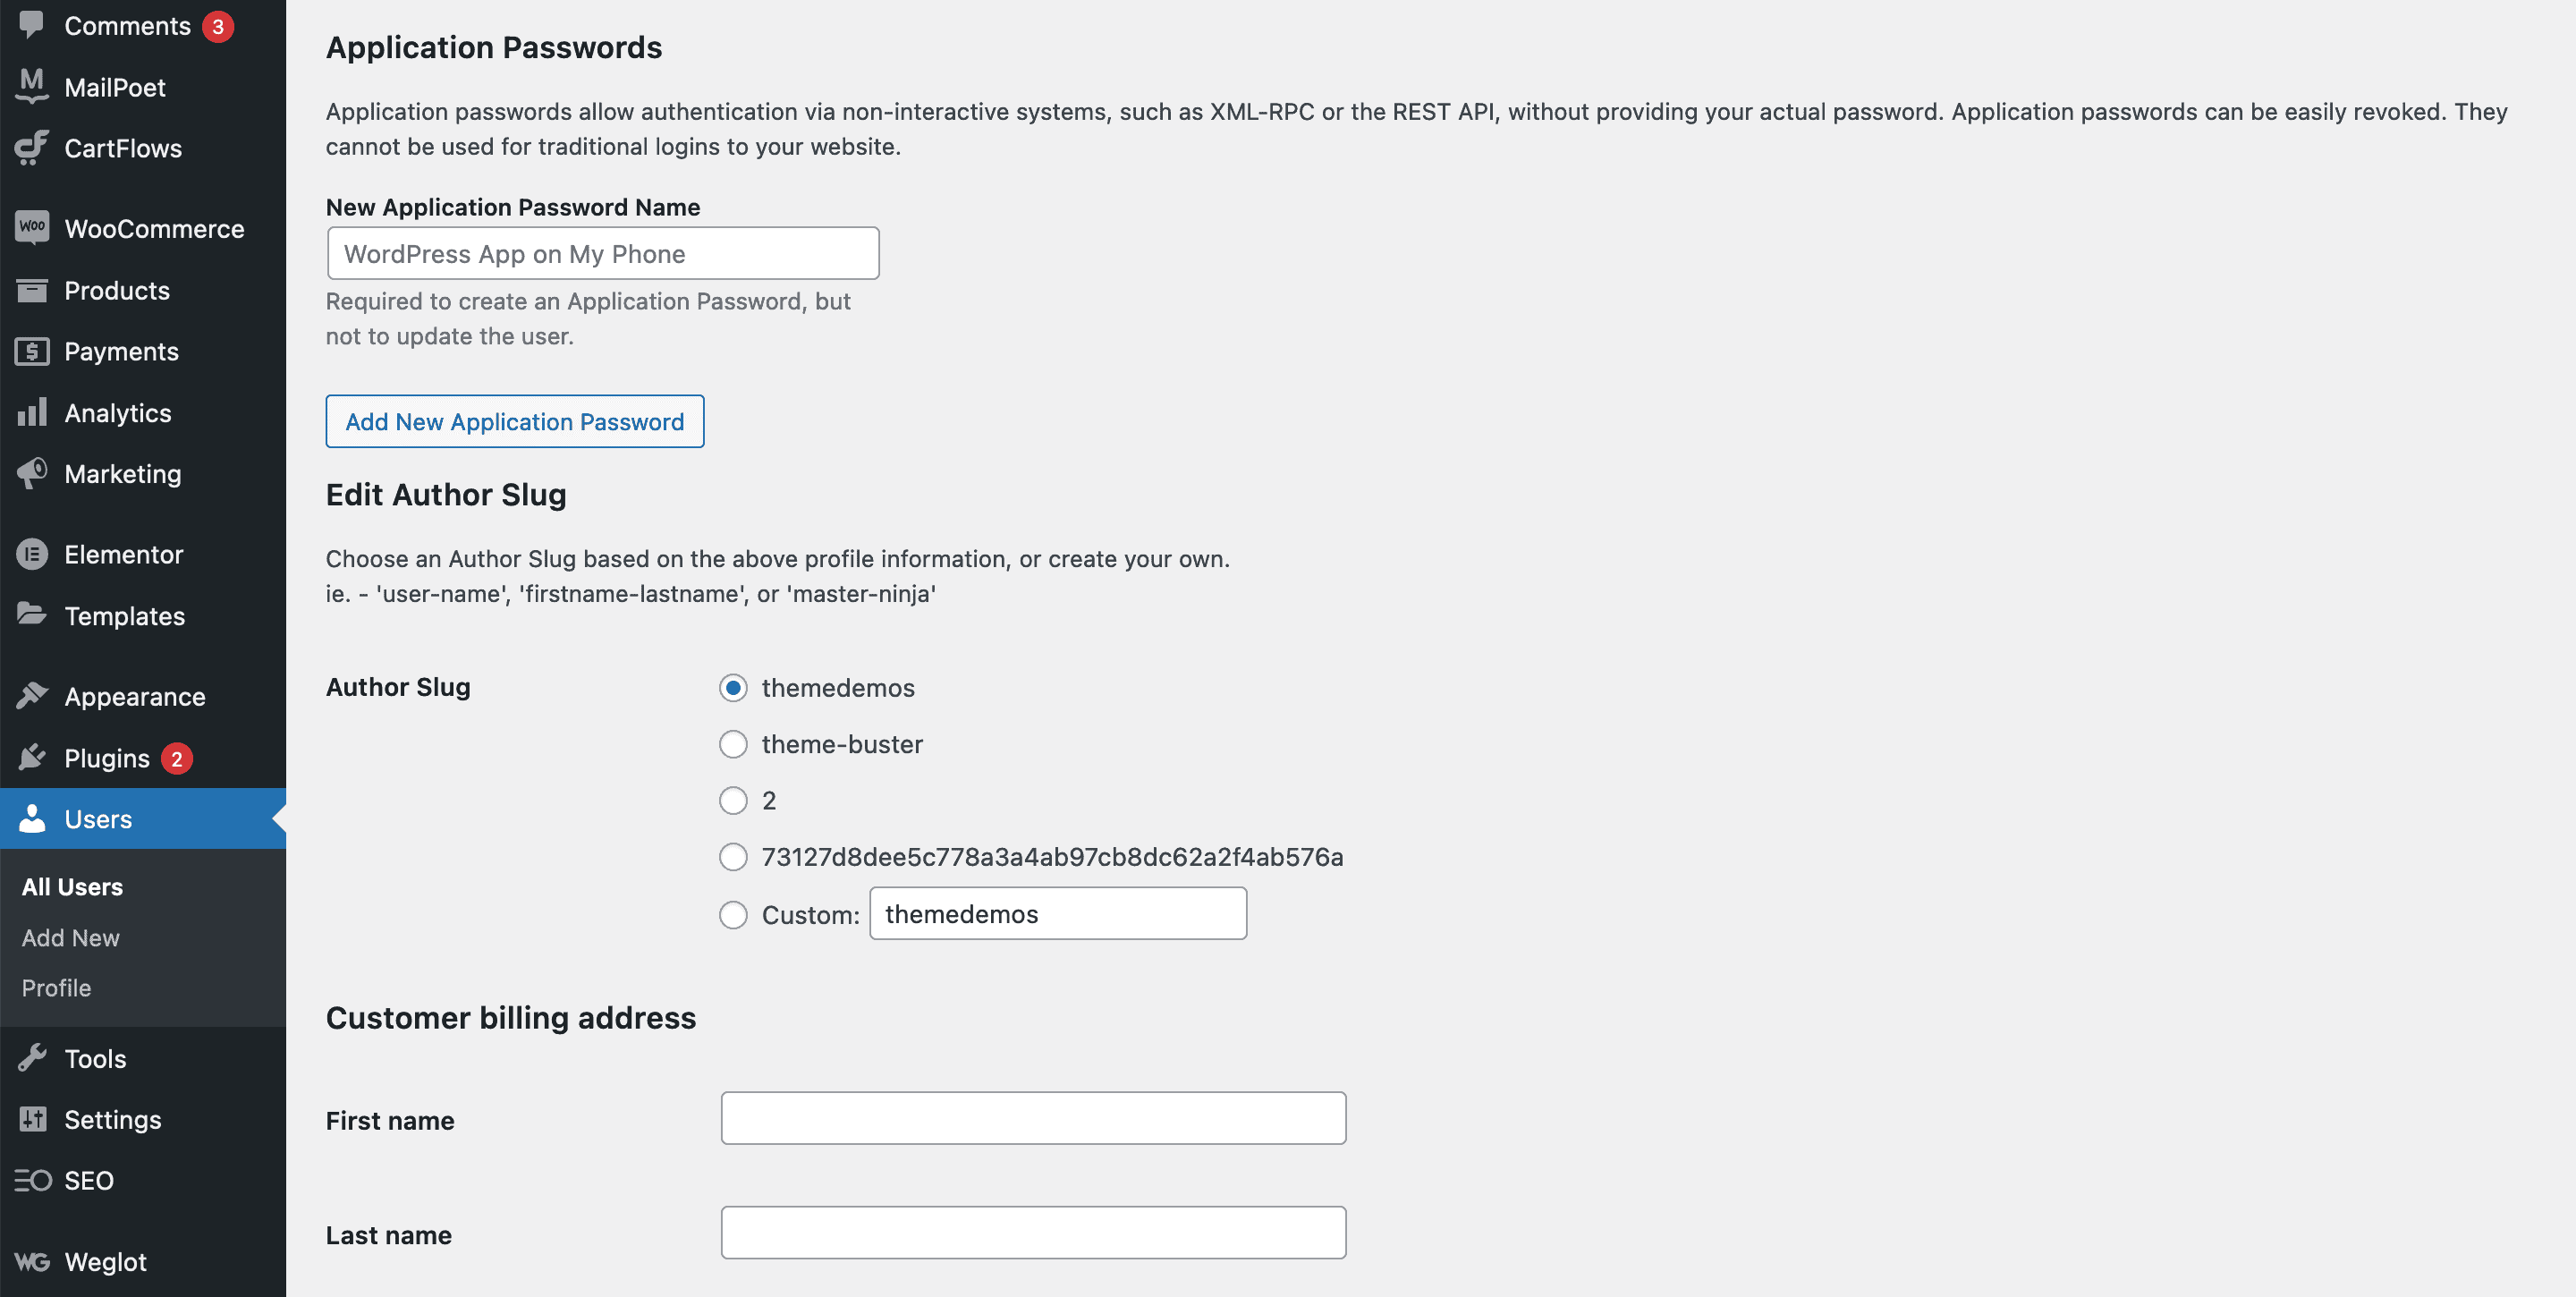
You can also edit single author slugs too, but heading into the Users > All Users page and selecting the profile in question. From here, scroll to the Edit Author Slug section, and make the changes you need to before clicking the Update User button:
We like the flexibility of this plugin, and it’s well worth an install if you have a specific format for your author slugs.
Tips for Changing Your WordPress Slug Once It’s Set
Before we wrap this article up, we want to discuss changing your WordPress slugs once they’ve been set. Under normal circumstances, we don’t recommend doing this. Slugs are (of course) part of the permalink, so by changing the slug, you’re altering the URL of your page, post, taxonomy, or author archive.
This is going to have an SEO impact, such as 404 errors and worse. The simple solution is to refrain from making changes to slugs once they’ve been set. In reality, this might not be possible sometimes.
We recommend using one of two approaches:
- Redirect 404 errors to your home page, although this isn’t the most optimal approach and could introduce further issues.
- Use 301 redirects to send users from one URL to another. This is the best approach, and if you need to make changes to slugs, 301 redirects are the most effective way to keep your links intact.
Both are viable solutions given the right circumstances, and are easy to implement to boot.
In Summary
The primary benefit of WordPress is the amount of control you have over almost all aspects of your site. Even your WordPress slugs aren’t safe from your hovering cursor. Working on them to increase their value is great idea – and it’s something WordPress can help you with.
You can access the specific slug on each post or page. If you keep it short and based around your focus keyword, this will be most of the job done. From there, enhance the focus of your WordPress slug and give it the chance to boost your SEO. Just remember: It’s a good idea not to change it once set, unless you have a watertight reason for doing so.
Do you optimize your WordPress slugs, and if so, how do you do it? Let us know in the comments section below!