WP Super Cache can help optimize your WordPress site to load faster and use fewer server resources. This provides a better experience for visitors to your site and can help your search engine optimization (SEO) efforts. Follow along and we’ll explain how WP Super Cache works and how you can use it to improve your site.
- How Does WP Super Cache Work?
- How to Use WP Super Cache

If you’re having trouble with your WordPress host, then check out InMotion’s WordPress Hosting solutions. We provide secure, optimized servers that are priced to meet your budget needs!
![]() Free WordPress Website Transfers
Free WordPress Website Transfers ![]() Free SSLs
Free SSLs ![]() Unlimited Bandwidth
Unlimited Bandwidth
View WordPress Hosting Plans
How Does WP Super Cache Work?
WP Super Cache will enable your website to load faster and use fewer server resources. This is accomplished by turning your pages into HTML files also known as static HTML files. Typically, when someone visits your WordPress site, each page is generated on-the-spot using PHP. This uses resources on your server and takes time to “create” the page.
For example, if 500 people visit one of your pages, your server would have to generate this same page 500 times using PHP. By caching commonly visited pages the first time they are requested, your site will deliver the pages faster. This also uses fewer server resources, since your site only has to generate each page one time. For more information see our article on the Common Causes and Solutions to Excessive Resource Usage.
How to Use WP Super Cache
Now that you know how WP Super Cache can improve your website, we’ll show you how to use it. Follow along and we’ll walk you through the available settings.
Install and Enable WP Super Cache
- Install the WP Super Cache plugin by Automattic on your WordPress website.
- Click Settings then WP Super Cache in the Dashboard menu.
- You should be on the Easy tab by default. Click the Caching on option.
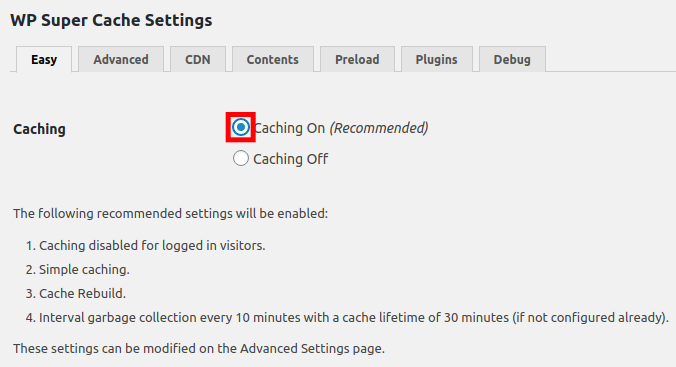
- Click the Update Status button to start caching pages. This will enable WP Super Cache with the default settings.
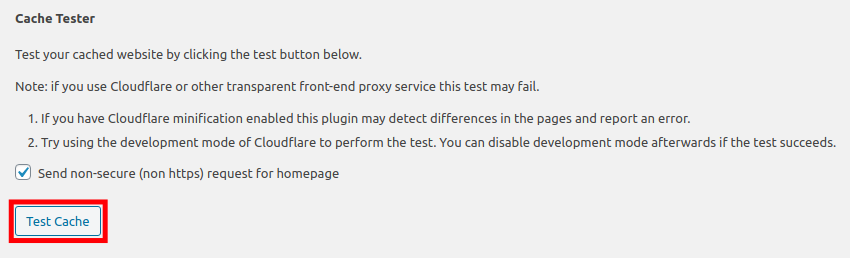
- You can click the Test Cache button to confirm that caching is enabled and working for your site.
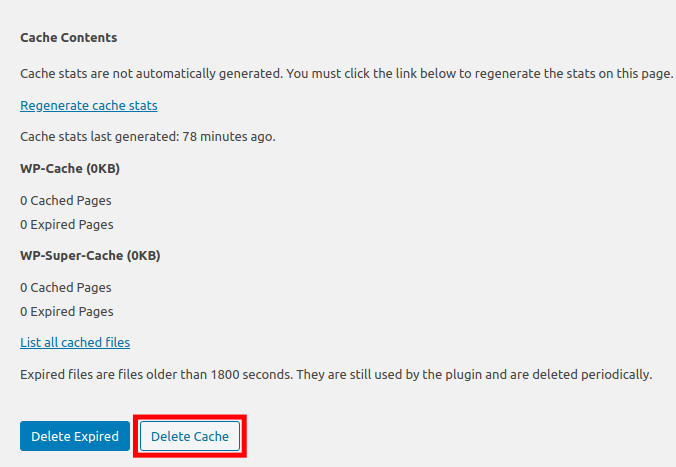
How to Delete Cache
There may be times when you want to delete all of your cached files, such as when you are troubleshooting an issue and want to ensure you are viewing the latest version of the page. Below are the steps to delete your cache.
- In your WordPress Dashboard click Settings then WP Super Cache.
- Open the Contents tab.
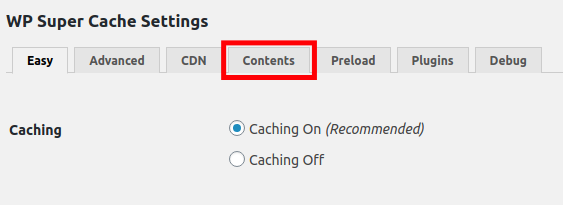
- Click the Delete Cache button to remove any existing cached pages/posts. The cache will be deleted immediately.
Advanced Caching Settings
Now that you know how to enable WP Super Cache with the default settings, we’ll go over some of the popular advanced settings that are available.
- Click Settings then WP Super Cache in the Dashboard menu.
- Now select the Advanced tab. Here you will have access to the following options.
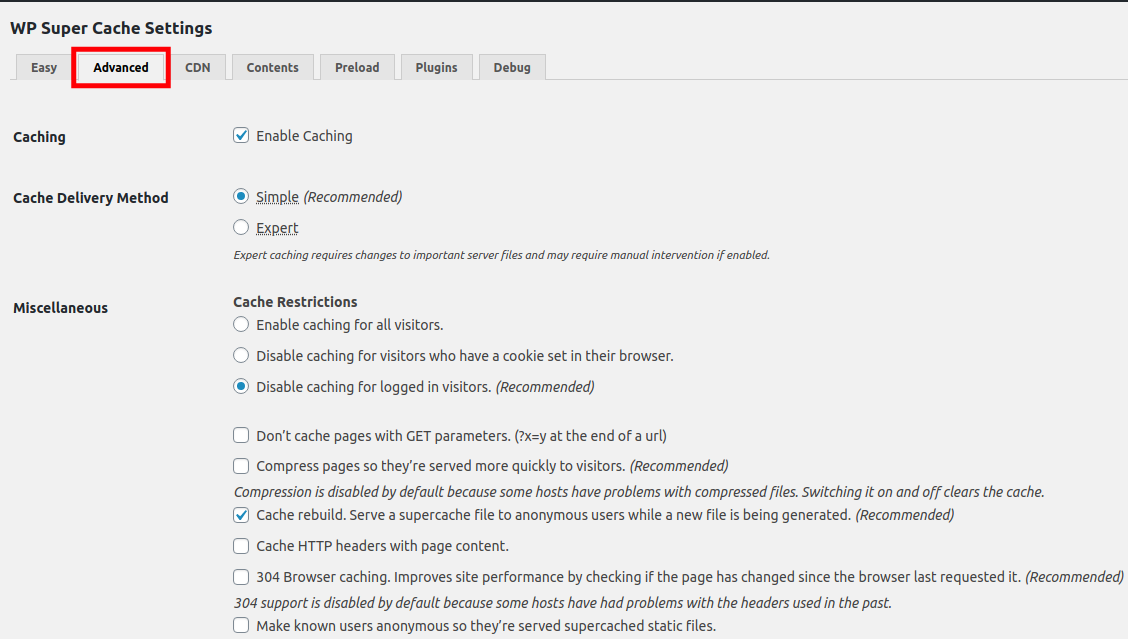
•Caching – Here you can enable and disable caching with a check box.
•Cache Delivery Method – Choose between Simple and Expert caching.
•Miscellaneous – This section allows you to set cache restrictions by enabling and disabling cache for users that are logged in or have a cookie set in their browser. You can also set whether you want to compress pages or cache HTTP headers.
•Advanced – One of the most important settings here is the ability to clear cache when content is updated or published. Some of the settings here require additional plugins. An example of this is covered in our article on How to Cache Mobile pages with the WordPress Super Cache and WPTouch Plugin. I recommend following the provided FAQ links for more information.
•Cache Location – Here you can set a specific path to store your site cache. Cached content will be moved automatically if you change this setting. - Once you have made your selections, click the Update Status button on the bottom.
- Next, we will scroll down and click the Expiry Time & Garbage Collection where you can adjust the following settings.
•Cache Timeout – Choose how long you want a page to be available before it is considered old or garbage.
•Scheduler – Select how often to check your site for old or garbage cache.
•Notification Emails – Check the box next to this to be notified when the cache has been cleared and rebuilt. - Click the Change Expiration button to save any changes made here.
- Click the Accepted Filenames & Rejected URIs link to choose what page types, strings, or filenames to include/exclude. Save each section as needed if you make changes.
- Click the Rejected User Agents link to stop pages from being cached due to bot requests.
- Click the Enable Lock Down button in the Lock Down section to stop the cache from being cleared when new comments are posted on your site. This is good if you are seeing a large influx of comment traffic and want to reduce the number of times the cache is rebuilding.
- In the Directly Cached Files section, you can manually add a file that you want cached.
- To reset all your settings, click the Restore Default Configuration button in the Fix Configuration section.
How to Preload Cache
By default, pages are only cached when they are requested by a visitor. Then other visitors after that will see this same cached page. It will only be refreshed based on the Expiry Time & Garbage Collection options set in the Advanced Caching settings. But, if you use the preload cache option, every page/post will automatically be generated and cached, even the ones that have not been requested.
- Click Settings, then WP Super Cache in your WordPress Dashboard.
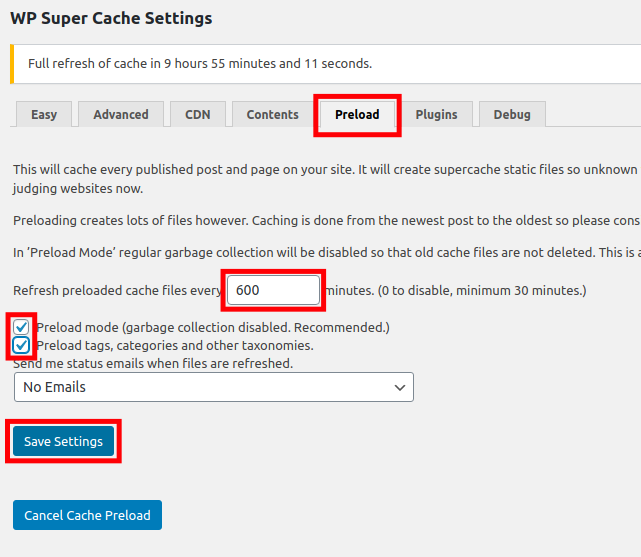
- Click the Preload tab.
- Set how often you want to preload the cache in minutes.
- Click the check box to enable Preload mode.
- Click the check box if you want to preload categories and tags.
- In the dropdown, you can choose to receive email notifications regarding site preloads. The email will be sent to your Admin email address.
- Click the Save Settings button.
- You can also click the Preload Cache Now button to preload immediately instead of waiting for the time interval you set.
How to Debug WP Super Cache
When troubleshooting caching issues, WP Super Cache includes some debugging tools. For example, you can record any problems into a log or have each page display the caching information. We’ll now go over the options.
- Click Settings, then WP Super Cache in your WordPress Dashboard.
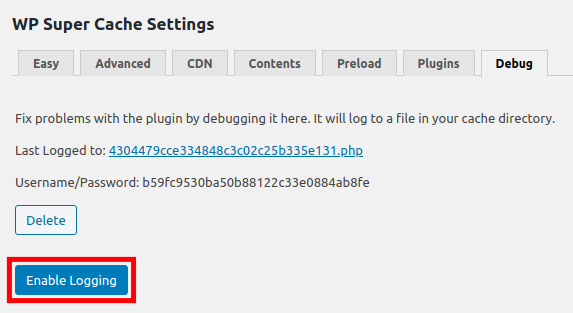
- Open the Debug tab.
- Click the Enable Logging button to start logging problems. By default, they will be saved to a file in your caching folder, which is typically located in “/wp-content/cache/”.
- If you only want to log errors from a specific user, enter their IP Address in the available field.
- Check the box next to Cache Status Messages to display cache information on the bottom of pages.
- In the Advanced section, you can choose to check the page every 5 minutes for a specific text. You can also choose to clear cache when errors occur and email the Admin account every 5 minutes when the check runs.
- Click the Save Settings button once you’ve selected your options.
Become a master of WordPress plugins! Protect, optimize, secure, and expand the functionality of your website easily with the help of WordPress plugins!