One of the key ‘non-negotiables’ we often talk about is how running your own site is a key factor for any business. However, there’s something inherent to that process we think is more crucial: email. As such, you’ll want to set up a professional email address almost as a first action. When you use Gmail and Google Workspace, the process is a snap.
If a visitor can contact you through email, you can respond to their query and open dialog. This has fantastic benefits right along the chain, and builds brand loyalty, trust, and more. Coupled with Google’s intuitive and straightforward operation, you can have your own email@yourdomain.com address to bolster your branding.
In this article, we’re going to discuss how to use Google Workspace to set up a professional email address. By the end, you’ll have everything set up, and it shouldn’t take more than 30 minutes.
How to Set Up a Professional Email Address With Gmail and Google Workspace (In 4 Steps)
There aren’t too many steps to take when you set up a professional email address using Google Workspace. However, at some points, there are some technical considerations to be mindful of. Here are the steps in general:
- Run the setup wizard for Google Workspace.
- Verify your domain name with Google, so that you can link your domain to your email server.
- Include other users for your Google Workspace account, although this is an optional step.
- Add MX records within your domain registrar to complete the process and link Google to your emails.
If some of this is confusing, don’t worry! We’ll show you everything you need in order to complete the job and set up a professional email address using Google Workspace.
1. Run Through the Google Workspace Account Creator
Of course, you’ll need a suitable Google Workspace account in order to establish your email server. You might already have this account, but we’ll run through things as a new user.
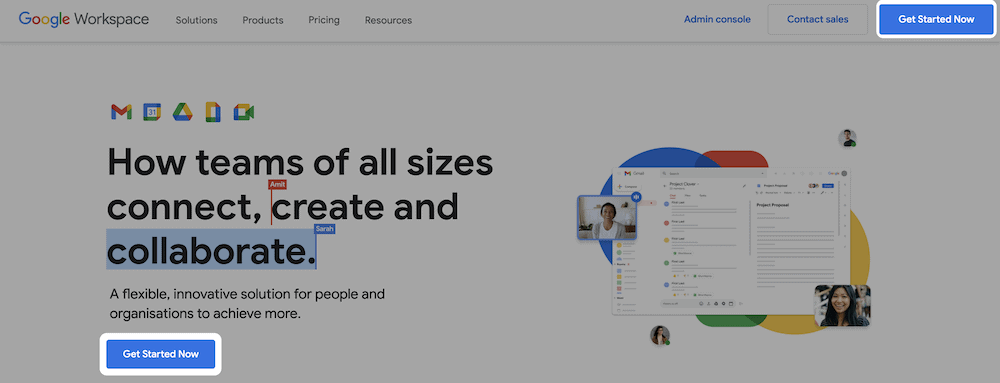
To start, head to the Google Workspace home page. Once you read the page here to find out more about what Google Workspace can do for you, click the Get Started Now button:
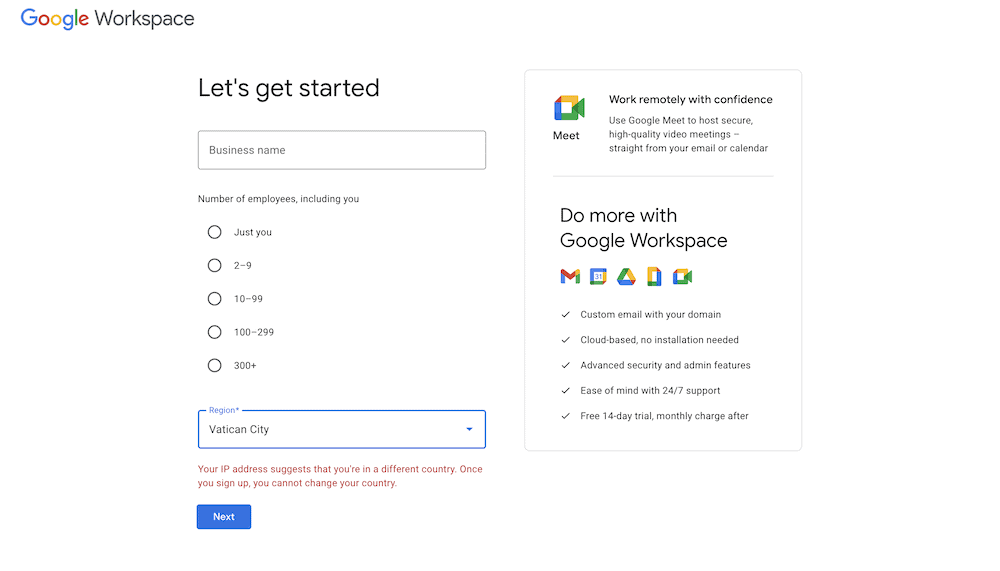
The information you’ll need to enter is straight forward. However, you’ll note that Google will offer a best (often right) guess at your location. If you decide to choose another, Google will display a warning that the region selected isn’t changeable:
The next screen will ask you to create an initial administrator and owner. In most circumstances this will be you:
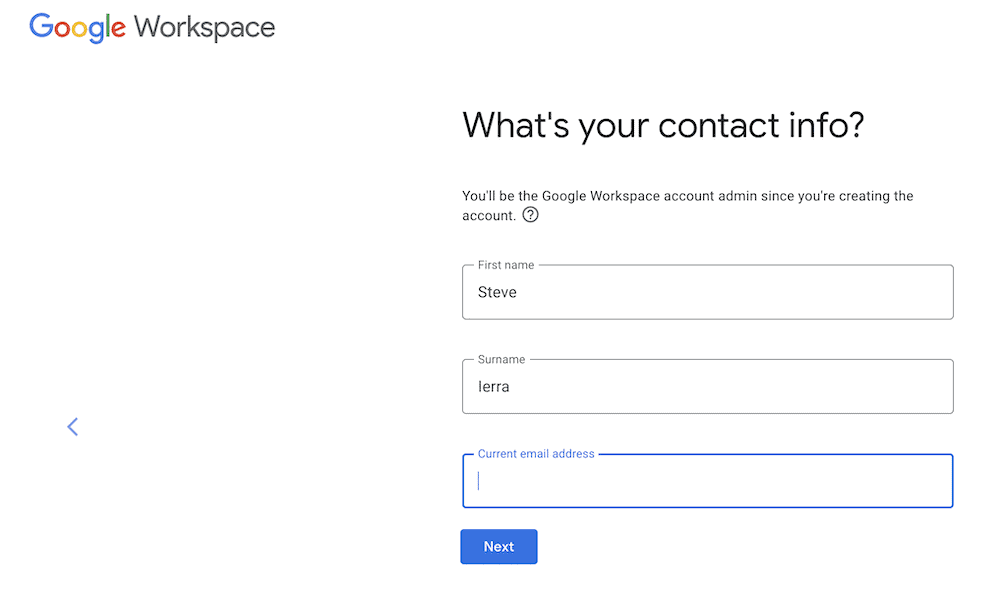
When it comes to the email address, you can choose either a personal one for now, or one that you have already created for your business.
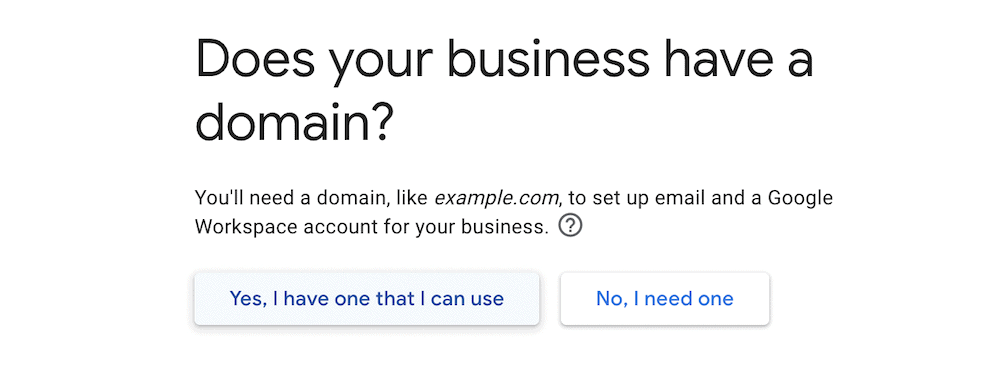
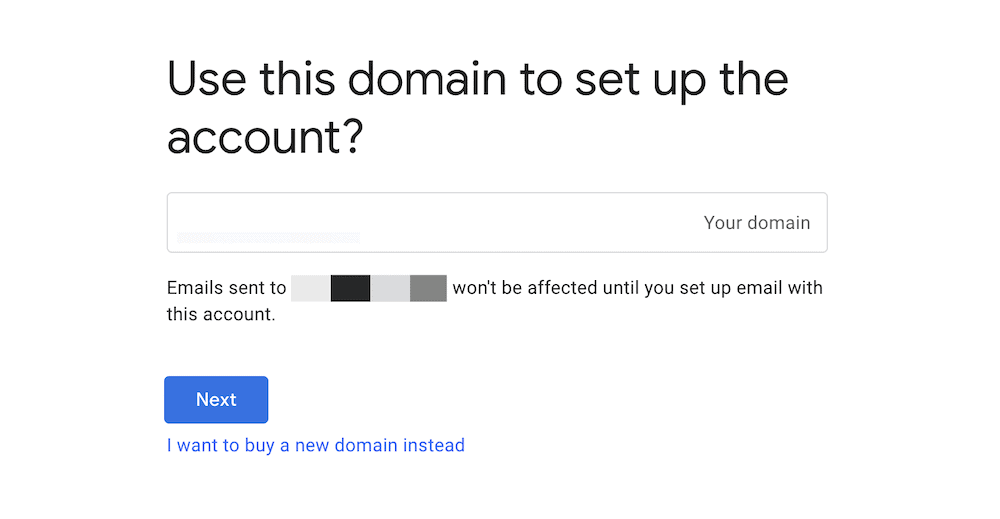
Once you click Next, you’ll have to tell Google whether you already have a domain to use for the setup process. It’s a good idea to have one in place before you do this, so take a detour if you need and come back to this when you have a domain ready to roll:
On the next screen, you’ll need to enter your domain in the field and click to continue:
After a couple of screens to confirm whether you’d like to hear about other Google offers, you’ll have to enter credentials for your Google Workspace account:

When you fill this in and click the Agree and continue button, you’ll then need to review your payment plan. Google Workspace is available on a 14-day trial basis, and you’ll need to enter your payment details before you finish the setup.
This is the last step. When you confirm, you’ll come to the familiar Google sign in screen, where you’ll enter your credentials and check out your dashboard.
2. Verify Your Domain Name With Google
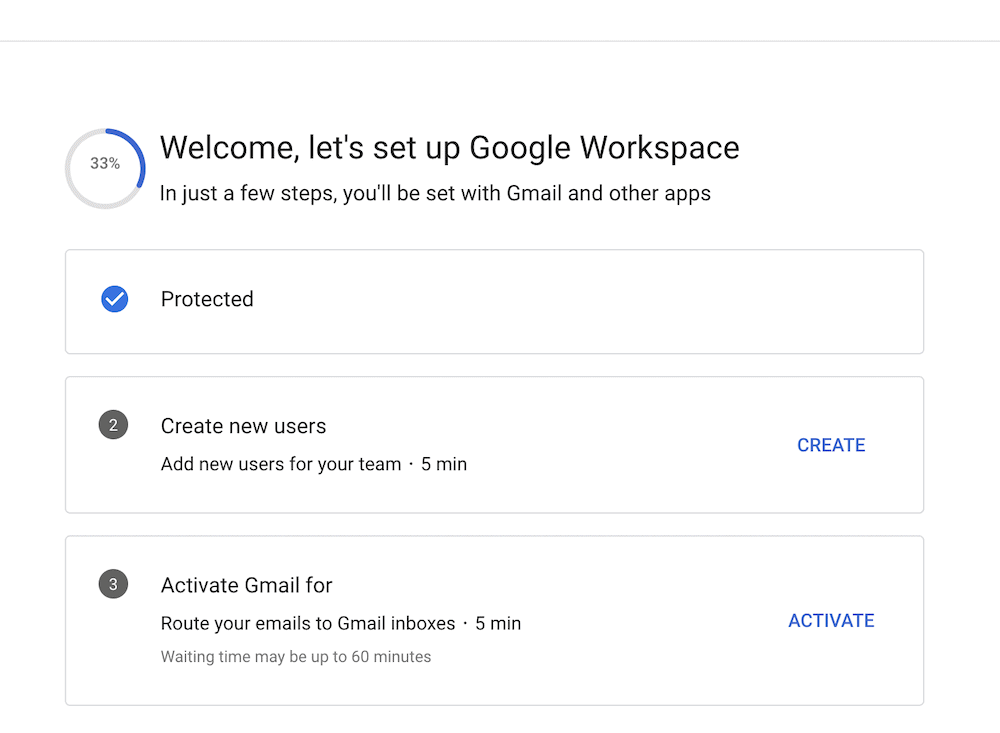
Once you log into your Google Workspace dashboard, you’ll have another three steps to go through. You’ll also see completion times for each step, which is helpful if you need to plan ahead:
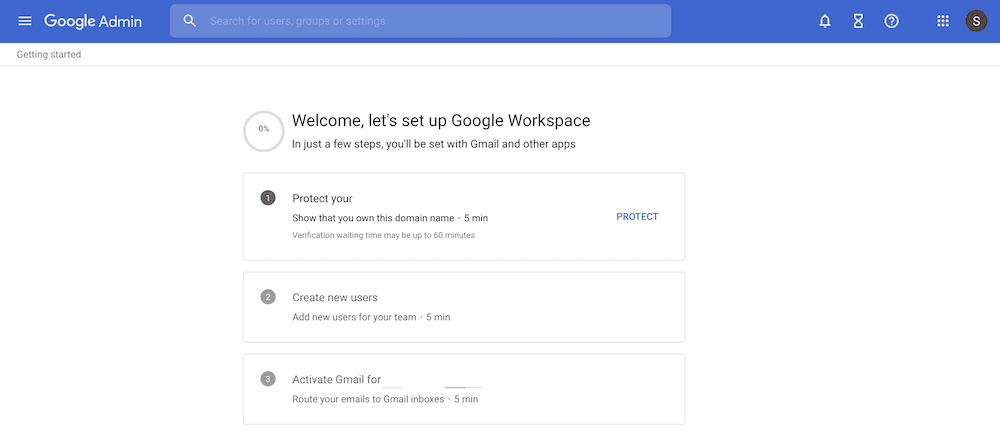
The first step is to verify your domain name with Google for security reasons. To start, click the Protect link. This will pop up a screen with instructions on how to verify your domain. For the most part, these will suffice, and you can follow along with Google.
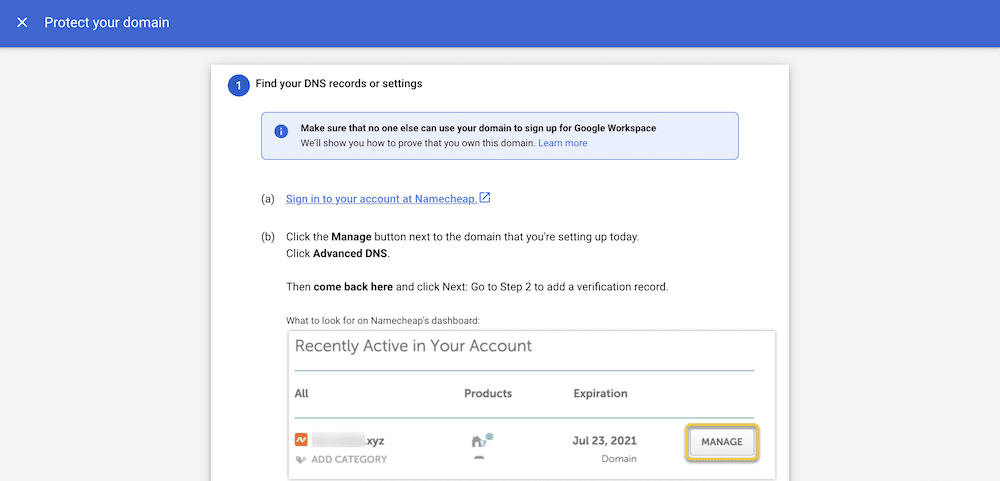
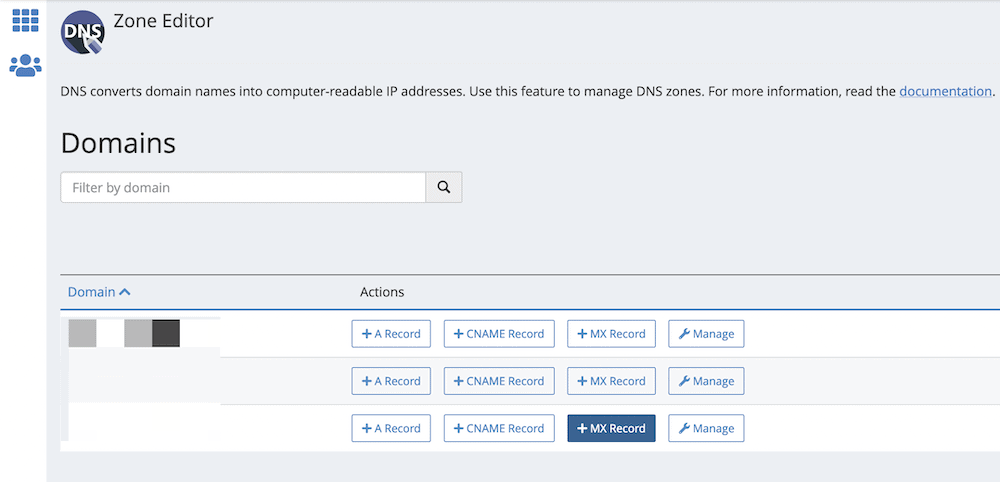
However, it could be that you want to work within your account host in order to verify your domain. This is necessary in some cases, and you’ll do it through the Domain Name Server (DNS) editor for your chosen account panel. This is going to be different depending on the host itself. Lots of hosts will use cPanel, and you’ll find the option you need under Domains > Zone Editor:
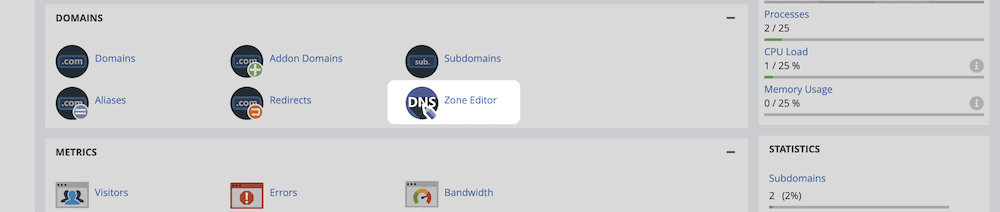
On the next screen, choose the Manage option for your domain:
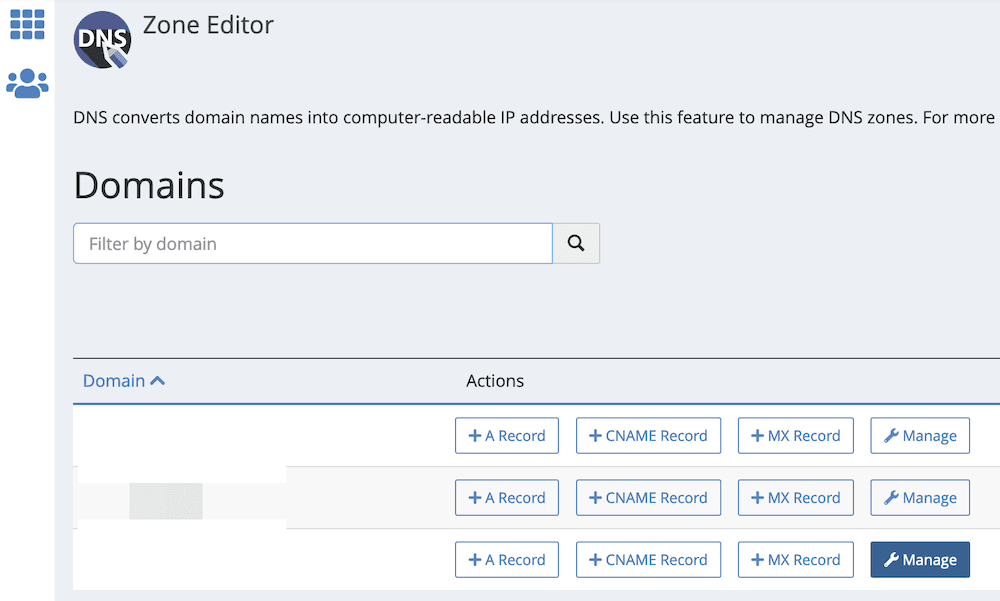
You’ll notice an Add Record button on the next page. If you click this, you can choose to add a new TXT file:
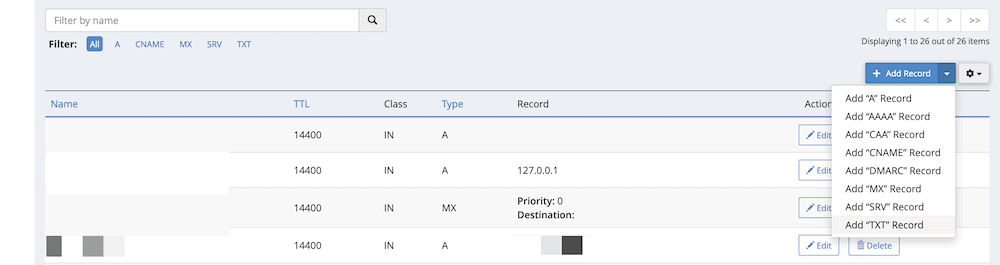
If you click this option, you’ll be able to add a new record to your DNS. The first three values you need are as follows:
- Name: This should be your domain name.
- TTL: There are lots of theoretical values for this, but you can go with a conservative number here, such as “86400”.
- Type: You can leave this as “TXT”.
For the last value, Record, head back to Google Workspace, specifically the Protect your domain screen. If you scroll to the bottom, you’ll note a TXT Value:
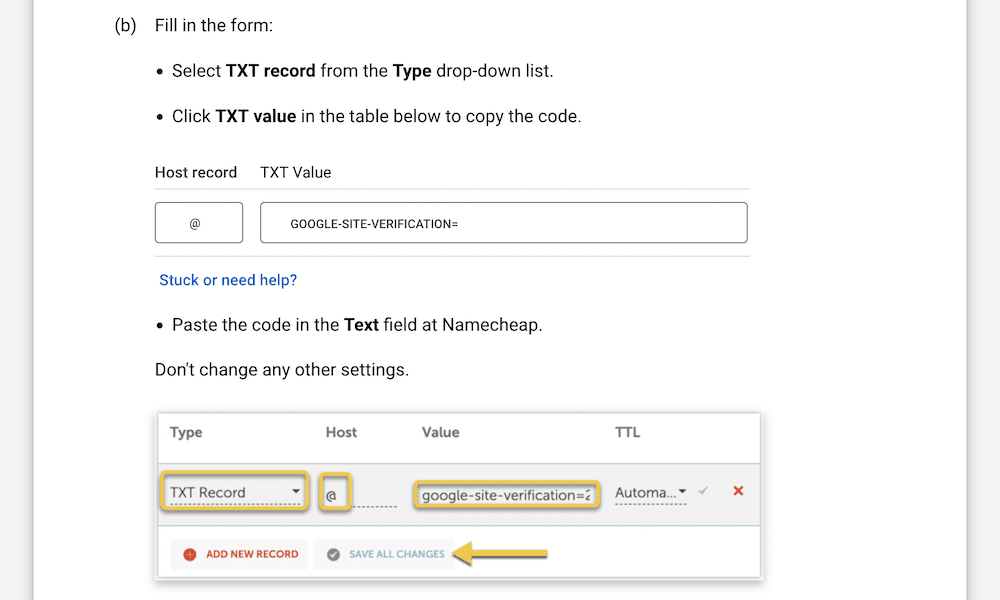
You should copy and paste this into your DNS Zone Editor’s Record field. Once you do that, click Add Record, then head back to Google Workspace and click the Protect Domain link.
3. Add New Users to Your Google Workspace Account
If you follow along with the setup wizard, the next step is optional. Regardless of the number of users for your Workspace account, you’ll need to click the Create link to run through this step:
This will bring you to the Add Users screen. If this part of the process isn’t going to be applicable to you, hit Continue. However, you can choose Add Another User to go through that process instead:
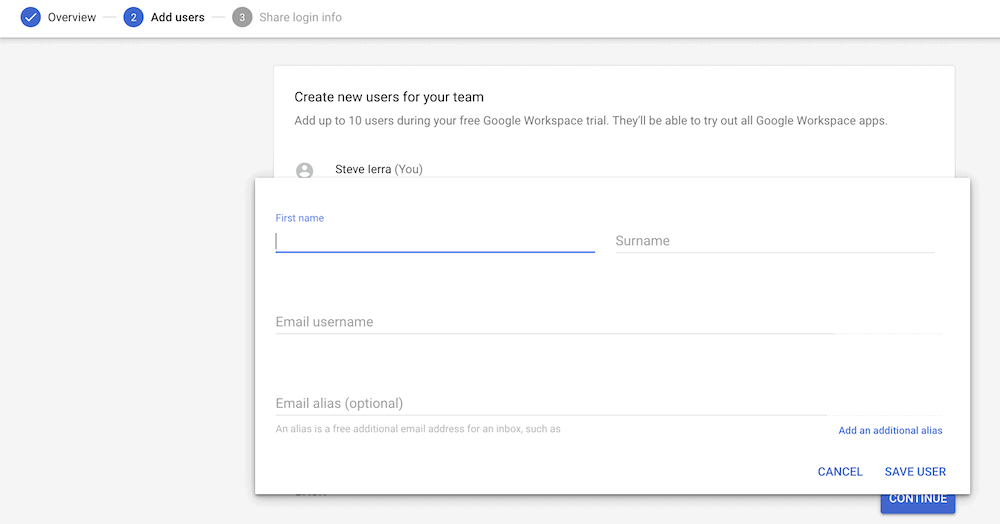
Note that this is also how you’ll add extra email aliases to your account. For example, you might want to have info, hello, admin, payments, and other specific email addresses for your site. Once you save your users, you can click Continue to move onto the next screen.
If you choose not to add new users at this stage, you won’t see the setup wizard complete the step. However, this won’t affect you from moving onto the final step – activating Gmail for your site.
4. Add Mail Exchange (MX) Records to Set Up a Professional Email Address
The final step lets Google handle your domain’s email. Again, the steps Google offers are comprehensive, but we can also take you through them here.
First, head into your hosting account panel, and look for the section to enter new MX records. For example, in HostGator (our choice here) it’s the Zone Editor again. You might have a dedicated option to do this in your own host.
Regardless, when you’re in the management screen, you’ll want to select your domain from the drop-down menu. Much like how hosts offer a one-click WordPress option, some will also provide a quick-setup wizard. Once you choose this, it will handle the setup and there’s no more for you to do.
However, if you don’t see this option, you’ll need to get to work.
How to Add MX Records to Your Host
First, open the Zone Editor (or relevant dedicated screen) within your hosting control panel. This could have different names depending on your host. From the list, choose the MX Record option from your chosen domain:
This will pop up a dialog to enter a new MX Record. There are a few to add here, and you’ll have to do this one at a time, using the following table:
| Priority | Destination |
| 1 | ASPMX.L.GOOGLE.COM |
| 5 | ALT1.ASPMX.L.GOOGLE.COM |
| 5 | ALT2.ASPMX.L.GOOGLE.COM |
| 10 | ALT3.ASPMX.L.GOOGLE.COM |
| 10 | ALT4.ASPMX.L.GOOGLE.COM |
If you get the option, look to delete the existing records before you add these – often there is a clear link to do so.
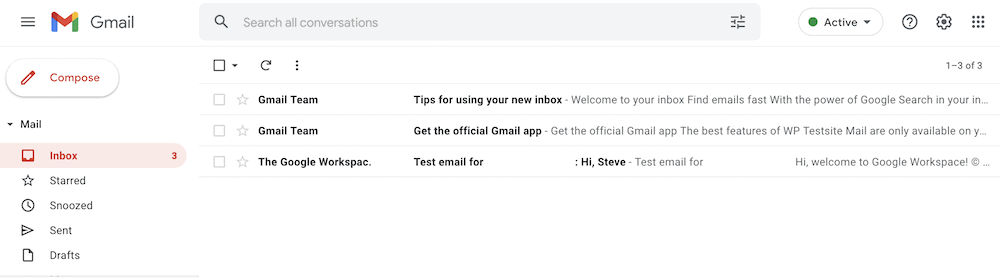
When you finish this, click the Activate link within Google Workspace. From here, Google will run through the setup and carry out some diagnostics. If all goes well, you’ll see a success screen. From here, you can log into Gmail and begin using your new Google Workspace account.
Some of the steps might mean you have to wait for servers to populate. For example, you may not be able to access your Gmail account straight away.
Wrapping Up
There’s no doubt that running a website is something important for your site, but having a branded email address is right up there as something equally as vital. This will show users that you (literally) mean business, and gives you a professional sheen to your presentation.
As such, this post has given you all of the information you need to set up a professional email address using Google Workspace. The steps are simple:
- Create a Google Workspace account.
- Verify your domain name for security reasons.
- Add more users if you have a team who needs Workspace access.
- Add MX records to your host to link your emails to Google.
Do you want to use Google Workspace to set up a professional email address, and if so, do you have any questions? Ask away in the comments section below!