

Every time a new version of WordPress is released, some people will experience compatibility problems with their sites. These can be minor and easily resolved, or they can be more tricky to diagnose. Either way, especially for non-developers, such problems are a little scary, particularly if they make your website inaccessible or unusable. One way to ease the stress of an upgrade, or to experiment with any changes you may want to make on your site, is to create a sandbox, or testing site. The video below shows you how you can easily do that using free tools.
If you use WP Engine or another managed WordPress host, you have access to a staging area, which allows you to make a duplicate of your site with one click.You can then use this staging area to test out upgrades, plugins, theme changes etc.
If your host doesn’t offer you a staging environment, you have a couple of other options:
1) Run a duplicate site on a local installation of WordPress. Local means it’s not accessible via the internet, only on your computer.
2) Use a spare domain to create a duplicate of your site. This would be live on the internet to anyone that had the web address.
I prefer option 1 because it’s more secure. If you set up a live dummy site you either need to delete it after your tests, or you need to maintain it just like you would any other site to maintain security. When people forget about their test sites they then forget to update plugins, WordPress etc and they tend to be easier targets for hackers. This tutorial focuses on option 1.
The video below demonstrates the following 8 simple steps needed to create a fully functioning duplicate of your site, running on your computer that you can do your worst with and it won’t matter if you break it! Scroll on if you prefer text instructions.
1) Download the free version of Desktop Server (if you are a developer or build a lot of sites, the Premium version is a must-have tool. I’ve been a premium subscriber since the product’s early days and it made my life SO much easier). The premium version will make the process even easier but I wanted to show you how it can be done for free.
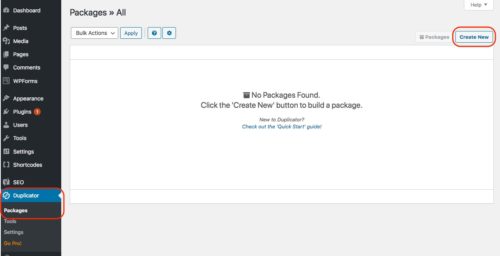
2) Install the Duplicator plugin on your live site, create a Package and download the Installer and Package files to a folder on your computer

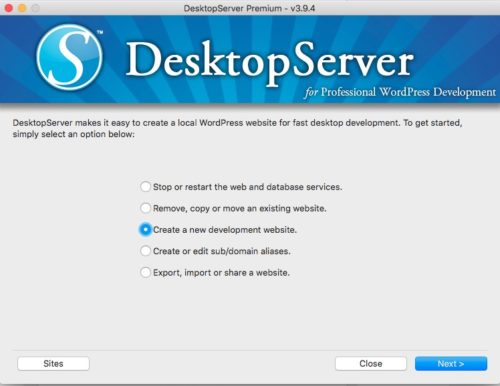
3) Launch Desktop Server and create a new development site, but stop short of creating a username and password.
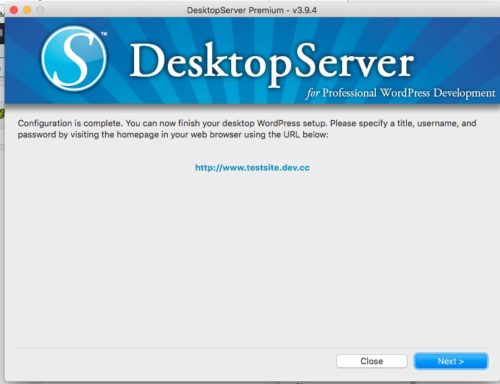
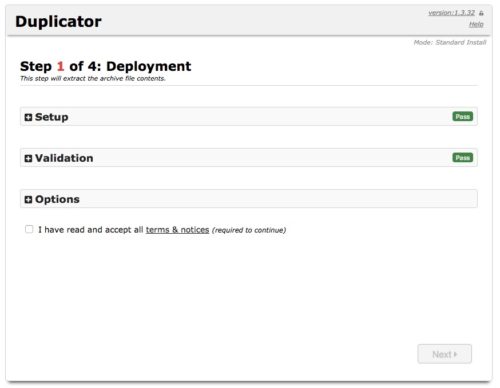
When you get to this screen, you have completed this step. Close the Desktop Server window and go to the next step:
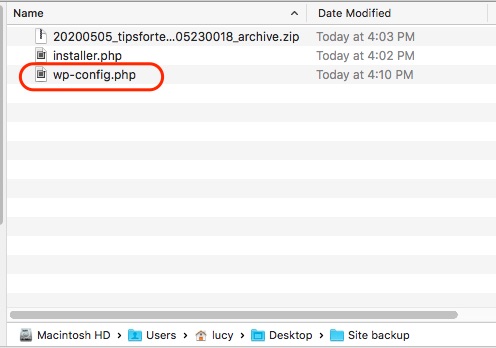
4) Navigate to your Sites folder where you will find a folder named for development site you just made (e.g. www.yoursite.dev.cc). Move the wp-config.php file from this folder into the same folder where you downloaded the two files from Duplicator.
5) Delete all the other files from the dev website folder (sounds weird but we’re replacing them with all the files from your live site instead)
6) Move the Duplicator package zip and installer.php files into the now-empty dev website folder:
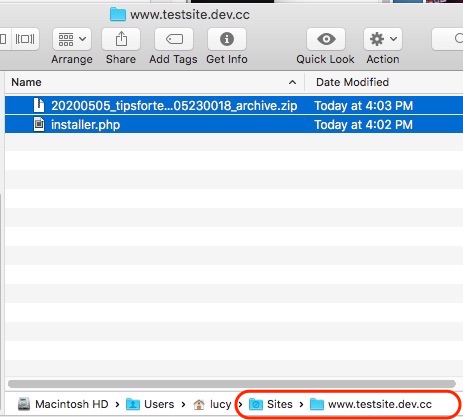
7) Navigate to the installer file by typing in the dev url you created and appending /installer.php, eg. www.testsite.dev.cc/installer.php
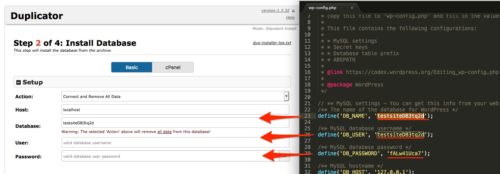
8) Open the wp-config.php file, then follow the onscreen steps, copying/ pasting the database info from the wp-config file:
After you complete the onscreen steps, navigate to your dev url and boom! – there’s a duplicate of your live site running locally on your computer. Congrats, you’re a genius!
Now you can test away, run the upgrade, see if any plugins need replacing etc. Then you will know exactly what needs to be done on your live site to ensure a smooth upgrade.

Aff. link
header image courtesy Dopey

![15+ Top Black Friday & Cyber Monday Deals for Developers and Designers [2023]](https://wiredgorilla.com/wp-content/uploads/2023/11/15-top-black-friday-cyber-monday-deals-for-developers-and-designers-2023.jpg)