Fantastico is an application installer available on some versions of cPanel. It makes setting up content management systems like WordPress quick and easy. Although many platforms have discontinued support for Fantastico in favor of other systems like Softaculous, it is still in use across the Internet.
Fantastico is great for beginner users who don’t know a lot about setting up a website. It takes all of the work off your hands while installing everything you need for WordPress. All you need is a bit of information about your website, and the system will do the rest.
In this tutorial, I’m going to show you how to install WordPress with Fantastico. It takes very little effort and will let you start building your website within moments.
Step 1: Login to your cPanel Account
Access your cPanel account from the customer portal. To do this, click the blue “cPanel Login” button from your account dashboard.
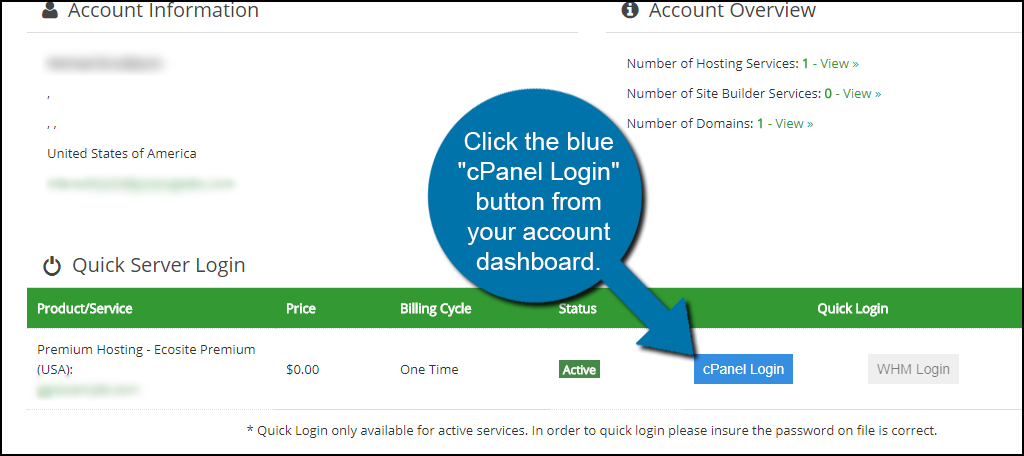
This may appear differently depending on settings and hosting accounts. Some hosting platforms may give you direct access to cPanel without using the customer dashboard. In any case, you’ll need to access cPanel.
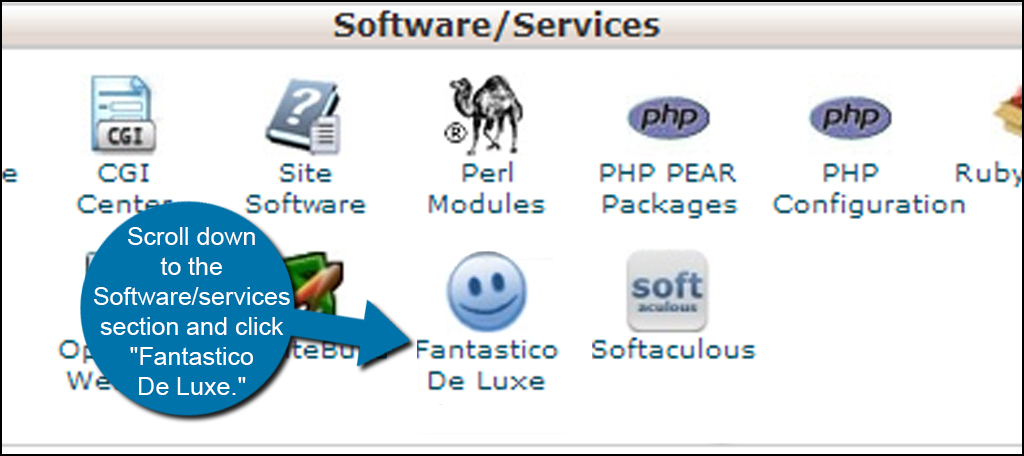
Step 2: Access Fantastico from the Software/Services Section
Once you’re in cPanel, scroll down to the Software/services section and click “Fantastico De Luxe.” It will be the tool with a blue smiley face.
Step 3: Select WordPress
In the Fantastico navigation screen, you’ll see a list of applications on the left. Click the radio button for “WordPress.”

Step 4: Select New Installation for WordPress
Clicking the WordPress radio button will cause the right panel to change. It will now show the information regarding WordPress including the current version available in Fantastico. You’ll also see a homepage link as well as a support forum in case you need additional information.
Click the link for “New Installation.”

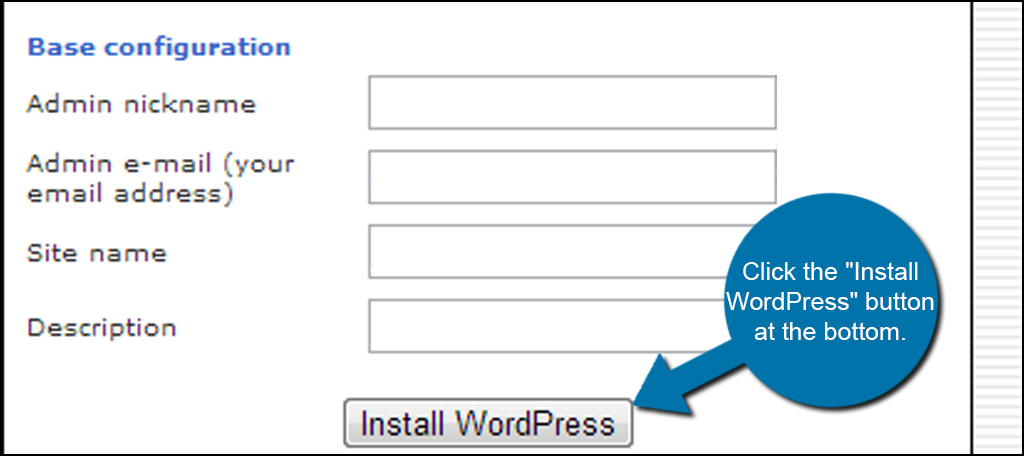
Step 5: Enter your WordPress Site Information and Install
In this screen, you will need to input your website’s information. This will be the settings your website is going to use during the installation process.
- Install on domain: This is a drop-down window displaying all of your domains and subdomains. Select which one you want WordPress to manage.
- Install in directory: Input a new file directory if you want WordPress to be saved in another location. For instance, some people will use WordPress as a blog on an eCommerce site. If the eCommerce site is the primary domain, then you would use something like “blog” in this area. So, it would look like “http://www.ggexample.com/blog” (replace “ggexample.com” with your domain). You can leave this blank if you want to use WordPress strictly for the website.
- Administrator Username: This is the username you’ll use to log into WordPress. I would suggest not using “admin.” This is often the first thing hackers and bots will look for on systems like WordPress. Use something that is unique.
- Password: Try to make your password as difficult as possible. The more letters, numbers and special characters you have, the harder it is to hack.
- Admin Nickname: This is not the same as the username. This will be displayed as a nickname after you log in. Some people will use their first names in this section.
- Admin e-mail: The is the email address for the admin account. WordPress will use this to send messages regarding updates, access data and other pertinent information regarding your website. No one else will see this but WordPress unless you make it public.
- Site name: This is the name of the site WordPress will use for the home page and operational information. Various plugins will also use this name such as those which optimize for search engine optimization. You can change this at any time.
- Description: You will want to add a brief description of your website. This, too, is often used in SEO to determine what your site is about. The description will also help people understand the purpose of your website. Try to keep it to one or two sentences.
After you’ve filled in the site information, click the “Install WordPress” button at the bottom.
Once the installation is complete, you’ll be given a link to access the admin panel. It’s probably a good idea to click the link and bookmark it so you can find your admin panel easily later on.
Build Your Website
The Fantastico WordPress installer will quickly get your site up and ready for content. It will be up to you to make something amazing of it. Whether it’s setting up landing pages for goods and services or creating a blog, WordPress can handle it all. Customize your site to fit your needs and explore what the system can do for you.
What kind of instant web applications have you used in the past? What inspires you to use WordPress to power your site?
The post How to Install WordPress Using Fantastico appeared first on GreenGeeks.