The beauty of WordPress is that you can do as deep down the rabbit hole as you like. If you have zero technical knowledge, you have the same relative power under your fingertips as a seasoned professional coder. Though sometimes, when you need to delve into the back end of WordPress to fix permissions errors, it helps to understand what you’re doing.
In simple terms, you can’t access certain files or folders if your permissions are wrong. In fact, it’s more correct to say the server doesn’t let anyone access those files. The fix is to get under the hood, make some changes, and get out.
Over the next few minutes, we’re going to look within WordPress to fix permissions errors. What’s more, we’ll give you everything you need to make a good job of it.
What ‘Permissions’ Are (And Why You Need Them)
The elevator pitch for permissions is that they protect your files and folders from unauthorized access. To get more complex, each file and folder has a certain permission level. If a client such as a browser tries to open or otherwise use the file, the server will check whether has the right permissions to do so.
If the client checks out, the server pings the file to the browser as part of the HTTP request. In contrast, if the client doesn’t have the right permissions, you’ll get an error.
Under the majority of circumstances, you won’t come up against a permissions error. This is because the system does its job to restrict access only to those who need the file or folder. If you didn’t have files permissions, your WordPress website along with your server could be in real trouble of malicious attacks.
What You’ll Need to Help WordPress Fix Permissions Errors
The great news is that you don’t need lots to re-harden WordPress and fix permissions errors. In fact, there’s only one tool you need: a Secure File Transfer Protocol (SFTP) client. There are a few of these on the market, but there are three we like the best.
For starters, FileZilla is a standard tool for accessing your site through SFTP, although Cyberduck has just as much usability and features:

If you’d like a premium SFTP solution that can also do lots of other things for you, Panic’s Transmit is a great tool:
This can help connect to WordPress and fix permissions errors, push and pull data from cloud storage, and much more.
Whichever SFTP tool you choose, you’ll also want to check that the following is in place before you crack open the bonnet of your site:
- Administrative access to your server. In short, if you encounter a permissions error while trying to fix a permissions error, you’ll be in dire straits!
- Knowledge of how to use SFTP, although you won’t need deep skills here – just enough to access your server and edit file settings. Of course, there are lots of ways to use SFTP with your WordPress server.
Also, while knowledge of how file permissions work with WordPress is useful and will speed up how long a fix will take, they’re not necessary right now. This article will show you which settings to change and how, and for the purposes of fixing errors, you won’t need to know the gory details.
We also recommend that you have a current and clean backup of your website, in case the changes you make don’t work out like you need them to. If you ‘tank’ your site, you’ll be glad that a fresh backup exists.
How to Harden WordPress and Fix Permissions Errors (In 4 Steps)
Permissions errors crop up when you look to install a theme or plugin. Because WordPress can’t access the file, you need to help it out.
We’re going to do this through four steps:
- Use SFTP to log into your server.
- Make sure files have the right permissions.
- Look at whether your folders have the right permissions too.
- Check that a bunch of specific files have unique permissions set.
The good news is you can use the guidance in the first couple of steps to carry out the rest. Also, note that we’re using Cyberduck for these steps, but each SFTP client will have its own method to amend file permissions. If you’re using something different to us, check out your documentation for the exact functionality.
First though, you need to get into your server.
1. Access Your Server Through SFTP
Your first step is to log into your server. To do this, you need your SFTP credentials. Often, you can find these within your hosting control panel:
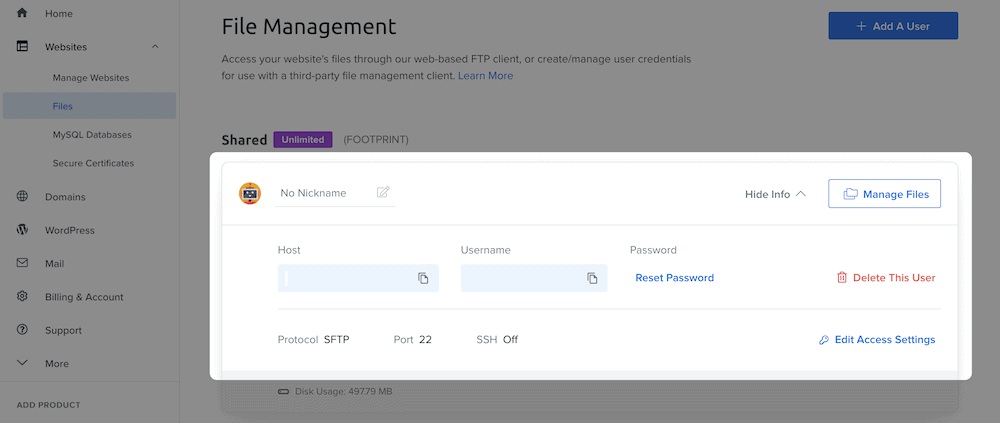
You may also find them in an email from your hosting company, so scour your inbox for those login details too.
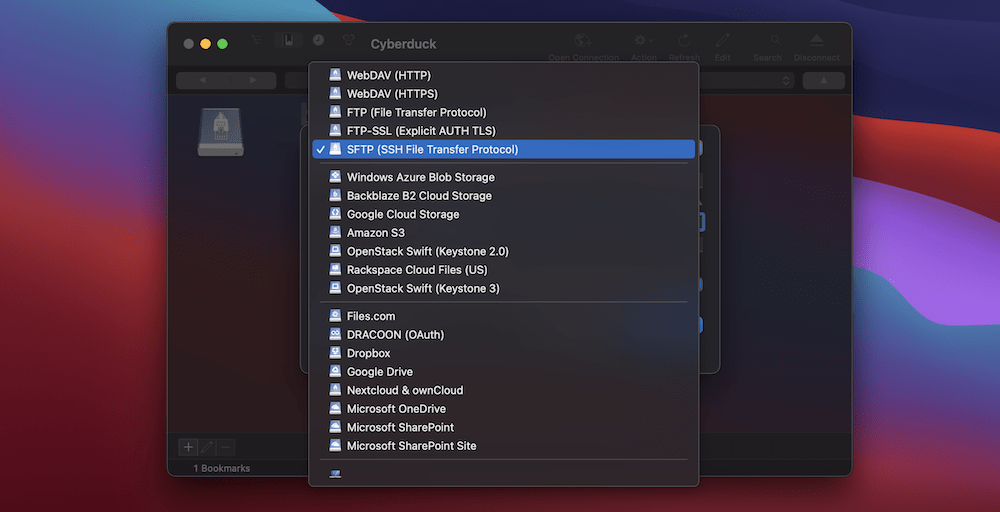
Once you have them, fire up your SFTP client, and look for the option to open a new connection – it may be called something different in your client:
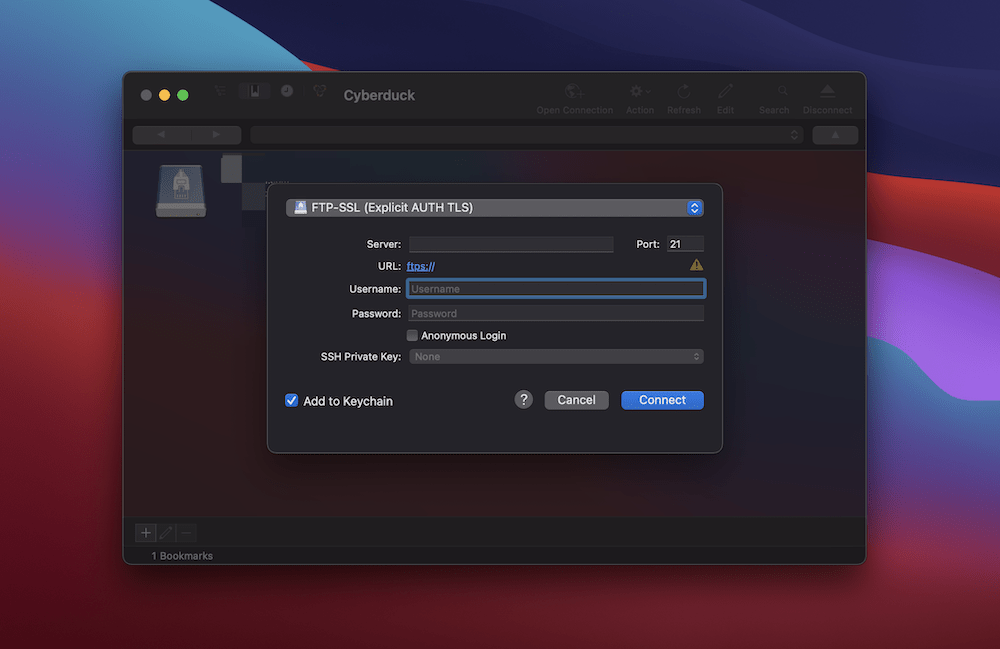
From here, populate the fields using your credentials. Though, make sure you are using an explicit SFTP connection if you have the option to choose. Some tools don’t have the same number of potential connections, and may default to SFTP. Though, double-check if you’re able to:
Once you’ve logged in, you’ll come to your home directory. This will contain all of your sites, and your next task is to choose the right WordPress site and fix permissions within it.
The site itself could have a variety of names – public_html, root, www, or the name of the site. Once you find your site, double-click to enter the folder. Inside is all of your WordPress core files. From here, you need to choose both your files and folder, and set the right permissions.
2. Set the Right File Permissions for Files
Once you have access to your site’s root directory, you can begin to set the right permissions. Before we show you how, let’s take a whizz-bang detour into the world of file permissions.
A Quick Primer on File Permission Settings
Permissions have three parts: Read, Write, and Execute. In turn, these let WordPress take data from a file, add data to it, and run other actions on it.
The traditional way of showing the permissions for each file is through a set of three-digit numbers. Each number represents a specific action (read, write, or execute) for a explicit user group – the owner, group, or other users.
We’ll mention file permissions using these three-digit codes, and most SFTP clients will also show you what they mean. This means you have the option of using either approach, while referencing the other.
Selecting Your Files and Changing Permissions
When you’re ready, select every file within your server, and make sure you deselect your folders. From here, you need to look for your file permission settings. In Cyberduck, you’d right-click and go to the Info screen, but in FileZilla you can select File Permissions instead. Regardless, this will bring up a box containing a three-digit number and a set of checkboxes:
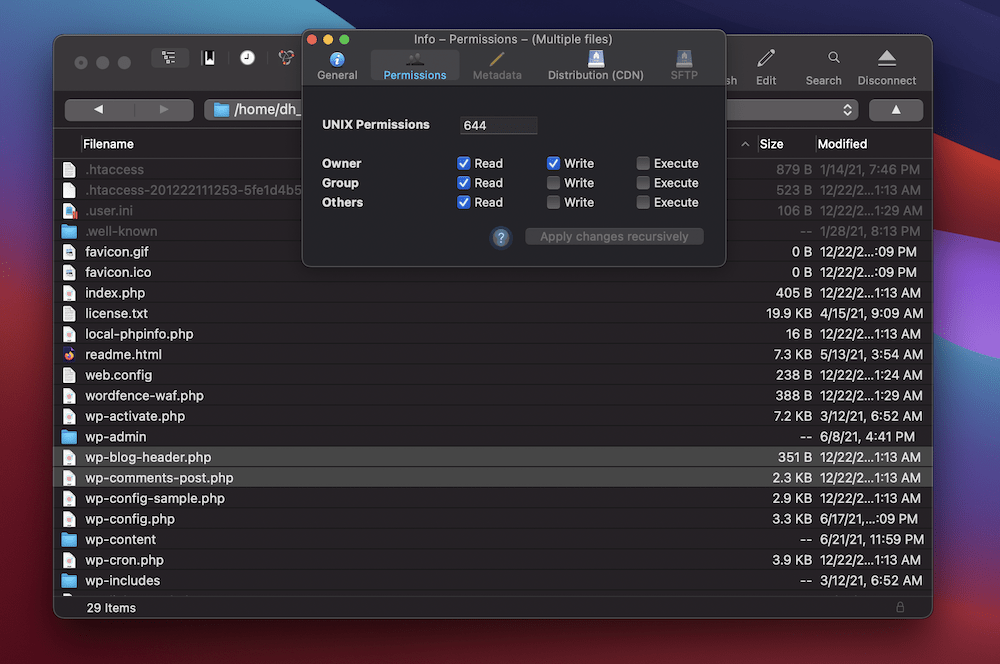
Most of your WordPress files should have 644 permissions. Once you type this into the box, also click the option to apply the changes recursively. Again, it might say something different in your chosen client.
Once you click to confirm, that’s one task out of the way. The next is working on your folders.
3. Set the Right Permissions for Folders
To set file permissions for folders, you use the same process from the last step. This time, you substitute files for folders.
First, choose every folder within your root directory, then open up your folder permission settings. This time, you want to use 755 as the permission. Again, confirm your changes, and that’s the task almost complete.
4. Make Sure Some Specific Files Have Unique Permissions
Before you wrap up, a few WordPress and server files have different permissions than the rest. The main WordPress file to have a different permission setting is wp-config.php. Because this is an important file, you want to make sure that it’s almost read-only. There should be some permissive element though, so following the steps from earlier, change the permissions to 440.
This means nobody can write to or execute the file. Though, you may experience issues with some server and/or plugin settings. If this is the case, start to open the file up until you don’t see any more errors. First try 444, then 600, next go to 640, and use 644 if it solves the issue.
You may also want to set your index.php file to 444, as it’s another important file that benefits from being more restrictive. Though, 644 is fine here too.
The WordPress.org website has a comprehensive article on file permissions and how to set them for specific files. If you’re wondering how to set a specific file or folder, check this article out, and you should find your answer.
In Summary
Much like any velvet rope outside of a club – if your name’s not down, you’re not coming in. WordPress has its own VIP section – your site’s server – and if a browser or user doesn’t have the right permissions to access a file within, it’s denied.
Throughout the course of this post, we’ve gone under the hood of WordPress to fix permissions errors and get a broken site working again. The best approach is to use SFTP, as the steps involved take no time. All you need is to make sure files and folders have a specific permission setting, and your site will be back to normal.
Do you need to access WordPress file permission settings, and if so, what’s stopping you? Let us know in the comments section below!