Almost every website needs a contact form. It’s a dynamic element that helps visitors engage with you. However, making contact isn’t the only job for a site’s form. If you work as or for a charity, develop software, or otherwise need financial support for your project, you can also create donation forms.
While you’ll piece together the form in the same way as any other, there are some elements that will differ. Because of this, you’ll want to bring in a flexible and stellar plugin for the job. Gravity Forms is one of the best examples, and it gets rave reviews by users and developers alike.
For this post, we’re going to show you how to build donations forms using the Gravity Forms plugin. We’re going to discuss why it’s the focus of this article later on. First, let’s talk about the general concept and thought process behind adding donation forms to your site.
How to Accept Donations On Your Website: The Concept
It’s a given that a website is not always a static calling card; it can be a dynamic and flexible hub for your project. What’s more, you’ll want to make engagement central to your strategy if you rely on user support. There are lots of industries and niches that need user contributions:
The key here is that the method of donation needs to be super straightforward to use, otherwise this will impact in a negative way on the donations you’ll receive. The best way to do this in our opinion is to use a dedicated donation form within WordPress. There are a few reasons to do this:
- First, a form is going to be the typical way you take user input. Accepting donations is a specific form of input.
- Next, a good form plugin will integrate with lots of different payment gateways. This makes the whole implementation easier.
- WordPress will offer embedded and inline design options for your chosen form and its placement.
This last bullet brings up a good question: Where should you place your donation forms for maximum impact? The next second will discuss this in more detail.
Where You Should Put Donation Forms On Your Site
As a forewarning, if you want an exact answer on where best to place your donation forms, you’ll have a wait. This is because there’s no one place that’s best. The real answer is that the form will go wherever you think the perfect place is.
However, we can give you a few pointers to help you understand where a form might go on your site:
- A donation form might work as a surrogate Call To Action (CTA). After all, you want a user to act once they see your project. As such, the same place you would add CTAs will also work for donation forms.
- If you offer downloads, this is an ideal place to put a donation form. This is because your project will be at the forefront of a user’s mind. However, look to combine the download and donation fields into one form. That way, you don’t ‘split’ the user’s interest.
- By extension, try to give the user one action to take around donating to your project. This means you don’t want to ask for donations at the contact screen, or when you want a user to sign-up for your newsletter.
- You’ll want to use a donation form on rare occasions, and triple-check that you don’t overdo the placement. This is because you don’t want donations to seem like a ‘shill’ or money-grab.
If you bear all of these points in mind, you’ll come across the ideal location for your donation forms. Our advice is to add your form to a dedicated page – again, if you offer downloads, do it here – then link to it throughout the rest of your site.
Why Gravity Forms Is a Fantastic Option For Implementing Donation Forms
We’ve given the game away throughout this article, but for the most suitable WordPress plugin to implement donation forms, you’ll want to go with Gravity Forms.

In fact, there’s an argument to consider the plugin your go-to for all the forms on your site. However, Gravity Forms is great for donations for a few reasons:
- It offer a beautiful and powerful drag-and-drop builder to help you create the perfect design.
- You can add a huge number of fields to your forms, to cover all eventualities and scenarios.
- Gravity Forms offers built-in conditional logic functionality, which is perfect to help an end user make the right action.
- There are lots of payment gateways to choose from. This is crucial if you want to tailor the donation experience to your users and needs.
There’s no free version of Gravity Forms, and the Basic plan won’t include the add-ons you need to implement payments. However, the Elite and Pro licenses will, and you’ll pay between $159–259 per year.
If your budget won’t stretch that far, you’ll want to check out our list of contact form plugins. Some of these will offer the right blend of functionality for you, and might work out more cost-effective to boot.
4 Steps to Create Donation Forms in WordPress (Using Gravity Forms)
There are only four steps between you and a complete donation form. Let’s go through them:
- Create the form, using Gravity Forms in our example (although any similar pllugin will do the trick).
- Build the structure of the form, and add donation functionality and conditional logic.
- Integrate the form with a suitable payment provider.
- Display the form on your site.
You should have all of the skills necessary, and as soon as you have a copy of Gravity Forms in hand, you can start at the first step.
1. Create Your Gravity Form
Once you install and activate Gravity Forms, you can head to the Forms > New Form screen. This will show you a pop-up dialog for creating a new form. Here, enter a mandatory title and optional description, then click Create Form:
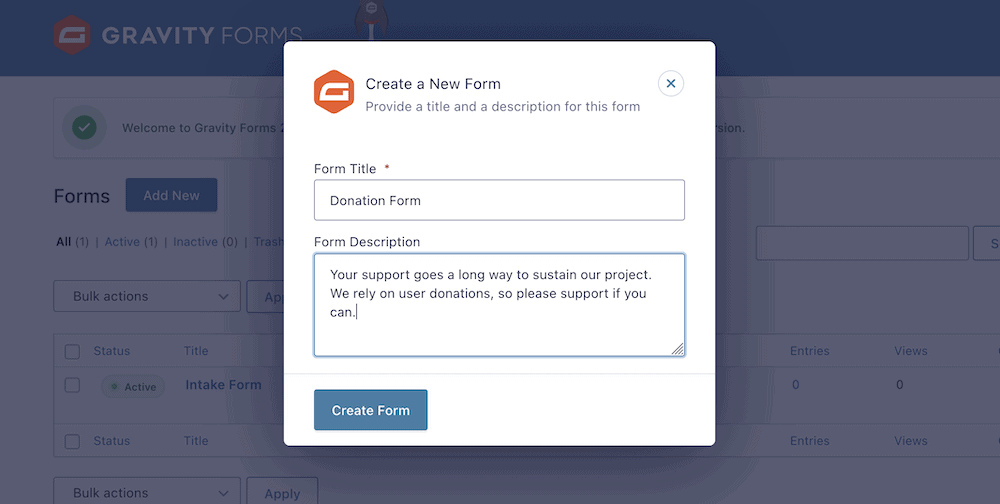
Note that while the description is optional, it’s a great way to help present your cause and the reason for donating. It’s always a good idea to offer a convincing argument for this sort of support, and Gravity Forms lets you do so almost at the first chance.
At this point, you’ll come to the form builder screen. From here, you can begin to piece together your donation form.
2. Build the Form’s Structure
Before you get into the donation functionality itself, you’ll want to take some time to build the general layout of your form, and add in some necessary fields. For starters, you’ll want to ask for a name and email address. You can do this from the right-hand sidebar. The Advanced Fields section offers specific fields for the task:
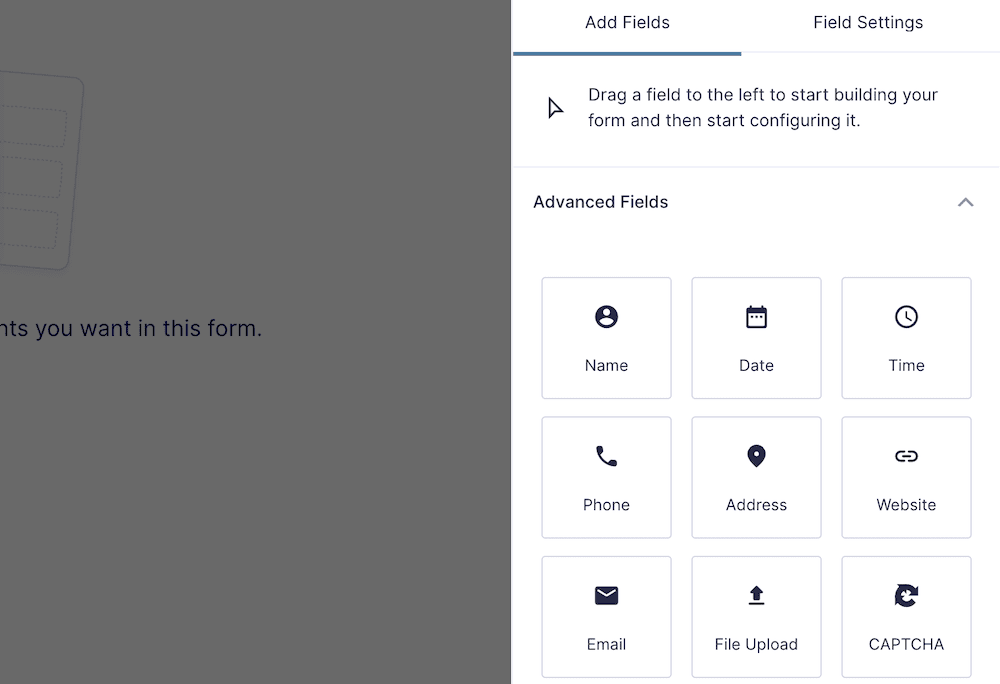
To add them to your form, drag your desired options onto the form ‘canvas’:
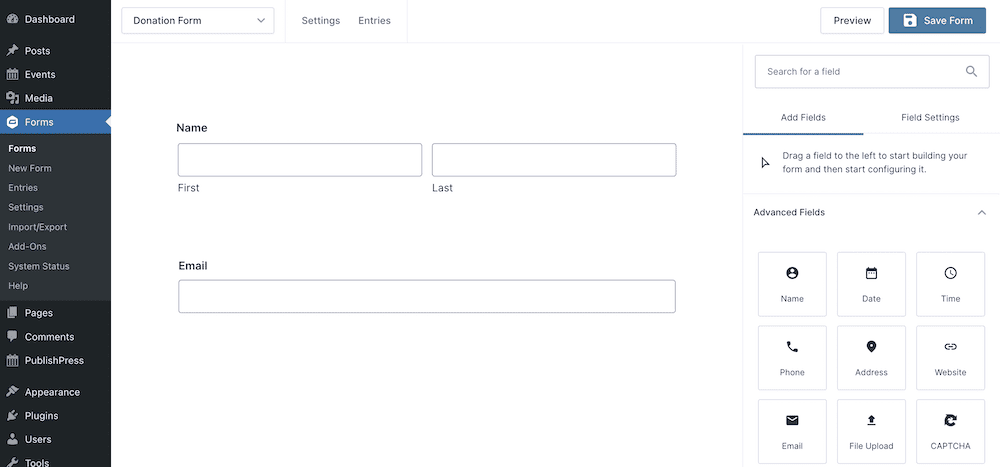
You can click each field and work with further options, to help customize your donation forms. This works in a similar way to the Block Editor, so you’ll be right at home:
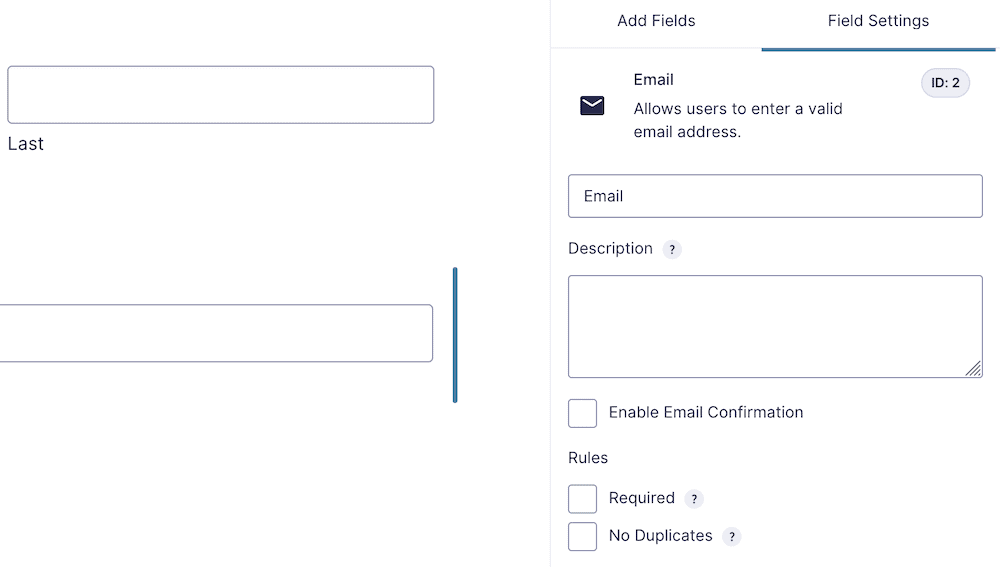
It’s a good idea to set these fields to Required, and to also add an email confirmation field. However, you only want to add as many fields as is necessary to process a donation. We advise asking for the name, email address, and donation amount. For the latter, you can look at a number of different ways.
Add Donation Functionality
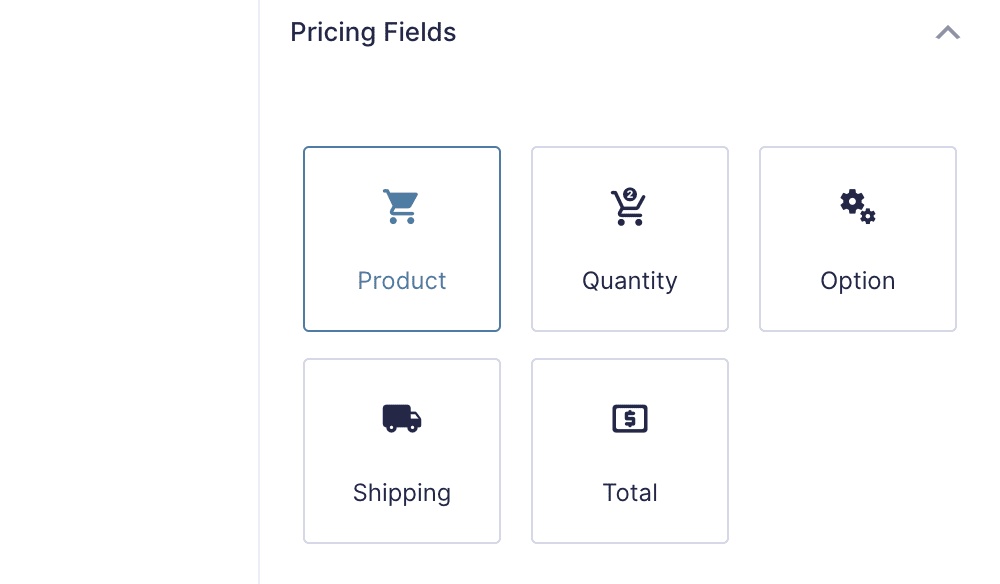
How you let the user select a donation amount is going to be subjective. However, Gravity Forms offers lots of ways to do so. You’ll start with the Pricing Fields > Product option:
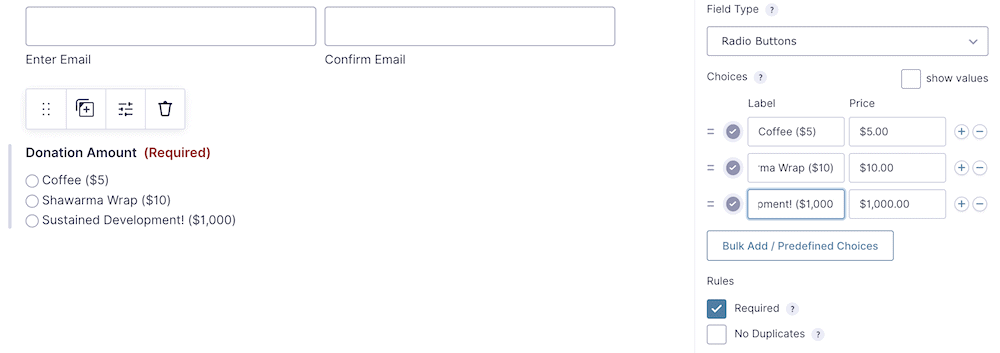
From here, choose the field type. In this case, it’s radio buttons – but there are others:

The Label field is what you’ll see on the front end, while the Price should be the amount the user will donate:
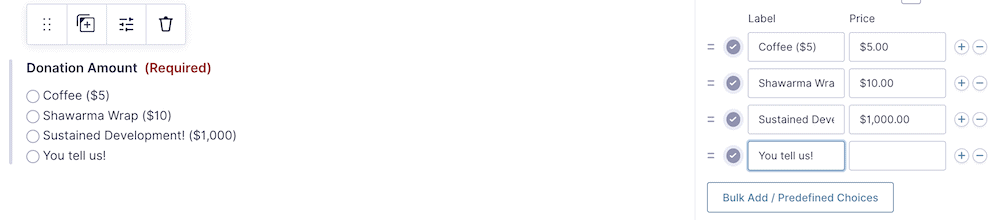
It’s also a good idea to let the user specify an amount if they’re not comfortable with those available. For this, you can add another radio button using the Plus icon, with the label Other (or whatever the correct wording for you is):
Of course, this won’t let the user enter the custom figure (yet). To achieve this, you’ll want to add another Product field to your form. This time, select User Defined Price from the drop-down options, and give it the same name as your custom radio button:

To give this field its functionality, you’ll need to enable conditional logic. This is going to help you provide unique options on your forms, and we’ll look at this next.
Use Conditional Logic to Create Custom Fields
No matter what tier your choose, every instance of Gravity Forms comes with conditional logic. This is welcome and perfect for your needs here, although you may need to enable the functionality first. This is straightforward: Click on the User Defined Price field, then toggle the switch under the Conditional Logic section:
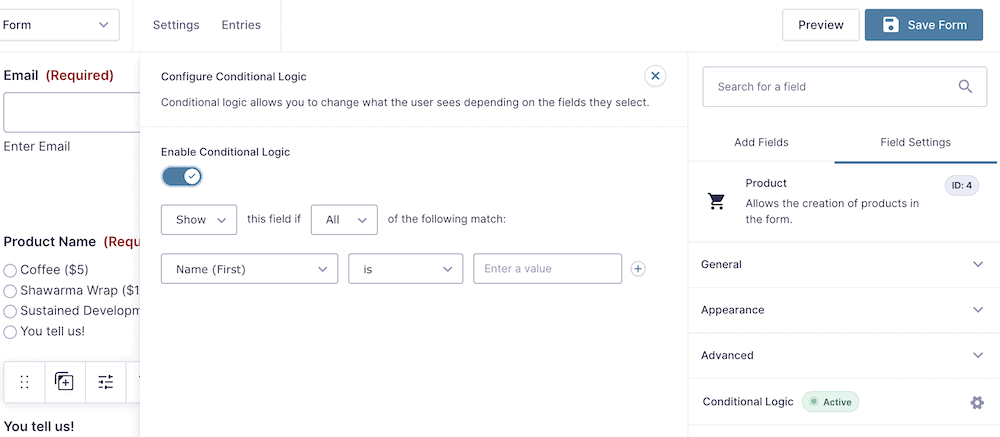
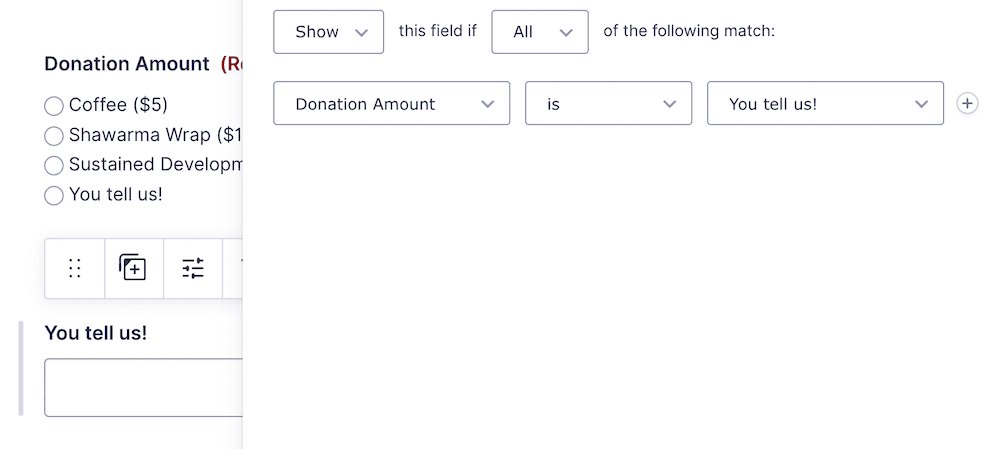
You’ll see Gravity Forms spring to life, and this will let you choose from a number of drop-downs to build your logic. You won’t need anything too complex here, although the result may look confusing if you choose a unique naming convention for your fields.
In short, you’ll want to make sure the conditional logic makes the custom pricing field visible when the radio button under the Donation Amount section relates to the user-defined pricing option:
This form is almost complete, but it needs a way for the user to pay, so this will be the penultimate step.
3. Integrate Your Donation Forms With a Suitable Payment Gateway
There are two elements to this one we must include: a way for the user to see the total amount, and a way to pay. The first is simple; select the Pricing Fields > Total option:

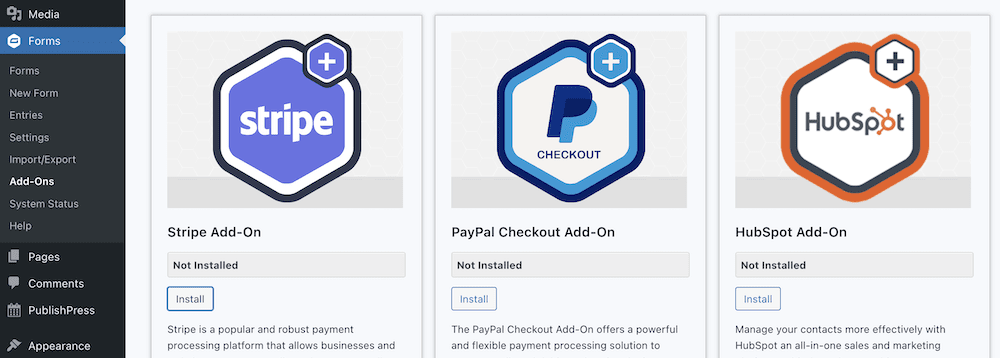
For the payment options, this can also be straightforward. However, if you don’t yet have any activated gateways, head to the Forms > Add-Ons screen, and install whichever suits your needs:
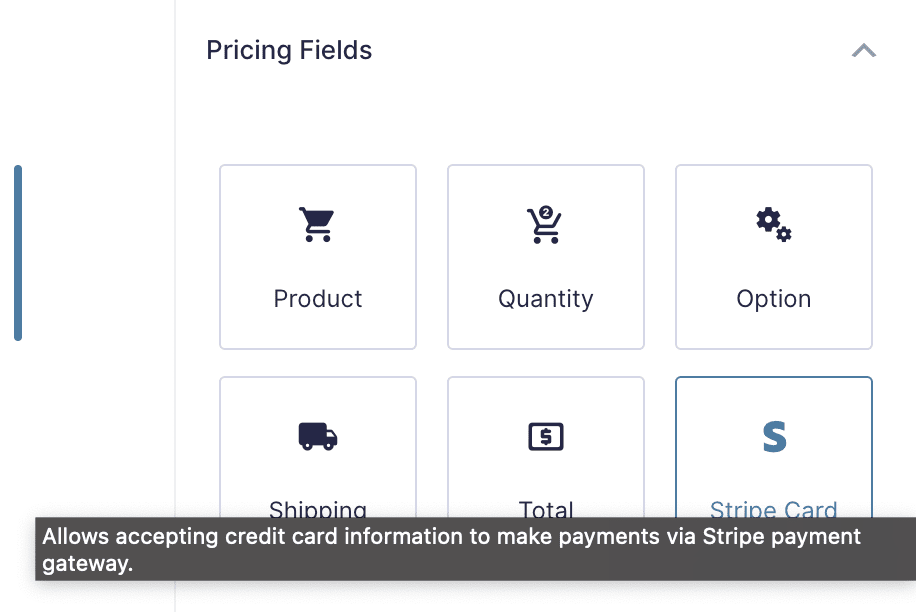
Depending on the gateways you activate, you’ll be able to choose from a variety of options within the Pricing Fields section:
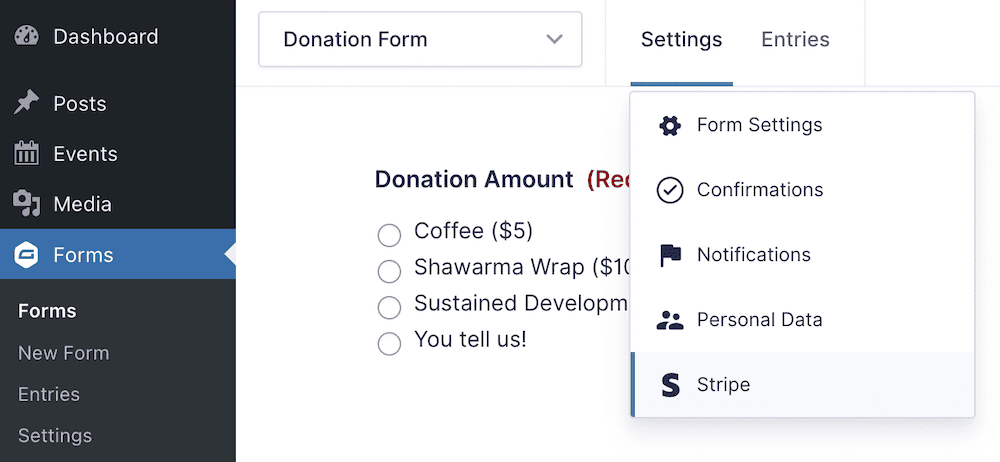
From here, you’ll need to connect the card fields to the gateway. To do this, you can select it from the Settings drop-down menu at the top of the form builder screen:
How to connect the feed will depend on the gateway in question. The Gravity Forms website has full documentation on how to do this for your chosen provider.
4. Embed Your Gravity Form In Your Post or Page
The embed process is as simple as any other WordPress elements. While we use the Block Editor, you might use Elementor, Beaver Builder, or another option for your page builder. However, the process will be similar: Choose the Gravity Forms option, and place it on the page. From there, choose the correct form from the drop-down menu:

Save your changes, then take a look at the form on the front end:
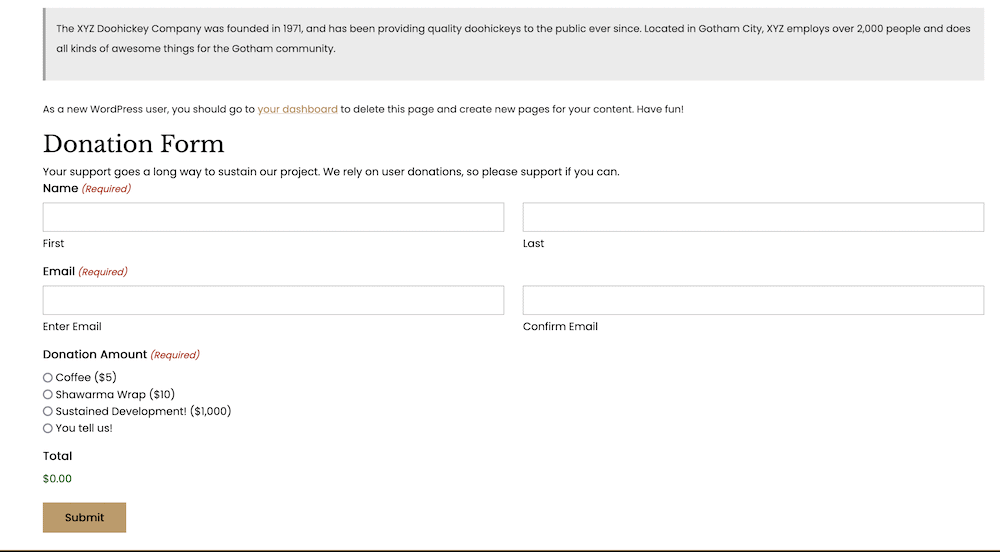
Of course, you can make the changes you need, or bolster your form in further ways. For example, you can offer optional survey questions to find out more about your users. Alternatively, you could link to a privacy policy, or provide another CTA after submission.
Wrapping Up
There are a number of projects, hobbies, and industries that rely on user donations to pay the bills. In fact, in the case of charities, a donation strategy will help to decide whether it operates at all. Using a WordPress plugin such as Gravity Forms can help you build good-looking donation forms for your site, and let users offer generosity when it comes to your project.
This post has looked at how to use Gravity Forms to create donation form on your site. The good news is that the process is just as simple as using any other form plugin. The core idea is to drag the fields into place, tailor them to your requirements, then publish the results. You’ll also need to link in a suitable payment gateway to make sure a user can give you a donation, but this isn’t much harder than the other steps.
Do you need to add donation forms to your WordPress website, and will Gravity Forms help you? Share you thoughts with us in the comments section below!