Our world is constantly changing and ensuring your business continues strong through change can be stressful. Though there are many options for building an engaging online presence, certain brick and mortar businesses may be at a disadvantage if they can’t physically interact with customers.
Luckily, if your business involves tours or viewings, you can use the WordPress VR plugin WP VR to add virtual reality tours to your website. With WP VR, you can quickly create walk-throughs of venues, homes, apartments, art galleries, gardens, and more.
Adding virtual tours to your WordPress website will allow prospective customers to view and hopefully book your services. You could even use virtual tours for online community events!
As you brainstorm ideas to boost engagement on your website with virtual tours, let’s learn more about the WordPress VR plugin WP VR.
- Navigating WP VR
- Creating a Virtual Tour with WP VR
Enjoy fast, secure hosting optimized for your WordPress site with our WordPress Hosting plans.
Navigating WP VR – A WordPress VR Plugin
The WordPress VR plugin WP VR creates a virtual reality tour in minutes. Once you upload a 360 panoramic image (i.e. taking a picture with the panoramic option on an iPhone) within the plugin’s settings, WP VR will create a virtual reality tour you can then add to any post or page.
In addition, the plugin provides varying options for VR customization based on if you’re using the free or premium version. Of course, before you can explore WP VR, you must install and activate the plugin in your WordPress dashboard.
Getting Started with WP VR
After the plugin is activated in your WordPress dashboard, you’ll notice a new menu item in your left sidebar titled WP VR. This is where you will upload and customize panoramic images for your virtual reality tours.
Clicking on WP VR or WP VR > Get Started will take you to the main settings area for the plugin. You will see 4 tabs: Info, Video Tutorials, Free vs Pro, and Settings. You will also see an alert at the very top asking your permission to allow WP VR to collect non-sensitive diagnostic data and usage information.
The title of each tab perfectly describes the information you’ll find on each, but we’ll still quickly go through them:
The Info tab gives a simplified outline of how to create a virtual tour, as well as provides links to their documentation and support. There is also minor marketing throughout for upgrading to the pro version of the plugin and exploring their additional plugins.
The Video Tutorials tab has the WP VR YouTube tutorials playlist embedded on the page. Allowing you to easily choose and watch the developer walk-throughs on how to use the virtual reality plugin.
The Free vs Pro tab lists the differences in features per the price points. Of course, additional customization features are only available with the pro version. However, if you’re looking for simple virtual reality tours, you may only need the free version.
The Settings tab allows you to configure the plugin settings per your needs. Each option has additional information that you can read by hovering your mouse over the ? icon. The plugin developer also provides a setup video on the Video Tutorial tab if you want more information on configuring your settings.
-
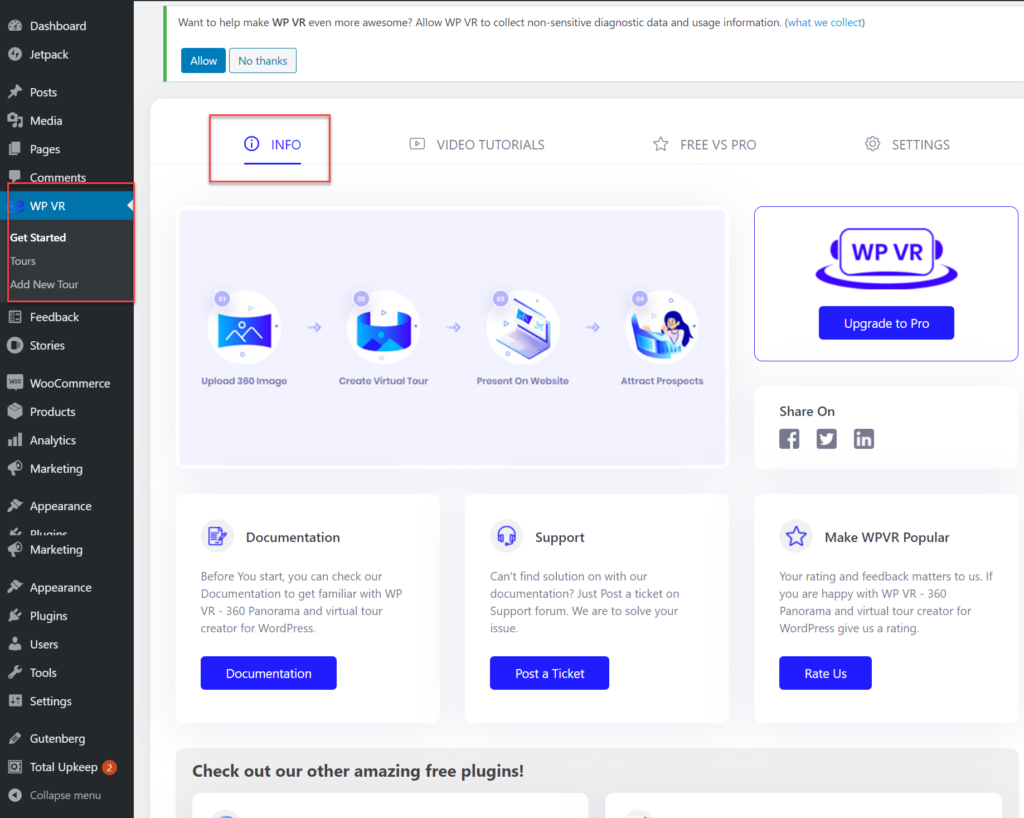
WP VR Info tab -
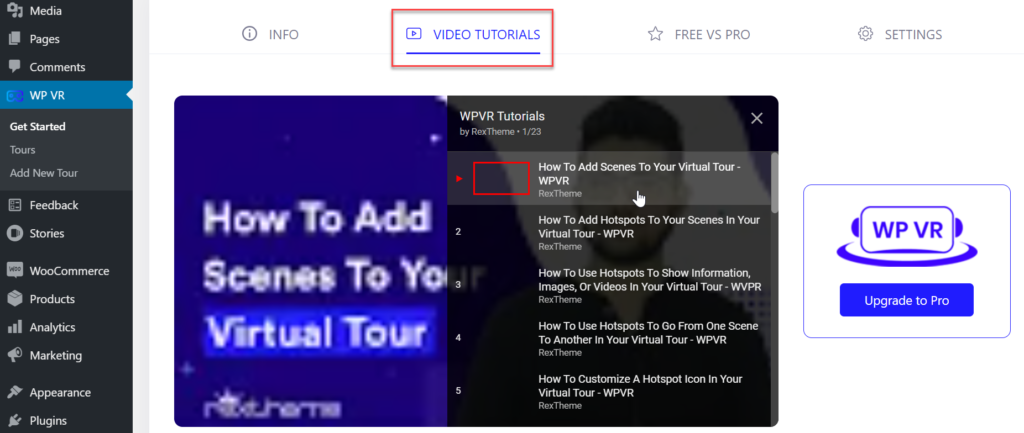
WP VR Video Tutorials tab -
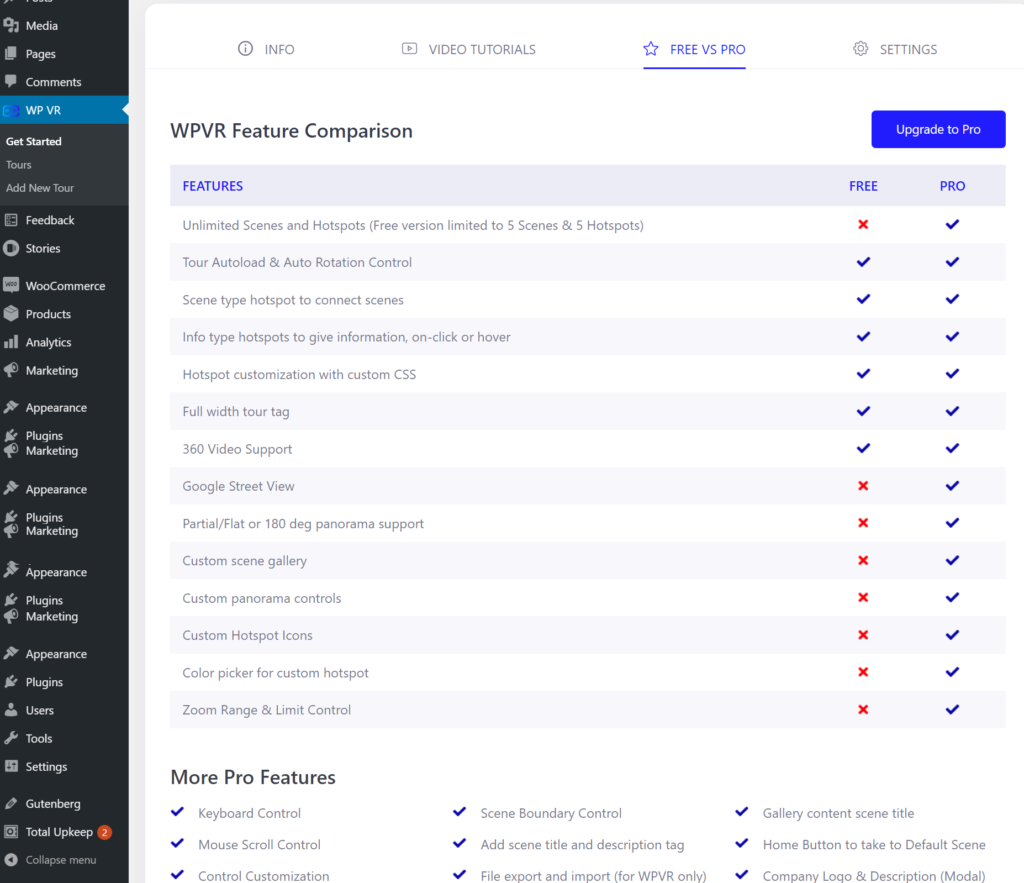
WP VR Free vs Pro tab -
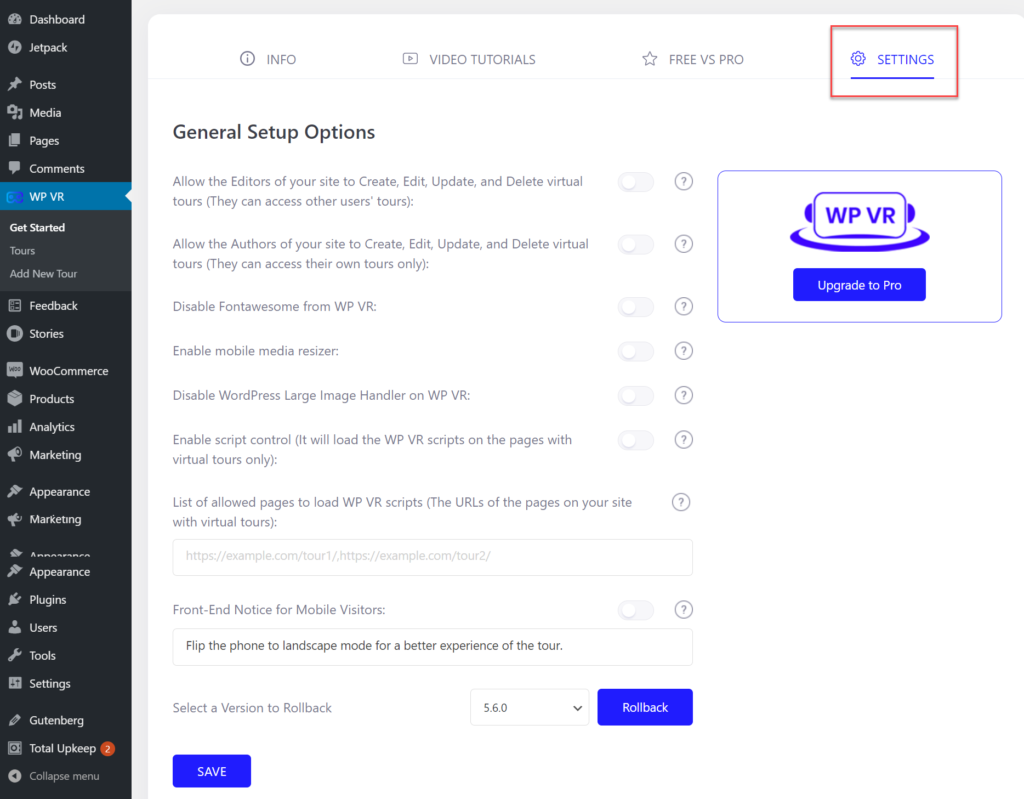
WP VR Settings tab
Gutenberg block or the shortcode.
-
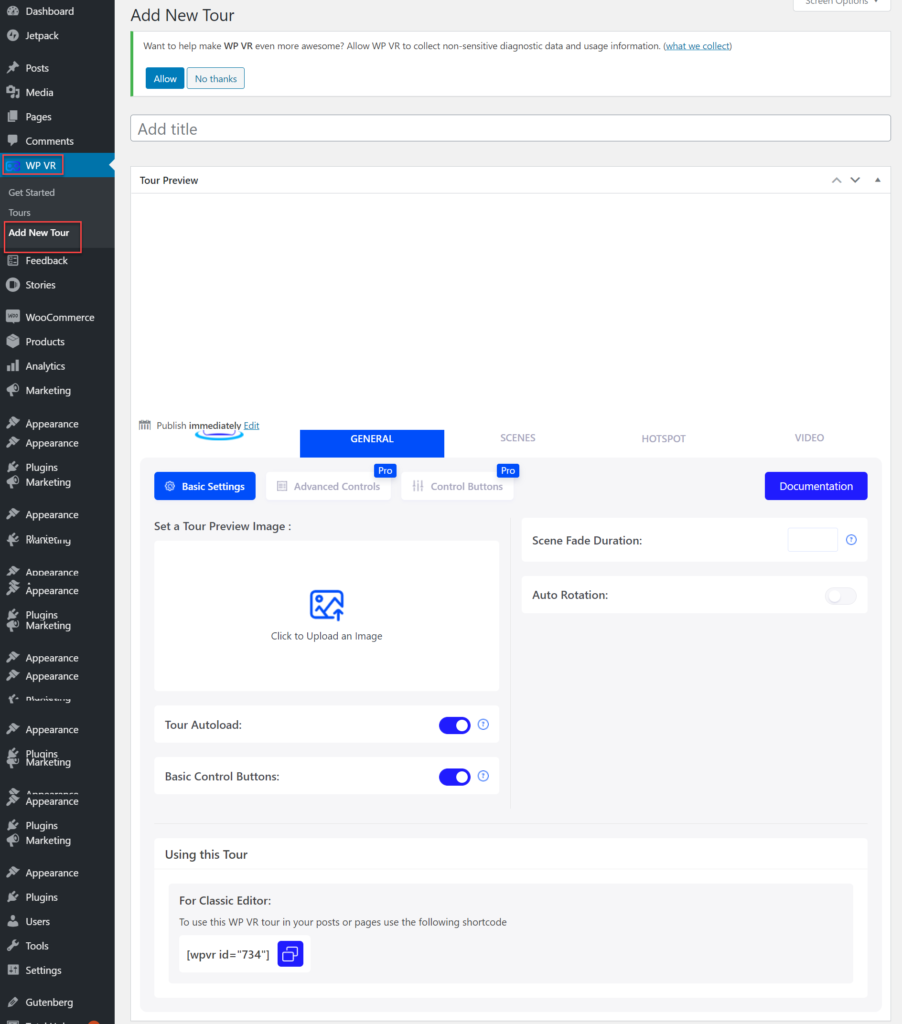
WP VR add a tour page -
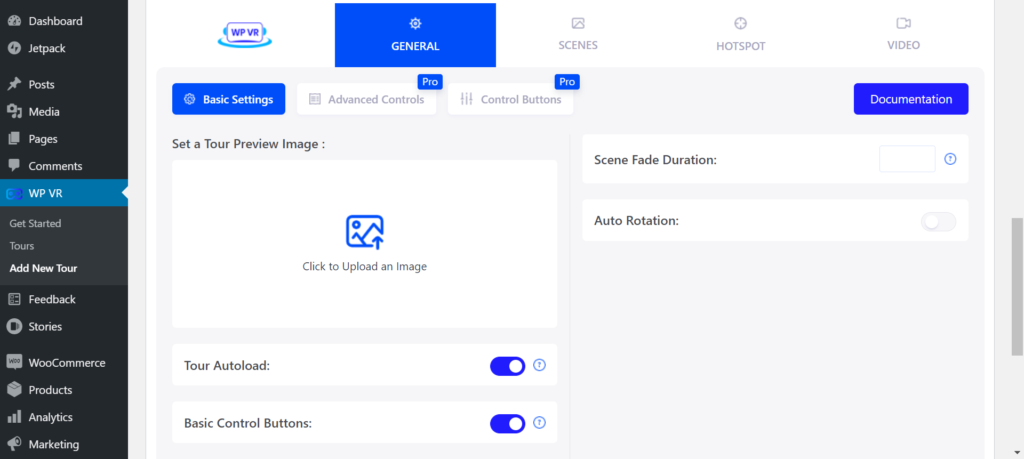
WP VR general options for adding a tour -
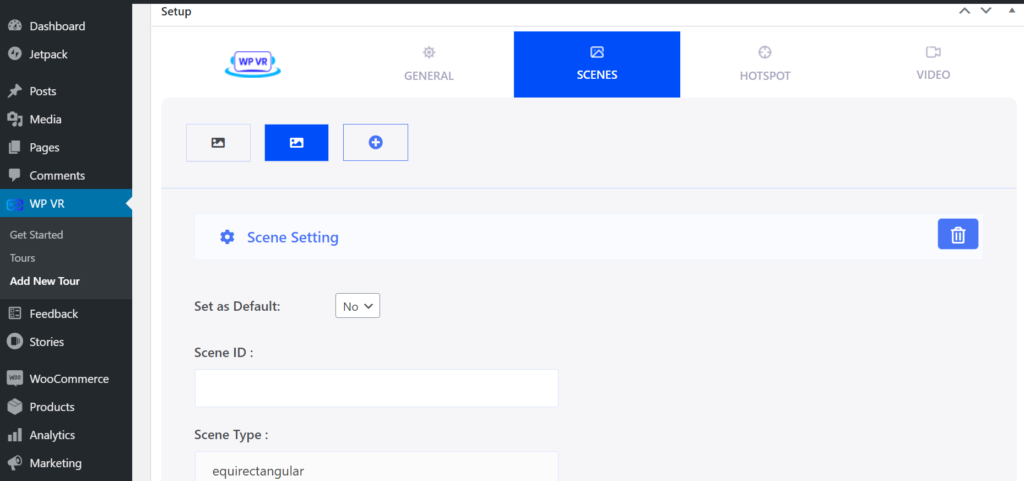
WP VR scene options for adding a tour -
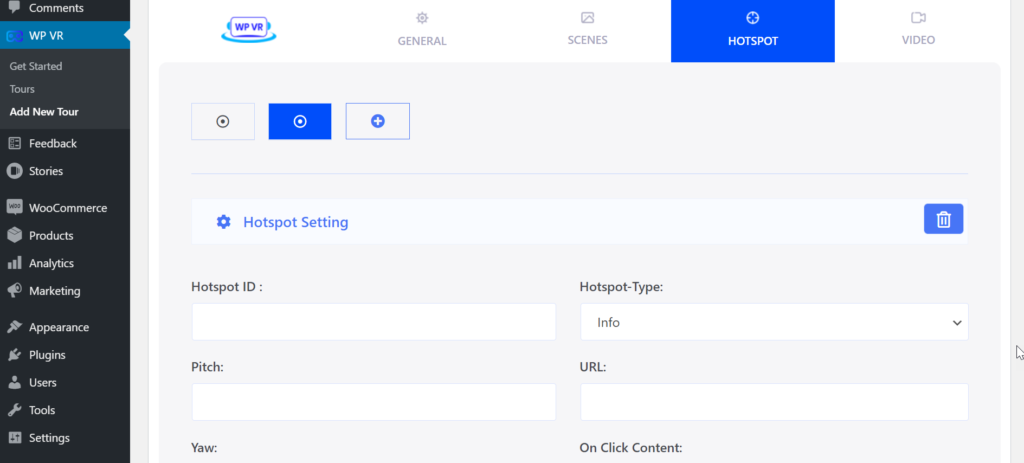
WP VR hotspot options for adding a tour -
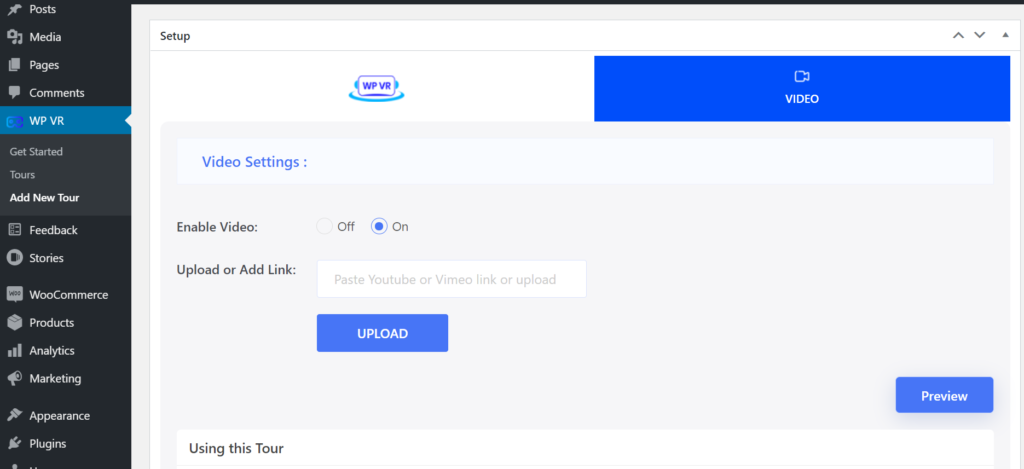
WP VR video options for adding a tour
WordPress plugins! Protect, optimize, secure, and expand the functionality of your website easily with the help of WordPress plugins!