Creating a staging site is a common practice for many website developers or designers who are updating and deploying updates to a site. It allows you to work on a different version of an existing website without interfering in its operation.
You can still use the practice of staging, just not as it was initially developed. BoldGrid users with cloud-based accounts can easily create staging sites. Stand-alone WordPress installations can create staging sites using the Total Upkeep backup plugin that comes free with a BoldGrid installation.
BoldGrid users who are not using cloud-based accounts may be familiar with the staging plugin for stand-alone WordPress installations, but this plugin has been phased out of the BoldGrid suite for the last few years.
This guide will give you the steps to use the free version of the Total Upkeep plugin for creating and deploying staging sites. The premium version of Total Upkeep will be necessary for the restoration of individual files.
- Installation of the Total Upkeep Plugin
- Creating the Staging Site
- Preserving Your Website Data
- Deploying Your Staging Site with the Total Upkeep Plugin

If you’re having trouble with your WordPress host, then check out InMotion’s WordPress Hosting solutions. We provide secure, optimized servers that are priced to meet your budget needs!
![]() Free WordPress Website Transfers
Free WordPress Website Transfers ![]() Free SSLs
Free SSLs ![]() Unlimited Bandwidth
Unlimited Bandwidth
View WordPress Hosting Plans
Installation of the Total Upkeep Plugin
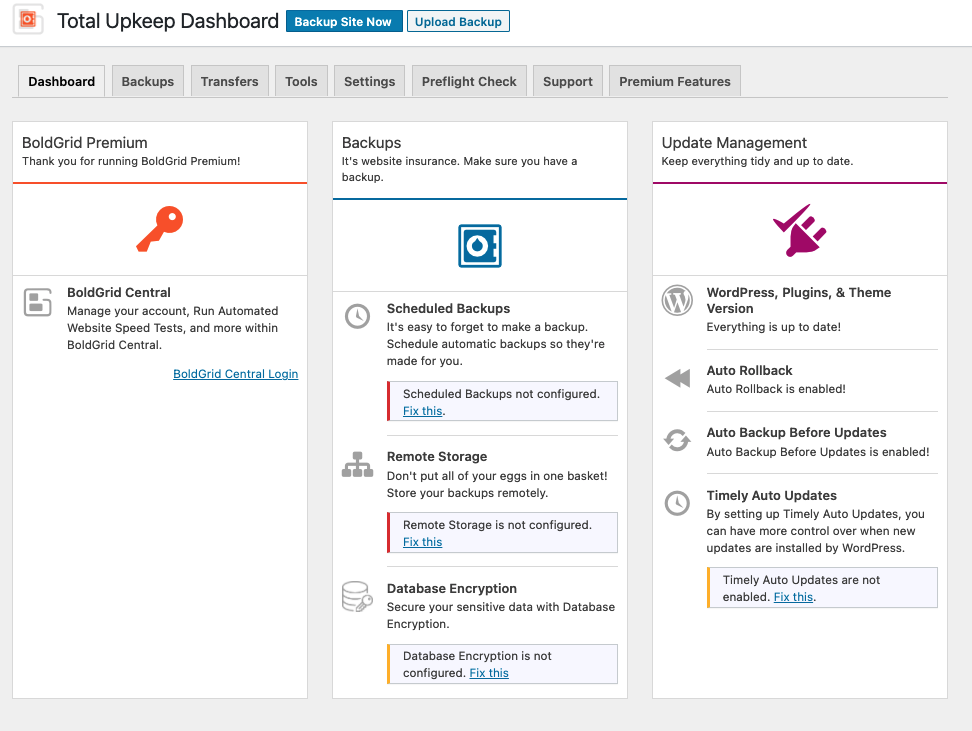
If you have already had BoldGrid installed, then you may not need to install the Total Upkeep plugin. You can skip this step if you can see that the plugin is installed. You can check for the plugin in the Plugins section of your WordPress site. Note: You do not need to have BoldGrid installed in order to use the Total Upkeep plugin.
- Login to the WordPress Administrator dashboard.
- Click on Plugins in the main menu. If the plugin is not already installed, click on Add New.
- In the search field labeled “Search plugins” type Total Upkeep.
- When the plugin appears in the search, click on the Install button. The installation will begin and then the button will change to Activate when the installation completes.
- Click on Activate to enable the plugin for your installation.
This completes the installation of the Total Upkeep plugin for your WordPress installation.
Creating the Staging Site
A staging site is basically a website that allows you to work on your existing site without disrupting the existing site’s ongoing operation. The Total Upkeep plugin allows you to make a backup of the existing site, then restore it using any name or restore it to a different location. You can also create a staging site by creating a brand new website in a new location or with a different domain name.
Create a Staging Site with a Backup
If you have a website named www.restaurantdemo.com, then you can make a backup of the existing site, then restore it to a different location. You would need to have the Total Upkeep plugin loaded on a blank WordPress site to restore the backup.
- Backup the existing site using the Total Upkeep plugin.
- To create the staging site from the backup, you will first need to install a blank WordPress site.
- Next, install the Total Upkeep plugin.
- Copy the backup file from step 1 so that you can access it from the Total Upkeep plugin where your staging site resides.
- Restore the site using the backup file.
Important! The location where you restore the site should either be a different server or just a different folder on the same server. You should also use a different name for the restored site. For example, you may want to name your staging site www.restaurantdemo-staging.com.
Remember that if you want to be able to access the site from the internet, then the URL you’re using must be a registered domain name, or you would need to define it in the hosts file.
An easy way to avoid the need to edit the hosts file is to simply restore the backup WordPress site into a subfolder. For example, www.restaurantdemo.com can be restored to a subfolder and accessed as www.restaurantdemo.com/staging.
When the site has been restored, it will be a fully functioning WordPress site that you can launch and customize. Total Upkeep does allow you to preserve and restore individual files, so you can retain existing data or uploaded files with the plugin. We will discuss this in more detail later in this guide.
Create a Staging Site with a New WordPress Site
The other way to create a WordPress site is to simply create a new WordPress website that is not named the same as your active one. The main difference in this method is that you are not working from a copy of the old site or its saved data. You would be creating a brand new site then using Total Upkeep to back up the site and then restore it over the original site.
- Create a new WordPress site. Remember that it can’t use the domain name that’s in use by your active website.
- Install Total Upkeep.
- Customize your WordPress site.
Regardless of how you create your staging site, it is important to remember that your staging site will eventually replace your live site.
Preserving Your Website Data
Ideally, when you’re working with your staging site, then your production site (the live site) would not change. This would allow you to work with a copy of that site’s database and then restore it while preserving the user data or files that your viewers may have previously added to your site.
However, this rarely happens and your live site will typically have user interactions during the time that you’re modifying the next version of your site. For example, you may have users making comments or posts on your WordPress site. If a change occurs after your site backup, then that data would be lost if you were to restore the new version of your site from your Staging site backup.
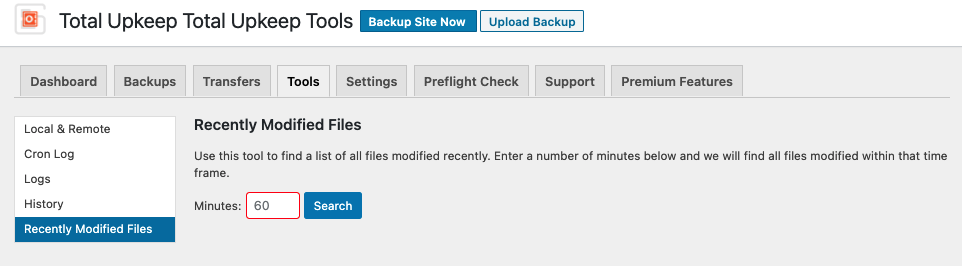
The Total Upkeep plugin gives you the solution to this problem in a few different ways! First, the customized backup option allows you to make backups of individual tables in the database. The plugin also allows you to search for recently changed files on your site.
This plugin feature allows you to work on your Staging site, then transfer database or file changes to your site when you’re ready to deploy. The option to restore individual files will require the premium version of the Total Upkeep plugin.
Deploying Your Staging Site with the Total Upkeep Plugin
When you’re finished with the development of your staging site, then your last step is to deploy it. The staging site would then replace your existing site and become your live site.
Total Upkeep allows you to do this by using its restore function. However, before you deploy, you should do at least 4 things:
- Notify your viewers that your site will be unavailable when you’re deploying your staging site. You should provide a date and the estimated time that your site will be down. Advanced notification to your customers shows that you care.
- Suspend all activity to your existing website. Use a maintenance mode plugin to make your WordPress site temporarily unavailable. If you have multiple administrators or editors then make sure they know when you’re deploying your staging site so that they’re not in the WordPress site during that time.
- Make a current backup of your WordPress site using the Total Upkeep plugin. This will help you recover should it be necessary.
- Make a note of any plugins or themes that have updated during the development of your staging site. Plugins or themes often get updated, and it may simply be easier to update plugins after you have deployed your staging site.
When you deploy your site with Total Upkeep you are using the restore function of the plugin to overwrite the existing WordPress site. So, it is very important that you have a current backup of your site and that you are aware that you will be replacing the existing live site.
Steps to Deploy your Staging Site
- Make a current backup of your Staging site. If you have a maintenance mode plugin, make sure to activate it before you make a backup of your site. This will allow your site to come up in maintenance mode and prevent access until you’re absolutely ready.
- Make a backup of your live site if you have not already done so. Make sure that the backup file is in a safe location where it will not be overwritten.
- Transfer the Staging site backup to a location where you can access it from the Total Upkeep plugin on your live site.
- Restore the Staging site backup overwriting the live site. Make sure you are restoring the site with the correct URL.
- Check your live site to make sure that your changes have properly been transferred.
- Disable any maintenance mode plugin and announce your newly restored and renovated site!
Deploying the staging site is the same as a site migration with the Total Upkeep plugin. Your last steps should be to make sure that your newly restored site is working properly. Make sure to double-check all the functionality. You should also check to make sure that any plugin or theme updates that occurred before your current deployment are applied to the site.
Finally, if you have any data or file updates that occurred during your staging site development, you can use Total Upkeep to restore those individual tables or file changes to the site without completely overriding your newly deployed site.
Congratulations! You now know how to create and deploy a staging site for WordPress development! To learn more about using WordPress, check out our WordPress Education Channel. We also have a section dedicated to many useful WordPress plugins.