The cPanel Backup Manager feature allows you to automatically make backups of your account’s files. This includes your database files and the website files within your cPanel account. Backups are stored on separate physical hardware from your hosting account. This is done to provide a secure and safe backup away from your web hosting server. To start, you are given a 10 GB block of storage space for your backups. Additional storage blocks can be purchased in your Account Management Panel (AMP) interface. Follow the tutorial below to learn how to use the features of the Backup Manager.
- Finding the Backup Manager in cPanel
- Describing the Sections of the Backup Manager
- How to Restore a Backup
- Backup Settings
- Specifying Child Account Backup Storage
High-Availability Cloud VPS subscriptions offer complete snapshots as an alternate way of making backups.
How to Find the Backup Manager in cPanel

Finding the Backup Manager in the cPanel is a quick and easy task.
- Log in to the cPanel.
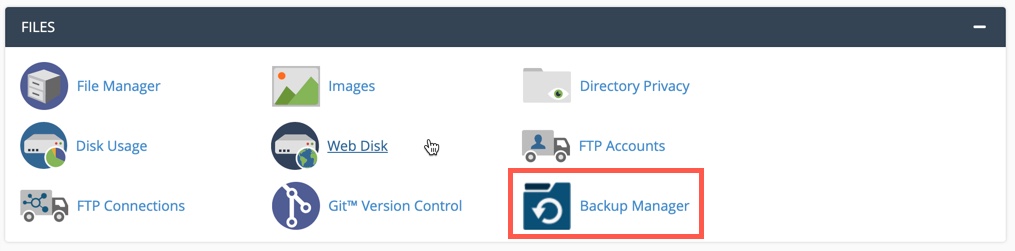
- Scroll down to the Files Section.
- You will then see the icon for the Backup Manager as per the screenshot above. Click on Backup Manager to launch the application.
Understanding the Sections of the Backup Manager
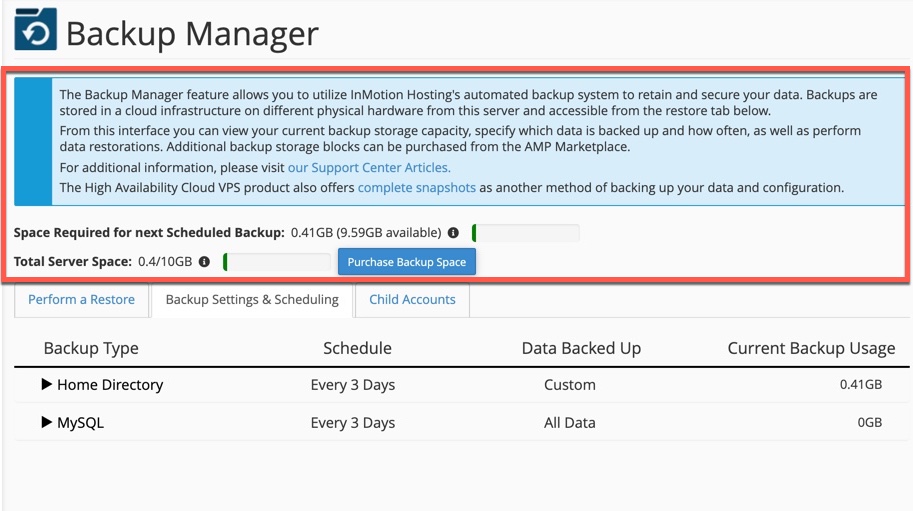
The interface of the Backup Manager can be described in two sections. The first section starts with a description of the Backup Manager followed by two lines that display the storage space needed by your upcoming backup and the total space used by all of your backups. There is also a button that lets you purchase additional space. You can see this section highlighted below.
The second part of the Backup Manager interface is divided into three main tabs. This portion of the Backup Manager is where you perform website file backups, database backups, and restorations. The third tab is for child accounts that have been created within your cPanel. Child accounts are simply websites that you added through your cPanel account. You can see this section in the screenshot below.
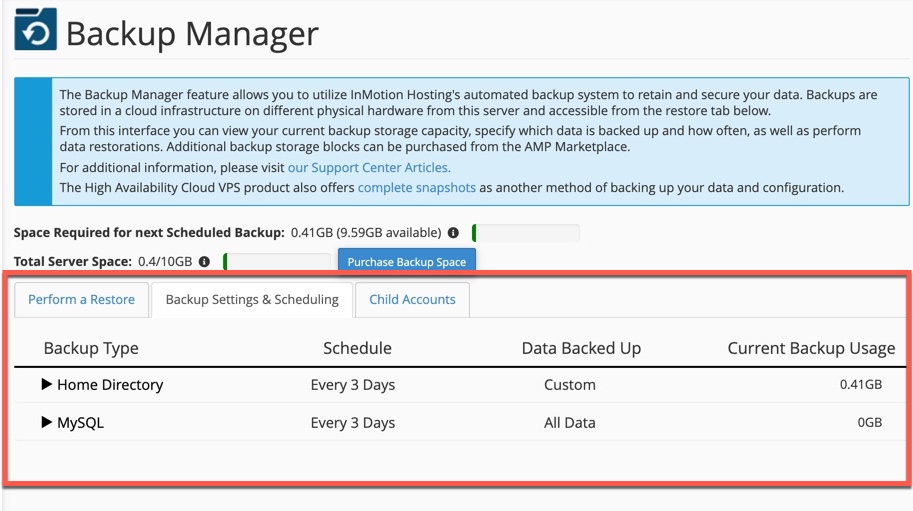
We will step you through each section and give you the steps on how to restore your backups, make backups for your entire account, and specify storage space for your child accounts.
Restoring Backups
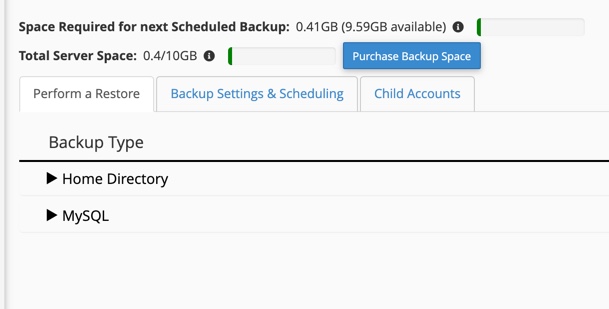
Restorations are divided into Backup Types:
- Home Directory – this area is where you can select website folders to be included in the restore
- MySQL – this where you can select database backup files to be restored
How to Restore Website Files
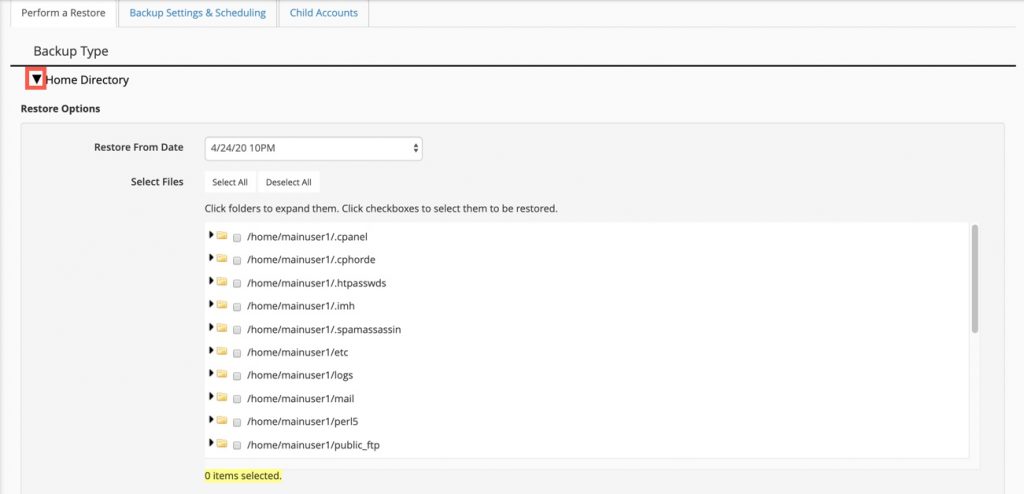
When you restore your website files you have the option to restore from a specific date, restore all files, or restore specific files that you select. You also have the option of selecting where the files will be restored and if you wish to receive an email notification when the restoration is complete. Follow these steps to restore a backup:
- Click on the arrow next to Home Directory to expand the options for restoring files.
- Click on the drop-down arrow next to the date in order to select a specific date to restore. Note that you would need to have multiple backups for this option to work.
- Next, you need to select all the files option or select files to restore.
- After you have selected what you want to restore, you will select where the restoration will occur. You can also elect to restore to a different location. You will need to provide that location, but it would still be within the same account.
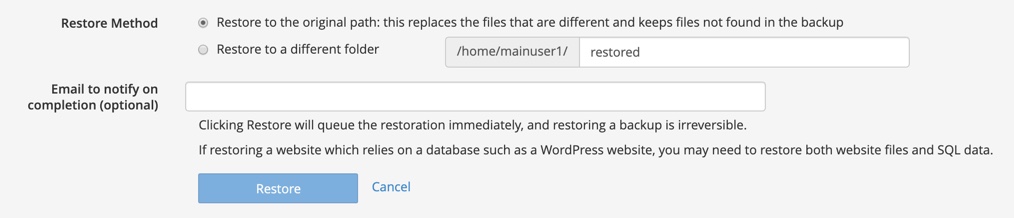
As per the warning in the first option, if you restore to the original location, it will overwrite and replace existing files that are different but keep files that are not found in the backup. This means that if a file name is the same in the backup, but with a different date (older or newer), then the file would be replaced. If the file name is not found in the backup, then it will remain.
- Type in an email if you wish to receive an email notification. This is helpful if the backup is large as it may take some time.
- Click on the Restore button to restore your backup.
How to Restore a Database Backup
- Click on the arrow next to MySQL in order to begin restoring a database.
- To restore from a specific date, click on the drop-down arrow to choose a different backup. You would need to have multiple backups in order for this option to work.
- Click on the drop-down arrow in order to select a specific database to backup. The Backup Manager backs up all of the databases created within the cPanel account. If you have several databases, then you will need to specify one to restore.
- Select where your database will be restored (dump path). You will be able to create a folder by typing a name in the blank field. Note that your restored database is being sent to your account location.
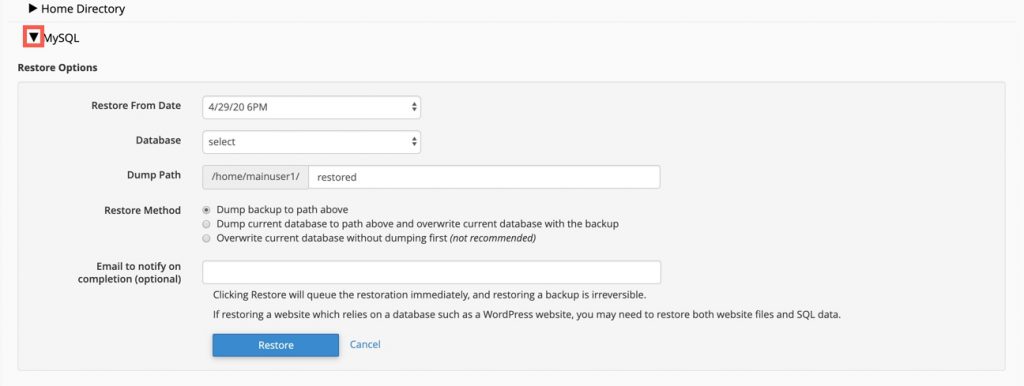
- The Restore Method allows you to select one of the following options:
– Dump backup to the dump path that you specified previously
– Dump current database and overwrite the database on your
MySQL server
– Overwrite the database without getting a dump of your
database - Type in an email address to get a notification when the restore is complete.
- Click on the Restore button to restore your database backup.
Backup Settings
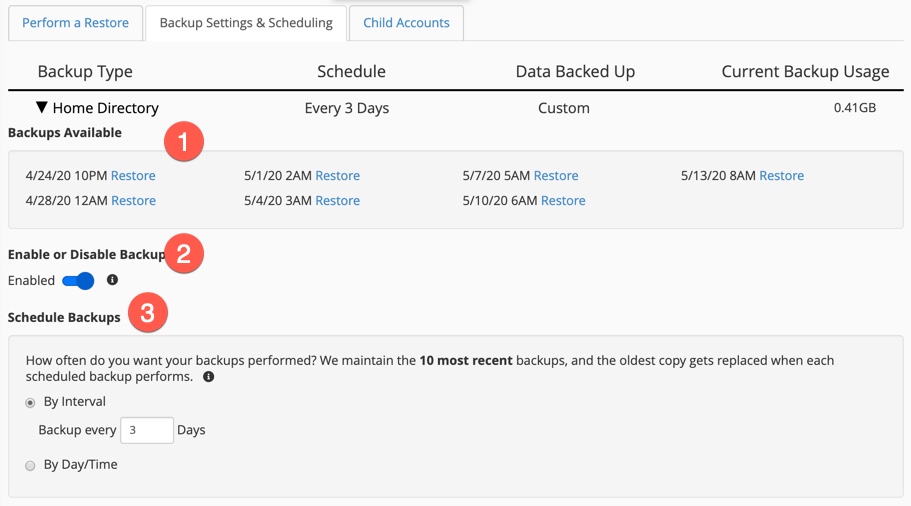
When you click on the Backup Settings & Scheduling tab you will see Home Directory and MySQL. Each option can be expanded by clicking on the arrow. The Home Directory gives you the option to configure and schedule the backups for your website files.
Home Directory Settings for Backup
| Setting | Description |
|---|---|
| Backups Available | If you already have backups completed, then they will be listed in the section labeled Backups Available. Each backup listed will have a Restore link next to it for convenience. |
| Enable or Disable Backups | Click on the switch to enable or disable backups. |
| Schedule Backups | You can select by interval (days), or by specific day and time. |
After the schedule settings, you will see a section labeled Data Included in Backup. Here you can select the files to include in your backup. You have the option to select all folders in the home directory, backup selected folders, or exclude selected folders. You can then select the folders using checkboxes in the window as per the screenshot below.
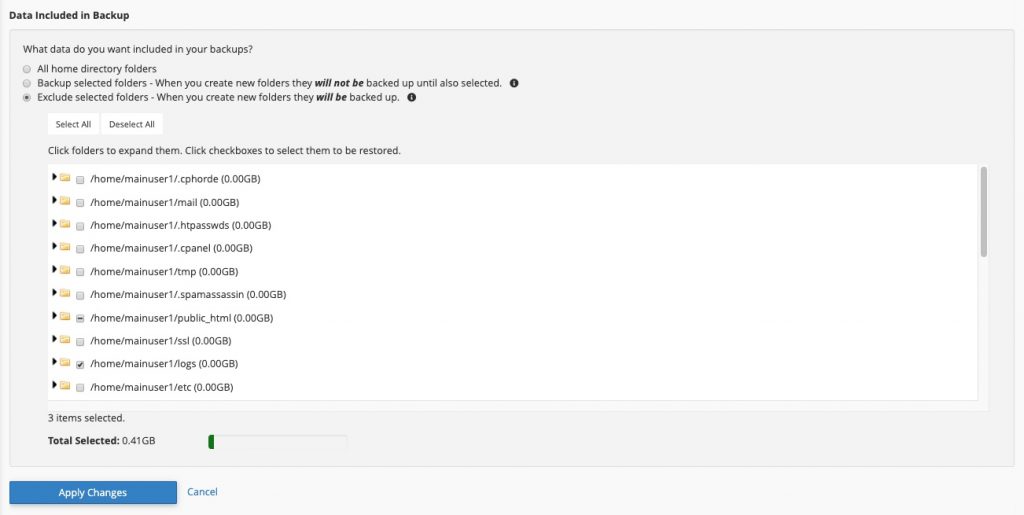
Once you have the settings set the way you want them, click on the Apply button to save your changes.
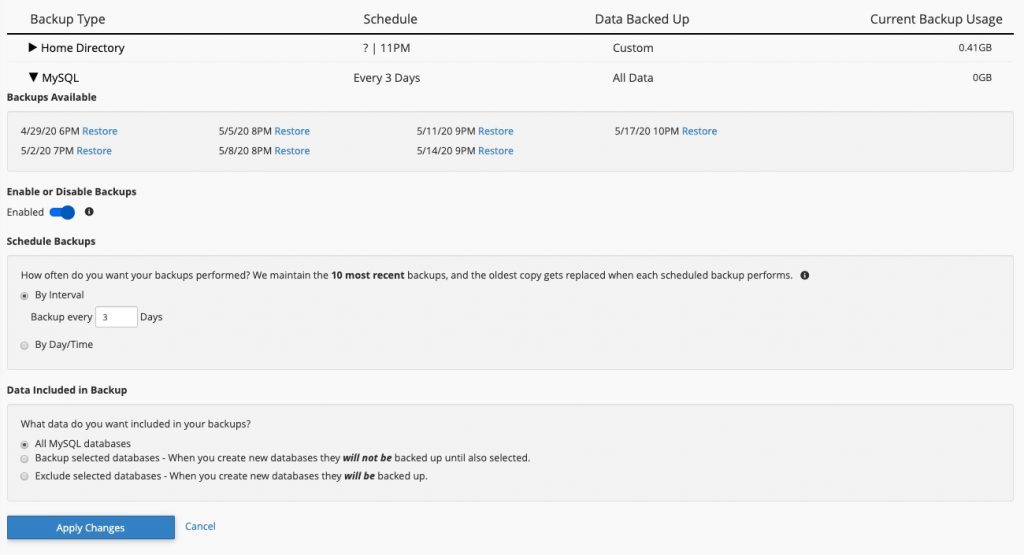
MySQL Settings for Database Backup
The settings for making database backups can be seen by clicking on the arrow next to MySQL.
| Setting | Description |
|---|---|
| Backups Available | If you have already created a backup then it will be listed here. You can also choose to restore it. |
| Enable or Disable Backups | Click on the toggle switch to enable or disable the backups for your databases. |
| Schedule Backups | Select to make your backups by an interval in days or by a day and time. |
| Data Included in Backup | Select what data will be included in your database backups. You can select all databases or specific databases. |
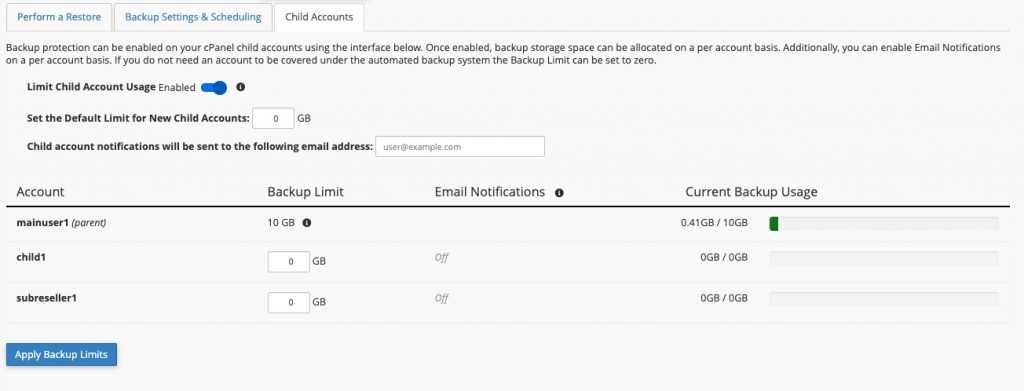
Child Accounts
cPanel accounts can include child accounts that can be part of the overall account backups. There may be instances when each child account needs to have limits imposed on their backups. The options provided with Child Accounts allow you to set the backup limits for each account as well as email notifications.
| Option | Description |
|---|---|
| Limit Child Account Usage | Click on the toggle to enable or disable this feature |
| Set the Default Limit for New Child Accounts | You can set the storage space limit on backups for child accounts (in GB) |
| Child Account Notifications email address | You can specify an email address for notifications when a backup is completed |
| Child account backup table | This table is a list of all the child accounts, the set backup limit, email notifications and the current backup usage of each child account |
You can disable backups for a specific child account by setting the backup limit to 0.
Once you have the limits set for your child accounts, click on Apply Backup Limits to save your changes.
For more information, please see the guides provided with InMotion’s Backups and Restorations page.