Replication is the process of making a copy of something. Using the replication process we can copy the active directory database from one site to another site. Replication is the process of sending update information for data that has changed in the directory to other domain controllers. That means we are creating a backup of the original domain controller to make sure it is available in the case of failures. Active Directory replication is key to the health and stability of an Active Directory environment. When replica of Active Directory is implemented, every change that is being made to master serve will be replicated to a secondary server.
Following are the steps to configure and test the Active Directory replication on Windows Server 2012. This will replicate the AD changes on Mirror Server :
First, we need to set up 2 Windows 2012 Servers [Master & Mirror]. After setting up servers, we need to install the ADDS on both the servers and Promote Master DC as mentioned below :
- Open Server Manager. from the Manage, click Add Roles and Features, and click Next.
- On the Select installation type page, click Role-based or feature-based installation and click Next.
- On the Select destination server page, click Select a server from the server pool, click the name of the server where you want to install AD DS and then click Next.
- On the Select server roles page, click Active Directory Domain Services, click Add Features and then click Next.
- On the Select features page, select any additional features that you want to install and click Next.
- On the Active Directory Domain Services page, review the information and then click Next.
- On the Confirm installation selections page, click Install.
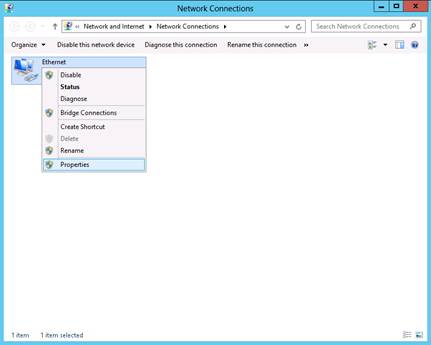
- On the Dashboard, verify Installation succeeded by clicking on flag icon, and click Promote this server to a domain controller to start the Active Directory Domain Services Configuration Wizard.
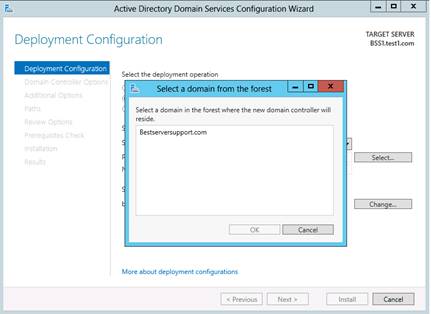
- On the Deployment Configuration page, click Add a new forest and then type the name of the root domain.
- On the Domain Controller Options page, select the domain and forest functional levels(i.e. Windows Server 2012), click Domain Name System (DNS) server, specify the DSRM password, and then click Next.

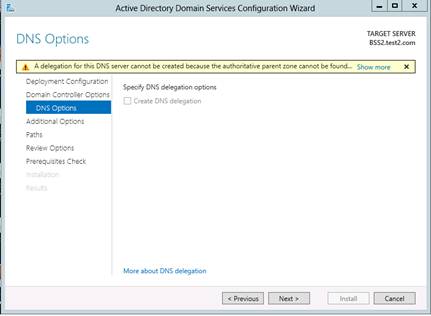
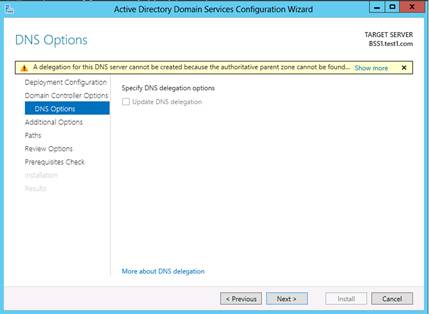
- On the DNS Options page, click Next. (We will see DNS Delegation Warning, and we can ignore it.)
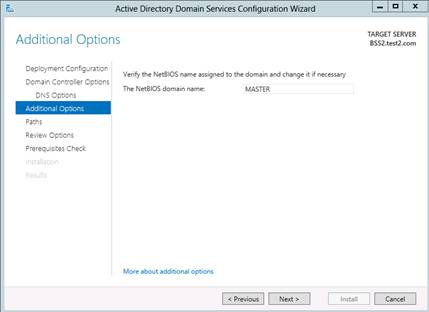
- On the Additional Options page, verify the default NetBIOS name of the domain, and then click Next
.
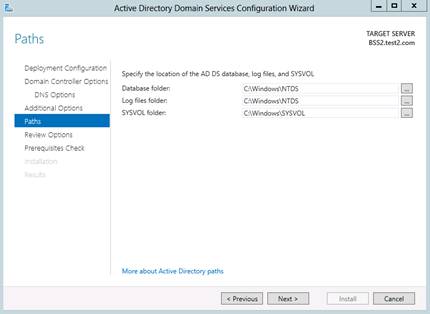
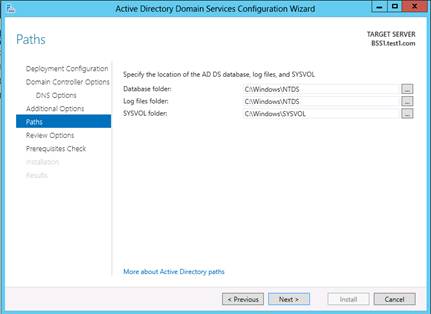
- On the Paths page, accept default locations, and click Next.
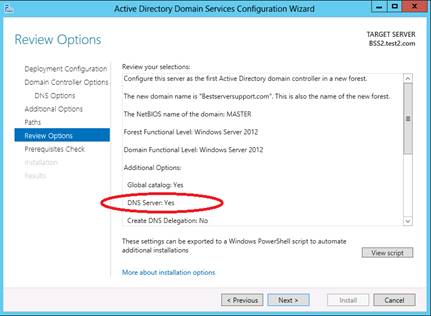
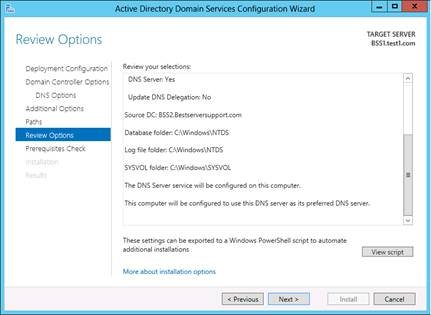
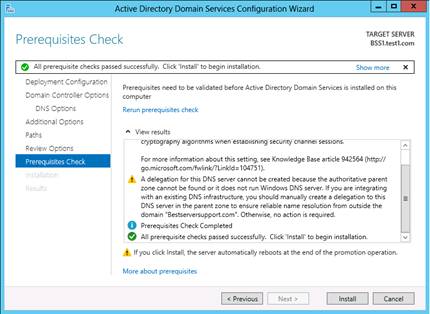
- On the Review Options page, confirm your selections, (We must need to check DNS Server: Yes from the script. If it is not there, our entire system will not function properly) and then click Next.
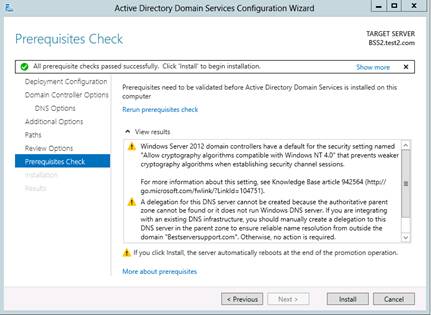
- On the Prerequisites Check page, confirm that prerequisite validation completed and then click Install.
- The server will now be restarted automatically to complete the AD DS installation.

Now follow the below mentioned steps for AD DS Promotion on the Mirror Server :
- Open Server Manager. from the Manage, click Add Roles and Features, and click Next.
- On the Select installation type page, click Role-based or feature-based installation and click Next.
- On the Select destination server page, click Select a server from the server pool, click the name of the server where you want to install AD DS and then click Next.
- On the Select server roles page, click Active Directory Domain Services, click Add Features and then click Next.
- On the Select features page, select any additional features that you want to install and click Next.
- On the Active Directory Domain Services page, review the information and then click Next.
- On the Confirm installation selections page, click Install.
- On the Dashboard, verify Installation succeeded by clicking on flag icon, and click Promote this server to a domain controller to start the Active Directory Domain Services Configuration Wizard.
- On the Deployment Configuration page, click Add a domain controller to an existing domain, type the name of existing domain and Click on Select Button and supply the admin login credentials of Master DC along with the Domain, and then click Next.
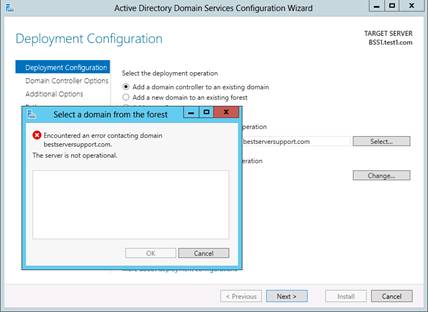
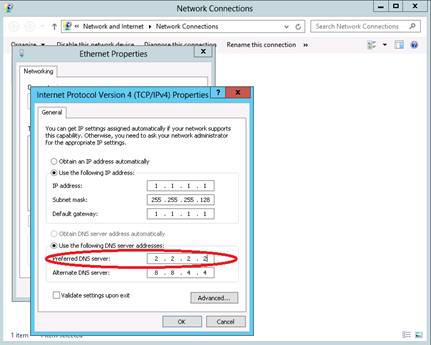
- If the domain is not in the list, then We need to add IP address of Master DC in Preferred DNS Server.
- For this, go to Ethernet Properties of your server and modify the settings of Preferred DNS Server. In preferred DNS, assign IP of Master DC.
- After this step, repeat above mentioned step no-9 for selecting domain. You can see now your domain is in the forest list.
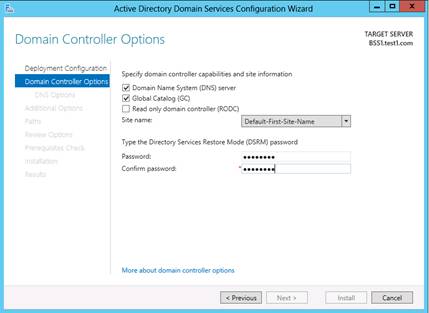
- Now, on the Domain Controller Options page,check DNS and GC options, type and confirm the Directory Services Restore Mode password, and then click Next.
- On the DNS Options page, we will see DNS Delegation Warning. If we Ignore above DNS Delegation Warning, it will manage the DNS Records from its end. We just need to ignore it.
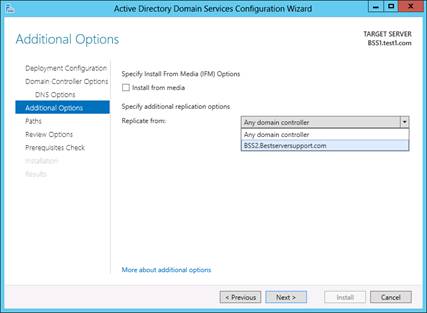
- On the Additional Options page, select the domain controller that you want to replicate the AD DS installation data from and then click Next.
- On the Paths page, accept default locations, and then click Next.
- On the Review Options page, confirm your selections, and then click Next.
- On the Prerequisites Check page, confirm that prerequisite validation completed and then click Install.
- The server will now restart automatically to complete the AD DS installation.
Here we are done with the basic configurations.
Now to Verify Active Directory Replication perform following steps:
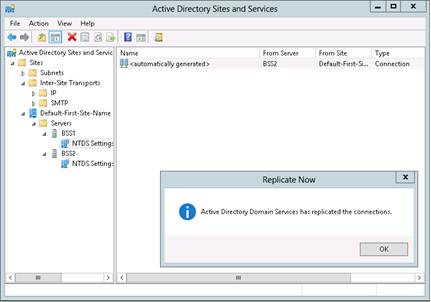
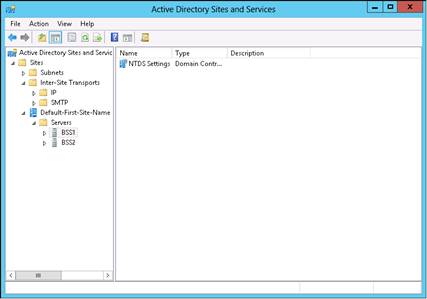
- Open Active Directory Sites and Services, here you will see both the servers are added.
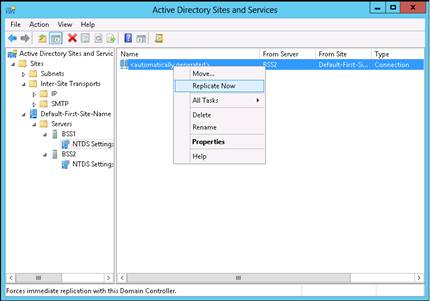
- Navigate to any of the servers and Right Click on Automatically Generated Script. Select Replicate Now Option.
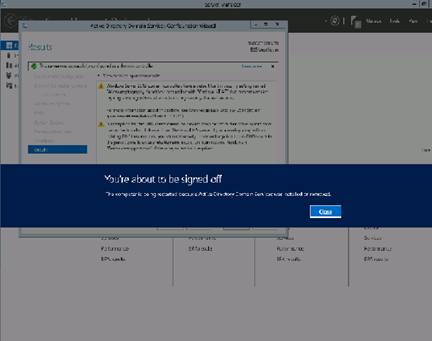
- You will see an informative dialog box as displayed in following picture which is a sign of a successful replication.