Searching for the best WordPress event calendar plugin? In our hands-on Sugar Calendar review, I’m going to take a look at a newly-revamped plugin from Sandhills Development, the same team behind the popular Easy Digital Downloads and AffiliateWP plugins (and previously the Restrict Content Pro membership plugin, before selling it to another company).
Overall, Sugar Calendar focuses on offering all of the important features that most people need in a really lightweight approach with a simple interface and settings area (and clean code, which developers will appreciate).
Personally, I like this approach as it keeps things simple, lightweight, and bloat-free. With the premium version, you’ll also still be able to access advanced features such as paid ticketing (via Stripe or WooCommerce), calendar integrations, front-end event submissions, and more.
All in all, if you’re looking for a lightweight, extensible event calendar plugin from a well-established WordPress development company, Sugar Calendar is a great option to consider.
Keep reading our Sugar Calendar review for a hands-on look at everything that it has to offer. Here’s everything that we’ll cover:
Sugar Calendar Review: Feature List

I’ll show you all of the features in detail, but here’s a quick rundown of what Sugar Calendar offers for free:
- Create unlimited events – each event gets its own dedicated page
- Display events in unlimited calendars
- Integrate with form plugins to create event registration forms
- Display event locations on Google Maps
And with the premium version, you can:
- Create recurring events
- Sell event tickets via Stripe or WooCommerce
- Link events to external URLs (e.g. a Zoom meeting link)
- Integrate with popular calendar services (Google Calendar, iCal, etc.)
- Create front-end event submission forms
Sugar Calendar Pricing
Sugar Calendar comes in both a free version at WordPress.org as well as a premium version. Beyond that, there are also free and premium add-ons.
The free add-ons are as follows:
- WP All Import integration to import events from CSV
- Google Maps integration to display event locations on Google Maps
- Integrations with Gravity Forms and Ninja Forms to create event registration forms
And here are the Pro add-ons:
- Front-end event submissions
- Event URLs
- Event ticketing
- Calendar feed integrations with Google Calendar, iCal, and more
You can purchase the core premium version starting at $29 for use on a single site, which includes premium features such as recurring events but does not include the Pro add-ons.
To access the Pro add-ons, you can either pay $89 for one year of support/updates or $249 for lifetime support/updates. Both of these plans support unlimited sites.
How to Use Sugar Calendar Free Version
In this first section, I’ll show you how to use the core event calendar features in the free plugin at WordPress.org. Then, in the next section, I’ll show you how to use the premium add-ons.
The core Sugar Calendar plugin is super simple and lightweight. Again, I think this is one of the plugin’s biggest selling points.
You can be up and running with an event in no time. Additionally, if you’re handing off the site to less technical people (e.g. a client), they will probably appreciate how simple the interface is.
Configuring Basic Settings
Once you install and activate the plugin, you can pretty much jump into creating events right away. However, there is a settings area that you might want to peruse first.
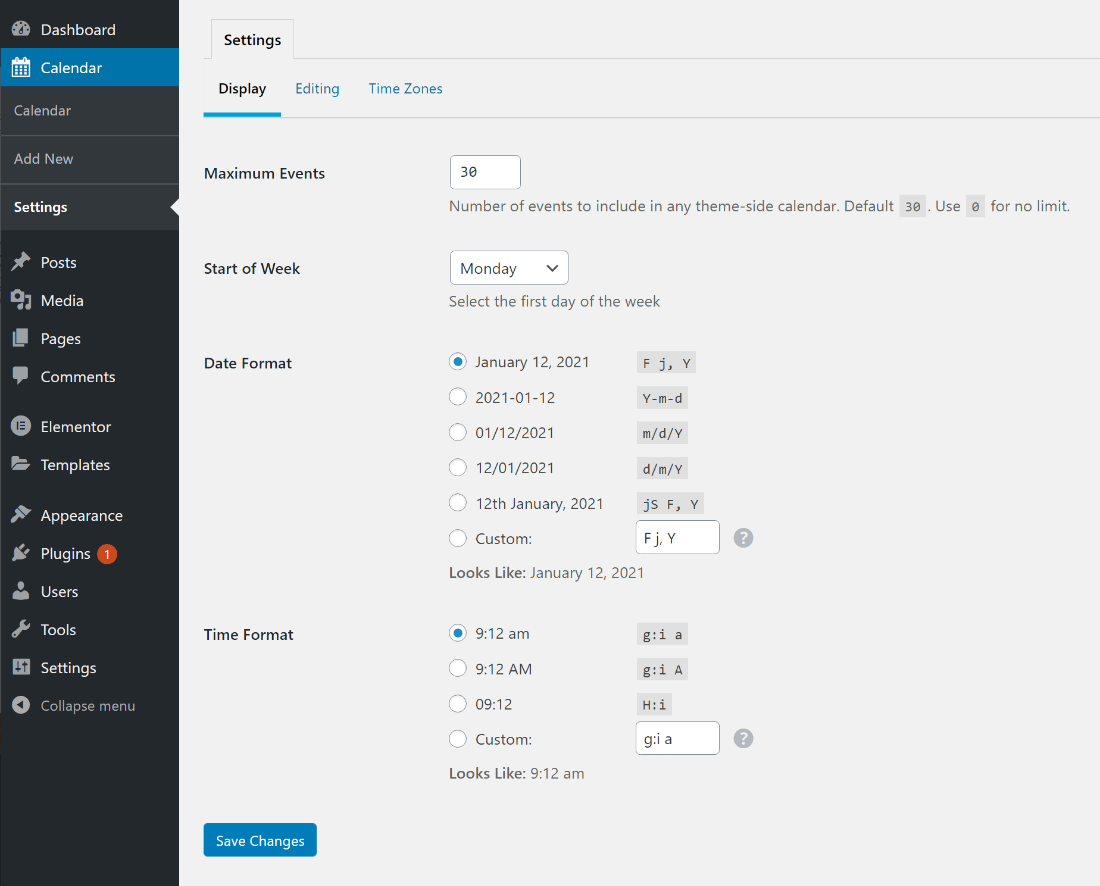
In the Display tab, you can choose basic date/time format settings:

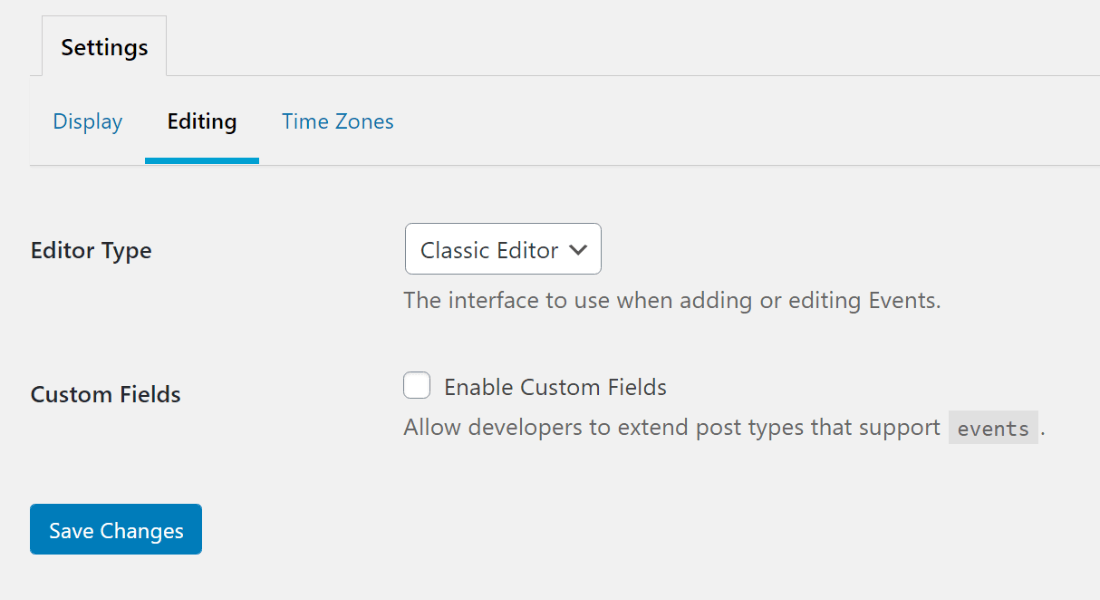
In the Editing settings, you can make two important choices.
First, you can choose which editor to use for creating event page content – either the new block editor or the Classic editor (which is the default).
Second, you can enable custom fields so that you (or your developer) are able to extend event pages with your own custom fields. This would let you collect, store, and display additional information about each event that’s unique to your situation:

Finally, the Time Zones tab lets you choose whether to offer a single time zone or multiple time zones. You can also automatically convert the time zone into the user’s local time zone, which is a neat feature to help you create more user-friendly event pages:

How to Create an Event
Once you’ve configured the settings, you’re ready to create your first event.
The event page looks exactly like your chosen editor – you can add the title/content in the regular editor fields and set a featured image. The only change is a new Event meta box at the bottom where you can:
- Add the start/end time (or mark it as all-day)
- Add a location
You can also use the Calendars option in the sidebar to assign an event to a specific “calendar”, which is essentially just an event category:

And just like that, you have a new event page:

If you want to display an event’s location on Google Maps, you can install the free Google Maps add-on. This will automatically display a map embed on your event page with the address from the Location field (but you’ll need to add a Google Maps API key).
How to Create Event Registration Forms
If you want to create forms to let people register for your events, Sugar Calendar offers a free integration plugin for Gravity Forms.
You can create a form with Gravity Forms. Then, you’ll be able to link that form to your event:

The form will then display on your event details page.
How to Add Your Calendar
To display a calendar view of your events on the front-end of your site, you have three options:
- Shortcode
- Widget
- PHP function
The basic [sc_events_calendar] shortcode displays all of your events in the default view. However, you can use shortcode parameters to:
- Filter events from one or more calendars (categories)
- Change the time frame
- Choose a different layout
Here’s what the default calendar looks like:

You can also view a calendar inside your WordPress dashboard, which helps you manage your events.
What About Styling the Event Calendar and Pages?
One important thing to note is that Sugar Calendar doesn’t include any of its own style/layout options.
It does a pretty good job of inheriting your theme’s styles, which means that it should automatically match the rest of your site out of the box. For example, it will automatically use the same colors, fonts, etc. as the rest of your theme.
However, if you want to make your own changes to its design, you will need to use custom CSS, which is something to keep in mind.
How to Use the Premium Sugar Calendar Features
What you saw above covers all of the free features. However, if you need more flexibility, the premium version and add-ons give you some more power in key areas.
Let’s go through some of these key features…
Creating Recurring Events
One feature that you get in the core premium plugin is the ability to create automatic recurring events.
You’ll get a new Recurrence option in the Event meta box that lets you repeat events on the following schedules:
- Daily
- Weekly
- Monthly
- Yearly
You can also set a hard end date to stop recurrence:

Using the Event URLs Add-On (Great for Virtual Events)
Because of the pandemic, virtual events have become a hot trend – a trend that is unlikely to disappear once we’re able to leave our houses.
With the Event URLs add-on, you can easily link your events to external URLs. You can either:
- Add a new option that links to the external URL
- Automatically redirect the event page to the external URL (instead of the single event page on your site)
For example, you could use this feature to link people to your Zoom meeting link or webinar software. Or, you could also use it for in-person events, such as linking to the website of the event venue.

Selling Event Tickets
If you want to sell tickets to your events, Sugar Calendar has a built-in Stripe integration as well as a WooCommerce integration if you want more flexibility when it comes to things like payment gateways and discounting.
I’m going to show you how it works with Stripe, but the same basic idea applies to WooCommerce.
First, you’ll want to go to the Tickets section of the settings to configure some basic details:
- Stripe or WooCommerce integration details, such as the payment success page
- Currency
- Notification emails that people receive

You’ll be able to actually customize email content, including using placeholders:

Now, you’re ready to get started. When creating/editing an event, you’ll get a new Tickets tab that lets you set a price and maximum number of tickets.
If you’re using WooCommerce, you can also link this event to a WooCommerce product:

Now, users will see a new purchase option on the event page – here’s how it looks for the Stripe integration:

Clicking that opens the payment details in a popup. People can also add individual attendee information if purchasing multiple tickets:

Once they make their purchase, they’ll receive a confirmation email and also see a confirmation page where they can download a copy of their ticket(s), along with a unique ticket code:

On the backend, you can see a list of purchases:

You can also manage individual tickets and change their statuses (for example, you might need to refund a ticket purchase):

To actually check-in attendees at your event, you would export the tickets to a CSV file (which you can do with a single click). Then, you can use this CSV file, along with the unique ticket IDs, to check-in attendees at your event.
Accept Frontend Event Submissions
If you want to allow other people to submit events, Sugar Calendar integrates with the following WordPress form plugins to let you create front-end event submission forms:
You’ll get new options in those form builders to link submissions to new events. For example, in Gravity Forms, you can create a Sugar Calendar feed and match form fields to event information:

Integrate With Calendars
Finally, the Calendar Feeds add-on lets you integrate both individual events and calendars with virtually any calendar application including Google Calendar, iCal, Gnome Calendar, etc.
Users will see a prompt on your event pages and calendar pages to add events to their preferred calendar. Here’s what it looks like on the single event page:

For the calendar page, users can sync with the entire calendar of upcoming events.
Final Thoughts on Sugar Calendar
Overall, Sugar Calendar is a really great option if you’re looking for a lightweight event calendar plugin.
It doesn’t have as lengthy of a feature list as some other popular options, but it’s also not trying to match those plugins feature-for-feature. Instead, it’s focused on giving you the core features that you need without the bloat (and with clean, extensible code).
Where I see this plugin being especially popular is with developers or power users that are looking for a reliable plugin to power the foundation of an event calendar system. I say this because you’ll almost certainly want to use custom CSS to spruce up the design of your single event pages and maybe collect extra information with custom fields.
For example, if your client wants to add an event calendar system to their site, this should definitely be one of the options that you check out.
So – if you want all the important event management features without any of the bloat (and from a well-established and respected development team), definitely give Sugar Calendar a look.