WordPress has an in-built image gallery feature which does not yet seem to be common knowledge even though it’s incredibly simple to use.
So let’s say you are writing a post that you want to include an image gallery in.
1) Using the usual upload/insert image button, upload any images you want to include in the gallery BUT make sure to just click “Save All Changes” instead of “Insert Into Post.”
2) If you want your gallery to have captions, make sure to fill in the Caption field when uploading your images.
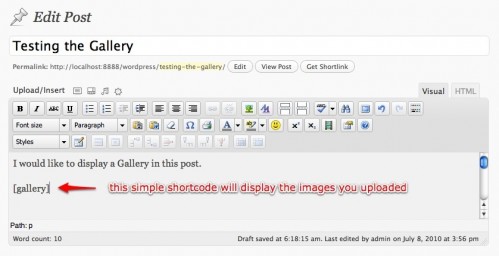
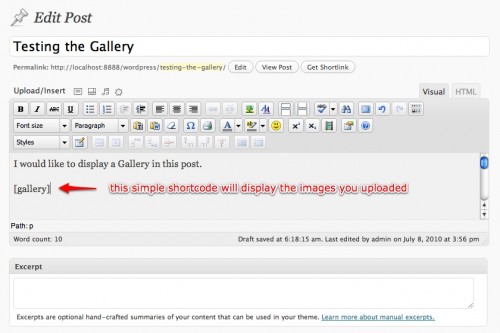
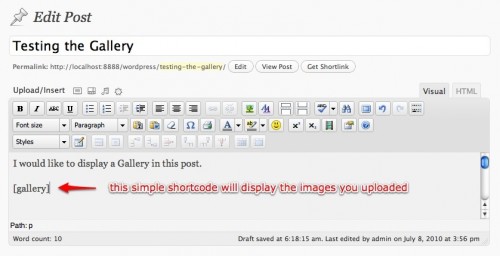
3) To display the images you just uploaded, simply use the shortcode:

You can type the shortcode in either the HTML or the Visual tab, and it will automatically display the images you uploaded.
Slightly more advanced options:
1) By default the gallery shortcode will display thumbnails – at the size set in your Media submenu under Settings. You can choose to display the images at Medium or Large sizes (again, according to the settings in your Media menu), or at the full size of the image. Just use the following format:

2) You can determine how many columns you want the images to display in by using this format:


This example would display images in 4 columns.
4) If you want to show images that are attached to another of your posts, just locate the ID number of that post and use this shortcode:
and replace “123” with the ID of the relevant post.
5) Combine options in the following way:


6) If you want to get fancy with it, you can style certain elements of the Gallery. See the Codex for more detailed information
The example gallery below features 3 images I uploaded, displayed as thumbnails (which I had set at 125×125) in 3 columns, and I assigned a caption for the first image.
