In this post we’ll go through how to integrate your knowledge base or FAQ on a WordPress site, such as our KnowAll theme package with a support ticketing system from HelpScout, Zendesk and others.
We’ll cover:
- Benefits of providing easy access to a ticketing system from your knowledge base
- How to set up a dedicated page on your site for users to submit tickets
- Best practises for directing visitors to appropriate support channels
Benefits of integrating your knowledge base with a ticketing platform
Knowledge Bases and FAQs are a great way to provide support and sales documentation, allowing users to explore your product for themselves and freeing up time spent answering queries. They have limits however, as there may be scenarios your documentation doesn’t cover or a query that is not answered. It’s important to allow a customer to get in touch should they not be able to get an answer from your online documentation.
At HeroThemes we leverage our own knowledge base to help customers set up and troubleshoot problems without having to raise a ticket every time. We also provide a way they can get in touch should they not find a solution from our documentation. Crucially we can monitor this to improve the articles that are resulting in higher-than-average tickets.
This means that customers can access high quality documentation 24/7, but are still able to make contact with specific queries. This increases customer satisfaction, while reducing support tickets, meaning a win-win for customers and the business.

Set up your submit a ticket form
Once you have installed and set up your knowledge base articles, the next step is to add a form to your site where users can submit their ticket.
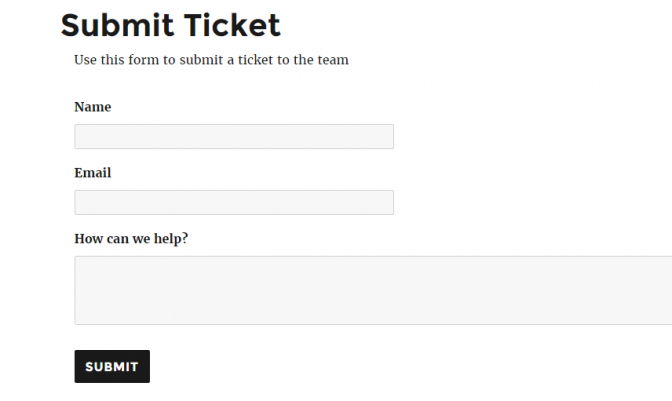
Create a new form with a plugin such as Contact Form 7 or GravityForms. Name, email and a entry for the query are the minimum requirements, but you may also want to add other information to help you best direct their query and a form provides an excellent way to capture key information, such a product version details or the nature of the message before it is submitted.
You’ll want to ensure that the result of the form submission is sent to your ticketing system via email. In Gravity Forms this is done from Settings > Notifications on the form editor. In Contact Form 7 this is configured from the Mail tab on the form editor. You’ll need to enter the correct mailbox settings for HelpScout or Zendesk to ensure when a user submits the form, a new ticket is created in your helpdesk software
Create a page to add your submit a ticket form to. From the WordPress dashboard click Pages > Add New and title the page ‘Submit a Ticket’, paste the shortcode specified by the form plugin in the newly created page. Visitors can now use this form to submit a ticket directly from your site.

How to direct your visitors to submit a ticket
You could add the submit a ticket page to your menu, making it accessible from any page on your site. However, you may wish to give consideration to making a better flow for your support process, directing customers first to your knowledge base. If searching the knowledge base yields no results or a customer reaches an article and they still have a query, that’s the point we want them to be able to raise a ticket.
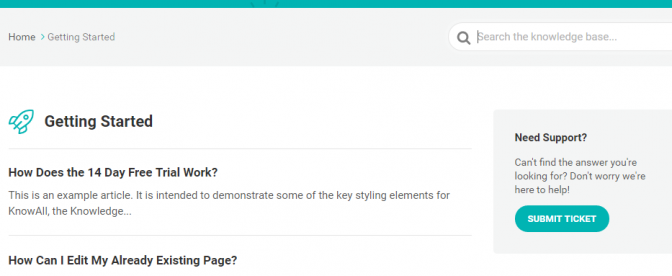
With the Exit point widget packaged with Heroic Knowledge Base included with KnowAll, and as we use ourselves on the HeroThemes support site, there is an easy way to link to your submit a ticket form from your knowledge base, or anywhere on your site. This has the advantage that unlike a regular link, each click is recorded, so it is easy to establish what articles are resulting in support tickets. Using this information, we can then improve those articles (combined with the in-article feedback system), to reduce the number of tickets that originate from this article. Over time, the effectiveness of the knowledge base improves and the support tickets reduce.
When we used this process on HeroThemes.com, we identified a few articles that were resulting in a higher percentage of new tickets. We re-wrote these to simplify and clarify the content, we now see fewer exits and queries regarding these topics.
To use the Exit point widget, navigate to Appearance > Widgets and drag the Exit point widget to the sidebar (or other widget area) you want the widget to appear. Enter the url of your submit a ticket page (or any other url you want to direct the user to if they need support) and any text that you want to appear in the widget.
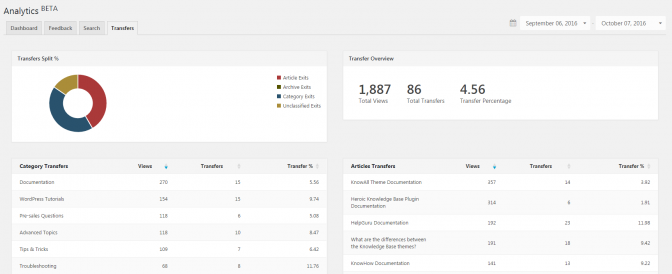
The next step is to monitor the success of your content. From Knowledge Base > Analytics, select the Transfers tab to see all the traffic that has exited the knowledge base

Conclusion
We have demonstrated a few simple steps that can be taken to help customers help themselves and you. By integrating your knowledge base with your ticketing system, you can monitor what content is resulting in queries and use this information to improve your support process, meaning happier customers and fewer support tickets.
The post How to integrate a WordPress Knowledge Base with a Ticketing system appeared first on HeroThemes.
