Ignorance is most definitely not bliss when it comes to the world of SEO. In this article, we address a relatively simple search ranking element that many WordPress users overlook.
If you want to maximize your rankings in Google (and ensure that you are not penalized), you must take ownership of every element of SEO — from your link profile to your onsite optimization, and so on.
This can seem unfair for beginners — after all, how are you supposed to know what to do? The simple answer is that you can’t know.
The productive answer is that while you can’t know, you need to learn.
With that in mind, today I want to address one relatively simple element of SEO that many WordPress users do not even consider — canonicalization.
It isn’t particularly glamorous, but it is important, and you have no excuse not to get it right.
What is a Canonical Page?
I can’t put it better than Google:
A canonical page is the preferred version of a set of pages with highly similar content.
To explain the purpose of canonical pages, we must first explore the issue of duplicate pages.
For example, try accessing your site in the following ways:
https://yoursite.com/
https://www.yoursite.com/
You will find that both methods work. Another example would be any web page that has modifiers added to the end of the URL.
You could have an eCommerce site where the exact same product page can be found across various different URLs, depending on how filters are set and so on.
The problem with these multiple instances of the same content is that Google will probably index most (if not all) of the pages on your site.
Then, it has to decide which one it thinks is the correct page to push up through the rankings.
It would be far more preferable if you could help Google to understand which pages are carbon copies of each other so that they can selectively index only what is necessary.
That is where canonicalization comes in — you tell Google which is the preferred page for indexing and ranking.

How Do I Set “Preferred” Pages?
Please note that you never really have full control over what Google does and doesn’t index (unless you go down the “noindex” or manual URL removal route).
Good canonicalization is about demonstrating to Google what version of a page you think they should prioritize in their index.
Their algorithms will then take that suggestion into account when assessing your site’s pages.
Note: It used to be that you could specify your preferred domain setting. Then Google switched to their new Search Console experience and actually said goodbye to the preferred domain setting.
You can still tell Google your preference in several ways, but if not, Google will pick the best option.
With the above in mind, there are three things that a WordPress user should do to ensure that their site is correctly optimized in terms of canonicalization.
1. Verify the Homepage’s Canonical URL in WordPress Settings
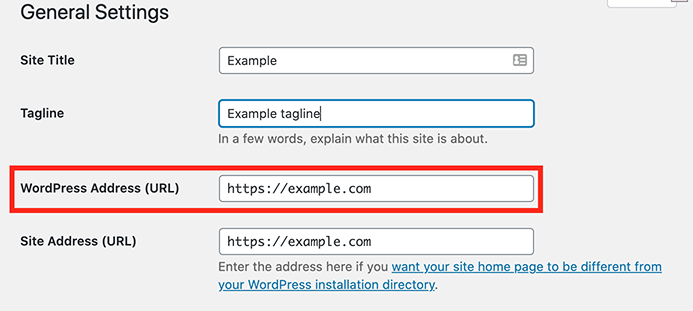
The first thing you need to do is make a decision as to whether your site should primarily be accessed via “https://”, or “https://www”.
You do this by setting the WordPress Address in General Settings.

WordPress will set up a 301 redirect from the “secondary” URL to your preferred canonical URL.
So in the above example, if anyone tries to access your website via “https://www.example.com/,” they will be automatically redirected to “https://example.com/”.
Furthermore, any backlinks that point to a non-canonical URL will be automatically forwarded via the 301 redirect.
2. Verify the Homepage’s Canonical URL in Google Search Console
Next, you need to tell Google which URL you prefer. You do this by first adding your URLs to Google Search Console.
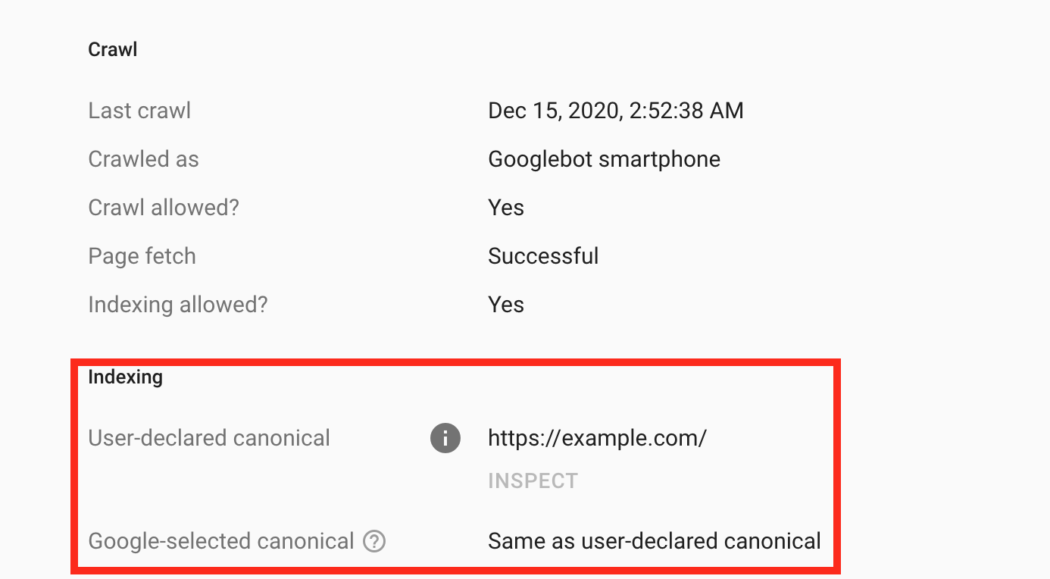
Once your site is verified, you can see what the Google-selected canonical for your site is.

As you can see, the User-declared canonical is the same as the Google-selected canonical.
3. Hide Redundant Canonical Link Tags On Your Site with SmartCrawl
This final step may sound a little daunting, but it is in fact the most straightforward and can be done in one-click.
First, install and activate our 5-star rated SEO plugin, SmartCrawl for free.

Once activated, navigate to the settings and simply click the Hide redundant canonical link tags.

That’s all you need to do! By clicking the switch over, you will avoid any possibly SEO content that’s a duplicate and keep your site from getting a backlash from search engines like Google.
Note: In addition to configuring the above, SmartCrawl also offers an in-post canonical URL option that lets you fine-tune canonicals on similar versions of posts or pages on a per-post/page basis.
To use this feature, go to the SmartCrawl > Advanced tab in your post or page editor and enter the full canonical URL (including http:// or https://) into the Canonical field.

Canonicalization is Complete
As you can see, there’s not a lot of work to do when it comes to canonicalization.
With just a few tweaks, adding your site to the Google Search Console, and with the help of SmartCrawl — your site can continue to stay in good standings with the SERPs and is more SEO-friendly.
And with that, canonicalization for your WordPress is complete.
Source: premium.wpmudev.org