With WordPress optimized hosting, should you DIY or have someone else manage it for you? In this guide, we explore both options and show you how to set up your own VPS…
There are many options when it comes to setting up hosting for your WordPress website. You can choose a shared hosting plan (where your site performance is at the mercy of over-provisioned servers), pay a bit more to run your very own VPS (virtual private server) with dedicated resources, or pay just a little bit extra to have someone else manage a VPS for you.
If you’re not sure about the right type of hosting for your needs, check out our guide to understanding different types of hosting.
In this guide, we’ll focus on the second option and help you understand what kind of effort goes into setting up a VPS for WordPress hosting.
More specifically, we’ll walk you through all the steps you need to set up your own VPS and then look at the pros and cons of choosing this option.
For ease of reference, you can jump to any section using the links below or go through the entire step-by-step tutorial:
- What Is DIY VPS Hosting for WordPress?
- Setting Up A WordPress-Optimized VPS:
- Create a non-root user to SSH to the server
- Secure the MySQL installation
- Configure Virtual Hosts for your domain(s)
- Install PhpMyAdmin to visually access your database (optional)
- Change the default WordPress database table prefix
- Configure your new droplet’s domain DNS settings
- Install a Let’s Encrypt certificate to serve your website over HTTPS
- Patch common vulnerabilities on your server
- Increase common PHP limits to help with WordPress performance
- Pros and Cons of DIY WordPress VPS vs Managed WordPress Hosting
What Is DIY VPS Hosting for WordPress?
VPS hosting is web hosting that uses a Virtual Private Server. As we explain here, a VPS is a nice compromise between shared and dedicated hosting.
You can customize the VPS resources to suit your needs in terms of disk space, memory, processing power, and bandwidth, and scale it if your site’s traffic increases.
DIY VPS hosting normally refers to running an unmanaged VPS (whereas with a “managed” VPS, the web hosting company handles everything like system setup, control panel installation, and technical support, leaving you free to just manage your web hosting account).
Although choosing unmanaged or DIY VPS hosting tends to be more affordable than managed VPS hosting, you need to handle everything yourself.
WordPress has its own server requirements, so if you plan to choose DIY VPS hosting specifically for WordPress, you’ll need to have technical experience with managing servers and running WordPress.
Setting Up A WordPress-Optimized VPS
VPS web hosts are plentiful and many offer great cloud-hosted servers at reasonable costs.
For this tutorial, we’ll use DigitalOcean as our host.

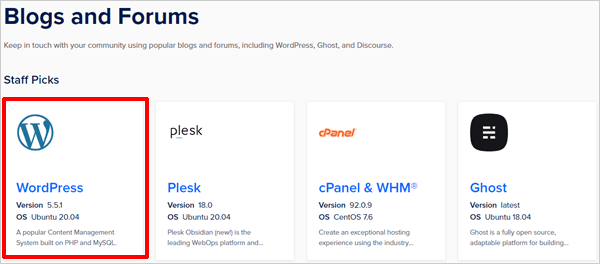
DigitalOcean makes it easy to set up your own WordPress-optimized VPS, as they have a one-click solution that will build a Ubuntu 20.04 VPS with WordPress and all its required software pre-installed.
That being said, there is still some configuration to be done to finish the installation of WordPress and to harden both WordPress and the server itself.
Let’s go through each step.
1. Create a non-root user to SSH to the server
First, create a Digital Ocean One-Click WordPress 5.5.1 on Ubuntu 20.04 droplet.

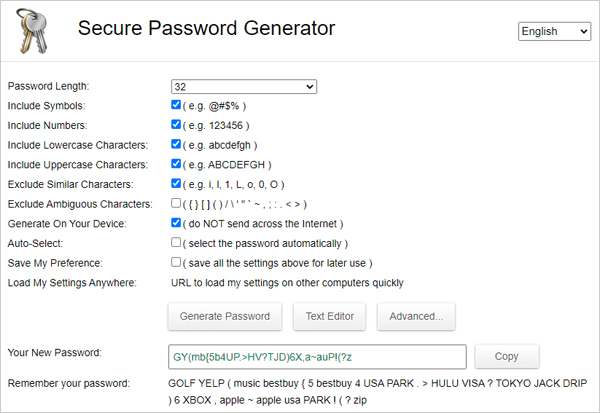
Note: Make sure to use a strong password for the root account (e.g. use a 32-character password)
Keep a copy of this password handy in a notepad on your computer. It will make connecting to the droplet easier. You will create a separate user to connect with in the future, so this is simply setting a strong password for the root user that will no longer be actively used.

Once you have done this, SSH to the server using the IP and root password from your initial setup.
You will be prompted to enter your domain name. Press CTRL+C to exit this script for now. We’ll come back to this configuration later.
Create a non-root user (replace myusername with your username):
adduser myusername usermod -aG sudo myusername usermod -aG www-data myusernameTest to make sure that myusername has sudo access:
su myusername ls -la /root sudo ls -la /rootNote: The second command above should give an error for permission denied, but prefixing the command with sudo will allow you to escalate your privilege to that of root.
2. Secure the MySQL installation
Use the following command to view your root mysql account password.
cat /root/.digitalocean_password
mysql_secure_installation
At the prompts for the command above, enter:
NO > root password > YES > YES > YES > YES
Then, delete the file containing your default passwords so that they are not plainly available on your server directory:
rm -rf /root/.digitalocean_password
3. Configure Virtual Hosts for your Domain(s)
This is so that your Apache server can handle serving numerous domains from your droplet.
Even though you may only be serving one domain from this droplet, it’s best practice to set up Virtual Hosts so that you are ready should the need arise in the future.
mkdir -p /var/www/mydomainname.com/html/ chown -R www-data:www-data /var/www/mydomainname.com/html/ rsync -avP /var/www/html/ /var/www/mydomainname.com/html/ cp /etc/apache2/sites-available/000-default.conf /etc/apache2/sites-available/mydomainname.com.conf vi /etc/apache2/sites-available/mydomainname.com.confEdit your mydomainname.com.conf file with the following lines, modifying existing content if needed:
ServerAdmin admin@mydomainname.com ServerName www.mydomainname.com ServerAlias mydomainname.com DocumentRoot /var/www/mydomainname.com/html <Directory /var/www/mydomainname.com/html/>Save the changes to your .conf and run the following commands to let the web server know about your new Virtual Host:
a2ensite mydomainname.com.conf a2dissite 000-default.conf a2enmod expires service apache2 reloadYour web server is now aware of your custom Virtual Host!
Archive the pre-built one-click WordPress folder structure
mv /var/www/html /var/www/html.bak
4. Install PHPMyAdmin so you can manage your database via a Web GUI (optional)
apt-get update apt-get install phpmyadmin“After this operation, 51.4 MB of additional disk space will be used.” >> Yes
“Auto-configure web server” or “Web server to reconfigure automatically” >> No (TAB then OK)
“Configure database for phpmyadmin with dbconfig-common?” >> No
echo "#Include /etc/phpmyadmin/apache.conf">>/etc/apache2/sites-enabled/mydomainname.com.conf
Note: Simply SSH to your droplet and remove the comment delimiter (#) from the line above to quickly disable PHPMyAdmin should you want to keep it disabled until you need it.
vi /etc/phpmyadmin/apache.conf
Update Alias to:
/my_db /usr/share/phpmyadmin
Note: This last line makes it so that you can access your PHPMyAdmin installation at mydomainname.com/my_db
service apache2 reload
5. Change the default WordPress database table prefix
Let’s harden the one-click WordPress database prior to installation.
We’ll do this by renaming the default wp_ database prefix to something custom so that attempts by hackers to extract your database table data based on the default names will fail:
sed -i 's/wp_/wp_510942_/g' /var/www/mydomainname.com/html/wp-config.php
Note: This will make your database tables prefixed with wp_510942_ instead of just wp_. You can use any random number or word to make it unique.
6. Configure your new droplet’s domain DNS settings
Log in to DigitalOcean and go to Networking.
For the droplet in question, use the following configurations:
NS ns1.digitalocean.com NS ns2.digitalocean.com NS ns3.digitalocean.com A mydomainname.com CNAME http://www.mydomainname.com CNAME *.mydomainname.com7. Install Let’s Encrypt certificate
sudo certbot --apache -d www.mydomainname.com -d mydomainname.com
- Support email: admin@mydomainname.com
- Select
YESto Terms of Service andNOto Share Email Address - Choose Option 2: SECURE – MAKE ALL REQUESTS REDIRECT TO SECURE HTTPS
8. Patch Common Vulnerabilities on Your Server
Additional hardening #1: Prevent LIBWWW-PERL vulnerabilities:
Edit your .htaccess and paste these two lines after RewriteEngine On
sudo vi /var/www/mydomainname.com/html/.htaccess
RewriteCond %{HTTP_USER_AGENT} libwww-perl.* RewriteRule .* ? [F,L]Additional hardening #2: Disable server signature
Edit apache2.conf, search for the two strings or append at the end of the file if they are not present, then reload apache2:
sudo vi /etc/apache2/apache2.conf
ServerSignature Off ServerTokens Prodservice apache2 reload
Additional hardening #3: Prevent Apache information disclosure via .htaccess:
sudo vi /var/www/mydomainname.com/html/.htaccess
## Prevent information disclosure ## <FilesMatch ".(txt|md|exe|sh|bak|inc|pot|po|mo|log|sql)$"> Require all denied </FilesMatch> <Files robots.txt> Require all granted </Files> <Files ads.txt> Require all granted </Files> ## End ## Additional hardening #4: Use keys for non-root SSH and disable passwords and root login
SSH keys provide an easy, secure way to log into your server and are recommended for all users.
For this step, we recommend following DigitalOcean’s detailed tutorial on setting up SSH keys for an Ubuntu 20.04 installation.
Note: The above is by no means an exhaustive, all-encompassing list of hardening measures (that’s a whole topic on its own), but it’s a really good start if you plan to set up and run your own VPS.
9. Increase PHP limits for WordPress performance:
sudo vi /etc/php/7.0/apache2/php.ini
Search for these settings, and raise any existing values to the following:
- max_execution_time: 60
- memory_limit: 128M
- post_max_size: 48M
- upload_max_filesize: 48M
sudo service apache2 restart
Once you have done this, navigate to your domain and step through the WordPress installation wizard.
DIY WordPress VPS vs Managed WordPress Hosting
If this all seems like a lot of work just to have a secure VPS server running WordPress, you’re right!
Thankfully, many of the above steps could be put into a script to automate the process, but the truth remains that the price to pay to have a self-managed VPS is…well…managing it all yourself!
This requires not only having the technical experience to set up and run the server but also troubleshoot and fix any problems.
Alternatively, if you’d prefer to have the equivalent performance and security of a DigitalOcean VPS without having to do it all yourself, then consider hosting with WPMU DEV! For just a few more dollars a month over the cost of a self-hosted DigitalOcean droplet, you get world-class VPS performance with world-class 24/7 technical and hosting support…all done for you!
Contributors
This article was written in collaboration with:

Phil Martin – Capital Web Design. Phil uses his twenty years of web design experience to achieve one goal: give back to his hometown by building modern websites for businesses and nonprofits in the Canadian capital!
***
Note: We do not accept articles from external sources. WPMU DEV members, however, may contribute ideas and suggestions for tutorials and articles on our blog via the Blog XChange.
Source: wpmudev.com