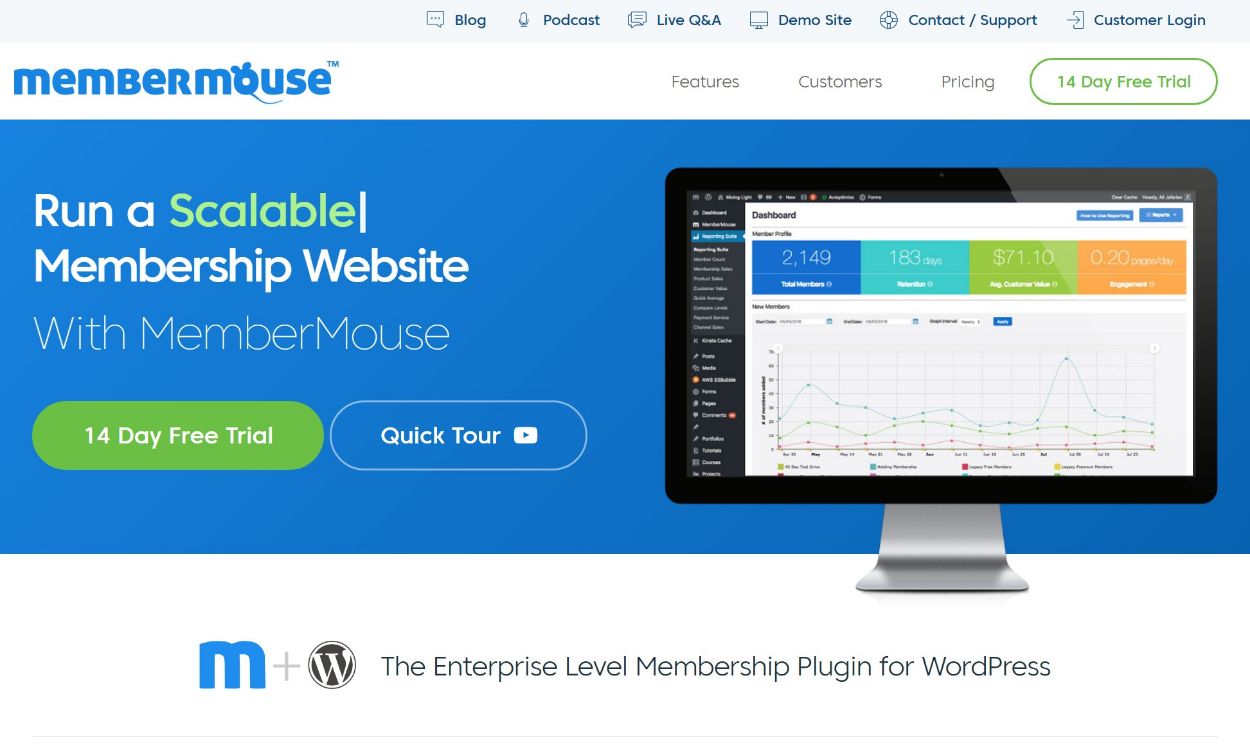
Considering using MemberMouse to create your own WordPress membership website?
MemberMouse is a popular option known for its advanced features, but it has some very real pros and cons, so it’s not the right solution for everyone.
In our hands-on MemberMouse review, we’ll help you understand MemberMouse’s advantages and limitations so that you can decide if it’s the right plugin for your needs.
There’s a lot to cover, so let’s dig in!
MemberMouse Review: A Quick Look at The Features

To kick off our MemberMouse review, I want to quickly run over the various features that MemberMouse gives you access to. I won’t spend too long here because you can find all this on the MemberMouse website (and I’ll go hands-on with these features in the next section). But I think it’s useful to start here so that you know what MemberMouse does.
To manage members, you can create unlimited free or paid membership levels or bundles (add-on levels). You’ll be able to easily manage your members and automatically assign members to certain WordPress roles as needed.
Members can also manage their own memberships from the front-end, including support for prorated upgrades/downgrades.
To restrict content, you get all the flexible options you’d expect from a membership plugin. You can:
- Restrict individual pieces of content (or parts of content) or bulk restrict content (like restricting all the posts in a certain category).
- Drip and schedule content to make it available at different times.
To monetize your site, you can:
- Sell one-off or recurring memberships that give people varying levels of access.
- Sell products, such as an eBook.
- Use coupons and other discounting strategies.
- Offer payment plans for high-ticket items/memberships.
- Use one-click upsells (or downsells) to create smart funnels.
Other useful features include:
- Custom notification emails (send to admins or users).
- SmartTags (shortcodes) to display dynamic content.
- Auto-lock shared accounts to prevent sharing.
Finally, you also get a very detailed reporting and analytics area that helps you track engagement, churn rate, lifetime value, your most effective products/channels/payment gateways, and more.
That’s just a brief look at the features – keep reading the full hands-on section of our MemberMouse review to see it in action.
Hands-On With MemberMouse
Now, let’s go hands-on with MemberMouse and I’ll show you what it’s like to use, as well as my thoughts on the features.
For reference, I’m using the MemberMouse Advanced plan on my test site.
Basic Setup
Once you activate the MemberMouse plugin, you’ll get two new menu areas in your WordPress dashboard:
- MemberMouse – this is where you manage most settings, including your members.
- Reporting Suite – with the Advanced plan or up, this is where you can view detailed reports on your membership site.
MemberMouse will also automatically create all the core pages that it needs. For example, it will create pages where people can purchase memberships, manage their accounts, reset their passwords, etc.
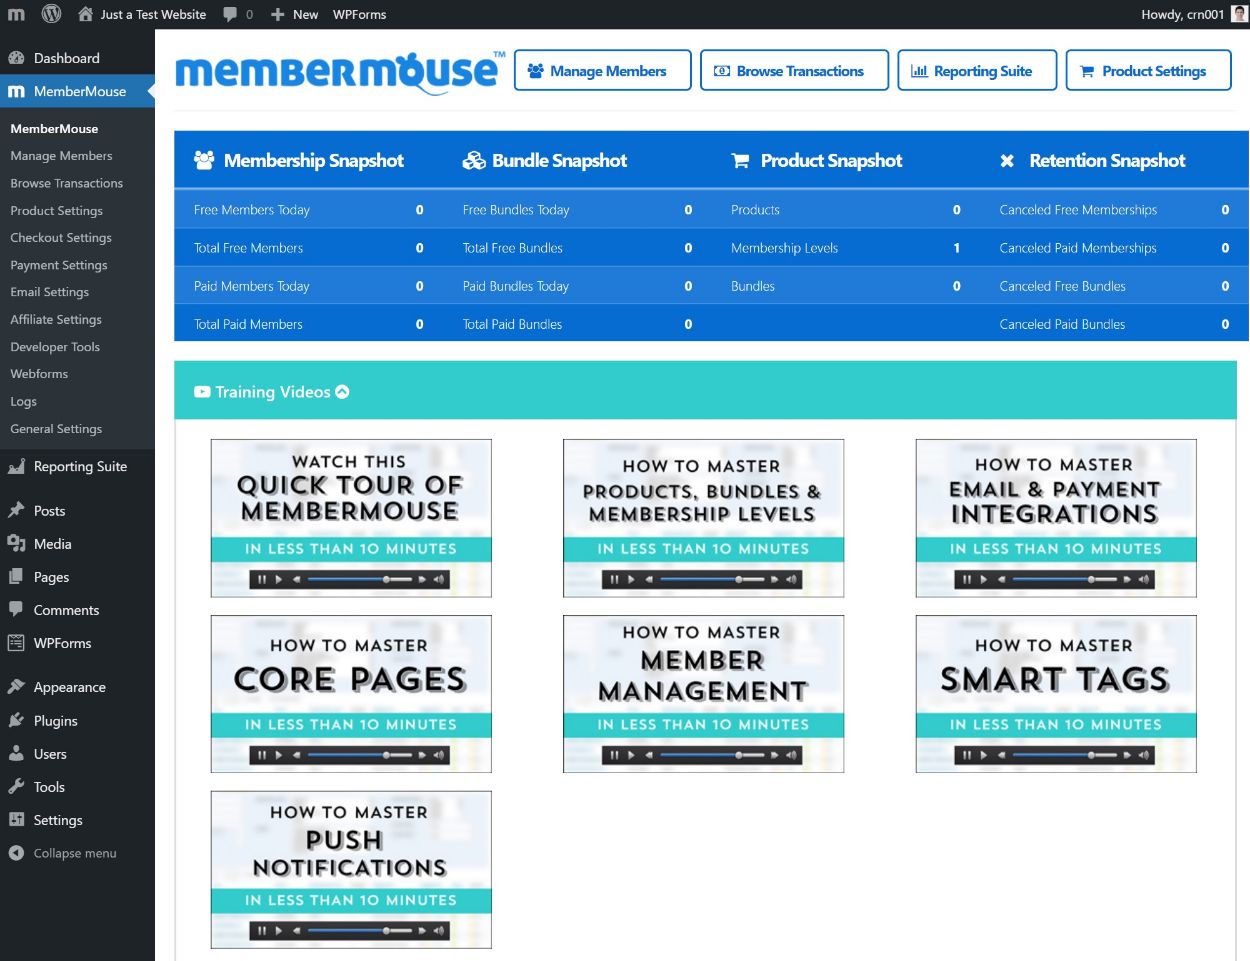
There’s no setup wizard beyond that, which I think would be useful for helping people to get up and running. But you do get a bunch of training videos if you go to the main MemberMouse area:

Creating Membership Levels
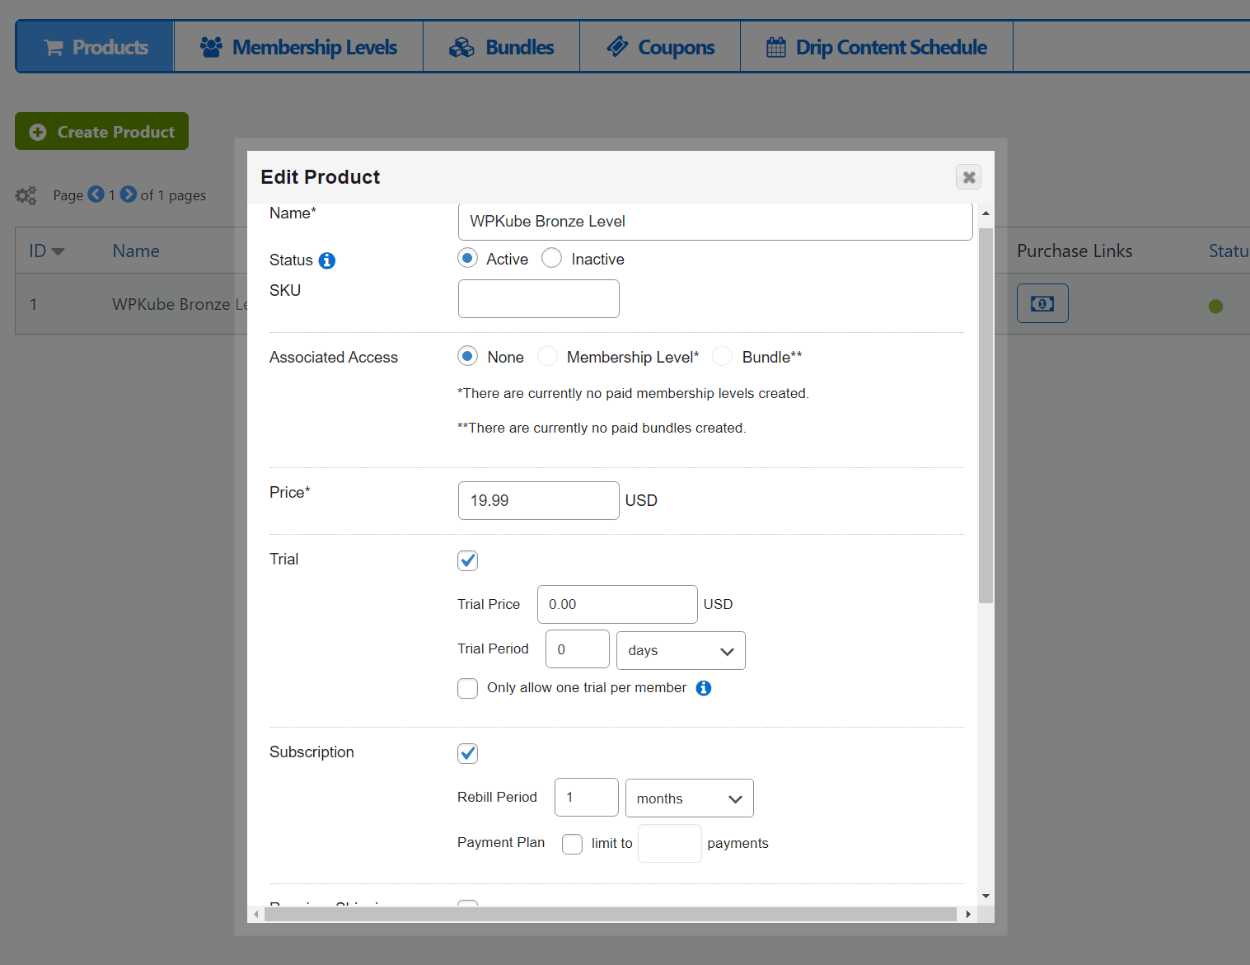
To create a membership level, you go to MemberMouse ? Product Settings. MemberMouse calls everything a “product”, whether you’re selling one-off or recurring membership access or an actual product (like an eBook).
When you create a new product, you’ll get a popup where you can:
- Enter the price.
- Add a free or paid trial period.
- Set up a recurring subscription on a custom schedule.
- Require shipping (for physical products).

You can also set up commission details if you’re offering an affiliate program (more on that later).
Once you create your product, you can go to the Membership Levels tab to link it to a membership level. This opens another popup where you can:
- Assign members of this level a certain user role.
- Make it free or paid. If paid, you can associate it with the product that you created.
- Add expiration details.
- Customize the welcome email.
- Assign it to bundles.
- Choose entire WordPress categories to automatically protect for this level.

You’ll get a similar interface when creating a bundle. A bundle acts like an “add-on”. Each member can only have one membership level at a time, but they can add unlimited bundles to their account. You can learn more about bundles here and the bundle creating interface looks a lot like adding a membership level, except that you can assign people who purchase a bundle to one of your existing membership levels:

Restricting Content
You already saw one option for restricting content in the previous section of our MemberMouse review- you can restrict access to entire categories when you create a membership level (or bundle).
For more control, you’ll also get a MemberMouse Options area when editing an individual piece of content that lets you grant access to just that content based on a user’s membership level or bundle.
This also lets you set up content dripping by only granting access on a certain day:

To easily see your content dripping schedule, you can go to Product Settings ? Drip Content Schedule:

You can also partially restrict content using a shortcode. This is called a SmartTag – more on them later.
Setting Up Payments and Checkouts
MemberMouse supports the following payment gateways:
- Stripe
- Braintree
- Authorize.net
- PayPal
- ClickBank
- Coinbase
You can set these up from MemberMouse ? Payment Settings:

If you go to the Checkout Settings area, you can also customize the checkout process, including adding your own custom fields to collect additional information from your customers:

Setting Up Emails and Notifications
One neat feature in MemberMouse is the ability to set up your own custom emails that are triggered by certain actions. You can do this by going to Developer Tools ? Push Notifications and you can send these to yourself (for admin) or to your users).
You can see the long list of event triggers in the screenshot below:

Creating Coupons
MemberMouse includes a built-in coupon system, which is useful for using discounting as a marketing strategy. You can set up various types of discounts and add restrictions:

Using SmartTags
SmartTags are one of MemberMouse’s most useful features, as they let you conditionally perform different actions. MemberMouse calls them “SmartTags”, but the WordPress term would be “shortcodes”. You can use SmartTags to:
- Partially restrict content.
- Create one-click upsells.
- Create downsells to save sales.
- Show special deals to specific members, like only showing an upsell to certain membership levels.
This is a pretty complicated topic, so it’s hard to cover in just a review. But it is important to understand if you’re going to use MemberMouse. So – I recommend that you check out the SmartTags overview page as well as the “6 most used SmartTags” page to learn more.
For example, if you want to display an upsell offer, you could use the MM_Order_Decision SmartTag to display a certain product (Product A) if a visitor is purchasing another product (Product B).

Managing Members
To manage members, you can go to the aptly named Manage Members area. This area also lets you track engagement, which is pretty unique. You can see how often a member has logged in and their last login date:

You can also manually create a new member if needed. If you assign the new member to a paid membership level, you can either charge them or comp the membership (give it to them for free).
You can also manage transactions by going to the Browse Transactions area.
Viewing Reporting
With the Advanced plan and up, MemberMouse gives you access to a detailed Reporting Suite where you can manage key details like:
- Total members
- Retention
- Average customer value
- Churn rate
- Engagement

You also get a lot of other reporting options for comparing data. For example, you can compare membership levels, payment services, channels (e.g. affiliates), and more.
This area goes much more in-depth than most other membership plugins. If you’ll use these advanced reporting options to optimize your membership site, I think this reporting suite is one of MemberMouse’s differentiating features.
MemberMouse Pricing Review
MemberMouse doesn’t have a free version, but it does have a 14-day free trial so that you can test out everything for free.
One unique thing about MemberMouse is that, despite being a WordPress plugin, MemberMouse uses SaaS-style recurring billing. That means you’ll need to continue to pay for as long as you want to use MemberMouse – it’s not like a “regular” WordPress plugin where you pay a one-time fee and only need to renew to continue receiving support and updates.
MemberMouse offers three plans – each plan offers different features and supports a different number of members.
- Builder – $29 per month (paid month-to-month) or $24.08 (paid annually). All the core features. Supports 5,000 active members.
- Advanced – $79 per month (paid month-to-month) or $65.58 (paid annually). Adds support for features like an affiliate program, analytics/reports, social signup, billing date management, and more. Supports 50,000 active members.
- Premium – $199 per month (paid month-to-month) or $165.17 (paid annually). Adds a Sticky.io integration and you also get phone support. Supports 100,000 active members.
If you go over your member limit, you’ll pay another $10 per month per 1,000 members over your limit.
If you want to save some money, you can get 25% off with our exclusive MemberMouse coupon.
You can view a full feature comparison of the plans below:

Overall, MemberMouse is definitely more expensive than your average WordPress membership plugin, especially if you need the Advanced or Premium tiers. However, you might find this extra price justified because of its simpler all-in-one, non-technical approach to make a membership website.
MemberMouse Pros and Cons
Let’s run over some pros and cons…
Pros
- MemberMouse offers an “all-in-one” approach to creating a membership site with WordPress. You don’t need to integrate it with third-party plugins (like WooCommerce) – you get everything in one package.
- MemberMouse lets you create an advanced membership site without relying on code, which makes it great for non-technical users. There is a learning curve because there are a lot of settings, but all you need to do is watch the videos and read the docs – you don’t need any technical knowledge.
- The Reporting Suite is more advanced than anything you’ll find in most other membership plugins and gives you useful information to optimize your site.
- The SmartTags give you a lot of flexibility for creating your own optimized sales funnels.
- You can use it to sell products in addition to memberships, whereas most other membership plugins don’t let you do that.
Cons
- MemberMouse is not GPL licensed and you don’t get full access to the source code. Most non-developers probably won’t care about this, but this will be a dealbreaker for some developers.
- MemberMouse’s SaaS-style billing model makes it more expensive than most other WordPress membership plugins.
MemberMouse: Should You Use It?
Now for the most important question in our MemberMouse review – should you use MemberMouse to create your own membership website powered by WordPress?
That depends…
When to Buy MemberMouse
I think MemberMouse excels at helping non-technical WordPress users create a membership site. This is because MemberMouse gives you all the features that you need in one package. You don’t need to mess around with code or integrating third-party plugins for payment processing or creating an affiliate program. Instead, every feature that you need is already built into the MemberMouse platform.
This means that a non-technical user can just install the plugin, set everything up using the code-free interface, and have a working membership website with advanced features.
I wouldn’t say the MemberMouse setup is especially beginner-friendly because there are a lot of settings. But it is non-technical – so if you watch the training videos, you should be able to set everything up even if you’re not a developer.
Beyond that, MemberMouse comes with a really useful reporting suite and the SmartTags let you set up your own funnels with upsells and downsells, which not all membership plugins offer.
When to Consider Another Membership Plugin
MemberMouse is probably not the best option for developers because it’s not GPL licensed and you can’t fully edit the source code, which means you can’t modify things to do exactly what you want (which might be important for more edge case-type scenarios). It does include its own hooks and filters, though, so that you can hook into the plugin at various spots.
MemberMouse is also a bit more expensive than most other WordPress membership plugins because it uses recurring SaaS billing. In a way, you’re kind of paying extra for improved simplicity and built-in features. If you’re happy to make that investment to create a successful membership website, you might not care. But if you’re on a tight budget, you might want to use a membership plugin that has more traditional one-time WordPress billing. Good options here are:
If you decide that MemberMouse’s all-in-one, non-technical convenience and advanced features make it right for you, click below to go to MemberMouse and make sure to use our exclusive MemberMouse coupon to save on your purchase:
Go to MemberMouse
If you want to see some other options, you can check out our full collection of the best WordPress membership plugins.
Do you still have any questions about MemberMouse or our MemberMouse review? Let us know in the comments section!