You may or may not know, but to manipulate images in WordPress, you must have an image optimization library in the PHP application. In fact, without it, WordPress will not even be able to produce thumbnails images. Instead, your images will display full-sized in areas where a thumbnail would be better.
There are two popular image optimization libraries: ImageMagick and GD. Though both perform similar actions, ImageMagick rises above for WordPress use. This article will explain why ImageMagick is great for WordPress, how to find and use ImageMagick, and give examples of ImageMagick in action.
- Why is ImageMagick Great for WordPress?
- Accessing ImageMagick
- Using ImageMagick
- Convert
- Mogrify
- Image Aspect Ratio
- Additional Info on ImageMagick
As of February 25, 2020, the servers for WordPress customers have the PHP extensions that allows the use of imagick from PHP code.
Why is ImageMagick Great for WordPress?
ImageMagick is a software suite that can be used to manipulate images. As mentioned above, GD and ImageMagick complete similar tasks, however, ImageMagick produces sharper, higher-quality compressed images. In addition, it’s dependable, supports many image formats (some lesser-used formats like TIFF, RAW), and can facilitate more tasks easily. To use ImageMagick with InMotion Hosting servers, you will need to use PHP or execute a command in SSH.
Accessing ImageMagick
By default, ImageMagick is installed on InMotion Hosting servers. However, it can only be accessed through the command line, a cron job or PHP code on a web page. The path for the command line options would look like this:
/usr/bin/convert/usr/bin/mogrify
ImageMagick has many modules that can be loaded, but for the purposes of InMotion’s hosting servers, the main commands available are convert and mogrify. These commands can be used through PHP using a native extension called Imagick. For more information, please see the Imagick class in the PHP documentation.
Using ImageMagick
ImageMagick can be used through SSH and PHP. The following examples are executed in SSH. Each example uses the convert command. By default, the convert command maintains the aspect ratio of the image by.
Using Convert
When you use the commands below, the apect ratio of the image is not changed. This means that if you convert an image that is originally 320×220 pixels to 64 x 64 pixels (as per the examples below), the actual size will be 64 x 44 pixels, because it shrinks to the smallest dimension while maintaining the aspect ratio. For more information, please see aspect ratio below.
VPS and Dedicated servers with SSH access
Cron job command for shared servers with no SSH access
PHP command for shared servers with no SSH access
You will need to replace USERNAME with the actual username of the account. You also need to make sure that the folder where the converted image is being saved has the proper write permissions.
Using Mogrify
The mogrify command can be used in place of convert to resize an image with the main difference being that it modifies the original file. Like convert, the mogrify command maintains the aspect ratio of the image by default. Want to learn more? Read additional documentation on mogrify.
VPS and Dedicated servers with SSH access
Cron job for shared servers with no SSH access
PHP script command for shared servers with no SSH access
You will need to replace USERNAME with the actual username of the account. You will also need to make sure that the folder where the converted image is being saved has the proper write permissions.
Understanding Image Aspect Ratio
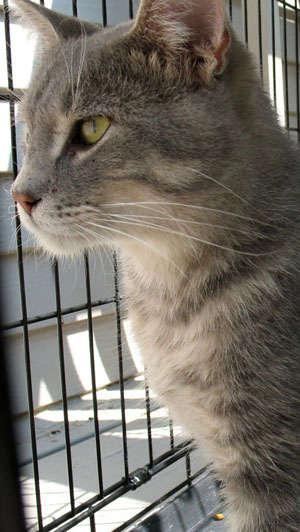
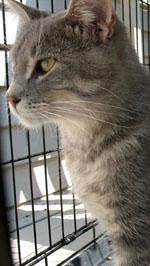
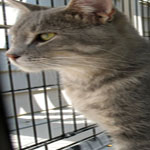
The simplest way to understand aspect ratio is to imagine taking an image and shrinking it down without causing any distortion. For example, the commands above use a square image of 64 x 64 pixels. If it was resized to 32 x 32 pixels, its aspect ratio will be maintained and will not show any distortion. However, if it was resized to 32 x 20 pixels, then the image is no longer square and the aspect ratio would be different causing distortion. You can see the differences in the cat images below. Using the above convert or mogrify commands will change the size of the image while automatically maintaining the aspect ratio. If you wish to force a change in aspect ratio, then the main difference in the command will be to add an “!” after the declared size for the image.
| Original Image | Aspect ratio maintained | Aspect ratio changed |
|---|---|---|
 |
 |
 |
Additional Information on ImageMagick
ImageMagick is a complex suite of tools that allow you to create and modify images in different formats. The information above is merely a snapshot of its vast capabilities. The options available on InMotion’s Shared servers primarily involve the convert and mogrify commands, but there are many other modules and processing options that you can load if you are using ImageMagick on a VPS or Dedicated server.
Of note, when using ImageMagick, processing many images at once can severely affect the resources of your server. For more information on server resources, please see excessive CPU processing. If you want to process a lot of images in bulk, do them in several groups and during off-peak hours. Ask our Community Support or 24/7 technical support team if you require further information. You can also visit the ImageMagick.org for additional tutorials and documentation.
