I would like to reduce the load on my MariaDB/MySQL/PostgreSQL server using memcached. How do I install and configure memcached server on Ubuntu Linux 18.04 LTS?
Introduction : Memcached is a high-performance, distributed memory object caching server. It is free and open source software intended for use in speeding up dynamic web applications by mitigating database load. This page shows how to install, configure, verify memcached installation on Ubuntu Linux 18.04 LTS.
How to install and configure memcached on Ubuntu 18.04
The procedure to install and configure memcached on Ubuntu is as follows:
- Update your Ubuntu based system using the apt command
- Install memcached on Ubuntu by running sudo apt install
Step 1 – Update your Ubuntu server
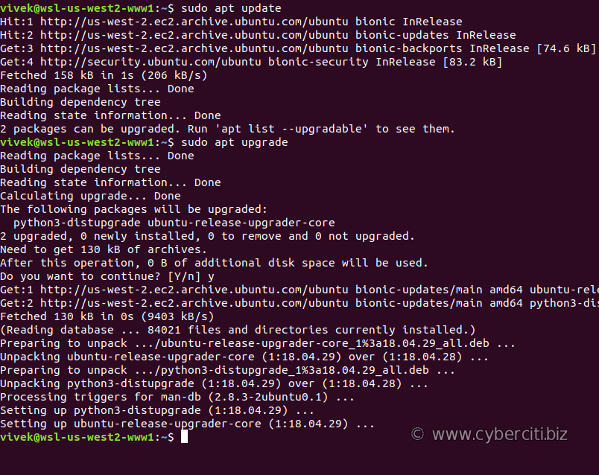
Type the following apt command or apt-get command to upgrade system to latest software:$ sudo apt update
$ sudo apt upgrade

Step 2 – Install memcached server on Ubuntu
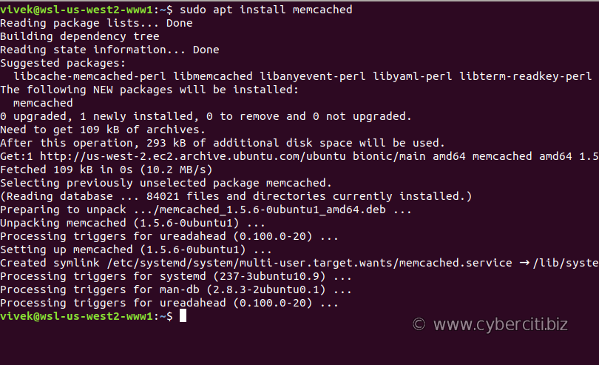
Again run apt command as follows:$ sudo apt install memcached

Step 3 – Configure memcached server on Ubuntu Linux 18.04 LTS
Next you need to edit config file named /etc/memcached.conf using a text editor such as nano command or vim command:$ sudo nano /etc/memcached.conf
OR$ sudo vi /etc/memcached.conf
Start with a cap of 256 MB of memory:-m 256
Default connection port for memcached is 11211:-p 11211
Specify which IP address to listen on. The default is to listen on all IP addresses. This parameter is one of the only security measures that memcached has, so make sure
it’s listening on a firewalled interface. In my example, I am going to listen on 127.0.0.1 and servers private IP address 172.26.12.173 :-l 127.0.0.1,172.26.12.173
Limit the number of simultaneous incoming connections. The daemon default is 1024 but I am going to increase to 4096:-c 4096
Save and close the file when using vim text editor by typing ESC + 😡.
How to restart, stop, reload memcached server on Ubuntu 18.04
One can use the systemctl command as follows:$ sudo systemctl stop memcached
$ sudo systemctl start memcached
$ sudo systemctl restart memcached
$ sudo systemctl status memcached

How to open memcached port 11211 using ufw
Let us say you have lxd based containers running on Ubuntu and using 10.147.164.0/24 sub-net range. I am going to limit IP access with the ufw based firewall on Ubuntu as follows:sudo ufw allow from container_ip1 to any port 11211
sudo ufw allow from vm2_ip2 to any port 11211
sudo ufw allow from sub/net to any port 11211
sudo ufw allow from 10.147.164.5 to any port 11211
sudo ufw allow from 10.147.164.3 to 172.26.12.173 port 11211 proto tcp
sudo ufw allow from 10.147.164.0/24 to any port 11211
How to verify that memcached is running
Use the ss command or netstat command to verify that TCP port # 11211 open and listing:$ sudo ss -tulpn | grep :11211
$ sudo netstat -tulpn | grep :11211
How to install CLI tool for talking to memcached via libmemcached
Let us install libmemcached-tools for management of memcached server and testing purpose:$ sudo apt install libmemcached-tools
Verify memcached server connectivity:$ memcstat --servers=127.0.0.1

How to access memcached from PHP/Perl/Python/Ruby lang
Install package as per your needs:
- ruby-dalli – Ruby client
- php-memcached – PHP module
- python-memcache – Python client
- python3-pymemcache – Python 3.x client
- libcache-memcached-libmemcached-perl – Perl for Memcached::libmemcached
Conclusion
This page showed how to install, configure, verify memcached server on Ubuntu Linux 18.04 LTS. For more info see the official memached project page here. Alternately, you can install memcached extensions for WordPress to improve performance.