The WordPress platform does a great job to help those without coding experience to implement just about any type of functionality. However, in some cases you’ll need to add header and footer code in WordPress to help third-party services embed its own functionality.
The most typical use case for this is to integrate Google Analytics into your site. However, there are plenty of other reasons you’ll want to do this – you may already know why you want to carry this task out.
For this tutorial, we’re going to show you a couple of ways to add header and footer code in WordPress. First though, we’re going to take a look at the sorts of reasons you’d want to do this in the first place.
What You Can Achieve With Extra Code in the Header and Footer of Your Site
A standard website will break down into a few different components, much like a text document:
- Header. Your site’s header contains a number of ‘pre-loading’ elements, and details about your Secure Sockets Layer (SSL) certificate, encryption, any JavaScript, and more.
- Footer. This operates in a similar way to your header, but instead ends up at the bottom of the page.
- Body. Most of the functionality you implement on your site will be within the ‘body’ of your content. This is the primary focus of almost everything within the WordPress dashboard, and the body represents what you see on the page.
Servers will load pages in a linear way – the head, body, then footer. This means the code in the header will load first, but footer code will load after everything else.
Everyday Code Snippet Use Cases
Social media and Search Engine Optimization (SEO) tools will often need you to add header code in WordPress. This is because those services have to take some priority when a site loads in order to log everything that comes after it.
It’s a similar situation with CSS code, because this dictates how your site will look. If this was in the footer, you’d see an array of layout changes before you see the styling.
While JavaScript helps us to produce, view, and interact with modern websites, it isn’t a necessary component (in a technical sense.) As such, JavaScript in the footer will give you greater performance in many cases, and if you have that option, you should go with it.
In fact, there are many more use cases, and we cover them in more detail in another article on the WPKube blog. However, in a typical WordPress situation, you don’t have access to the header and footer elements of your site. To do this, you’ll need to either get your hands dirty, or call on outside help.
How to Add Header and Footer Code in WordPress (2 Ways)
Over the rest of the article, we’re going to cover two ways to add header and footer code in WordPress. Both are simple, but we prefer one over the other:
- You can use a plugin to help you add the code to the right areas of your site.
- You’re able to add code to your
functions.phpfile, and you’ll need to have extra knowledge on how to access your site’s files.
We’re going to look at the plugin option first, for reasons we’ll explain shortly.
1. Use a Plugin to Add Code to Your Header and Footer
If you want to implement something in WordPress, a plugin should do the job for you. We’d consider a plugin the default in most cases for WordPress websites. As such, if you want to add header and footer code in WordPress, the Embed Code plugin will be ideal:

This is a solution that our sister site DesignBombs develops, and it gives you a quick and painless way to add code either to your site as a whole, specific pages or posts, and even custom post types.
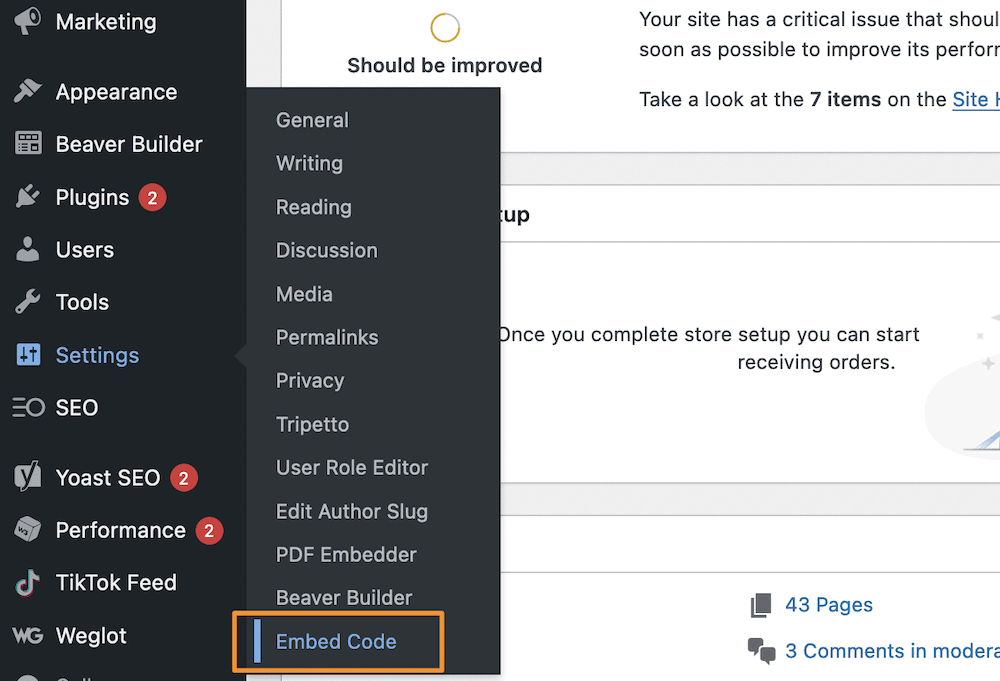
To use it, you’ll install and activate the plugin in the typical WordPress way. When this process finishes, you’ll see a new Settings > Embed Code option on the dashboard:

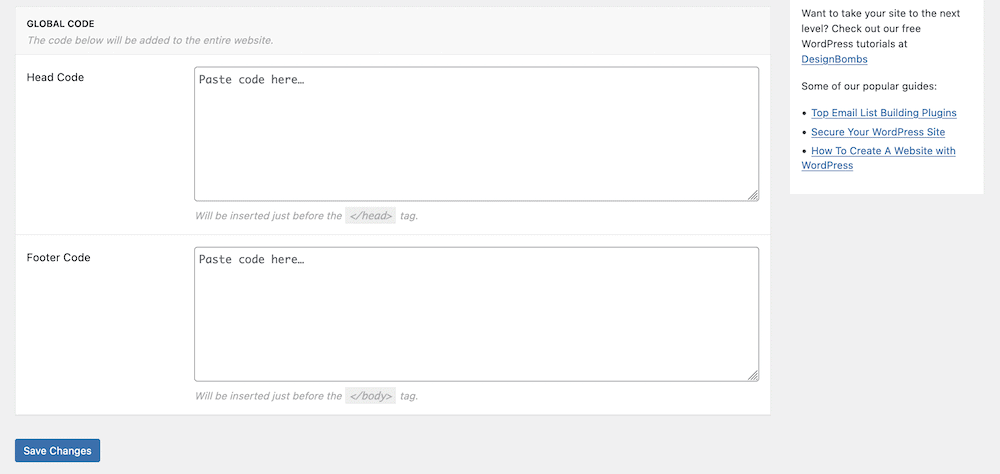
On this screen, you’ll spot two text areas: one for the head and one for the footer. You’ll even get a hint as to where the code you enter will sit within your HTML:

Using this tool is super-straightforward. Once you enter your code, save your changes. This will add any code here on a global (i.e. site-wide) level. However, you may only want to add code to an individual post or page. You can do this through the Block Editor – the metabox and options you need are at the bottom of the screen:

While Embed Code is our preferred method, and one you should use for the minimum of fuss, there is also another way that can get you the results you need. We’ll look at this one next.
2. Add Code Snippets to Your functions.php File
Every WordPress installation can access a dedicated functions.php file within its top-level or theme-specific directory. This enables you to add snippets of code to help WordPress use more functionality. However, there are some prerequisites you’ll need to understand and have in place before you begin:
- You access your WordPress core files – and by extension, the
functions.phpfile – using Secure File Transfer Protocol (SFTP.) As such, you’ll need knowledge of how this works in order to find your sites files and work with them. - We’d also recommend you use a child theme, in order to preserve your changes if the theme in question receives an update.
- You’ll want at least working knowledge of WordPress hooks, actions, and filters. What’s more, you’ll want to understand how WordPress accesses your header and footer through these hooks.
When it comes to using SFTP, WPKube has a selection of articles that you can consider essential reading:
You may also want to look at the WordPress Developer hook library, especially those entries for wp_head and wp_footer, although this is optional as you won’t use them in a heavy-handed way.
From here, the process takes a few steps. First, open your site’s server within your SFTP client, then navigate to wp-content/themes. Here, open up your current theme’s directory, and look for the relevant functions.php file:

You’ll want to open this file in your favorite text or code editor. Within, you can place the following snippet template:
add_action( 'wp_head', '<SNIPPET_NAME>' );

function <SNIPPET_NAME>() {
?>
<!-- Place your HTML code or other script here. -->
<?php
}
In short, this adds an action hook to WordPress using whatever you call it as the <SNIPPET_NAME>. Within the function itself, you’ll either replace or type underneath the comment line (i.e. the line that begins with <!-- .) If you want to add code to the footer, you’ll replace 'wp_head' with 'wp_footer' and continue as normal.
Once you save your changes, this should apply to your site. Depending on the code you add, there should be something visible on the front end page itself, within your WordPress dashboard, or even in a third-party dashboard.
Wrapping Up
While WordPress doesn’t need typical coding knowledge to use to the full, in some cases you may need to add header and footer code in WordPress. For example, you might want to use analytics, which is a popular reason to crack open your site’s files.
This post has looked at two different ways to add code to your header and footer:
- A plugin such as Embed Code will let you add header and footer code to WordPress using the dashboard. As such, you’ll simply need to copy and paste, without the worry of accessing your server.
- However, if you have the know-how, you can look to add a snippet to your
functions.phpfile. You’ll need SFTP knowledge, and a little experience with your WordPress files, but this approach is just as good as the plugin option.
What method will you go with to add header and footer code in WordPress? Let us know in the comments section below!