Teasers are nice default feature of the Thesis WordPress theme. However, to take them to the next level there are a couple of nice n’ easy customizations you can make to move beyond the default look. This post will discuss thumbnail images. A future post will address changing the width and styling of the teasers.
The addition of an image to the teaser is a really simple way to give your Thesis design an extra boost. This is especially great for creative sites that use wonderful imagery – food blogs, arts n crafty blogs, art/design blogs etc.
Assuming you also typically use a header image at the very top of your post (similar to the way posts on this blog look), the easiest way to achieve this by default is to use Thesis image fields to handle the main image for your post, from which it will also auto-create the teaser thumbnail.
Set up the default options
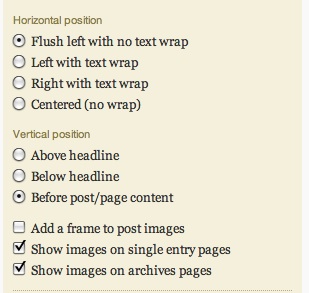
 In the Thesis options menu, go to the Design Options submenu, then Post Images and Thumbnails. The Default Post Image Settings control where the main image for your post will be positioned. I personally prefer ‘before post/page content’ so that it shows up under the headline of the post, immediately before the text of the post. You can play with the options to see how it changes the look.
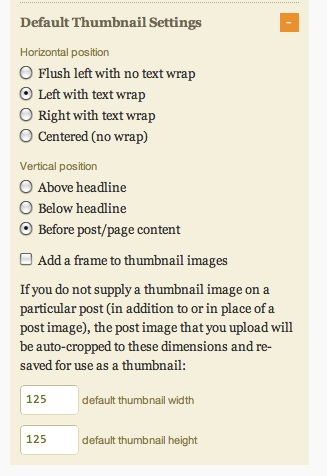
The Default Thumbnail Settings relate to how the thumbnail will be displayed in the teaser. I prefer “Left with text wrap” but again, play with it and see what suits you.

All of these settings can be overridden on a post by post basis if necessary.
Don’t forget the big ass save button.
Implement in a post
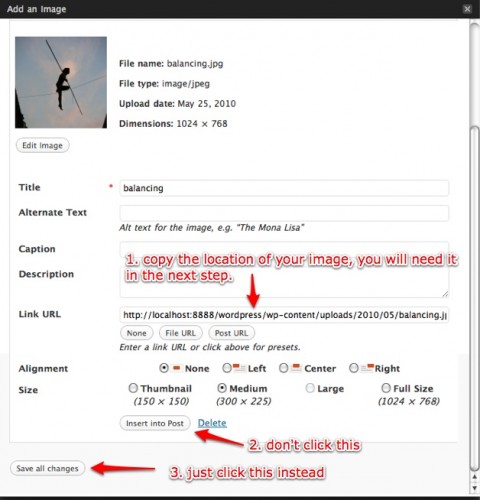
When you are writing your post and you want to add an image to the top of the post, you click on upload image as normal. The difference happens when you would ordinarily click ‘insert into post’. Instead, you now copy the url of your image and hit save instead.

Now scroll down the post editing page past several fields until you reach “Post Image and Thumbnail”. In the field labeled “post image” – paste the url of your image, then enter the alt text in the field below.

Now save your post and that’s it. Your image will automatically appear at the top of your post AND in the teaser as a thumbnail.
The other fields will inherit the information you set in the default Thesis menu as above. If you want to override the defaults, this is where you would do that, but generally speaking you won’t need to touch these.
You can play with the placement and border options to change the look.


This process will give you the same teaser thumbnail as main header image. If you want a different thumbnail – you’ll have to upload a separate image to your media library, grab the image url and paste it into the Thumbnail image field on your post. Note that if you specify an image url here Thesis will not resize it, so you will have to upload the exact size image you want to display.
Other images you want to include in the body of your post can be uploaded and inserted in the usual manner – this method relates to a main header image for your post only.