When creating a website for your business or about a particular subject, you’ll often be passionate and have a lot of information to communicate. However, to ensure your readers understand your content and that you reach a broader audience, it’s beneficial to share terminology & definitions.
What is a glossary?
A glossary is sometimes called lexicon.
In other words, it’s a collection of terms (often complex or technical) with their definitions. The terms defined are often specific to a technical subject or language.
Another way to define a glossary is that it’s a concise dictionary, arranged in alphabetical order for quick reference.

Why do you need a glossary?
1. Help your audience understand your content
If your content is technical or unusual, chances are, not everyone will understand your jargon and acronyms.
In order to maximize your page view conversion rate, you want your visitors to be able to understand your content. By having a glossary, you ensure that your customers understand your content, and thus, understand the great value your business brings.
2. A glossary page boosts your SEO
SEO is a major challenge. The Google algorithm is constantly evolving, but one thing is certain: Google highlights websites with quality informative content.
A glossary is a clever way to gather ua-targeted content that will catch the attention of search engines, helping you index higher on search engine results.
Moreover, you’ll be able to link to your glossary page when words within the glossary are used in your content. By adding relevant links between the pages of your site, you strengthen your internal network of links. Search engines love that!
This not only allows your website to be easily crawled by search engine robots, it also strengthens the lexical field of your site.
With the correct keywords and links, your glossary can become an important catalyst for quality traffic for your business’s website.
3. A glossary helps retain your visitors for longer
Picture a customer who visits your site. They’ll navigate your pages and stumble across words they don’t understand.
If no explanation is provided, it’s likely that they’ll leave your website sooner than later.
Either they’ll seek an explanation on another website such as Wikipedia or those of your competitors, or they’ll just give up and leave. It’s entirely possible they don’t return to your website.
If your website already provides all the necessary definitions and explanations, then you’ve just metaphorically bought your own insurance for customer retention.
Creating a glossary can save you from losing valuable visitors and future business prospects, so it’s something you should definitely seek to accomplish!
4. Establish your credibility
A site that takes the time to explain things clearly to their visitors and customers reassures them that you know what you are talking about and provides the feeling that you understand their problems.
When compared with other sites in your industry, your visitors will feel that they’ll receive better service with you, and that you will solve their problems because you understand them.
Creating a glossary simply gives your business credibility by showing that you have control over your subject, product, or service offered.
With the growing number of “scammy” websites, it’s cogent that you create a glossary to prove your credibility and reliability from the get go.
How to make a glossary on your WordPress site for free
Setting up a glossary is simple and free.
Obviously, writing all the definitions will take time, and depends on how quickly you can write, as well as the number of entries in your glossary.
But when it comes to the technology, using a WordPress glossary plugin will allow you to add a glossary to your site instantaneously.
Here’s a mini guide to implementing a glossary on your site using WordPress:
1. Install the Heroic Glossary plugin for WordPress

There are a few free glossary and dictionary plugins out there. Including Heroic Glossary.
Why Heroic Glossary? Here are three reasons:
- It’s a native Gutenberg block, so you can easily add it to any post or page
- It has a slick modern design
- It’s extremely simple to add and update entries in the editor
How to install it:
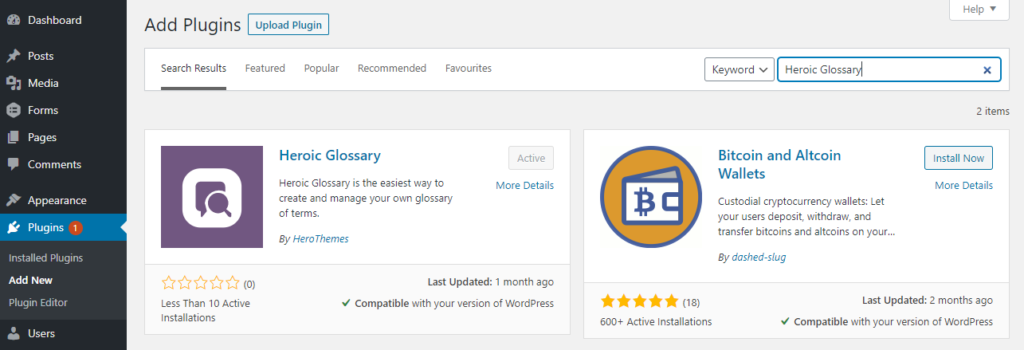
- Step 1 – In your WordPress Dashboard click on ‘Plugins’, then ‘Add new’
- Step 2 – In the search bar, search for ‘Heroic Glossary’
- Step 3 – Click on ‘Install’ and click on ‘Activate’ to activate the plugin

And that’s it! The plugin is ready to be used in your posts and pages.
2. Add a glossary to your site
Let’s create your first glossary together.
Once again it’s 3 easy steps:
- Step 1 – In your post or page, click on ‘Add block’ in the top option bar of the WordPress editor.
- Step 2 – Search for ‘Heroic Glossary’ and click on the block to add it to your page

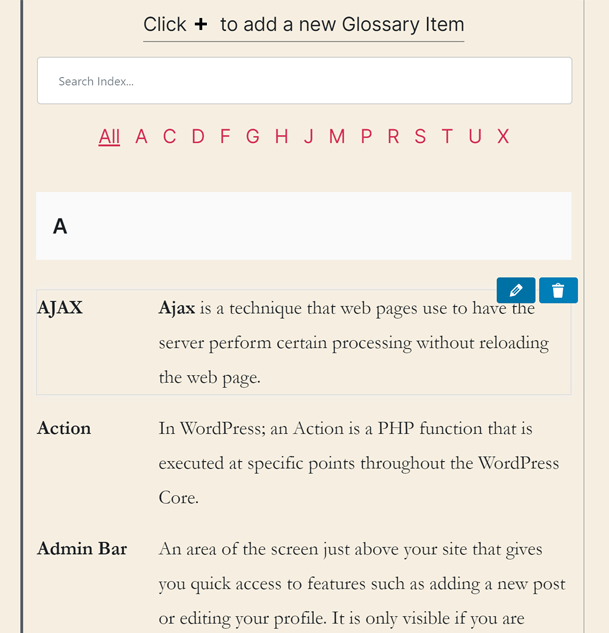
- Step 3 – Start adding the entries by clicking the ‘+’ at the top of the block and then click on ‘Insert’ to add it to the glossary.


You’ll see the entries appearing alphabetically in your glossary.
You can edit or delete any entries by clicking on the entry.
Add as many entries in any order you want. Heroic Glossary will organize it automatically!

3. Check whether the result is displayed the way you want
The great thing with this dictionary plugin is that, in the editor, you are already previewing the exact design of your glossary, the same way your customers will see it. As you can see, the ergonomics are simple and modern.
Depending on your needs and the size of your glossary, you’ll probably want to customize how it looks.
Heroic Glossary Plugin offers 4 great display options:
- Choose between the classic design or a boxed one
- Display or hide the search bar
- Display or hide the filter bar with the list of all the letters that have entries
- Disable the empty sections so all the letters that do not have any entries will be hidden
- Pro Tip: you can add your own CSS-class and use it to customize the appearance (colors, margins…)

4. Extra feature: create reusable glossaries
You can set up a glossary as a reusable block with a click-in-the-block option. You’ll then be able to name your new block and it will appear in the ‘Add block’ selection in every page and post, so you can add it with a click, with all the content already pre-filled.

There you go! You now have a functional, professional-looking glossary in your page or post. Don’t just take my word for it. Check out this example of the Heroic Glossary Plugin in action on a parental blog.
Wouldn’t that look good on your site? And the best thing is; it’s free and quick!
Let us know what you think about adding a glossary on your site and what the most useful features are for your business.
If you’re looking for more quick tutorials about knowledge sharing, you might be interested in our step by step guide on how to add an FAQ to your site.
The post How To Add A Glossary To WordPress appeared first on HeroThemes.