
Mistakes are part of the learning process, but in homelabbing, they can be not only costly but also time-consuming and take the fun out of it.
Over the years, I have made countless mistakes that cost me time, energy, and a lot of sweat. It’s easy to lose the joy of homelabbling after that. To ensure your pursuit of new knowledge doesn’t falter due to unforeseen obstacles, I sat down and wrote this comprehensive article.
I will give you a behind the scenes look and share my personal insights. Find out where I wasted a lot of money and where more thoughtful planning would have saved me from a lot of guilt.
1. Overly ambitious planning
When I first decided to set up a homelab, my ambitions were enormous. In my mind’s eye, I already envisioned a server rack crammed full of enterprise hardware: dozens of high-performance rack servers, a high-performance 10 Gbps switch stack, and a fully-fledged firewall failover with dual WAN connectivity. I won’t even get started on the storage cluster.
Later, when I started researching, I quickly realized how expensive even old hardware can be, and that a server rack also costs a fortune, especially in Global South. Ultimately, I abandoned my plans and wasted valuable time that I could have better used for my professional development.

And let’s be honest, nobody needs a 42U rack full of enterprise hardware at home to improve their admin or DevOps skills. In retrospect, a simple thin client like the HP T630 with Proxmox and three virtual machines would have sufficed back then.
A managed switch would have been completely unnecessary back then as my provider’s Box couldn’t handle the VLAN anyway because of my such overambitious expectations, my project simply didn’t get off the ground for a long time.
So don’t make the mistake of trying to start with something far too big. These days, it’s perfectly possible to run a virtual Kubernetes cluster or a dozen virtual servers on a powerful mini-PC. Even running a pure Docker host is a cost-effective way to get started. After all, virtually all homelab services are available in containerized form.
At the moment, my homelab mixes compact nodes with heavier hardware that carries the demanding workloads, and each system has settled into a role that matches its strengths. Minisforum NAB6 Lite with an Intel Core i5 12600H handles most of the always-on services, including Docker stacks, light Kubernetes testing, and a few monitoring agents. MinisForum UM250 with a Ryzen 5 Pro acts as a dependable secondary node where I spin up short lived VMs, test new tools, and run anything experimental that I do not want on the main box. The EliteMini HM90 has become my remote Steam machine for indie gaming and doubles as a small GPU capable host for media tasks when needed. These three mini-PCs save me a lot of save and electricity cost.
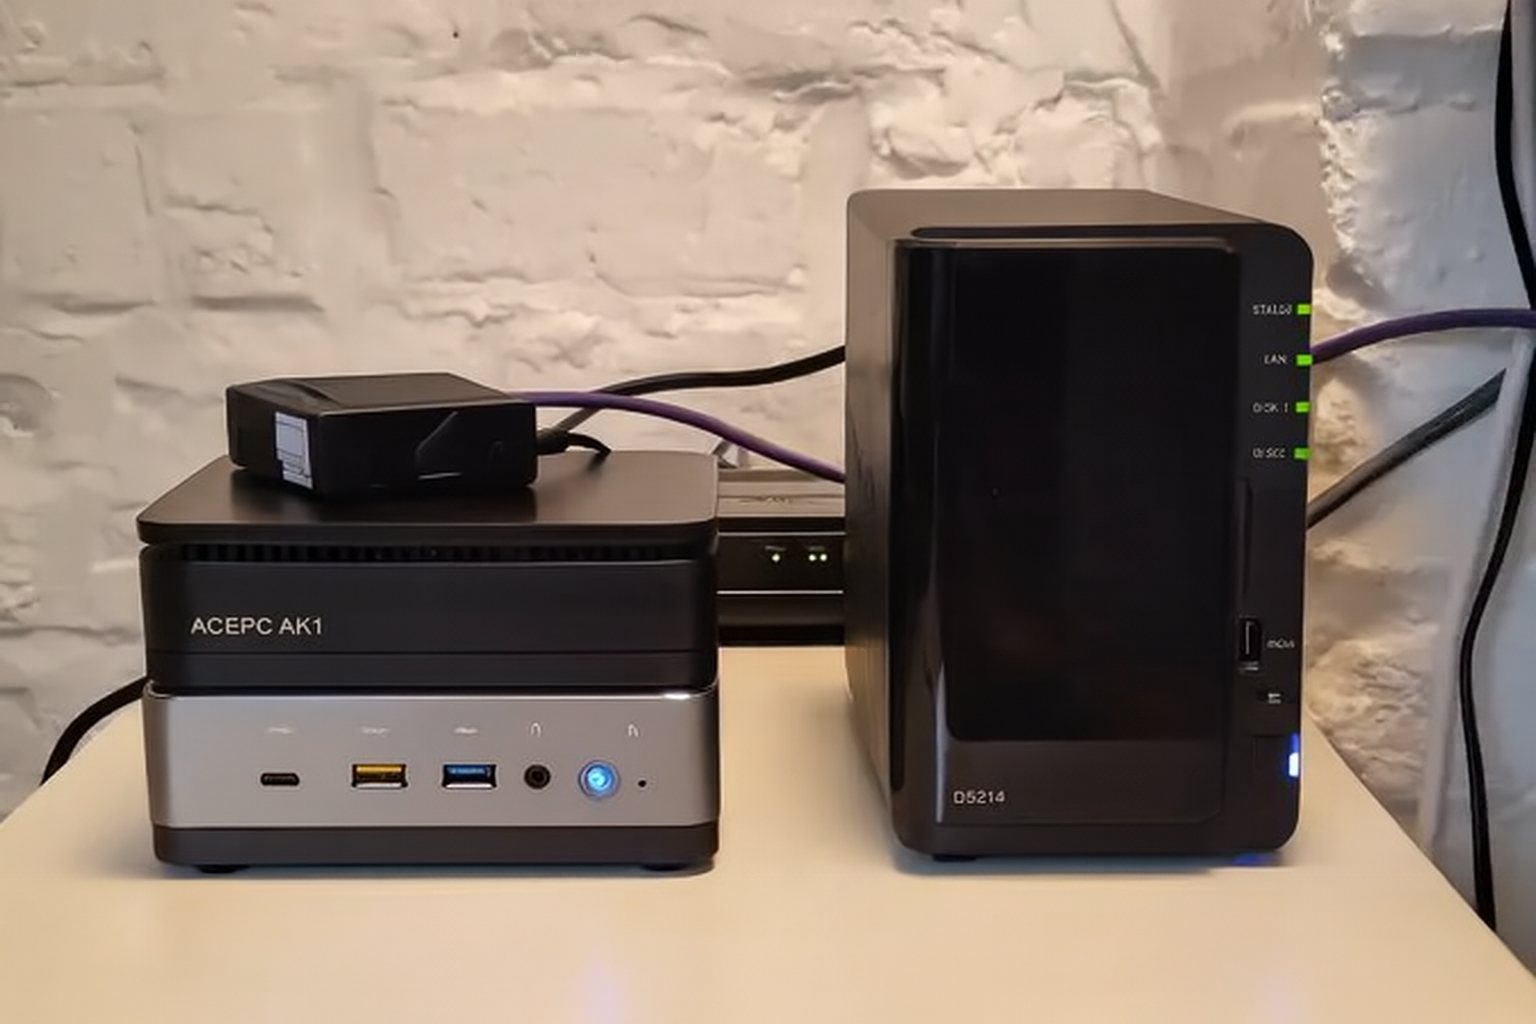
I also have a ACEPC AK1 with its Intel Celeron J3455 fills the role of a low power utility system for status dashboards, uptime monitoring, and a couple of background scripts that do not need real compute. A Synology DiskStation DS925 Plus handles shared storage, snapshots, and offloading backups for the entire lab and a Cisco switch keeps the network organized and gives me the VLAN separation I need. The monstrous, HP Z640 with dual Xeon E5 2680 v4 processors anchors the setup by taking on Proxmox, but I will change it soon with something that consumes less power and isn’t that noisy. For networking, I rely on pfSense which runs on barebone box that I got from AliExpress.
📋
Start small. Start with existing hardware at hand. Don’t burn money at the beginning.
2. Using only open source software
I am all for open source and Proxmox is my hypervisor of choice. Apparently, there’s nothing wrong with this approach and you might be wondering why I included it in the list.
The problem is, most companies don’t rely on open source technology stack. In practice, you are more likely to find VMware vSphere as their virtualization solution. In most cases, no one is familiar with the Proxmox Backup Server either. Veeam, on the other hand, is known to almost everyone. Therefore, your homelab should also have a traditional enterprise environment.
This offers the advantage of creating synergies. Update processes are already familiar from your own lab, and you can calmly test a wide variety of configurations there. You might argue that the entire software is extremely expensive and simply unaffordable. However, that’s not the case:
- NFR (Not-for-Resale) licenses: These are licenses used by vendors to authorize content creators, partners, and others to use their software. This is a great source of free software. If you like a particular piece of software or solution, contact the vendor and check if they offer such licenses that you can use.
- VMUG Advantage: When I first started running VMware vSphere at home, I wasn’t really aware of VMUG Advantage. It’s a subscription that allows you to use the full VMware software suite in your home lab for a year without any restrictions. It’s not cheap, but certainly reasonable if you are thinking of a career and are not just a hobbiest.
📋
If you are using enterprise software at work, you can use their freemium version in your homelab. Reduces the learning curve with a new (open source) software.
3. Inadequate planning
Those who don’t think things through sufficiently may find themselves having to purchase additional hardware more frequently. Thinking back to the beginning of my homelab, the 8-port switch was too small after only 3 months, the Raspberry Pi 4 was too underpowered after just a few days, and the inexpensive firewall couldn’t route more than 500 Mbps of traffic.
Then came the first Proxmox cluster with two nodes and a NAS as shared storage. The latter was only connected at 1 Gbps, which resulted in incredibly poor performance for my VMs, and the former immediately went into read-only mode whenever a node restarted. When I added another QDevice, I first had to replace the cheap triple power strip.

You don’t need to start big, but accurately assessing your needs is crucial. Just jumping in isn’t a good idea. Sit down and think carefully about what you want to implement after completing the smaller projects because inexpensive server hardware quickly reaches its performance limits, the backup pool fills up faster than expected, and cheap SSDs in the servers tend to almost fail under multiple simultaneous random write operations. As a result, everything has to be replaced and the setup rebuilt from scratch. This not only wastes valuable time but also incurs unnecessary expenses.
📋
If you have to buy hardware at the beginning, assess your need. What you buy today may not be sufficient in a few months.
4. Forego backups
A home lab serves as a learning environment for new skills and is therefore often reconfigured regularly. In this process, backups are often considered less important and deemed unnecessary. However, many forget the backbone of their network, namely the firewall, switch, wireless access point, and smart home hub.
A lack of backups in these areas can have devastating consequences in a worst-case scenario. Even a malfunctioning DNS ad blocker like the popular Pi-hole or the more modern AdGuard Home can cripple the entire home network. Therefore, it’s advisable to create backups and the built-in tools of these services are sufficient for this. Exporting configurations is possible almost everywhere.
Users with ample storage space who are running Proxmox can utilize the integrated backup function. However, this continuously creates full backups, which can quickly deplete available storage space with frequent backups. A more efficient solution is offered by the Proxmox Backup Server, which enables incremental backups.
Furthermore, PBS has a very practical feature, you can view and even download files in the graphical user interface, just like in a file browser. Additionally, there’s the Proxmox Backup Server Client tool, which allows you to backup physical servers, making it particularly useful for the PVE hypervisor itself.
Veeam, especially the free edition, also proves to be a powerful backup solution and is definitely worth considering. However, the number of backup clients is limited. Furthermore, Synology NAS systems offer a great built-in solution with Active Backup for Business. Those who prefer can also consider cloud services like the Hetzner Storage Box.
Since this is only cloud storage, you still need software to perform backups. Ultimately, the question remains: what exactly needs to be backed up? In practice, you often hear the term “critical infrastructure.” In my opinion, the following systems in a home lab fall into this category:
- Virtual machines
- Containers (LXC, Docker or K8s)
- Switch/Firewall configurations
- Hypervisor settings
You should also consider the following:
- Offsite backups: Carefully consider which backups or configuration files are essential for you. It makes perfect sense to also move a selection of your backups to the cloud. This might seem paranoid at first. But consider this: What good is a nightly backup on your own NAS if a lightning strike destroys both the hypervisor and the network storage?
- Storage replication: Do you have a central storage device that provides the majority of the storage for your network? Then you should back it up as well. RAID is not a substitute for backups. Although RAID offers higher availability and redundancy, it doesn’t protect against hardware failures. The simplest way to implement a backup is to run an RSYNC job from the primary to the secondary storage once a night.
📋
Have multiple backup copies. And no, RAID is not backup.
5. Everything in one network
Combining all smart home devices, network storage, and servers into a single network introduces numerous problems. Network performance suffers significantly, especially when VoIP, video streaming, and storage replication are running simultaneously on the same network. Furthermore, configuring just Quality of Service (QoS) no longer provides a solution.
Such a network design has a very negative impact on time-critical applications like VoIP or online gaming. Therefore, I recommend using VLANs. Not least because they simplify management and improve security. Guests can be isolated in a separate VLAN, while the management VLAN is only accessible to specific devices.
Furthermore, I am a big fan of operating smart home devices in a dedicated IoT network. This allows for better monitoring of their traffic and enables a quick response to any data privacy concerns. Moreover, IoT devices are a frequent target for attacks, so they must not be allowed to connect to sensitive areas of my network.
Security is my top priority. Furthermore, I see the use of VLANs as an excellent opportunity for system administrators to deepen their firewall and switching skills. A solid understanding of network traffic will be important sooner or later, even if it’s just the connection between the load balancer and the backend.
The following structure is recommended as a general guideline:
- LAN: A dedicated VLAN for normal home network traffic. This could include laptops, PCs, tablets, and smartphones.
- Server: A dedicated VLAN where you make your self-hosted services available.
- IoT: Due to the security risks of IoT devices, they should be placed in their own VLAN. Ensure that firewall rules prevent these devices from connecting to sensitive network areas.
- Guests: A special VLAN where visitors’ devices are located. Ensure that the devices are isolated at Layer 2, although not every switch and wireless access point supports this.
- MGMT: A dedicated VLAN in which all administrative access to the infrastructure components is only possible for specific IP addresses.
- DMZ: A VLAN where you can place publicly accessible services. Examples include web servers, game servers, and VPN servers. You need to design your firewall rules particularly strictly here.

A positive side effect of network segmentation for me was the opportunity to delve deeper into IPv6. In particular, setting up Stateless Address Autoconfiguration (SLAAC) for the different subnets was interesting and significantly improved my understanding of IPv6.
📋
Take advantage of VLANs and divide the network and divices as per usage.
6. Insufficient resources
Another common mistake when homelabling is underestimating the resources required. Initially, Linux might seem like a major hurdle that needs to be overcome, but after a few weeks, the picture changes. When you then want to start your first project, for example a Nextcloud instance, you could be in for a nasty surprise.
The inexpensive thin client might only have one hard drive connection, and integrating network storage doesn’t make much sense with a 1 Gbps connection. Therefore, purchasing more powerful hardware with more hard drive connections is necessary. Several months later, when attempting to create a Kubernetes cluster, bottlenecks arise again.
The two installed consumer SSDs can’t handle the read and write demands of multiple virtual machines. Furthermore, failures become increasingly frequent because the ZFS completely overloads the consumer drives. Then the cycle starts all over again, and used Intel SSDs are purchased, or NVMe drives are supposed to be the solution to all the problems.
All these problems could have been avoided with more careful planning and a more precise resource estimate. Therefore, it’s important to consider your long-term goals. Do you simply want to run individual VMs or even just a few Docker containers? Or are you aiming to operate failover clusters?
For those interested in entering the data center field, it might be wise to invest in more hardware from the outset. In professional practice, one is often confronted with complex setups that require a thorough understanding down to the smallest detail. Resource clustering, in particular, is ubiquitous and demands comprehensive expertise.
For example, if you want to familiarize yourself with Kubernetes and SUSE Rancher, you need sufficient hardware to run an upstream and downstream cluster. In addition, the containerized workloads require adequate computing power and of course, you also need to factor in the resources required for a few more virtual machines.
Just think about GitOps in the form of a Gitea server or S3-compatible storage like MinIO. Often you also require a host to run Ansible, Puppet, or Terraform code. As you can see, resource planning can be highly individual. As a rough guide, I can give you the following standalone hypervisor recommendations:
- Budget-friendly setup for trainees: 4C/8T Intel Core i5 or AMD Ryzen 5, 16 GB RAM, 2 x 500 GB SSDs and 1 Gigabit network card.
- Price-performance winner for admins and DevOps: 8C/16T Intel Core i7 or AMD Ryzen 7, 64 GB RAM, 2 x 1 TB NVME and 2.5 Gigabit network card.
- Resource-packed powerhouse for enthusiasts: 12C/24T Intel Core i9 or AMD Ryzen 9, 128 GB RAM, 2 x 2 TB NVMEs and a 10 Gigabit network card.
Although storage is extremely affordable these days, many people still opt for slow SMR HDDs. These don’t achieve high transfer rates, neither for reading nor writing. Furthermore, they often don’t last very long and are hardly any cheaper than enterprise SATA hard drives.
📋
Reassess your needs and be prepared for spending more on hardware as your needs expand.
7. Missing documentation
One of the biggest and most common mistakes in a home lab is the lack of documentation. How often have you told yourself: “Oh, I’ll remember where that is,” or which network it’s connected to, or how the upgrade process works in detail? I have often regretted not writing certain things down.
Start with the network, you should write down all the assigned IP addresses. It’s also a good idea to properly document the physical cabling in the rack. It’s so easy for a cable to come loose during renovations. Labeling the cables has saved me a lot of time and frustration in this regard.
A few months or years later, when you suddenly need to know how things are configured, it’s great to be able to pull out your documentation and understand how all the connections are established. Depending on what you want to document, there are several interesting solutions available. For IP management, I can recommend GestioIP or the classic phpIPAM.
If you want to document your setup down to the last detail, I highly recommend the wiki software BookStack, which can be deployed as a Docker container in no time.
📋
Documentation is important even if you build and manage everything on your own. Create separate, proper knowledge base for your homelab. Your futurself will thank you.
8. No UPS in use
For a long time, I hesitated to purchase a UPS for my small rack. The costs seemed far too high, and the benefits questionable anyway, but despite CoW systems like ZFS on my servers, the file systems of my switches, firewall, and wireless access points can become corrupted during . Therefore, after a while, I only switched the machines on sporadically to explore new technologies.
Nevertheless, electricity consumption remained quite high, and I had to pay a hefty additional bill. What I hadn’t considered was the immense standby power consumption of the three Dell PowerEdge servers. A full 30 watts per device were wasted so that the iDRAC could dutifully display the latest system statistics.
This is why I emphasize using MiniPCs instead of buying old enterprise hardware unless you don’t have an option. Their only advantage is the remote management interface but you can build your own PiKVM and connect it to various servers via a KVM switch. If that seems too complicated, you can also get a used Lantronix Spider KVM. Another option is to use an old monitor with an inexpensive KVM switch.
📋
Even if you live in a first world country that (almost) never sees power cuts, it is a good idea to have a power backup in place.
10. Lack of interaction
Don’t despair over a problem for days. If you are stuck on something, someone else has most likely had the same or a similar problem and can help you solve it. A great way to give something back is to actively participate in forums, social media, or other community platforms.
If you have a question, post it, and chances are good that experienced IT professionals will be willing to share their knowledge with you.
Many open-source projects appreciate active support. Don’t worry if programming isn’t your thing, you will still find a good fit in the PR teams. Furthermore, many developers struggle with writing helpful tutorials. Improvements to documentation are therefore always welcome. With that in mind, get involved in the community.
📋
Don’t hesitate to seek help. Don’t shy away from helping others. Join relavant forums.
Wrapping Up
A homelab feels worthwhile once the entire setup stops fighting you and starts making space for real experimenting. You do not need an overly expensive setup that your internet connection cannot fully utilize. Likewise, a system that offers high performance at a low price can become frustrating if the components constantly cause problems, such as frequent driver reinstalls, network interface failures, video output issues, or compatibility problems with the kernel.
Every decision from hardware selection to basic topology shapes the stability of your lab. Think of it as a slow project that benefits from steady improvement rather than dramatic overhauls. With a bit of care, you can avoid the usual traps and end up with a setup that keeps you curious instead of frustrated.


