Do you want to install a theme in WordPress, but don’t know how? Don’t worry! After you read this article, you’ll be able to install any kind of WordPress theme.
Installing themes might not be as difficult as you’re thinking. There are different methods to install a theme in WordPress, which are discussed below for you. So, let’s get started.
What is a WordPress Theme? (Overview)
But first of all, exactly what is a WordPress theme? A WordPress theme is a design layout that decides how your website will look visually. You can style the front-end part of your site through themes, which your visitors will then see.
Simply put, the contents of your site are displayed according to the theme you choose. In other words, the theme you’re using on your site determines how your content appears to the users online.
The different theme comes with different layouts. For e.g, a magazine based theme comes with a layout so that you can add articles, news, etc. Similarly, an eCommerce based theme comes with features which makes it easier for both seller and buyer.
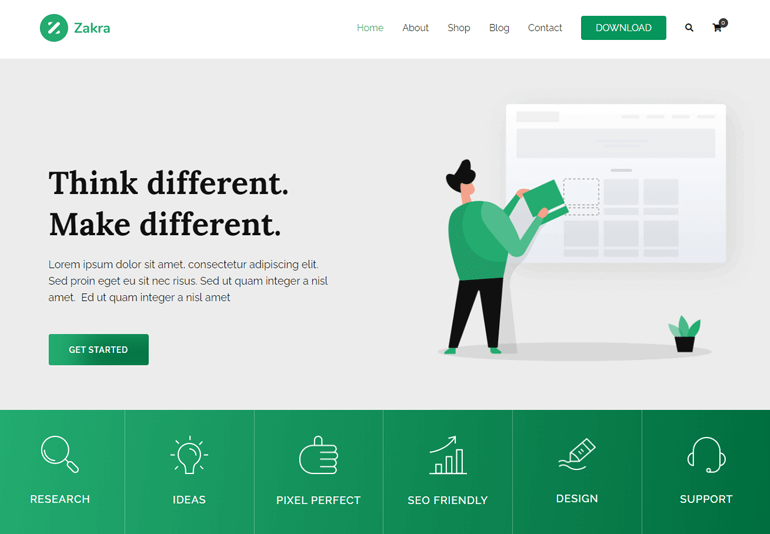
E.g here’s how your site will look if you use the Zakra theme.

Of course, this is just a sample page. You can further customize it and change the appearance as per your preference.
Before Installing a Theme in WordPress
Before we jump into the process of installing the themes, let’s discuss the things you should be careful about before you install a new theme.
While Installing a theme, choosing the right theme comes first. Yes, there are thousands of free themes available on the internet. However, not all free themes will be good for your website. Remember, not all sites provide well-coded free themes.
The other mistake you might make is not knowing the type of theme you want. There are themes for every site like – business themes, photography themes, medical site themes, blogging themes, and more. You name it, there’ll be a theme for it.
Here are a few tips for you to keep in mind before installing a new theme
- Always install/download themes from trusted sites. Some of the most trusted sites are WordPress.org, ThemeGrill, ThemeForest, Elegant Themes, etc.
- Choose the theme according to the content of your site. For e:g If your content consists of news and similar articles, choose a magazine-based theme like ColorMag.
- If you’re still confused about the theme to choose, a high-quality multipurpose theme such as Zakra might be the right choice.

Now that you know from where and how to choose the right theme, let’s learn about how to install those themes.
How to Install a WordPress Theme?
To install a new theme, you need to login to your WordPress Dashboard first.
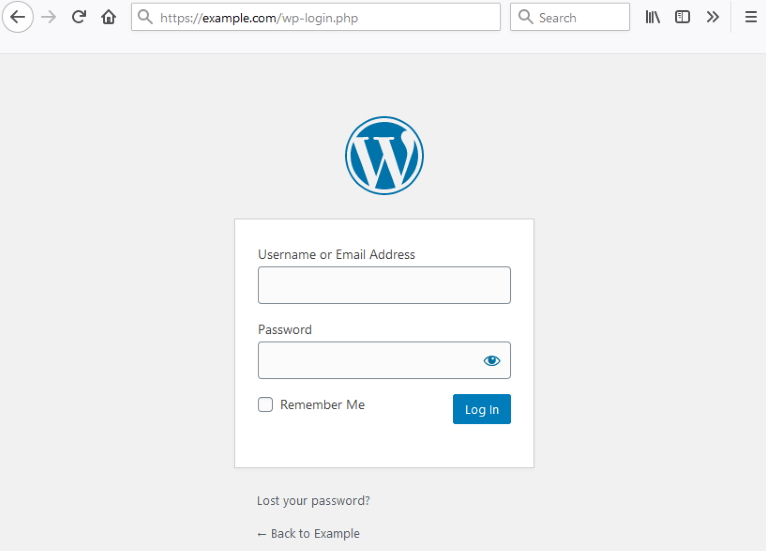
Enter your WordPress login URL in this format: ‘your domain name/wp-login.php’. Suppose the name of your site is ‘example.com’, then enter ‘example.com/wp-login.php’. You’re then taken to your WordPress dashboard.

Now let’s install a new WordPress theme. There are 3 ways to install a theme in WordPress.
- Installing a Free Theme from WordPress Admin
- Manually Uploading the Downloaded Themes
- Using the FTP method
Here is the full explanation of the different methods to install the WordPress themes.
1. Installing a Free Theme from WordPress Admin
You can use this method to install the free WordPress themes available at the WordPress.org theme directory. To install these free themes follow these steps.
Firstly, log in to your WordPress dashboard. Here, you’ll see the admin area with various control menus on the left such as Posts, Media, Pages, Plugins, Appearance, Settings, etc. Navigate to ‘Appearance’ and then click on the ‘Themes’ option.

Now, you’ll see the ‘Manage Themes’ page with one or more pre-installed themes that were developed by a team of core WordPress contributors at WordPress.org.

If you choose WordPress Auto-Install or One-Click installation offered by WordPress hosting companies, then your WordPress may come with a set of their favorite themes and plugins pre-installed.
To install a new theme, you need to click on the ‘Add New’ button. You’ll find this button at the top left next to the search bar. Or you can click the ‘Add New Theme’ box after the installed themes.

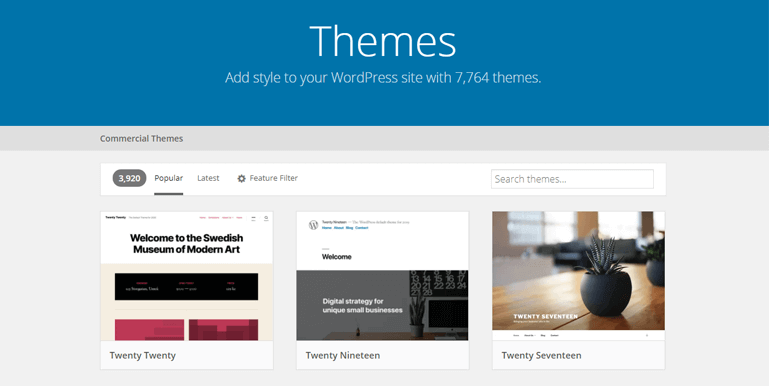
On the next page, you’ll find different themes. These themes are loaded automatically from the WordPress.org theme repository. Here, you can simply use the search box to find a theme then click on the ‘Install’ button.

Once done, it will turn into the ‘Activate’ button. Just click on it, and you’re done!

And that’s it! The theme is installed and activated. If you check your site, you’ll see that the content now appears
according to your new theme.
Exploring More Themes from the Dashboard
However, sometimes you may not have a pre-selected theme or you’re still looking for options. If so, then you can try selecting from various options available at WordPress.org. You can choose between featured, popular, latest, or favorites themes.

- Featured themes: Some themes having distinctive or specific features.
- Popular themes: The themes which are popular and most downloaded.
- Latest: The latest and brand new themes available on the repository.
- Favorites: You can search the theme’s that you’ve marked as favorite in the WordPress.org site.

To access your favorite themes you need an account on the WordPress.org site. Once you have one, you can simply add any of the themes from the WordPress.com repository into your favorites with a click.

Using the Feature Filter to find Themes
Also, you can use the Feature Filter option available on the Add Themes page. It allows you to search for the exact type of theme you want. You can choose the Subject, Features, and Layout of the theme.

You can select now use filters to select the type of theme you want. Once you’re done, just click on ‘Apply Filters’.
For example, we selected ‘Blog’ for the subject, ‘Custom-Background’ for the features, and ‘Grid Layout’ for the layout options.

You’ll then see all the themes that are suitable for blogging, have the custom background and grid layout. How easy is that?
Previewing Themes before Installation
Once you’ve selected a theme for your site, you can start the installation. But it’s better to preview the theme before installing it. With WordPress, you can easily preview any theme’s design and check if you like it or not.
For all the themes, you’ll see the ‘Preview’ option right next to the ‘ Install ’ option. Or you can also click the ‘Details & Preview’ option which appears when you hover over a theme.

When you click on the preview option you can see how your site will look in real-time. You’ll be taken to the ‘Theme Preview’ page where at the right you can see how your site looks. And at the left, you can see some brief description of the theme.

If you like the layout then you can install the theme from that same page by clicking the ‘Install’ button above the theme description.

However, even if you’ve installed a new theme, your content will be shown according to your old theme. To change that, you’ll have to ‘Activate’ your newly uploaded theme.
After you install the theme from the ‘Preview theme’ page, there is an ‘Activate’ button instead of an ‘Install’ button. Just click on that and all your content will be displayed according to your new theme.

And that’s it. You’ve just installed and activated a WordPress theme using the theme functionality in your WordPress admin.
2. Manually Uploading the Downloaded Themes
Sometimes the free themes at WordPress.org may not have all the features you’re looking for. At those times, you can purchase a premium theme and then install it to WordPress. You can even build a custom theme yourself or hire someone to develop a theme for your site.
In any of the above cases, you need to use the Manual Upload method. Simply put, this method is used when you want to use themes that aren’t available at WordPress.org.
As an example, we’ll show you how you can buy a paid theme and install it on your site. First, buy the premium theme you find suitable for your site. Remember to use trustworthy sites like ThemeGrill, Zakra Theme, or the marketplace ThemeForest.

Purchasing the theme should allow you to download the theme file.

The file is almost always compressed in a .zip format, as it is the format accepted by WordPress. In case the file isn’t compressed, you can easily zip it yourself.
To zip the file, right-click on the folder containing all the theme files and navigate to ‘Send to’ and click on the ‘Compressed (zipped) folder’.

Now to install this theme follow the steps below.
Upload & Install the Purchased WordPress Theme to Your Site
Now that you have your theme in the zipped folder, you’re ready to upload and install it on your site. First, log in to your WordPress dashboard. Then from the menus at the left navigate to ‘ Appearance >> Themes’.
On the next page, you’ll see all your pre-installed and default themes. And at the top, click on the ‘Add new’ button. Since you can’t use the search function to find the downloaded theme, you need to click on the ‘Upload Theme’ button.

When you click the upload theme button, you’ll be given the option ‘Choose File’. Also, there is a message above the ‘Choose File’ option that you can upload only .zip files, which we mentioned earlier.
If your file is ready, you can click on the ‘Choose File’ button and find the file. Then, click on the ‘Install Now’ button. It will take a short time to install the theme.

Once installed, don’t forget to click on the ‘ Activate’ button. Congratulations! You’ve learned another method to install a WordPress theme.
3. Install Using The FTP Method
Let us warn you that this method might be a bit complicated for beginners.
Sometimes the files you downloaded may be larger and it might be difficult to install using the Upload method. In that situation, you’ll need FTP to install the theme.
FTP ( File-Transfer Protocol) is the most commonly used protocol to safely transfer files between client and server on the computer network. It also provides file access and file management functionalities.

Before the installation process, download the theme of your choice and make sure it is unzipped. Now, you can do the following steps to install the theme using FTP.
Download an FTP client. FTP clients is a program that allows you to connect to the hosting account and manually move files. Some famous FTP clients are FileZilla, WinSCP, Cyberduck, etc.

The next step will be to get your FTP credentials. You can get those through your web host. Log in to your cPanel then navigate to Files >> FTP Accounts and create an FTP account. You need to provide a username and password to create your account.

Once the account is created, open your installed FTP client (FileZilla in our case) and enter your login credentials. Just put in your domain name, username, password, and click on ‘ Quickconnect’.

Then you’ll see that the page is divided into two. The right side is your server-side and the left side is your local-side. On the left side, you’ll find your local files including the theme you downloaded.

Now, on the right side navigate to public_html >> wp-content >> themes folder. Then just drag the folder with the theme files from your left side and drop it on the themes folder on the right. It might take some time to move all the files.

Once the theme is uploaded, go to your WordPress administrator. Navigate to Appearance >> Themes. You’ll find the theme you have uploaded via FTP. Activate that theme and build your WordPress site.

4. Installing a Child Theme
A child theme is a theme that is created to modify and add more functionality to any particular theme. The theme that you’ve modified to create the child theme is known as the parent theme.
The process of installing a child theme is basically the same as manually uploading a theme. Here’s what you need to do.
The first thing to do is to download the child theme file. Then, you can log in to your WordPress dashboard. Now navigate to Appearance >> Themes and click the ‘ Add New’ button.

Here, click on the ‘Upload Theme’ button at the top.

Click on the ‘ Browse’ button and choose the child theme you have downloaded. Then click on ‘Install Now’. Like before, wait until it is installed and then click on ‘Activate’.
Keeping Your Theme Updated to the Latest Version
It’s always a wise decision to update your theme. An obvious reason for that is to make sure that your theme supports the latest version of WordPress.
Furthermore, outdated themes also
leave your site exposed to security exploits and vulnerabilities. A report by Sucuri found that based on their data, having outdated components was the leading cause of malware infections.
It also helps make your website compatible with all browsers and the latest versions of mobile devices. Updating your themes means you’re keeping up as technology evolves.
Now that you know it’s important to update your themes, here are the two ways you can update your themes.
- Update the Installed themes from the Dashboard
- Download and Manually Upload the Updated version
Before updating your themes, always remember to backup your site files and data so you don’t lose your data should anything go wrong.
1. Update The Installed Themes from the Dashboard
WordPress gives you the option to update the themes individually or update all the outdated ones at once.
To update all the outdated themes, first, go to your WordPress dashboard. On the menus to the left, click on ‘Updates’. There’s a small icon that shows you the number of available updates.

When you click the option you’ll be taken to the page where you’ll see all the themes which have newer versions. Besides themes, you can also update plugins and even the WordPress software itself from here.
Now you can just update the theme you want to update or select all the themes and update them all at once.

Another method is to update your themes individually. From your dashboard, navigate to ‘Appearance >> Themes’. For the outdated themes, there’ll be a message at the top saying ‘New version available. Update Now’.

To update, simply click on the ‘Update Now’ and your theme will be updated.
If you want some details on the update, you can get that here as well. Instead of clicking on the ‘Update Now’ option, hover on the theme and click on the ‘Theme Details’ button that appears.

You can see which version you’ve installed and which version is now available. Also some brief descriptions of the theme. To update the theme, you can just click on the ‘Update Now’ button here.

And that’s how you update installed themes from your dashboard.
2. Download and Manually Upload the Updated Version
The above method is to update the themes from the official repository. However, you’ll also need to regularly update your premium themes. Here’s how you can do that.
Start by downloading the latest version of the theme you want to update. Then follow the following steps :
- Go to your WordPress dashboard and navigate to Appearance >> Themes.
- Then on the next page click on the ‘Add New’ option.
- After that click on ‘Upload Theme’. And upload the latest version of your theme.
If you’re using an earlier version of WordPress than 5.5., then you may encounter a problem that says ‘the folder already exists’. To solve the problem, you should update your site to the latest version.
If you want a solution for the old version of WordPress, you will need to use FTP.
- Enable any other theme besides the one you want to update and then log in to FTP.
- Navigate to public_html >> wp-content >> themes folder and delete the older version of the theme.
- Drag the folder of the latest version of your theme and add drop it into the themes folder.
- From your dashboard, navigate to Appearance >> Themes, search the theme you uploaded, and click on the ‘Activate’ button.
Conclusion
That was the different methods which you can use to install and update your WordPress themes. It’s super easy to do and your site will look amazing in no time at all. Before wrapping up, here are some themes we suggest you try installing:
Zakra is a super versatile multipurpose theme with a ton of amazing demos that you can check out. For news and magazine websites, ColorMag is a popular choice. If you’re looking for a way to kickstart an online store then you can’t go wrong with eStore.
These are free themes and have all the functionality you need to build a good website. You can download these themes and also buy the premium versions of these themes from sites like Zakra Theme and ThemeGrill.com.
That’s the end of this article. Hope this article was helpful for you and you were able to install a new theme into your WordPress. If you have any suggestions and questions, please feel free to comment down below.
The post How to Install a WordPress Theme? (Step by Step Guide for Beginners) appeared first on ThemeGrill Blog.