With Defender and The Hub, securing your site and keeping tabs on any volatile issues is as easy as ever – all in one place!
Any hackers up to no good, malware, or threatening bots, don’t stand a chance against our combined forces. And eliminating any potential problem can be done in a few clicks.
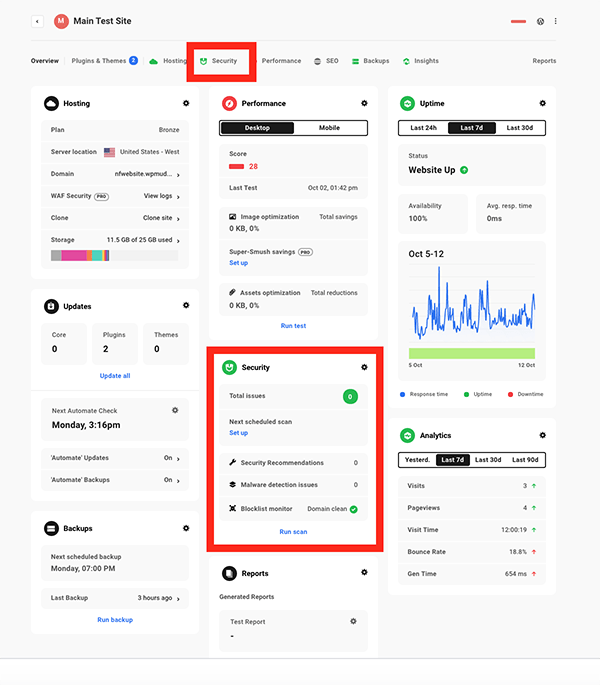
All of this is done in one place: The Hub’s Security panel. You can access it from the main overview in The Hub or the Security tab.

The Security area gives you a 360-degree look at everything on your site, from Firewall, malware detection, reporting, and more. Plus, from here, you can run all of your security operations with security scans, audits, and instantly handle security recommendations.
With quick accessibility and ease of use, you’ll see how The Hub and Defender are your answer to your site’s security.
We’ll be looking at how to:
- Easily Run a Security Scan or Have One Scheduled
- Instantly Tweak Security
- Set Up Tailored Security Reports Delivered Right to Your Inbox
- Get Notified (and delete) Suspicious Files
- Set Up Firewall with WAF
- Activate Other Security Tools in One-Click
By the time you read through this article, you’ll see how to view, handle, and keep tabs on your security in the most direct way possible.
1. Defender’s documentation. 4. hackers get stopped in their tracks with Defender before even making it to your site. 5. WAF will also monitor all of the IP addresses and user agents attempting to access your site. It filters out traffic that is known to be unsafe or that you’ve identified as not wanted. Your site will be protected from attacks, such as cross-site request forgeries, cross-site-scripting, file inclusions, and SQL injection attacks.
5. WAF will also monitor all of the IP addresses and user agents attempting to access your site. It filters out traffic that is known to be unsafe or that you’ve identified as not wanted. Your site will be protected from attacks, such as cross-site request forgeries, cross-site-scripting, file inclusions, and SQL injection attacks.
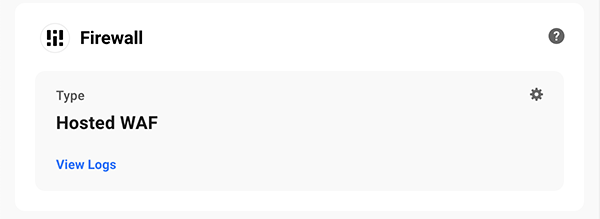
In The Hub, the Firewall section shows what type of WAF protection you have. You can view logs and set it up directly from The Hub.

When you click on this box, you can turn it on and enter information for:
- IP Allowlist
- IP Blocklist
- User Agent Allowlist
- User Agent Blocklist
- URL Allowlist
- Disabled Rule IDs
Edit and adjust the WAF exactly how you’d like.
Effortlessly change the WAF settings at any time, keeping your WordPress site in good shape as issues arise.
6. Activate Other Security Tools in One-Click
The Hub has a lot of other security tools that you can activate and use in one-click. Here’s a rundown of what else you can do.
Audit Logging
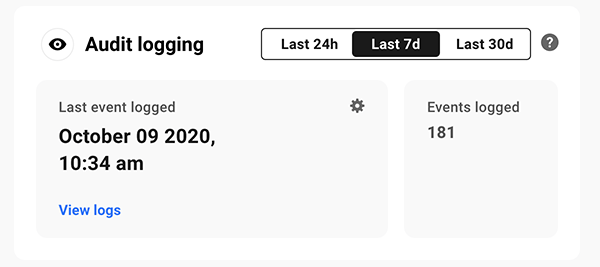
Want to track and log events that have happened on your website in a given amount of time? That’s easy to do with Audit Logging.
Simply choose between the Last 24 Hours, Last Seven Days, or Last 30-Days, and you can view your logs.

Audit Logging ensures you’re on top of all the events in detail.
Two-Factor Authentication
To protect your login and automatically lockout any suspicious behavior, you can enable two-factor authentication.
In this area, you can also see the Status (whether it’s on or off) and enable Lost Phone authentication.

With one-click, you can activate both two-factor authentication and lost phone.
You can also choose what users and roles need to have two-factor authentication by:
- Administrator
- Editor
- Author
- Contributor
- Subscriber
- Revisor
Along with all of this, you can fine-tune it all by enabling Force Authentication, adding Custom Graphics above login fields, customize two-factor emails, download the Google Authenticator, view active users, and deactivate two-factor authentication.
There is quite a bit you can customize and adjust when it comes to two-factor authentication.
Blocklist Monitor
Add Blocklist Monitoring in one-click. This will automatically check to see if you’re on Google’s blocklist every six hours.

If there’s an issue, we’ll also notify you immediately by email.
Advanced Tools
Turn on Advanced Tools, so you have enhanced protection against even the most aggressive hackers and bots out there.

Once activated, a new tab will open up in Defender’s dashboard. Here, you can enable all of these features just by enabling them:
- X-Frame Options
- X-XSS-Protection
- X-Content-Type-Options
- Strict Transport
- Referrer Policy
- Feature Policy
Each feature has a detailed description of precisely what it does.
With these enabled, you’re set for advanced protection!
There’s No Sub for Security with The Hub
When you combine The Hub and Defender, you can rest easy knowing your site is safe. There’s no sub for security against bots, hackers, and other potential threats.
And with The Hub’s ease of accessibility and instant security tweaks, you’re always in the know if any issues do arise and can handle them with a click or two – or automatically with email notifications.
Plus, if you ever need help, it’s always available 24/7 with our support superheroes.
Be sure to keep tabs on what’s next for The Hub and Defender with our Roadmap. Also, learn more about getting the most out of Defender security here.
You should never feel insecure about your site’s security. With the combination of The Hub and Defender, you don’t have to.
Source: premium.wpmudev.org