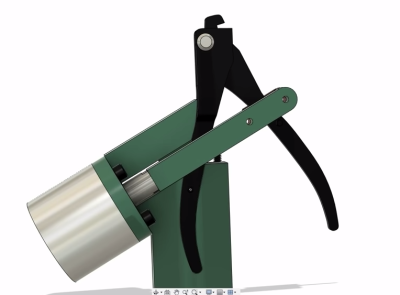
In high volume production, smaller PCBs are often “panelized” so that multiple copies can be shuffled through assembly as a single piece. Each board is attached to the panel with a few strategically placed tabs, not unlike the sprues in a plastic model kit. If you only have to separate a few boards you can simply cut them with a hand nipper, but when you’re doing hundreds or thousands of boards, it quickly becomes impractical.
 Which is where [Clough42] found himself recently. Looking to automate the process without breaking the bank, he decided to automate his trusty hand-held depanelizer tool. The basic idea was to build an actuator that could stand in for his own hand when operating the tool. He already had a pneumatic cylinder that he could power the device with, he just needed to design it.
In the video below, he] walks the viewer though his CAD design process for this project. His first step, which is one that’s often overlooked by new players, is creating digital representations of the hardware he’s using. This allows him to quickly design 3D printed parts that have the proper dimensions and clearances to interface with his real-world components. Remember: it’s a lot easier to adapt your 3D model to the components on hand than the other way around.
With the appropriate valves, hoses, and a foot pedal attached to the pneumatic cylinder, he’s able to operate the cutter completely hands-free. He still has to manually move the panel around, but at least it saves him from the repetitive squeezing motion.
With a tool like this and a custom testing jig, you’ll be producing PCBs like the pros in no time.
[Thanks to Anathae for the tip.]