
I am a new Ubuntu Linux 18.04 LTS cloud server user. By default my serer name to ‘localhost’ during installation but now I would like to change the computer name to ‘u1804-nixcraft’. Can you tell me how do I remove localhost and set it to u1804-nixcraft on Ubuntu 18.04 Linux? How do I change the Ubuntu computer name from ‘localhost’ to ‘u1804-nixcraft’? Can you tell me more about Ubuntu Linux change hostname command?
You need to use the hostnamectl command to see or set the Ubuntu 18.04 LTS system’s host name. The host name or computer name is usually at system startup in /etc/hostname file. Open the terminal application and type the following commands to set or change hostname or computer name on Ubuntu.
How to display the current Ubuntu hostname
Simply type the following command:$ hostnamectl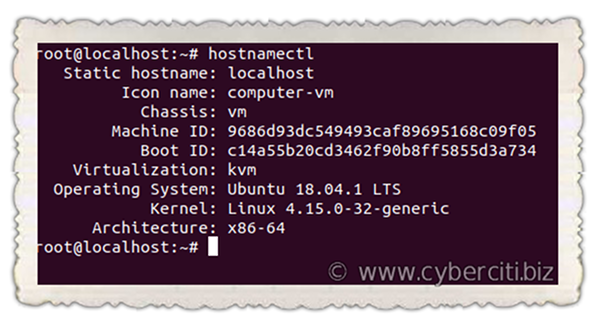
Ubuntu 18.04 LTS change hostname permanently
The procedure to change the computer name on Ubuntu 18.04 LTS:
- Type the hostnamectl command :
sudo hostnamectl set-hostname newNameHere
Delete the old name and setup new name. - Next Edit the /etc/hosts file:
sudo nano /etc/hosts
Replace any occurrence of the existing computer name with your new one. - Reboot the system to changes take effect:
sudo reboot
How to change hostname on Ubuntu 18.04 without a system restart
Let us see current setting just type the following command:$ hostnamectl
Next change hostname from localhost to u1804-nixcraft, enter:$ hostnamectl set-hostname u1804-nixcraft
Verify new changes:$ hostnamectl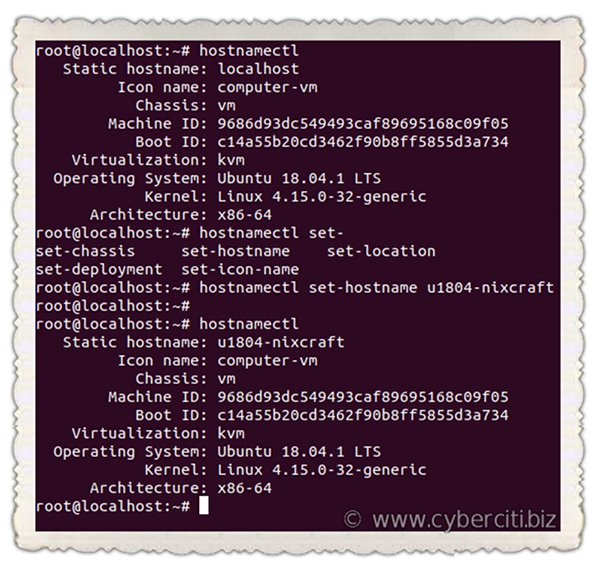
Find your public or private IP address by running the ip command:$ ip a
$ ip a s eth0
2: eth0: <BROADCAST,MULTICAST,UP,LOWER_UP> mtu 1500 qdisc fq_codel state UP group default qlen 1000 link/ether 40:9f:38:28:f6:b5 brd ff:ff:ff:ff:ff:ff inet 192.168.2.24/24 brd 192.168.2.255 scope global noprefixroute enp6s0 valid_lft forever preferred_lft forever inet6 fe80::429f:38ff:fe28:f6b5/64 scope link valid_lft forever preferred_lft forever |
Update /etc/hosts file with that IP address such as 192.168.2.24 using a text editor such as vim command/nano command:$ sudo vi /etc/hosts
OR$ sudo nano /etc/hosts
Update/append:192.168.2.24 u1804-nixcraft
Make sure you replace any occurrence of the old computer name with your new one too. Save and close the file in vim.
Conclusion
You learned how to change hostname permanently when using Ubuntu 18.04 LTS as per your needs.