Preloading your links before a user clicks them is a great technique for delivering your site content quickly. In this guide, we’ll show you how to speed up your website with Flying Pages by WP Speed Matters.
This plugin will automatically check your site for any links that appear on a visitor’s screen and fetch them ahead of time. So, when they click on the link, it will load without delay. It will not put increased strain on your server’s resources, since it waits until their browser is not busy.
This can help you provide an overall better experience for your viewers and increase the likelihood of them staying. After all, nobody wants to sit around and wait for pages to load.
Improve the performance and security of your WordPress website with our WordPress hosting plans.
![]() Web Application Firewalls
Web Application Firewalls ![]() Free SSL Certificates
Free SSL Certificates ![]() Advanced Server Caching
Advanced Server Caching
View WordPress Hosting Plans
How to Use Flying Pages for WordPress
Below we’ll show you how to get the most out of the Flying Pages plugin. You must first install the plugin, then we’ll show you how to access the compatibility check tool and go over the available settings.
- Install the Flying Pages plugin by WP Speed Matters. Once you have the plugin installed, you should ensure that your site is compatible.
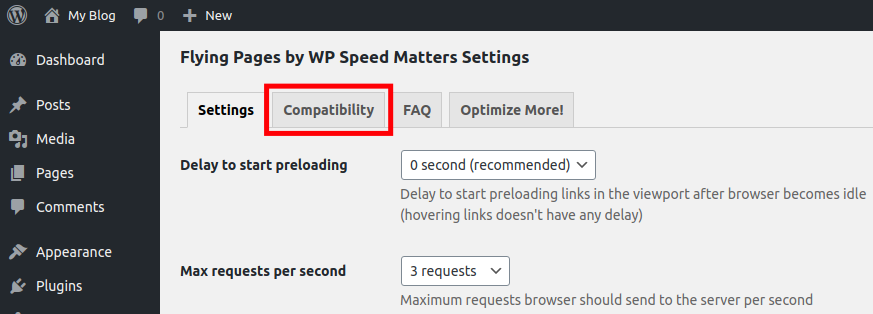
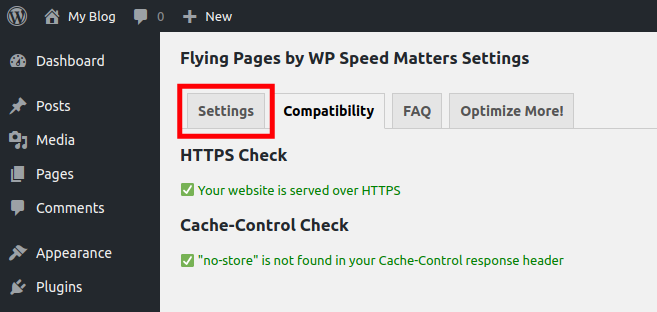
- Click the Settings link in your WordPress Dashboard.
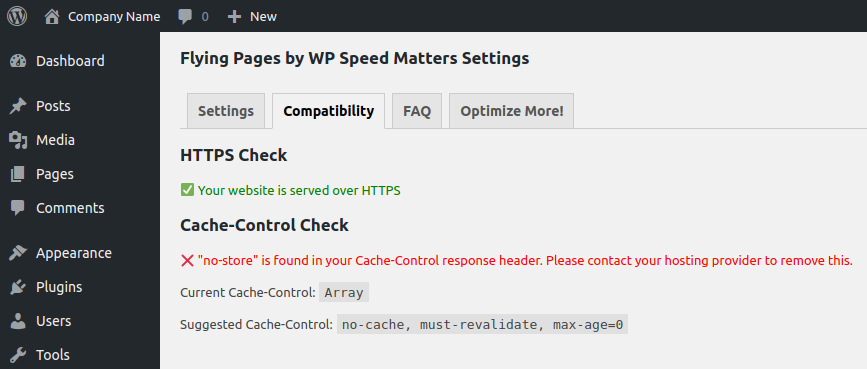
- Click the Compatibility tab to access the test results.
- You will then see the results of the compatibility check. If you fail the “HTTPS Check” I recommend our article on How to Enable HTTPS (SSL) in WordPress. You can also use a plugin such as Really Simple SSL.
Keep in mind that most web hosting options from InMotion, such as our WordPress Hosting plans, include a Free AutoSSL.
- If you fail the “Cache-Control Check”, you may have to modify your server’s cache settings or reach out to your web host for assistance.
- Now click the Settings tab so we can complete the setup process.
- We will now go over the available options for setting up the Flying Pages plugin.
Option Description Delay to start preloading Set how many seconds you want to wait before fetching the link. Default recommended setting is “0 seconds”. Max requests per second Set a limit for how many server requests can be sent per second. Default is “3 requests”. Preload only on mouse hover If this option is selected, links will only be preloaded once your mouse rolls over it. Mouse hover delay Set how many milliseconds (ms) you want to wait after you roll over a link, before it starts fetching the content. Default is “50 ms”. Ignore keywords Here you can see the list of keywords for content that is not preloaded. Click in the box to enter more keywords on a new line. Disable for logged in admins Check this box if you do not want to preload pages when you are logged in as an Administrator. - Click the Save Changes button once you have chosen your settings. You are finished when you see a message stating “Settings have been saved! Please clear cache if you’re using a cache plugin.”
Now you know how to speed up your WordPress site with the Flying Pages plugin. Check out our WordPress Education Channel for many more guides on how to make your website successful.
Looking for more guides? We have over 400 WordPress How To Articles to help you!