Since my last twitter post on Netapp Ontap 9.3, a few people have asked me how I’m running the latest version on the simulator without the Ontap 9.3 simulator being out. It’s actually quite simple and I’ll walk you through the steps below.
NetApp Ontap 9.3 Simulator
First download the Ontap 9.2 Simulator from the Netapp Support site
Download HTTP File Server Tool
I have installed my Ontap 9.2 Simulator within VMware.
Once the Simulator has been deployed, disks initialized and you have run through the cluster wizard, we can start with the upgrade.
Upgrading NetApp Ontap 9.2 to Ontap 9.3
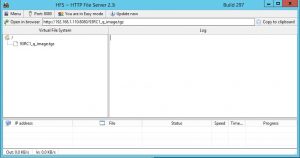
Launch the HTTP File Server Tool and drag the 93RC1_q_image.tgz into the HTTP File Server Tool. HTTP File Server Tool should be reachable or on the same network subnet as your Ontap 9.2 management IP’s. Your HTTP File Server Tool should look like this:

Now that we have the URL for our Ontap 9.3 image we can login into our Ontap 9.2 Simulator with either SSH or console and begin the upgrade process.
::> cluster image package get -url http://192.168.1.110:8080/93RC1_q_image.tgz
::> cluster image package show-repository

::> cluster image validate -version 9.3RC1
::> cluster image update -version 9.3RC1 (Select yes to proceed when asked. The upgrade will be disruptive due to the fact that I only have 1 node within the cluster)
::> cluster image show-update-progress (Displays update progress)
::> cluster image show-update-history (Displays status of the upgrade as successful or failed, previous version and updated version)
Once the node has been updated, you will be able to login to the new looking Ontap 9.3 System Manager.

As you can see in the screenshot below, the navigation bar has been moved from the top to the left side.

The post Netapp Ontap 9.3 Simulator appeared first on SYSADMINTUTORIALS IT TECHNOLOGY BLOG.