I am a new Linux system admin user. How do I use ip command line utility to display or configure networking, routing, and tunnels on Linux operating systems? How do I configures or displays network interface parameters for a network using TCP/IP on Linux operating systems?
The ip command is used to assign an address to a network interface and/or configure network interface parameters on Linux operating systems. This command replaces old good and now deprecated ifconfig command on modern Linux distributions.
It is used for the following purposes:
1. Find out which interfaces are configured on the system.
2. Query the status of a IP interface.
3. Configure the local loop-back, Ethernet and other IP interfaces.
4. Mark the interface as up or down.
5. Configure and modify default and static routing.
6. Set up tunnel over IP.
7. Show ARP or NDISC cache entry.
8. Assign, delete, set up IP address, routes, subnet and other IP information to IP interfaces.
9. List IP Addresses and property information.
10. Manage and display the state of all network.
11. Gather multicast IP addresses info.
12. Show neighbour objects i.e. ARP cache, invalidate ARP cache, add an entry to ARP cache and more.
13. Set or delete routing entry.
14. Find the route an address (say 8.8.8.8 or 192.168.2.24) will take.
15. Modify the status of interface.
Purpose
Use this command to display and configure the network parameters for host interfaces.
Syntax
ip OBJECT COMMAND
ip [options] OBJECT COMMAND
ip OBJECT help
Understanding ip command OBJECTS syntax
OBJECTS can be any one of the following and may be written in full or abbreviated form:
| Object | Abbreviated form | Purpose |
| link | l | Network device. |
| address | a addr | Protocol (IP or IPv6) address on a device. |
| addrlabel | addrl | Label configuration for protocol address selection. |
| neighbour | n neigh | ARP or NDISC cache entry. |
| route | r | Routing table entry. |
| rule | ru | Rule in routing policy database. |
| maddress | m maddr | Multicast address. |
| mroute | mr | Multicast routing cache entry. |
| tunnel | t | Tunnel over IP. |
| xfrm | x | Framework for IPsec protocol. |
To get information about each object use help command as follows:
ip OBJECT help
ip OBJECT h
ip a help
ip r help
Warning: The commands described below must be executed with care. If you make a mistake, you will loos connectivity to the server. You must take special care while working over the ssh based remote session.
ip command examples
Don’t be intimidated by ip command syntax. Let us get started quickly with examples.
Displays info about all network interfaces
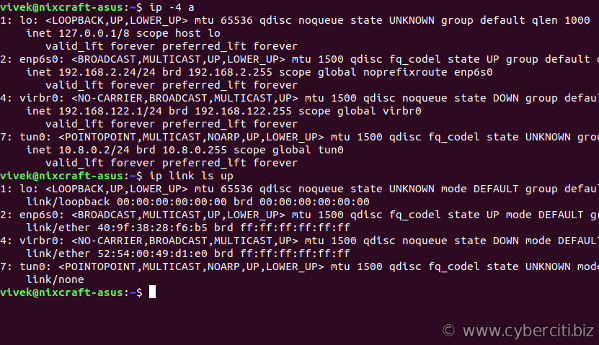
Type the following command to list and show all ip address associated on on all network interfaces:ip a
ORip addr
Sample outputs:

You can select between IPv4 and IPv6 using the following syntax:
### Only show TCP/IP IPv4 ## ip -4 a ### Only show TCP/IP IPv6 ### ip -6 a |
It is also possible to specify and list particular interface TCP/IP details:
### Only show eth0 interface ### ip a show eth0 ip a list eth0 ip a show dev eth0 ### Only show running interfaces ### ip link ls up |
Assigns the IP address to the interface
The syntax is as follows to add an IPv4/IPv6 address:ip a add {ip_addr/mask} dev {interface}
To assign 192.168.1.200/255.255.255.0 to eth0, enter:ip a add 192.168.1.200/255.255.255.0 dev eth0
ORip a add 192.168.1.200/24 dev eth0
Adding the broadcast address on the interface
By default, the ip command does not set any broadcast address unless explicitly requested. So syntax is as follows to set broadcast ADDRESS:ip addr add brd {ADDDRESS-HERE} dev {interface}
ip addr add broadcast {ADDDRESS-HERE} dev {interface}
ip addr add broadcast 172.20.10.255 dev dummy0
It is possible to use the special symbols such as + and - instead of the broadcast address by setting/resetting the host bits of the interface prex. In this example, add the address 192.168.1.50 with netmask 255.255.255.0 (/24) with standard broadcast and label “eth0Home” to the interface eth0:ip addr add 192.168.1.50/24 brd + dev eth0 label eth0Home
You can set loopback address to the loopback device lo as follows:ip addr add 127.0.0.1/8 dev lo brd + scope host
Remove / Delete the IP address from the interface
The syntax is as follows to remove an IPv4/IPv6 address:ip a del {ipv6_addr_OR_ipv4_addr} dev {interface}
To delete 192.168.1.200/24 from eth0, enter:ip a del 192.168.1.200/24 dev eth0
Flush the IP address from the interface
You can delete or remote an IPv4/IPv6 address one-by-one as described above. However, the flush command can remove as flush the IP address as per given condition. For example, you can delete all the IP addresses from the private network 192.168.2.0/24 using the following command:ip -s -s a f to 192.168.2.0/24
Sample outputs:
2: eth0 inet 192.168.2.201/24 scope global secondary eth0
2: eth0 inet 192.168.2.200/24 scope global eth0 *** Round 1, deleting 2 addresses ***
*** Flush is complete after 1 round ***
You can disable IP address on all the ppp (Point-to-Point) interfaces:ip -4 addr flush label "ppp*"
Here is another example for all the Ethernet interfaces:ip -4 addr flush label "eth*"
How do I change the state of the device to UP or DOWN?
The syntax is as follows:ip link set dev {DEVICE} {up|down}
To make the state of the device eth1 down, enter:ip link set dev eth1 down
To make the state of the device eth1 up, enter:ip link set dev eth1 up
How do I change the txqueuelen of the device?
You can set the length of the transmit queue of the device using ifconfig command or ip command as follows:ip link set txqueuelen {NUMBER} dev {DEVICE}
In this example, change the default txqueuelen from 1000 to 10000 for the eth0:ip link set txqueuelen 10000 dev eth0
ip a list eth0
How do I change the MTU of the device?
For gigabit networks you can set maximum transmission units (MTU) sizes (JumboFrames) for better network performance. The syntax is:ip link set mtu {NUMBER} dev {DEVICE}
To change the MTU of the device eth0 to 9000, enter:ip link set mtu 9000 dev eth0
ip a list eth0
Sample outputs:
2: eth0: mtu 9000 qdisc pfifo_fast state UP qlen 1000 link/ether 00:08:9b:c4:30:30 brd ff:ff:ff:ff:ff:ff inet 192.168.1.10/24 brd 192.168.1.255 scope global eth1 inet6 fe80::208:9bff:fec4:3030/64 scope link valid_lft forever preferred_lft forever
Display neighbour/arp cache
The syntax is:ip n show
ip neigh show
Sample outputs (note: I masked out some data with alphabets):
74.xx.yy.zz dev eth1 lladdr 00:30:48:yy:zz:ww REACHABLE
10.10.29.66 dev eth0 lladdr 00:30:48:c6:0a:d8 REACHABLE
74.ww.yyy.xxx dev eth1 lladdr 00:1a:30:yy:zz:ww REACHABLE
10.10.29.68 dev eth0 lladdr 00:30:48:33:bc:32 REACHABLE
74.fff.uu.cc dev eth1 lladdr 00:30:48:yy:zz:ww STALE
74.rr.ww.fff dev eth1 lladdr 00:30:48:yy:zz:ww DELAY
10.10.29.65 dev eth0 lladdr 00:1a:30:38:a8:00 REACHABLE
10.10.29.74 dev eth0 lladdr 00:30:48:8e:31:ac REACHABLE
The last field show the the state of the “neighbour unreachability detection” machine for this entry:
- STALE – The neighbour is valid, but is probably already unreachable, so the kernel will try to check it at the first transmission.
- DELAY – A packet has been sent to the stale neighbour and the kernel is waiting for confirmation.
- REACHABLE – The neighbour is valid and apparently reachable.
Add a new ARP entry
The syntax is:ip neigh add {IP-HERE} lladdr {MAC/LLADDRESS} dev {DEVICE} nud {STATE}
In this example, add a permanent ARP entry for the neighbour 192.168.1.5 on the device eth0:ip neigh add 192.168.1.5 lladdr 00:1a:30:38:a8:00 dev eth0 nud perm
Where,
| neighbour state (nud) | meaning |
| permanent | The neighbour entry is valid forever and can be only be removed administratively |
| noarp | The neighbour entry is valid. No attempts to validate this entry will be made but it can be removed when its lifetime expires. |
| stale | The neighbour entry is valid but suspicious. This option to ip neigh does not change the neighbour state if it was valid and the address is not changed by this command. |
| reachable | The neighbour entry is valid until the reachability timeout expires. |
Delete a ARP entry
The syntax to invalidate or delete an ARP entry for the neighbour 192.168.1.5 on the device eth1 is as follows.ip neigh del {IPAddress} dev {DEVICE}
ip neigh del 192.168.1.5 dev eth1
Change are state to reachable for the neighbour 192.168.1.100 on the device eth1
ip neigh chg 192.168.1.100 dev eth1 nud reachable
Flush ARP entry
This flush or f command flushes neighbour/arp tables, by specifying some condition. The syntax is:ip -s -s n f {IPAddress}
In this example, flush neighbour/arp tableip -s -s n f 192.168.1.5
ORip -s -s n flush 192.168.1.5
ip route: Routing table management commands
Use the following command to manage or manipulate the kernel routing table.
Show routing table
To display the contents of the routing tables:ip r
ip r list
ip route list
ip r list [options]
ip route
Sample outputs:
default via 192.168.1.254 dev eth1 192.168.1.0/24 dev eth1 proto kernel scope link src 192.168.1.10 |
Display routing for 192.168.1.0/24:ip r list 192.168.1.0/24
Sample outputs:
192.168.1.0/24 dev eth1 proto kernel scope link src 192.168.1.10
Add a new route
The syntax is:ip route add {NETWORK/MASK} via {GATEWAYIP}
ip route add {NETWORK/MASK} dev {DEVICE}
ip route add default {NETWORK/MASK} dev {DEVICE}
ip route add default {NETWORK/MASK} via {GATEWAYIP}
Add a plain route to network 192.168.1.0/24 via gateway 192.168.1.254:ip route add 192.168.1.0/24 via 192.168.1.254
To route all traffic via 192.168.1.254 gateway connected via eth0 network interface:ip route add 192.168.1.0/24 dev eth0
Delete a route
The syntax is as follows to delete default gateway:ip route del default
In this example, delete the route created in previous subsection:ip route del 192.168.1.0/24 dev eth0
Old vs. new tool
Deprecated Linux command and their replacement cheat sheet:
| Old command (Deprecated) | New command |
|---|---|
| ifconfig -a | ip a |
| ifconfig enp6s0 down | ip link set enp6s0 down |
| ifconfig enp6s0 up | ip link set enp6s0 up |
| ifconfig enp6s0 192.168.2.24 | ip addr add 192.168.2.24/24 dev enp6s0 |
| ifconfig enp6s0 netmask 255.255.255.0 | ip addr add 192.168.1.1/24 dev enp6s0 |
| ifconfig enp6s0 mtu 9000 | ip link set enp6s0 mtu 9000 |
| ifconfig enp6s0:0 192.168.2.25 | ip addr add 192.168.2.25/24 dev enp6s0 |
| netstat | ss |
| netstat -tulpn | ss -tulpn |
| netstat -neopa | ss -neopa |
| netstat -g | ip maddr |
| route | ip r |
| route add -net 192.168.2.0 netmask 255.255.255.0 dev enp6s0 | ip route add 192.168.2.0/24 dev enp6s0 |
| route add default gw 192.168.2.254 | ip route add default via 192.168.2.254 |
| arp -a | ip neigh |
| arp -v | ip -s neigh |
| arp -s 192.168.2.33 1:2:3:4:5:6 | ip neigh add 192.168.3.33 lladdr 1:2:3:4:5:6 dev enp6s0 |
| arp -i enp6s0 -d 192.168.2.254 | ip neigh del 192.168.2.254 dev wlp7s0 |