Email authentication makes it more difficult for spammers to “spoof” (make an email appear that it came from your domain) email addresses on your domain. It can also validate email sent from your domain, greatly reducing deliverability issues.
In this tutorial, we’ll show you how to enable email authentication In cPanel, both through email settings (DKIM and SPF) and through DNS settings (DMARC).
Enabling DKIM and SPF Email Authentication
The two most-used tools for email authentication are SPF (Sender Policy Framework) and DKIM (DomainKeys Identified Mail) records.
- An SPF record contains information about which IP addresses are authorized to send mail from your domain. So when you send a message, the receiving server compares the IP address information in the message with the IP address information in your publicly available SPF record. If they are a match, the email is delivered.
- When a DKIM record is added to the DNS zone for a domain, a code is added to the DNS zone and the headers of outgoing messages. The receiving servers compare the code in the headers with the information in DNS zone. If they are a match, the email is delivered.
The methods are similar, with the receiving server checking DNS records to authenticate messages, but SPF uses path-based authentication (your server’s IP address) while DKIM uses identity-based authentication (the unique code in your message headers).
If it sounds complicated, the good news is the records can be created and published automatically for your cPanel-managed email accounts. The cPanel “Email Deliverability” section is where DKIM and SPF records are created or managed, and where the status of PTR (Reverse DNS) records is displayed.
How to Authenticate All of Your Email in a Few Easy Steps
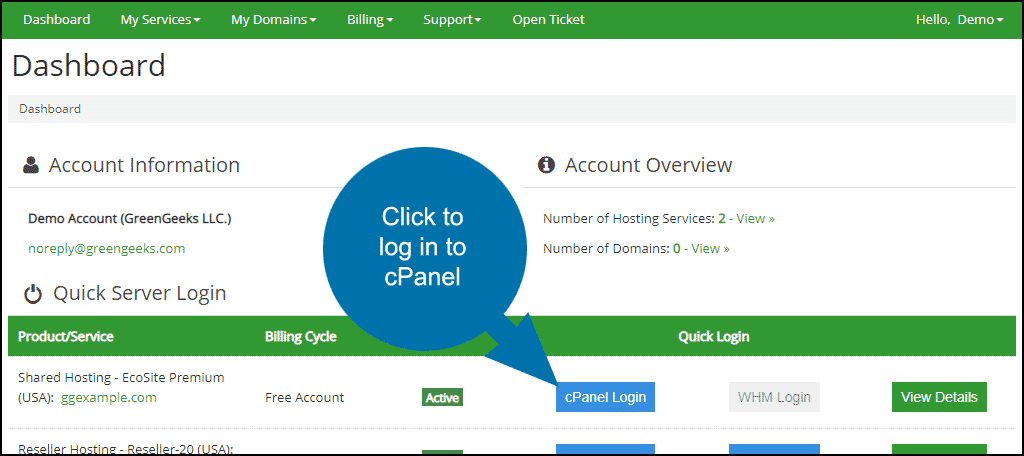
To access the email deliverability tools, log into GreenGeeks and go to cPanel by clicking the “cPanel Login” button in the “Quick Server Login” section.
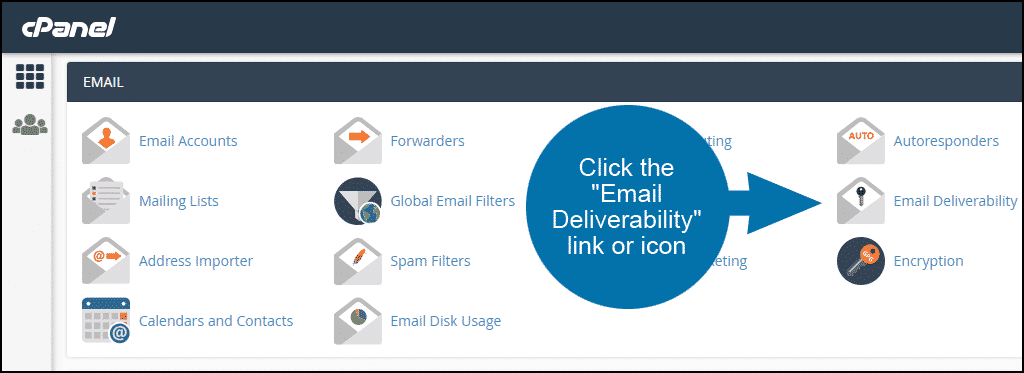
In the “EMAIL” section, click the “Email Deliverability” link or icon.
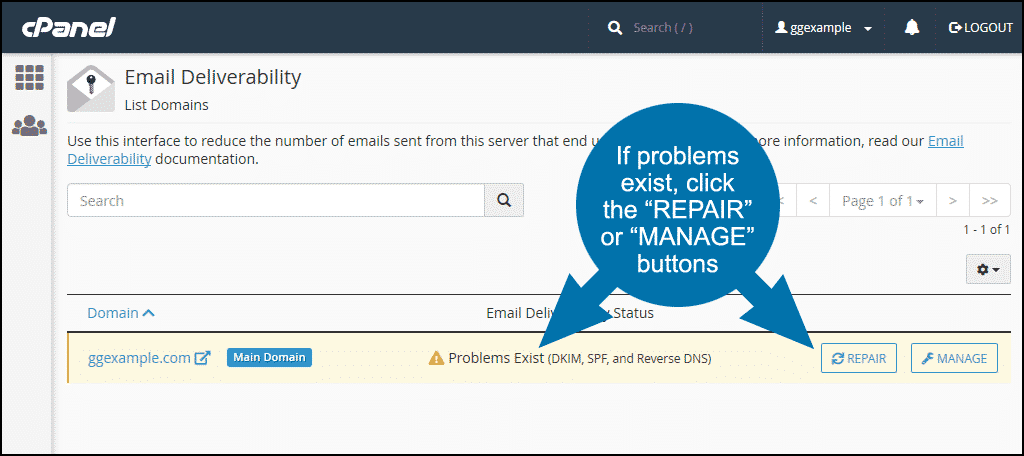
If the “Problems Exist” warning is shown, click the “REPAIR” or “MANAGE” buttons. “REPAIR” takes you through the settings step by step, “MANAGE” is all of the controls on one page, used for manual configuration or copying values to your DNZ zone file.
For the purposes of this tutorial, we will use the “REPAIR” button.
Note that the “REPAIR” button may not be available if your DNS does not point to the cPanel server.
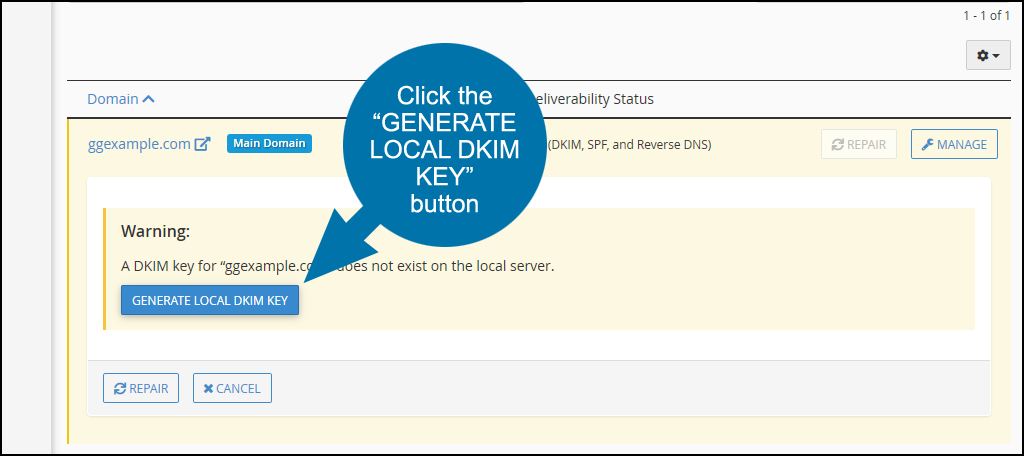
If you’ve never set up any email authentication, the first thing you will see after clicking the “REPAIR” button is “A DKIM key for ‘ggexample.com’ does not exist on the local server.”
Click the “GENERATE LOCAL DKIM KEY” button.
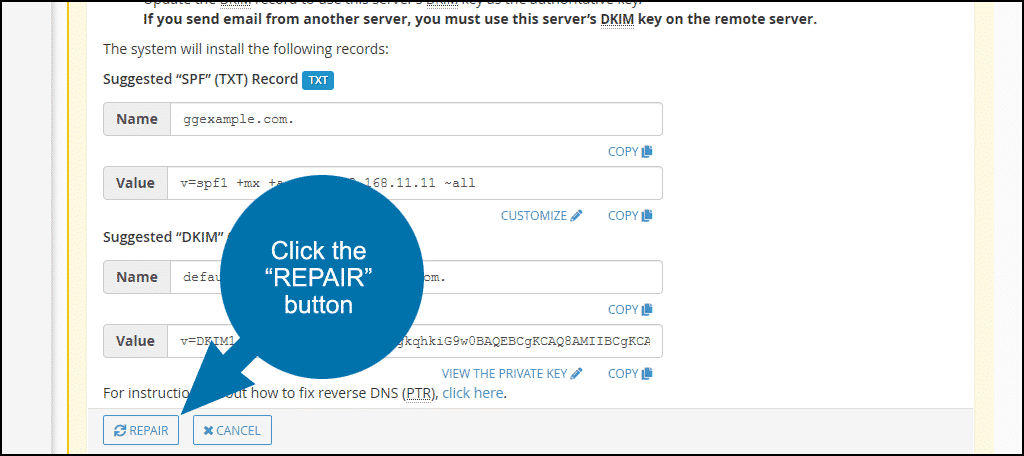
The “Suggested ‘SPF’ (TXT) Record” and “Suggested ‘DKIM’ (TXT) Record” fields will be pre-populated with the system’s recommendations (if there are no existing records, the recommendations can’t be edited, they can only be accepted).
Click the “REPAIR” button to add the records to the DNS zone of the domain.
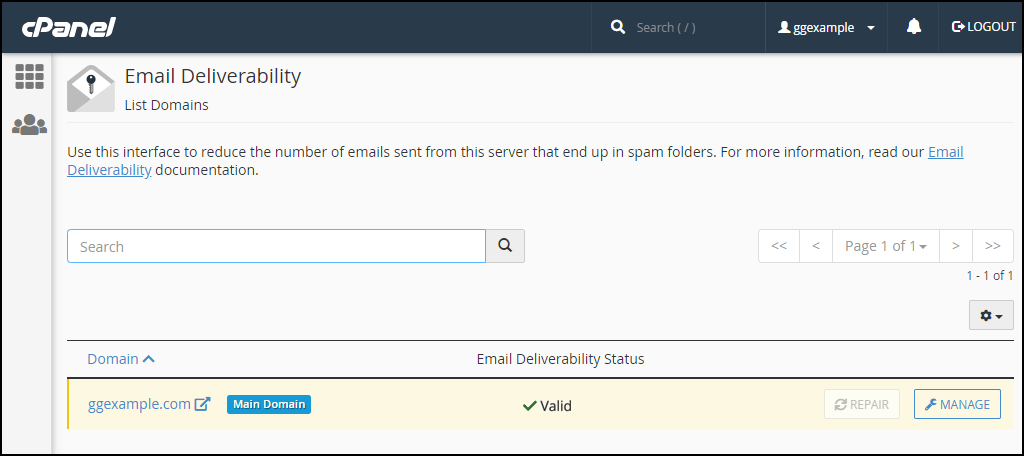
When you go back to the main Email Deliverability page, you should see a “Valid” status (it may take a minute or two for the records to be checked).
Configuring DMARC Authentication
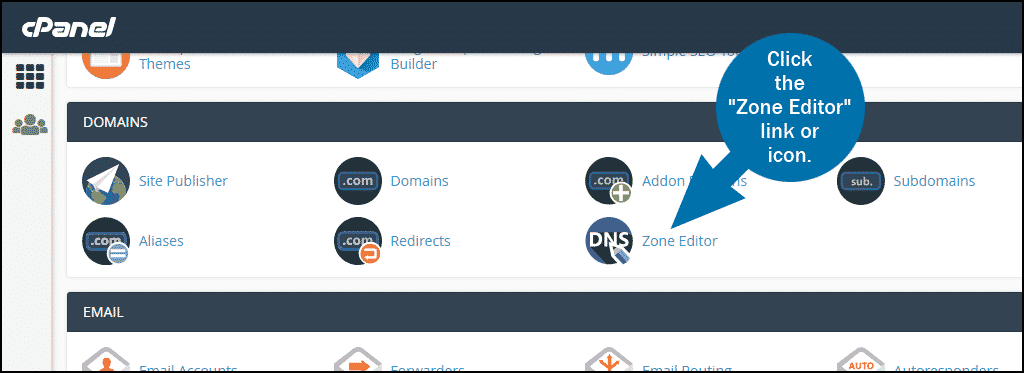
If you want to take your email authentication even further than DKIM and SPF, you can use cPanel to set up DMARC authentication. Unlike DKIM and SPF, DMARC is not configured in the Email Authentication section. It is set up in the DNS section, using a TXT entry.
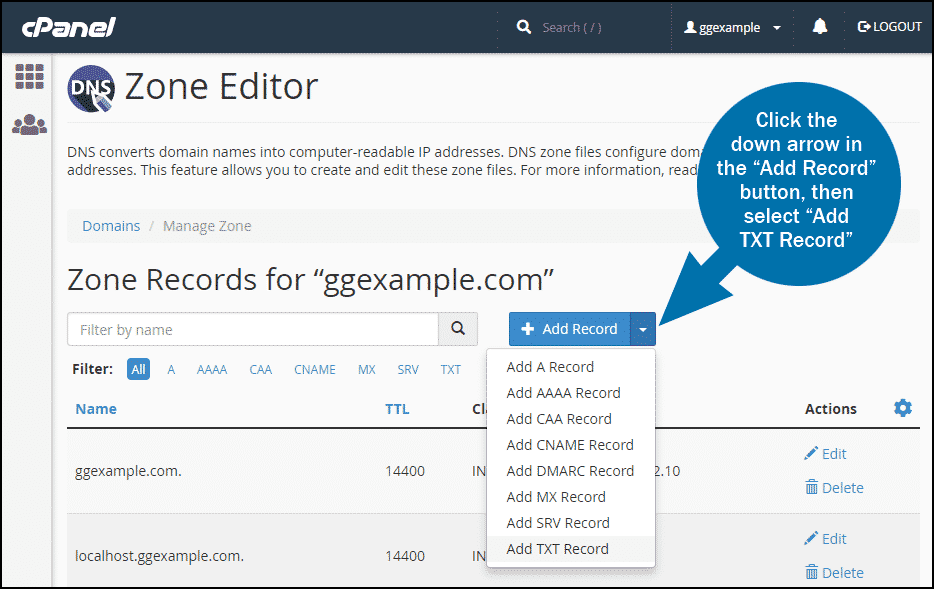
In the “DOMAINS” section of cPanel, click the “Zone Editor” link or icon.
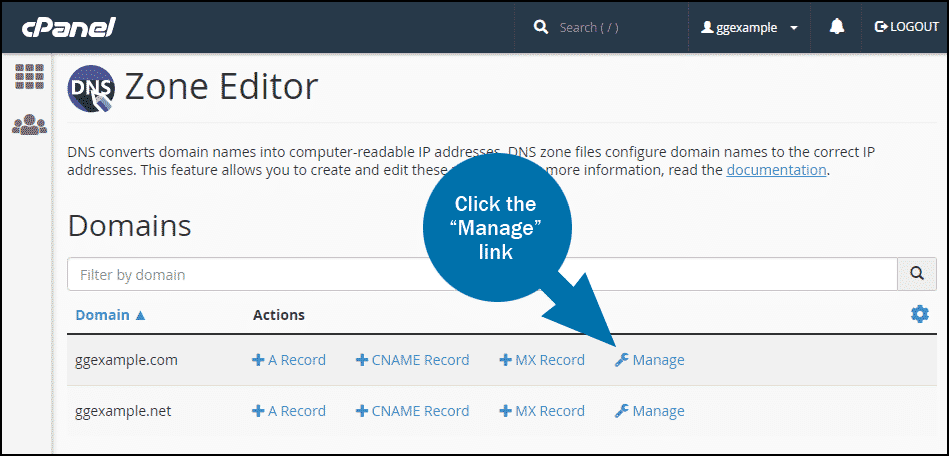
Click the “Manage” link for the domain that you want to configure DMARC authentication for.
Click the little down arrow on the right side of the “Add Record” button and select “Add TXT Record.”
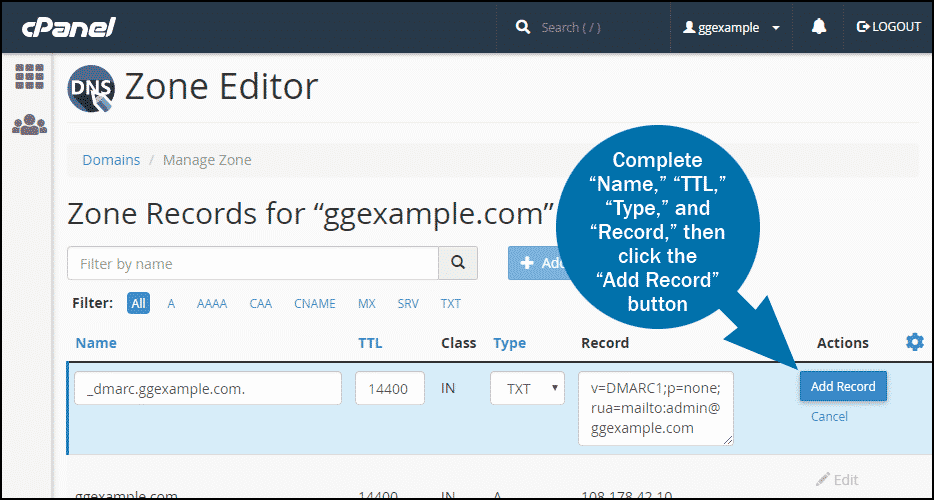
- In the “Name” field, enter _dmarc (when your cursor leaves the text box cPanel will automatically add the domain name).
- TTL should be set to 14400 (it will likely default to that value).
- Type should be TXT (it should default to that value since that’s what we selected from the dropdown).
- In the “Record” field, enter the DMARC configuration line (see below).
- Click the “Add Record” button.
DMARC settings can be complicated. It is not really a one-size-fits-all kind of configuration, so we can’t tell you exactly what to use in the “Record” section of the TXT entry as a DMARC configuration line.
You can go to the overview page at dmarc.org and scroll down to the “Anatomy of a DMARC resource record in the DNS” section for an example and the breakdown of the record elements. Also, check out their resources section for links to tutorials and validators.
The post How to Enable Email Authentication appeared first on GreenGeeks.