Don’t know how to add social media share buttons to WordPress blog? Don’t worry! This article will help you out.
If you’re a blogger, then it’s essential to connect with your readers/users. And the easiest way out has to be through social media. As of today, they are one of the biggest platforms to connect with others and even promote your work.
A super easy for your readers to share your posts on social media networks is using social media share buttons. Once you add them to your site, visitors can instantly share your content in just a click. Ultimately, this will improve your blog’s traffic and grow conversions.
You might be wonder, how do I add these social media share buttons on my blogs? Don’t worry, we’ve written a complete guide just for you. So keep scrolling.
Why Use Social Share Buttons in WordPress?
There’s no doubt that social media is one of the biggest platforms to share your work. According to Statista, over 3.6 billion people were using social media worldwide in 2020? And, it’s estimated to increase up to almost 4.41 billion in 2025.

You can imagine the power of social media by these numbers. If that doesn’t convince you, we’re discussed some benefits of adding a social share button to your WordPress blog below.
1. More traffic to your website:
Social Share buttons allow all the readers/customers to share your post on their social media so their followers and friends will come across your post. If they like it then they’ll also read your works and share them, creating a chain. Hence, increased traffic to your website.
2. Generate more leads and sales:
Lead generation is a process where you can turn your potential users into actual buying customers. In simple words, you lead your users to purchase your products. Once you have genuine and loyal customers, they can increase your sales.
Your loyal customers can share your posts/pages with the help of social share buttons. This will attract more users and they can eventually turn into your buying customers. And, in this way you can generate more leads and sales.
3. Grow brand reputation:
Using the social share buttons, your customers/readers easily share a positive opinion of your products or post on their timeline. As more and more people begin to do that, your brand’s reputation is going to improve so you stand out from the competition.
How to Add Social Share Button in WordPress?
And now here are the steps on how to add social media share buttons to WordPress blog.
Step 1: Choosing the Best Social Media Sharing Plugin
If you’re a WordPress enthusiast you must know there are plugins for almost everything. That means there’s also a plugin to add social share buttons in your WordPress blog.
Since there are so many social media share button plugins on the internet, that you might get confused. Choosing the right plugin is a crucial part of this process. Here are a few things to consider.
- Updates: An outdated plugin can actually be a security risk for your site, so make sure that its been updated recently.
- User Reviews: A plugin with good reviews and ratings means that a lot of people can vouch for its usefulness.
- Support: Should any problems arise, the developers should be able to help you handle them.
- Design: The plugin should allow you to design your buttons easily with lots of design options.
With all that in mind, we have a plugin that fulfills these criteria, and it’s our very own Easy Social Sharing.
As you can see for yourself, the plugin has 5 Star user reviews as well as frequent updates. Above all, Easy Social Sharing allows you to add all the major social networks, from Facebook to Pinterest, to your blog. Additionally, it provides you plenty of styling and layout options.
In conclusion, the plugin checks all the boxes of what a great plugin should have. And, we provide amazing support.
Step 2: Installing the Easy Social Sharing Plugin
The second step is to install the Easy Social Sharing plugin. And for that, here’s a brief explanation of how you can install plugins.
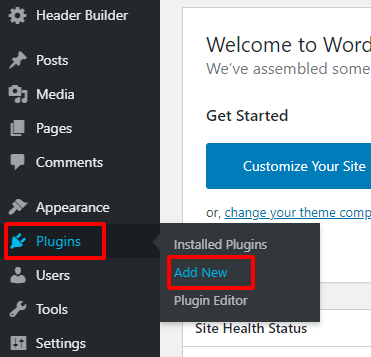
First thing first, you need to login to your WordPress dashboard and navigate to Plugins >> Add New.
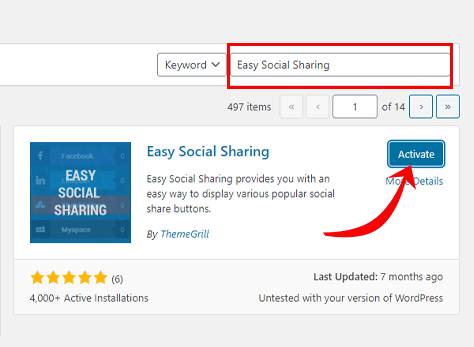
Now, just write ‘Easy Social Sharing’ on the ‘ Search Plugins’ field. Once the plugin appears, click on the ‘Install Now’ button. Finally, don’t forget to activate the plugin by clicking the ‘Activate’ button.
And just like that, you can install the Easy Social Sharing plugin in your WordPress dashboard. Now the plugin is ready to be used.
Step 3: Configure Social Sharing Options and Add to Your Site
Now you can go ahead and configure social sharing options and adding social share buttons to your site.
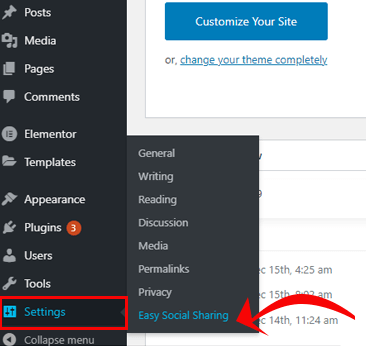
From the control menu, navigate to ‘Settings’ options and click on ‘Easy Social Sharing’.
After that, you’ll be taken to the next page where you can customize your social share buttons. On the top, you can see there are three options – General, Network, and Layouts. The three options are discussed below.
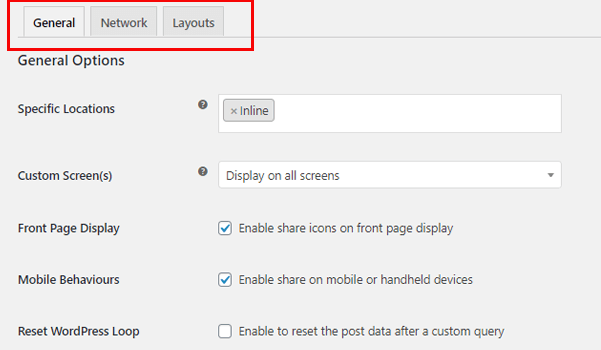
I. General Options
In this section you can decide the location of your buttons, custom screens, mobile behaviors, front page display. Here’s how you can set these options.
a) Specific locations:
This option is to decide where you can add your social share button. There are two options for you – Inline and Sidebar.
If you choose inline, your share buttons will appear above or below the content. As you see our social share buttons are above as well as below the content. That’s because we’ve enabled the inline option.

Similarly, if you choose the sidebar option, your share buttons will appear on the left or right side of the screen.

b) Custom Screen(s):
This option allows you to choose whether you want to display the social share button on all your posts, pages, or not. You can display the buttons on all your posts and pages. Or choose to display buttons on specific posts and pages only.
Here are the options you can enable and disable according to your preference. You ca get this option by clicking on the dropdown menu.
- Display on all screens: Enables you to display social share buttons on all of your posts, pages, as well as templates.
- Display on all screens, except for…: Enables you to display the social share buttons on the specific posts or pages except the chosen one.
- Display on specific screens: Enables you to display the buttons on specific posts or pages from the Allow Specific Screens Textbox.
c) Front Page Display:
This option allows you to display the social share buttons on the front page i:e Home.
d) Mobile Behaviors:
You can disable the display of the social share buttons while your users are browsing through mobile devices.
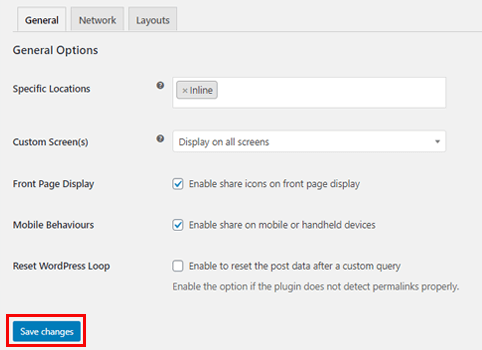
Once you’re satisfied with the changes, don’t forget to click on the ‘Save Changes’ button at the bottom.
II. Network Options
Network options have further two options – Social Networks, Social Options.
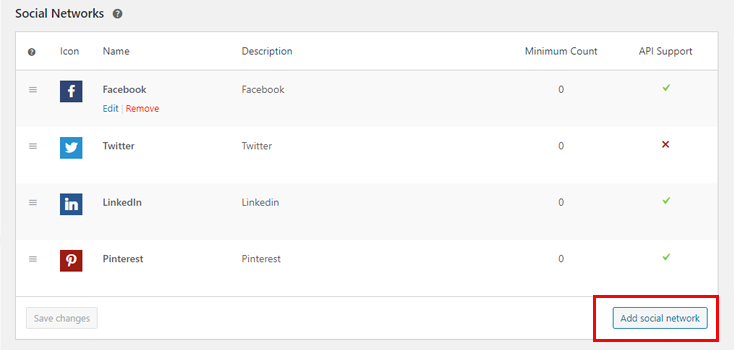
a) Social Networks
Under the Social Networks option, you can add or remove social networks.
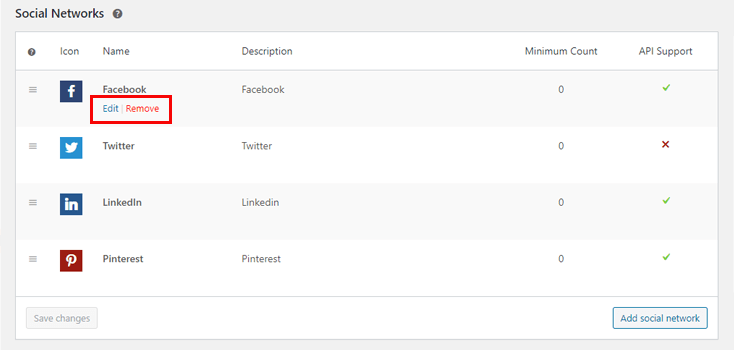
On the network page list, you can see 4 networks are already there by default – Facebook, Twitter, LinkedIn, and Pinterest. To add a new network just click on the ‘Add Social Network’ at the bottom right.
Simply click on the dropdown menu and you can see lots of options you can choose from. Choose the network you want, add the description, and also the minimum count.
The minimum count is to display the number of shares done by your readers. Suppose you choose the minimum count as 5 then, the shared count will not be there unless the total count reaches 5 for the particular network.
You can also replace the existing networks and add a new one. To do that, click on the ‘Edit’ button written below the network’s name. Then, simply follow the above steps – choose the network of your desire, add a description, and minimum count.
You can also remove the network by clicking on the ‘Remove’ button.
b) Social Options
In this section, you need to set credentials to access social network-related functionality.
- Twitter Username: If you add the username, whenever someone shares your posts/pages, you’ll be provided the credit on a tweet.
- Facebook App ID: To get the Facebook app id you need to convert your Facebook account to a developer’s account. First, you need to register your app using the App dashboard.
- Facebook App Secret: Get the Facebook secrets and app id via this link
- API Supported Networks: Enable this option to provide support for API-supported networks.
Once you’ve added the networks of your choice, and enabled the social options you’ve to click the ‘Save Changes’ button at the bottom.
III. Layouts Options
You can see the option ‘ Layouts’ at the top along with ‘General’ and ‘Networks’ options. When you click on the option you’ll be taken to the layout setting page.
The layout options have further 3 options – Layout options, Inline layout, and Sidebar layout.
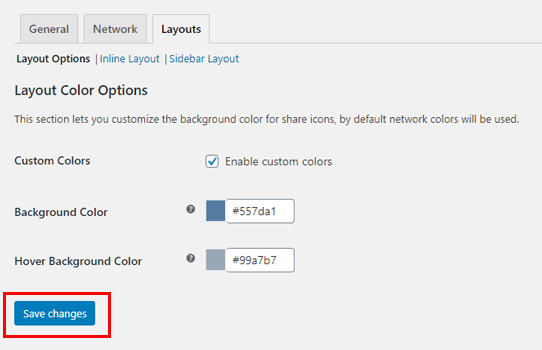
a) Layout options
You can set the color of your choice on this page.
- Custom color: Enable this option to set the custom color. Once you enable this option the default background and hover background color can be overwritten.
- Background color: Choose the color of your choice for the background for the social share icons.
- Hover Background color: Choose the hover background color for the social share icons.
b) Inline Layout
- Enable networks label: Enabling this option allows you to display the social media site’s name along with the icons in the sharing buttons.
- Enable social share counts: By enabling this option, you can display the share counts of a particular post or page.
- Display total shares counter: This option allows your users to view the entire share count of all your posts and pages in all social networks.
- Show all networks: Enabling this option helps you to add all of the social sites to be available or not for sharing.
c) Sidebar Layout
Similarly, here’s the option you get when you click on the ‘Sidebar layout’ option next to the ‘Inline layout’.
- Icon shape: Choose the shape of an icon. You can choose between square, rounded, and curved edges.
- Layout orientation: Select between the left and right middle sections of the browser.
- Enable social share counts: Enables you to display the total number of sharing counts of the particular posts or pages.
- Display total shares counter: Allows your users to view the total shares performed in all social networks.
- Show all networks: Enabling this option helps you to add all of the social sites to be available or not for sharing.
We’ve mentioned many times, but here’s a reminder again. Don’t forget to click the ‘Save Changes’ button.
Conclusion
Social media plugins can turn out to be your truest friend when used rightly. Hence, you’ve to choose the right plugin. And, Easy Social Sharing is the best plugin out there.
Easy Social Sharing not only allows your users to share your posts/pages to their timeline but also you can enable the share count button. Enabling this will make visible the total number of shares your posts/pages get.
And that’s all we’ve to say about how to add social media share buttons to the WordPress blog. Hope this article was helpful and you were able to add social share buttons to your posts/pages. And if you did, don’t forget to let us know by commenting down below.
Liked this article so much that you want to continue reading? Here’s an article on how to add a contact form in WordPress. Also, follow us on Twitter and Facebook for future updates.
Lastly, don’t forget to share this article with your friends and family.
The post How to Add Social Media Share Buttons to Your WordPress Blog? appeared first on ThemeGrill Blog.