I saved a tweet a while back from William Lam about the ability to send keystrokes to a VM via PowerCLI. The first thing that popped into mind is “Automating a nested ESXi installation”. As you could imagine this would be extremely convenient in spinning up a new VMware Lab.
Last weekend was the day for testing this out!
The script works by a function that allows you to specify which keystrokes to send via vCenter Server, directly to the VM. For example, as you type a word, IP address, etc, the script will loop through each character and send them 1-by-1 to the VM. Let’s say you want to set the IP address for your ESXi host, you can simply send 192.168.1.10 and voila, it will appear on the host.
Set-VMKeystrokes -VMName MYESXIHOST -StringInput "192.168.1.10"
The script function that William Lam provides is more than awesome in itself, however, I made a few tweaks to add additional functionality. What mods did I make you ask?
The original script is great for single digit characters, however, what if I need to send a function key such as F2 or press the ESC key?
Automating VMware ESXi Installations – Modifications to Original Function
In order to allow for these special keys, I had to change the mandatory -StringInput switch to being optional. I also added another switch called -SpecialKeyInput which includes:
- All functions keys (F1-F12)
- Keyboard TAB, ESC, Backspace, Enter
- Keyboard Up, Down, Left, Right
With the extra modifications being set, it was time to start creating the script line by line. You will find the entire script below. It is important to note that you must do the following before running the script:
- You will need PowerCLI – You can find the install instructions here
- The script requires a minimum of ESXi 6.5
- Set all your variables in the “Set your variables here” section of the script
- There are sleep timers in the script of 5 seconds. I found within my lab some windows took 1-2 seconds to appear after pressing enter
- There are some Pauses in the script which allows you to double check a setting or wait for the install. (Optionally you could remove the PAUSE and set a long Sleep timer such as 5 mins)
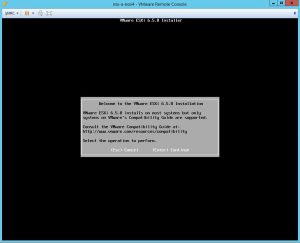
- Boot your ESXi VM to the installation screen (see screenshot below)
Automating VMware ESXi with PowerCLI Demonstration
Automating ESXi Installation PowerCLI Script
Before running the script in your lab, please watch the video above so you can see what the whole process looks like and how the script will behave.
NOTE: The Debug output is turned on for all Set-VMKeyStrokes. You can disable Debug Output by changing the switch from -DebugOn $True to -DebugOn $False
GITHUB: The script is also available on my Github page
<# =========================================================================== Main Script Created by: David Rodriguez Blog: www.sysadmintutorials.com Twitter: @systutorials Set-VMKeystrokes Function Created by: William Lam Organization: VMware Blog: www.virtuallyghetto.com Twitter: @lamw =========================================================================== .DESCRIPTION This Script will Automate your ESXi installation by sending keystrokes directly to the VM. .SETTINGS Scroll down to, "Set your Variables here" .IMPORTANT When all your variables are set, you must boot ESXi so that it's waiting at the installation prompt. Once at the installation prompt, you can proceed to run this script and watch the magic happen #> # Connect to vCenter Server $VcenterServer = "vmvcenter.vmlab.local" #Vcenter Server that contains the nested esxi host - Replace with your vCenter server address Connect-VIServer $VcenterServer -ErrorAction Stop #Connect to vCenter Server # Set your Variables here $UseVlan = "No" #Use Yes/No here, if you would like to assign a vlan to your esxi host $VlanID = "" #If using the above option, set VLAN ID here. If not leave blank "" $VirtualMachine = Get-VM nsx-a-esxi4 #Set your nested ESXi VM Name here $Ipv4Address = "192.168.1.89" #Set ESXi Host IP Address $Ipv4Subnet = "255.255.255.0" #Set ESXi Host Subnet Mask $Ipv4Gateway = "192.168.1.1" #Set ESXi Host Default Gateway $PrimaryDNS = "192.168.1.101" #Set ESXi Host Primary DNS $HostName = "nsx-a-esxi4.vmlab.local" #Set ESXi Host Name $DNSSuffix = "vmlab.local" #Set ESXi DNS suffix $RootPw = "vmware123!" #Set ESXi Root Password sleep 5 # Functions Function Set-VMKeystrokes { <# .NOTES =========================================================================== Created by: William Lam Organization: VMware Blog: www.virtuallyghetto.com Twitter: @lamw =========================================================================== .DESCRIPTION This function sends a series of character keystrokse to a particular VM .PARAMETER VMName The name of a VM to send keystrokes to .PARAMETER StringInput The string of characters to send to VM .PARAMETER DebugOn Enable debugging which will output input charcaters and their mappings .EXAMPLE Set-VMKeystrokes -VMName $VM -StringInput "root" .EXAMPLE Set-VMKeystrokes -VMName $VM -StringInput "root" -ReturnCarriage $true .EXAMPLE Set-VMKeystrokes -VMName $VM -StringInput "root" -DebugOn $true =========================================================================== Modified by: David Rodriguez Organization: Sysadmintutorials Blog: www.sysadmintutorials.com Twitter: @systutorials =========================================================================== .MODS Made $StringInput Optional Added a $SpecialKeyInput - See PARAMETER SpecialKeyInput below Added description to write-hosts [SCRIPTINPUT] OR [SPECIALKEYINPUT] .PARAMETER StringInput The string of single characters to send to the VM .PARAMETER SpecialKeyInput All Function Keys i.e. F1 - F12 Keyboard TAB, ESC, BACKSPACE, ENTER Keyboard Up, Down, Left Right .EXAMPLE Set-VMKeystrokes -VMName $VM -SpecialKeyInput "F2" #> param( [Parameter(Mandatory=$true)][String]$VMName, [Parameter(Mandatory=$false)][String]$StringInput, [Parameter(Mandatory=$false)][String]$SpecialKeyInput, [Parameter(Mandatory=$false)][Boolean]$ReturnCarriage, [Parameter(Mandatory=$false)][Boolean]$DebugOn ) # Map subset of USB HID keyboard scancodes # https://gist.github.com/MightyPork/6da26e382a7ad91b5496ee55fdc73db2 $hidCharacterMap = @{ "a"="0x04"; "b"="0x05"; "c"="0x06"; "d"="0x07"; "e"="0x08"; "f"="0x09"; "g"="0x0a"; "h"="0x0b"; "i"="0x0c"; "j"="0x0d"; "k"="0x0e"; "l"="0x0f"; "m"="0x10"; "n"="0x11"; "o"="0x12"; "p"="0x13"; "q"="0x14"; "r"="0x15"; "s"="0x16"; "t"="0x17"; "u"="0x18"; "v"="0x19"; "w"="0x1a"; "x"="0x1b"; "y"="0x1c"; "z"="0x1d"; "1"="0x1e"; "2"="0x1f"; "3"="0x20"; "4"="0x21"; "5"="0x22"; "6"="0x23"; "7"="0x24"; "8"="0x25"; "9"="0x26"; "0"="0x27"; "!"="0x1e"; "@"="0x1f"; "#"="0x20"; "$"="0x21"; "%"="0x22"; "^"="0x23"; "&"="0x24"; "*"="0x25"; "("="0x26"; ")"="0x27"; "_"="0x2d"; "+"="0x2e"; "{"="0x2f"; "}"="0x30"; "|"="0x31"; ":"="0x33"; "`""="0x34"; "~"="0x35"; "<"="0x36"; ">"="0x37"; "?"="0x38"; "-"="0x2d"; "="="0x2e"; "["="0x2f"; "]"="0x30"; ""="0x31"; "`;"="0x33"; "`'"="0x34"; ","="0x36"; "."="0x37"; "/"="0x38"; " "="0x2c"; "F1"="0x3a"; "F2"="0x3b"; "F3"="0x3c"; "F4"="0x3d"; "F5"="0x3e"; "F6"="0x3f"; "F7"="0x40"; "F8"="0x41"; "F9"="0x42"; "F10"="0x43"; "F11"="0x44"; "F12"="0x45"; "TAB"="0x2b"; "KeyUp"="0x52"; "KeyDown"="0x51"; "KeyLeft"="0x50"; "KeyRight"="0x4f"; "KeyESC"="0x29"; "KeyBackSpace"="0x2a"; "KeyEnter"="0x28"; } $vm = Get-View -ViewType VirtualMachine -Filter @{"Name"="^$($VMName)$"} # Verify we have a VM or fail if(!$vm) { Write-host "Unable to find VM $VMName" return } #Code for -StringInput if($StringInput) { $hidCodesEvents = @() foreach($character in $StringInput.ToCharArray()) { # Check to see if we've mapped the character to HID code if($hidCharacterMap.ContainsKey([string]$character)) { $hidCode = $hidCharacterMap[[string]$character] $tmp = New-Object VMware.Vim.UsbScanCodeSpecKeyEvent # Add leftShift modifer for capital letters and/or special characters if( ($character -cmatch "[A-Z]") -or ($character -match "[!|@|#|$|%|^|&|(|)|_|+|{|}|||:|~|<|>|?|*]") ) { $modifer = New-Object Vmware.Vim.UsbScanCodeSpecModifierType $modifer.LeftShift = $true $tmp.Modifiers = $modifer } # Convert to expected HID code format $hidCodeHexToInt = [Convert]::ToInt64($hidCode,"16") $hidCodeValue = ($hidCodeHexToInt -shl 16) -bor 0007 $tmp.UsbHidCode = $hidCodeValue $hidCodesEvents+=$tmp if($DebugOn) { Write-Host "[StringInput] Character: $character -> HIDCode: $hidCode -> HIDCodeValue: $hidCodeValue" } } else { Write-Host "[StringInput] The following character `"$character`" has not been mapped, you will need to manually process this character" break } } } #Code for -SpecialKeyInput if($SpecialKeyInput) { if($hidCharacterMap.ContainsKey([string]$SpecialKeyInput)) { $hidCode = $hidCharacterMap[[string]$SpecialKeyInput] $tmp = New-Object VMware.Vim.UsbScanCodeSpecKeyEvent $hidCodeHexToInt = [Convert]::ToInt64($hidCode,"16") $hidCodeValue = ($hidCodeHexToInt -shl 16) -bor 0007 $tmp.UsbHidCode = $hidCodeValue $hidCodesEvents+=$tmp if($DebugOn) { Write-Host "[SpecialKeyInput] Character: $character -> HIDCode: $hidCode -> HIDCodeValue: $hidCodeValue" } } else { Write-Host "[SpecialKeyInput] The following character `"$character`" has not been mapped, you will need to manually process this character" break } } # Add return carriage to the end of the string input (useful for logins or executing commands) if($ReturnCarriage) { # Convert return carriage to HID code format $hidCodeHexToInt = [Convert]::ToInt64("0x28","16") $hidCodeValue = ($hidCodeHexToInt -shl 16) + 7 $tmp = New-Object VMware.Vim.UsbScanCodeSpecKeyEvent $tmp.UsbHidCode = $hidCodeValue $hidCodesEvents+=$tmp } # Call API to send keystrokes to VM $spec = New-Object Vmware.Vim.UsbScanCodeSpec $spec.KeyEvents = $hidCodesEvents Write-Host "Sending keystrokes to $VMName ...`n" $results = $vm.PutUsbScanCodes($spec) } # From this point forward, the ESXi configuration starts Set-VMKeystrokes -VMName $VirtualMachine -SpecialKeyInput "KeyEnter" -DebugOn $True #ESXi Setup - Key Enter Set-VMKeystrokes -VMName $VirtualMachine -SpecialKeyInput "F11" -DebugOn $True #ESXi Setup - Press F11 to accept EULA Write-Host "Check that you are installing ESXi to local disk, if correct press Enter" -BackgroundColor DarkRed -ForegroundColor White PAUSE Set-VMKeystrokes -VMName $VirtualMachine -SpecialKeyInput "KeyEnter" -DebugOn $True #ESXi Setup - Key Enter Write-Host "Setting US Default for Keyboard Layout" -ForegroundColor Yellow SLEEP 5 Set-VMKeystrokes -VMName $VirtualMachine -SpecialKeyInput "KeyEnter" -DebugOn $True #ESXi Setup - Key Enter Write-Host "Setting Root Password for ESXi" -ForegroundColor Yellow SLEEP 5 Set-VMKeystrokes -VMName $VirtualMachine -StringInput "$RootPw" -ReturnCarriage $True -DebugOn $True #ESXi Setup - Root password Set-VMKeystrokes -VMName $VirtualMachine -SpecialKeyInput "TAB" -DebugOn $True #ESXi Setup - Root password Set-VMKeystrokes -VMName $VirtualMachine -StringInput "$RootPw" -ReturnCarriage $True -DebugOn $True #ESXi Setup - Root password Write-Host "Beginning the Installation" -ForegroundColor Yellow SLEEP 5 Set-VMKeystrokes -VMName $VirtualMachine -SpecialKeyInput "F11" -DebugOn $True #ESXi Setup - Begin Installation Write-Host "Once the install has finished, press Enter to Reboot and Complete Installation" -BackgroundColor DarkGreen -ForegroundColor White PAUSE Set-VMKeystrokes -VMName $VirtualMachine -SpecialKeyInput "KeyEnter" -DebugOn $True #ESXi Setup - Key Enter Write-Host "Once Host has rebooted, Press Enter to Begin ESXi setup" -BackgroundColor DarkRed -ForegroundColor White PAUSE #Start ESXi Configuration Set-VMKeystrokes -VMName $VirtualMachine -SpecialKeyInput "F2" -DebugOn $True #ESXi Setup - F2 to login SLEEP 5 Set-VMKeystrokes -VMName $VirtualMachine -SpecialKeyInput "TAB" -DebugOn $True #ESXi Setup - Tab to Password Set-VMKeystrokes -VMName $VirtualMachine -StringInput "$RootPw" -ReturnCarriage $True -DebugOn $True #ESXi Setup - Root password Set-VMKeystrokes -VMName $VirtualMachine -SpecialKeyInput "KeyEnter" -DebugOn $True #ESXi Setup - Key Enter SLEEP 15 Set-VMKeystrokes -VMName $VirtualMachine -SpecialKeyInput "KeyDown" -DebugOn $True #ESXi Setup - Key Down to Configure Management Network Set-VMKeystrokes -VMName $VirtualMachine -SpecialKeyInput "KeyEnter" -DebugOn $True #ESXi Setup - Key Enter #Use VLAN or Not If ($UseVlan -eq "Yes") { Set-VMKeystrokes -VMName $VirtualMachine -SpecialKeyInput "KeyDown" -DebugOn $True #ESXi Setup - Key Down to VLAN Set-VMKeystrokes -VMName $VirtualMachine -StringInput " " -ReturnCarriage $True -DebugOn $True #ESXi Setup - Enter Set-VMKeystrokes -VMName $VirtualMachine -StringInput "$VlanID" -ReturnCarriage $True -DebugOn $True #ESXi Setup - Enter Set-VMKeystrokes -VMName $VirtualMachine -SpecialKeyInput "KeyESC" -DebugOn $True #ESXi Setup - ESC back Set-VMKeystrokes -VMName $VirtualMachine -SpecialKeyInput "KeyDown" -DebugOn $True #ESXi Setup - Key Down to IPv4 Configuration Set-VMKeystrokes -VMName $VirtualMachine -SpecialKeyInput "KeyEnter" -DebugOn $True #ESXi Setup - Key Enter } ELSE { Set-VMKeystrokes -VMName $VirtualMachine -SpecialKeyInput "KeyDown" -DebugOn $True #ESXi Setup - Key Down Set-VMKeystrokes -VMName $VirtualMachine -SpecialKeyInput "KeyDown" -DebugOn $True #ESXi Setup - Key Down to IPv4 Configuration Set-VMKeystrokes -VMName $VirtualMachine -SpecialKeyInput "KeyEnter" -DebugOn $True #ESXi Setup - Key Enter } #Set IPv4 Configuration Set-VMKeystrokes -VMName $VirtualMachine -SpecialKeyInput "KeyDown" -DebugOn $True #ESXi Setup - Key Down Set-VMKeystrokes -VMName $VirtualMachine -SpecialKeyInput "KeyDown" -DebugOn $True #ESXi Setup - Key Down Set-VMKeystrokes -VMName $VirtualMachine -StringInput " " -DebugOn $True #ESXi Setup - Select Disable IPv6 SLEEP 5 Set-VMKeystrokes -VMName $VirtualMachine -SpecialKeyInput "KeyDown" -DebugOn $True #ESXi Setup - Key Down Set-VMKeystrokes -VMName $VirtualMachine -SpecialKeyInput "KeyBackSpace" -DebugOn $True #ESXi Setup - Remove existing IPv4 Address Set-VMKeystrokes -VMName $VirtualMachine -StringInput "$Ipv4Address" -DebugOn $True #ESXi Setup - Enter IPv4 Address Set-VMKeystrokes -VMName $VirtualMachine -SpecialKeyInput "KeyDown" -DebugOn $True #ESXi Setup - Key Down Set-VMKeystrokes -VMName $VirtualMachine -SpecialKeyInput "KeyBackSpace" -DebugOn $True #ESXi Setup - Remove existing IPv4 Subnet Set-VMKeystrokes -VMName $VirtualMachine -StringInput "$Ipv4Subnet" -DebugOn $True #ESXi Setup - Enter IPv4 Subnet Set-VMKeystrokes -VMName $VirtualMachine -SpecialKeyInput "KeyDown" -DebugOn $True #ESXi Setup - Key Down Set-VMKeystrokes -VMName $VirtualMachine -SpecialKeyInput "KeyBackSpace" -DebugOn $True #ESXi Setup - Remove existing IPv4 Default Gateway Set-VMKeystrokes -VMName $VirtualMachine -StringInput "$Ipv4Gateway" -DebugOn $True #ESXi Setup - Enter IPv4 Subnet Set-VMKeystrokes -VMName $VirtualMachine -SpecialKeyInput "KeyEnter" -DebugOn $True #ESXi Setup - Remove existing IPv4 Default Gateway SLEEP 5 #Disable IPv6 Set-VMKeystrokes -VMName $VirtualMachine -SpecialKeyInput "KeyDown" -DebugOn $True #ESXi Setup - Key Down Set-VMKeystrokes -VMName $VirtualMachine -SpecialKeyInput "KeyEnter" -DebugOn $True #ESXi Setup - IPv6 Configuration SLEEP 5 Set-VMKeystrokes -VMName $VirtualMachine -SpecialKeyInput "KeyUp" -DebugOn $True #ESXi Setup - Key Down Set-VMKeystrokes -VMName $VirtualMachine -StringInput " " -DebugOn $True #ESXi Setup - Select Disable IPv6 Set-VMKeystrokes -VMName $VirtualMachine -SpecialKeyInput "KeyEnter" -DebugOn $True #ESXi Setup - IPv6 Commit Changes SLEEP 5 #Set DNS Configuration Set-VMKeystrokes -VMName $VirtualMachine -SpecialKeyInput "KeyDown" -DebugOn $True #ESXi Setup - Key Down Set-VMKeystrokes -VMName $VirtualMachine -SpecialKeyInput "KeyEnter" -DebugOn $True #ESXi Setup - DNS Configuration SLEEP 5 Set-VMKeystrokes -VMName $VirtualMachine -StringInput "$PrimaryDNS" -DebugOn $True #ESXi Setup - Primary DNS IP Address Set-VMKeystrokes -VMName $VirtualMachine -SpecialKeyInput "KeyDown" -DebugOn $True #ESXi Setup - Key Down Set-VMKeystrokes -VMName $VirtualMachine -SpecialKeyInput "KeyDown" -DebugOn $True #ESXi Setup - Key Down Set-VMKeystrokes -VMName $VirtualMachine -SpecialKeyInput "KeyBackSpace" -DebugOn $True #ESXi Setup - Remove existing Hostname Set-VMKeystrokes -VMName $VirtualMachine -StringInput "$HostName" -DebugOn $True #ESXi Setup -Hostname Set-VMKeystrokes -VMName $VirtualMachine -SpecialKeyInput "KeyEnter" -DebugOn $True #ESXi Setup - DNS Commit Changes SLEEP 5 #Set Custom DNS Suffixes Set-VMKeystrokes -VMName $VirtualMachine -SpecialKeyInput "KeyDown" -DebugOn $True #ESXi Setup - Key Down Set-VMKeystrokes -VMName $VirtualMachine -SpecialKeyInput "KeyEnter" -DebugOn $True #ESXi Setup - DNS Commit Changes SLEEP 5 Set-VMKeystrokes -VMName $VirtualMachine -StringInput "$DNSSuffix" -DebugOn $True #ESXi Setup -Hostname Set-VMKeystrokes -VMName $VirtualMachine -SpecialKeyInput "KeyEnter" -DebugOn $True #ESXi Setup - DNS Commit Changes SLEEP 5 #Complete Setup and Reboot Set-VMKeystrokes -VMName $VirtualMachine -SpecialKeyInput "KeyESC" -DebugOn $True #ESXi Setup - ESC back SLEEP 5 Set-VMKeystrokes -VMName $VirtualMachine -StringInput "Y" -DebugOn $True #ESXi Setup - Apply Changes and reboot host Write-Host "Your Host is now Ready!!" -BackgroundColor DarkGreen -ForegroundColor White
The post Automating The Installation Of VMware ESXi With PowerCLI appeared first on SYSADMINTUTORIALS IT TECHNOLOGY BLOG.