Creating your own knowledge base on your WordPress powered site is easy with the The Heroic Knowledge Base plugin.
In the last article Heroic Knowledge Base – Using the templating system, I covered how to integrate the plugin seamlessly with the newly released TwentySixteen theme and also showed some theme development techniques using the plugin’s templating system to give you even greater control.
But what if you would like to use the Knowledge Base plugin in conjunction with other plugins?
In this article, I’m going to show you how to integrate the Heroic Knowledge Base Plugin into WooCommerce using WooCommerce’s templating system and the Advanced Custom Fields plugin, and also how to do it without modifying any templates.
By the end of this article you should be able to assign a category of Knowledge Base articles and display that category on each product page.
The Scenario
Ok, I can hear you asking “Why would I ever want to do this?”
Say you had an online store selling sound systems that was built on WordPress and using WooCommerce for the ecommerce solution. It is feasible that each product would have a lot of technical specifications and you would probably get quite a lot of questions about each item. For example: What is the item compatible with? Do other brand wifi enabled speakers work with it? How loud is 5 watt? etc etc.
Wouldn’t it be nice to be able to set up a knowledge base section for each product that answers all of these questions and display that section on the actual product page instead of in a different part of the website?
Getting started
Much like the previous article I am going to assume you know how to install plugins, have a good knowledge of theme development and a basic understanding of PHP.
By using the same website you worked on previously, I can also assume that you already have a WordPress install ready with a child theme active (TwentySixteen being the parent theme), the Knowledge Base plugin installed, activated and populated. Therefore, all you need to do now is install the WooCommerce and Advanced Custom Fields plugins. Both of these are free to use, and although they do have premium addons, you won’t need any of them for this exercise.
Note: If you are using your own theme, not all themes are immediately compatible with WooCommerce. Techniques to ensure your theme’s compatibility can be found in the WooThemes documentation.
Creating the custom field
The first step is to create the admin interface that allows you to select a category of Knowledge Base articles from an auto populated list and link it to a specific product. You would do this by using the Taxonomy field in Elliot Condon’s Advanced Custom Fields plugin.
It is important to note that the Knowledge Base plugin uses a custom post type for its articles and therefore, although the taxonomy used to order those posts is referred to as categories, it is actually a custom taxonomy and not the same categories used to order standard posts. If you want to know more about taxonomies have a read of the codex here: Codex – taxonomies
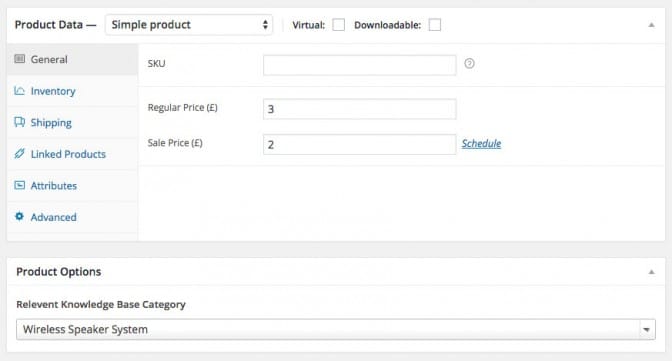
To create our taxonomy field, go to Custom Fields at the bottom of the main menu and then create a new field group. I called this field group ‘Product Options’ so that I know that everything added to this group will only apply to products.
Click the ‘+ Add Field’ button to get the options for our new custom field. Give the field a label (this will be displayed on the add / edit product screen, so make sure it is descriptive). I called this ‘Select Relevant Knowledge Base Category’.
Once the label has been added, the field name box will be added automatically. Because my field label is quite long and the field name is actually used within your templates I shortened this to ‘kb_category’ (you will see why this is useful a little later).
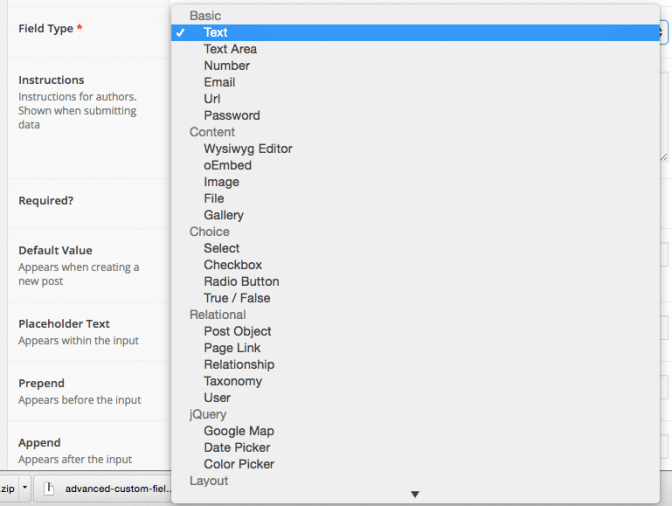
For the field type select Taxonomy from under the heading ‘Relational’.
Once Taxonomy has been selected you will get a new set of options specific to this field. In the Taxonomy select box choose ht_kb_category. This is the custom taxonomy used to categorize the Knowledge Base articles.
Next, change the Appearance options to ‘Single Value Select’. This is so that only one category can be chosen per product, and then leave all of the other options on their defaults.
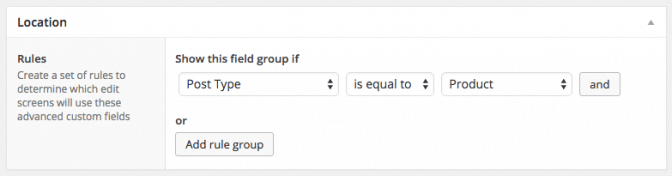
The last thing we need to do here is set the field group to only display on product pages. To do that, below our field options is another box labelled location. Set this to only display if the post type is equal to product. This will ensure that our new options only display on the add / edit product screen.
Click update at the top of the page and we are done. Now when you add or edit a product you should see the new option we set up.
Now that you have set up your new field and assigned some Knowledge Base categories to products you need to set up your theme to display the articles on the product page.
Approach 1 Modifying the WooCommerce template files
What is nice about the Knowledge Base Templating system is, it works in a very similar way to the WooCommerce templating system. Which means this bit *should* seem familiar.
In order to make modifications in an ‘upgrade safe way’ you will need to copy the templates you plan to edit from the WooCommerce plugin folder into your child theme folder.
Note: Be careful to copy the folder structure exactly but remove the /templates/ sub directory. For more information on overriding WooCommerce templates visit: https://docs.woocommerce.com/document/template-structure/
In this exercise you will only need to copy one file and that is: content-single-product.php
Once you have that file copied safely into your child theme, you will need to write the code to display the relevant Knowledge Base category. The first step is to get the contents our new custom field. You can do this really simply by adding:
$kb_category = get_field('kb_category')?
Test this by echoing $kb_category and view a product which has a Knowledge Base category associated with it. Because the taxonomy field was set to save the ID rather than the whole object (this was a default setting) you should now see the ID of the selected Knowledge Base category displayed on the page.
Now you have the ID of the selected category you need to use it to create a custom query. This query is actually inside the main loop, therefore it needs to be a nested query so that you don’t interfere with the main loop at all. For more information about the loop check out: https://codex.wordpress.org/The_Loop Your nested loop will look like this:
//get the ACF field $kb_category = get_field('kb_category')? //if the field has been populated... if ( $kb_category ) : //create a custom query looking for this term id $kb_args = array( 'post_type' => 'ht_kb', 'tax_query' => array( array( 'taxonomy' => 'ht_kb_category', 'field' => 'term_id', 'terms' => $kb_category ) ) )? $kb_query = new WP_Query( $kb_args )? //if there any posts in the query if ( $kb_query->have_posts() ) : while ( $kb_query->have_posts() ) : //setup the post $kb_query->the_post()? //DO STUFF HERE endwhile? endif? //reset the post data so we don't mess with the main loop wp_reset_postdata()? endif?
Let’s break this down…
First of all you are checking to see if a Knowledge Base category has been set, if so, run the code.
if ( $kb_category ) : //create a custom query looking for this term id $kb_args = array( 'post_type' => 'ht_kb', 'tax_query' => array( array( 'taxonomy' => 'ht_kb_category', 'field' => 'term_id', 'terms' => $kb_category ) ) )?
This is where the information about the categories actually being a custom taxonomy becomes important. Because the Knowledge Base uses a custom taxonomy instead of standard categories, the query arguments need to use tax_query instead of the more common ‘cat’ parameter to select the category. Inside the tax_query array you then need to specify the custom taxonomy you wish to query, which field (in this case you want to find the ID because that is what has been stored) and the actual value to match it against.. For more information about taxonomy parameters check out: https://codex.wordpress.org/Function_Reference/WP_Query#Taxonomy_Parameters
Next, create a new Query object so that it can be nested inside the main loop already running.
//if there any posts in the query if ( $kb_query->have_posts() ) : while ( $kb_query->have_posts() ) : //setup the post $kb_query->the_post()? //DO STUFF HERE endwhile? endif? //reset the post data so we don't mess with the main loop wp_reset_postdata()?
The final step is to reset this query using wp_reset_postdata()?
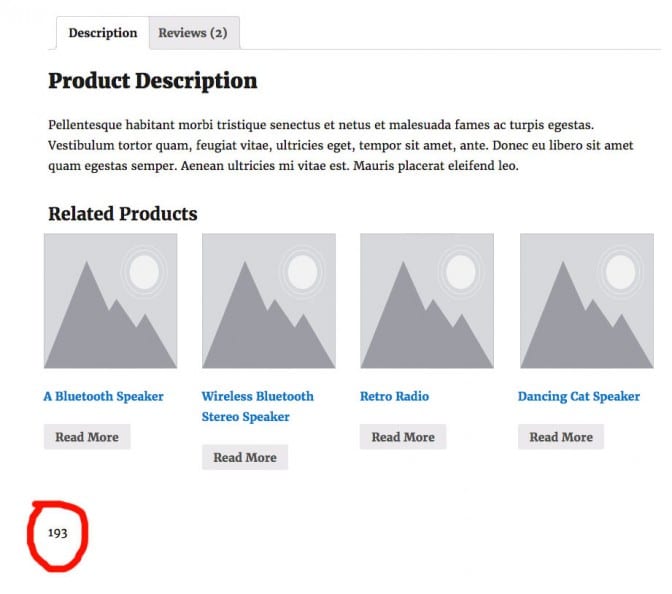
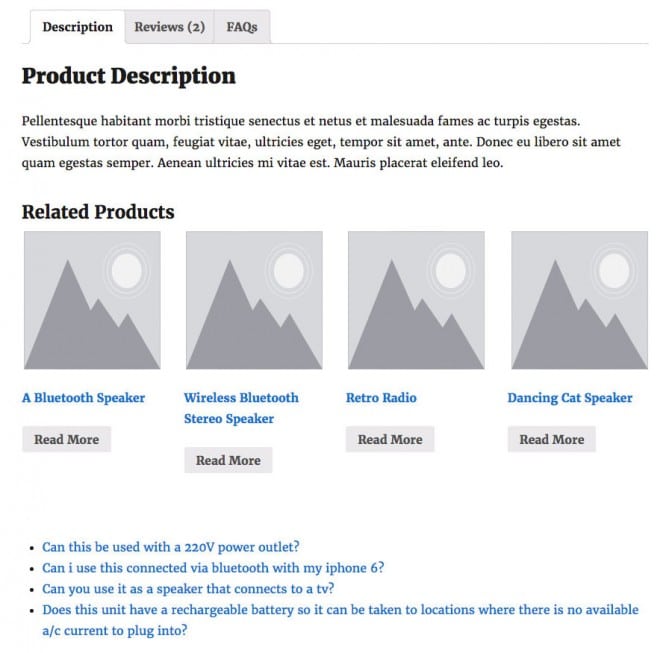
The new query will output all of the articles, that are in the category specified, below the product information. In this example, in the product edit screen I selected the Heroic Knowledge Base Plugin category which had one post in it, so below the main product information there is one post listed.
This list of articles could be displayed anywhere on the page, it just depends on where in content-single-product.php you placed your code.
But what if we want to include this information as a new tab along with the product description and reviews instead?
Approach 2 Not modifying any WooCommerce template files at all
Approach 1 is fine if you just want to get your head around how nested loops work with custom posts, custom taxonomies and custom fields, but it feels a little messy. Therefore, instead of copying content-single-product.php into your child theme and including the nested loop in that file, you can modify the functions.php in your child theme. This approach will use a filter which you can hook new content into. If you are unsure about Hooks and Filters I would recommend you have a read of Thomas Mier’s article over on Smashing Mag: Useful tips to get started with hooks. WooCommerce also has a good section about using Hooks and filters too: https://docs.woothemes.com/document/hooks/
The first step is to add the filter to amend the product tabs to your functions.php.
‘woocommerce_product_tabs’ is the name of the existing filter, already created by woocommerce, which we are going to hook our new function into. And ‘woo_knowledge_base_tab’ is the name of the function you are going to create. More information about adding filters can be found at the codex here: https://codex.wordpress.org/Function_Reference/add_filter Next you will need to create the function that actually adds the new tab.
function woo_knowledge_base_tab( $tabs ) { //Add the new tab for our Knowledge Base Tab $tabs['faqs_tab'] = array( 'title' => __( 'FAQs', 'woocommerce' ), 'priority' => 50, 'callback' => 'woo_knowledge_base_tab_content' )? return $tabs? }
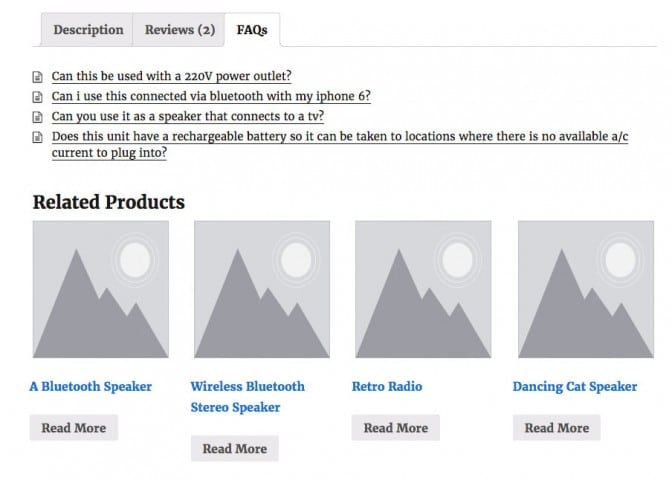
All this function does is adds a new custom tab of your making to the $tabs array, and defines the title, priority of that tab and what content will be in that tab. You’ll notice that although I’ve called the function ‘woo_knowledge_base_tab’, I’ve actually given the tab the title of FAQs. You could call this whatever you wanted. FAQs is personal preference because, as I described at the beginning of this article, a likely scenario for using the Knowledge Base plugin with Woocommerce would be to give frequently asked questions for each product in an online electrical store.
The last step is to add the content itself to the newly created tab, you do this by creating a second function, which you have already listed in the callback parameter of your woo_knowledge_base_tab() function.
function woo_knowledge_base_tab_content() {}
And then, simply cut and paste the code you originally added to content-single-product.php and paste it inside this function (remember to remove this from content-single-product.php completely). What you should have is this:
function woo_knowledge_base_content() { global $post? //Get the taxonomy field $kb_category = get_field('kb_category')? //if the field has been populated... if ( $kb_category ) : //create a custom query looking for this term id $kb_args = array( 'post_type' => 'ht_kb', 'tax_query' => array( array( 'taxonomy' => 'ht_kb_category', 'field' => 'term_id', 'terms' => $kb_category ) ) )? $kb_query = new WP_Query( $kb_args )? //if there any posts in the query if ( $kb_query->have_posts() ) : while ( $kb_query->have_posts() ) : //setup the post $kb_query->the_post()? ?> <li class="hkb-article-list__<?php hkb_post_format_class($post->ID)? ?>"> <a href="<?php echo get_permalink()? ?>" rel="bookmark"> <?php echo get_the_title()? ?> </a> </li> <?php endwhile? endif? //reset the post data so we don't mess with the main loop wp_reset_postdata()? endif? }
Now you should see a new tab labelled FAQs and when you click that tab, you should see your knowledge base articles.
Note: I’ve added global $post here as well so that
hkb_post_format_class($post-&gt;ID)?
works inside the function.
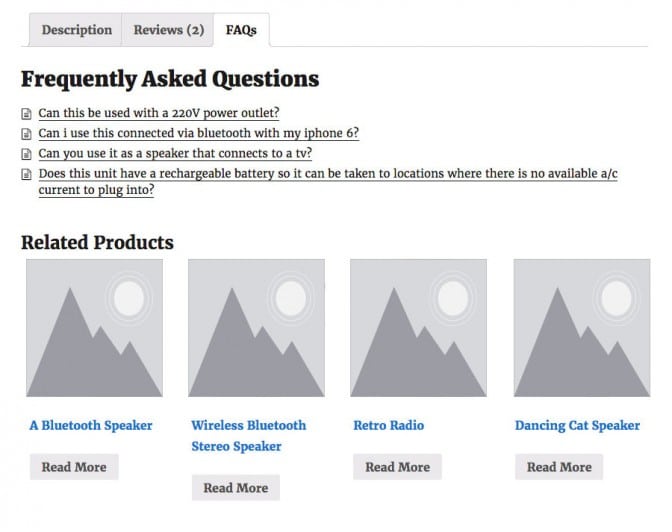
The last thing to do is to style it up a little bit…
The Knowledge Base plugin already has its own styles so rather than start from scratch, if you wrap the ul in a div with the class .hkbcategory and then wrap that div inside another with the id #hkb, the preexisting styles will be applied.
The only other thing I did here was to add a h2 wrapper above the list so that there was a heading on the page. The finished content block should look like this
<div id="hkb"> <div class="hkb-category"> <h2> Frequently Asked Questions</h2> <ul class="hkb-article-list"> <?php //loop through all of the posts to display the relevent articles while ( $kb_query->have_posts() ) : $kb_query->the_post()? ?> <li class="hkb-article-list__<?php hkb_post_format_class($post->ID)? ?>"> <a href="<?php echo get_permalink()? ?>" rel="bookmark"> <?php echo get_the_title()? ?> </a> </li> <?php endwhile? ?> </ul> <!-- end article list --> </div> </div>
Taking it further…
This really is just the starting point for integrating the Heroic Knowledge Base plugin with WooCommerce.
If you were to take this example even further, you could hook this custom query into a different filter so that it displays as part of the product’s information without modifying any templates. Or you could build a nice show / hide function for each article’s content so that you could read each FAQ without being taken away from the product page.
It is also good practice if you develop themes and use the Advanced Custom Fields plugin to export the php code for any fields you have set up and include them in your functions file so that your theme can work with or without the plugin itself.
The possibilities are endless. Enjoy!
The post Integrating Heroic Knowledge Base with WooCommerce appeared first on HeroThemes.