

Just recently I’ve worked on two sites that needed a way to display testimonials and a way to collect them from clients via the website itself. With WordPress there are several ways you could achieve this, this is just the method I happened to come up with recently.
Most of the time, for testimonials I end up using the Testimonials Widget plugin. Mostly I like the widget that comes with it which rotates individual testimonials. It’s pretty user friendly to get up and running with as well.
Since I use Gravity Forms (cupcake, AKA affiliate link ) on pretty much all my client sites, it made sense to put the two plugins together to create the submission system. Gravity Forms comes built-in with the ability to have a user submit a form which gets saved in your WordPress site as a post. The Testimonials Widget plugin uses Custom Post Types to create a customized edit screen for adding new Testimonials. Fortunately there is a free plugin for Gravity Forms which extends that capability of saving form entries as posts, to custom post types as well. It’s appropriately named Gravity Forms + Custom Post Types. Once the plugin is activated it integrates seamlessly with the usual Gravity Forms creation process.
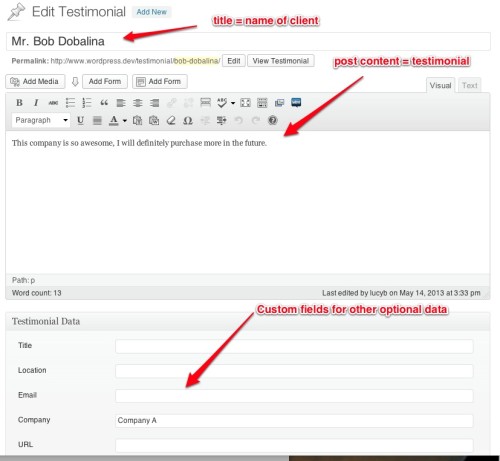
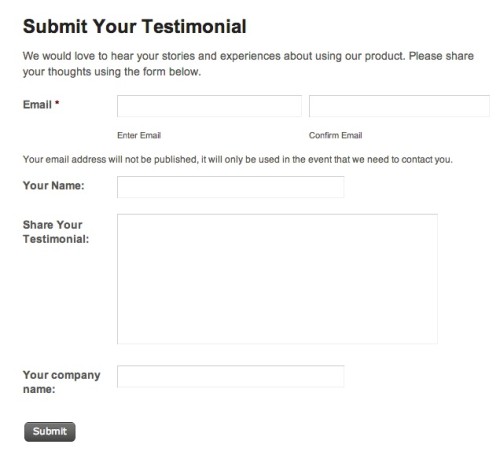
So basically we’re going to make a Gravity Form which will collect the testimonial info and save it as a Draft testimonial. So then all my client has to do is publish it. Before we make our form we need to know what elements to add to it. If we look at the Edit screen for a Testimonial we can see that what is typically the Post Title field is being used to collect the name of the person submitting the testimonial. The main post body is where the testimonial text goes. Then there are some custom fields which can be used to gather additional info if you want such as the company name etc.
So here’s the process to actually create the form. You may want to add in other fields, I’m just focusing on the Testimonial-pertient parts.
1) Create a new Gravity Form by going to Forms > Add New
2) From the Post Fields section on the right choose “Title”. Since the person filling this in won’t know they are actually submitting a post, I’ll label the field “Your Name” instead of “Post Title” since that’s the info we’re really asking of the user. Click on the Advanced tab to see the CPT magic. You’ll see the “save as post type” option and you can select “Testimonials” from the list.
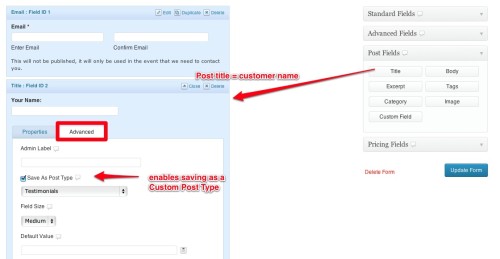
I make sure it’s saved as a Draft so that the client can approve them before they go live on the site. I don’t worry too much about the other settings for this field.
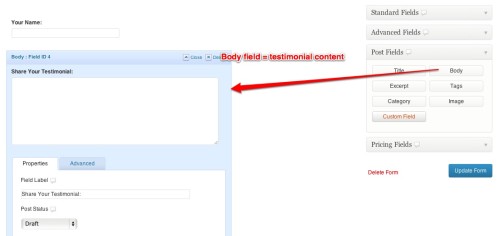
3) From the Post Fields section add a “Body” field. This will be where the customer enters the actual testimonial itself.
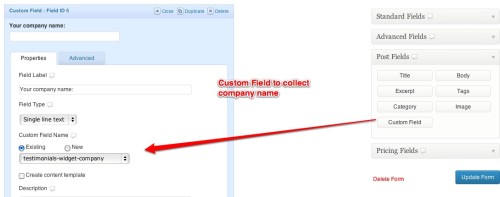
4) If you want to collect any of the extra data that the Testimonials plugin offers, such as company name, just use as many “Custom Field” boxes as you need. For each one you can map it to a particular piece of info. So if I want to ask for the client’s company name I’ll select “testimonials-widget-company” from the drop-down of existing custom fields.
5) After someone submits a testimonial using this form, their entry will be saved as a Draft under Testimonials for you to approve or otherwise.
Easy! The one “gotcha” I came upon relates to using specific categories to organize your testimonials. If you have a custom taxonomy for this, it doesn’t actually show up in the Post Fields section as you might expect. You have to use a Drop Down field from the Standard Fields section. If you click on the Advanced tab you can then choose “Populate With A Taxonomy”.
Let me know what you think of this method in the comments. Or if you have a better way, I’m all ears!

aff. link
header image credit

![15+ Top Black Friday & Cyber Monday Deals for Developers and Designers [2023]](http://wiredgorilla.com/wp-content/uploads/2023/11/15-top-black-friday-cyber-monday-deals-for-developers-and-designers-2023.jpg)